Configuring Neo cloud portal with Azure
Steps
-
On the Azure services section, click the Azure Active Directory option. The Azure Active Directory page
opens.
.png)
-
From the left navigation pane, click the Enterprise applications option.
.png)
-
On the Enterprise applications page, from the top bar, click the New application button. The Browse Azure AD
Gallery page opens.
.png)
-
Click the Create your own application button.
.png)
-
Under the Create your own application dialog:
-
Click the Create button.
.png)
After a few minutes, a success message is prompted on the screen. The Forcepoint Neo application is created now.
-
Click the Create button.
-
Scroll down the Properties dialog, set the Visible to users? toggle button to No. Click the
Save button.
.png)
-
Under the Getting Started section, in the Set up single sign on option, click the Get started button. The
Single sign-on dialog opens.
.png)
-
In the Select a single sign-on method section, click the SAML option. The SAML-based sign-on dialog opens.
.png)
-
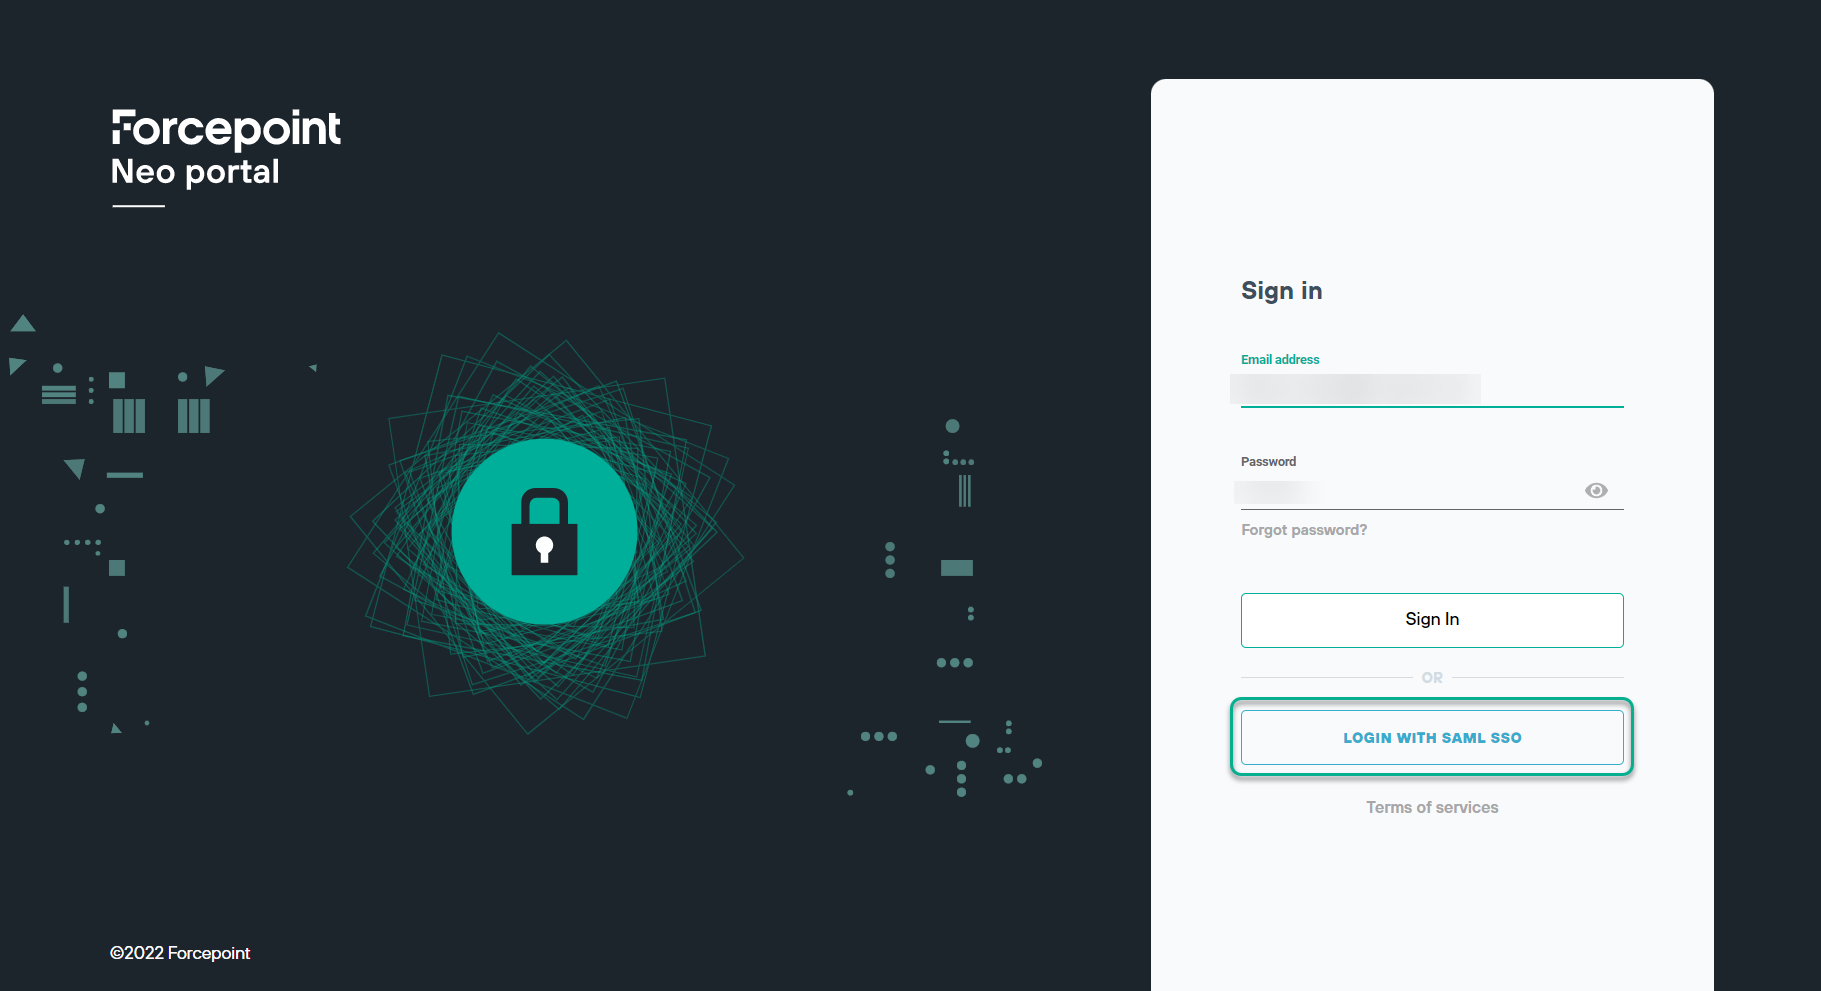
Under the STEP 1, you can copy the Single Sign On URL, Audience Restriction, and Tenant
ID details.
.png)
-
Under the Set up Single Sign-On with SAML section:
-
In the Basic SAML Configuration section, click the Edit button on the top right corner. The Basic SAML
Configuration dialog opens.
.png)
-
In the Identifier (Entity ID) section:
- Click the Add identifier button to add a new row.
- In the Identifier (Entity ID) field, enter the Audience Restriction from the Neo cloud portal.
.png)
-
In the Reply URL (Assertion Consumer Service URL) section:
- Click the Add reply URL button to add a new row.
- In the Reply URL (Assertion Consumer Service URL) field, enter the Single Sign On URL from the Neo cloud
portal.
.png)
- Click the Save button on the top left corner.
-
In the Attributes & Claims section, click the Edit button on the top right corner.
.png)
-
On the Attributes & Claims dialog:
You must delete the last three lines highlighted in the following image.
- In the Additional claims section, select the
.png) icon
from a specific line, click the Delete button.
icon
from a specific line, click the Delete button. .png)
- On the Claim deletion dialog, click the OK button. Repeat step i and step ii to delete the other two
lines.
.png)
- Click the Add new claim button on the top bar, the Manage claim page opens.
.png)
- In the Name field, enter tenantId and in the Source attribute field, enter the Tenant
ID from the Neo cloud portal and click the Save button.
.png)
- Repeat step iii, in the Name field, enter name and in the Source attribute field, enter
user.displayName and click the Save button.
.png)
- In the Additional claims section, select the
-
Under the SAML Certificates section, from the Federation Metadata XML field, click the Download
button. The Federation Metadata XML file started to download.
.png)
-
In the Basic SAML Configuration section, click the Edit button on the top right corner. The Basic SAML
Configuration dialog opens.
-
After a success message prompted on the screen, open the Federation Metadata XML file in a notepad.
.png)
-
Under the STEP 2, in the IDP metadata field, enter the copied Federation Metadata XML details.
.png)
Result