Configure general settings
Steps
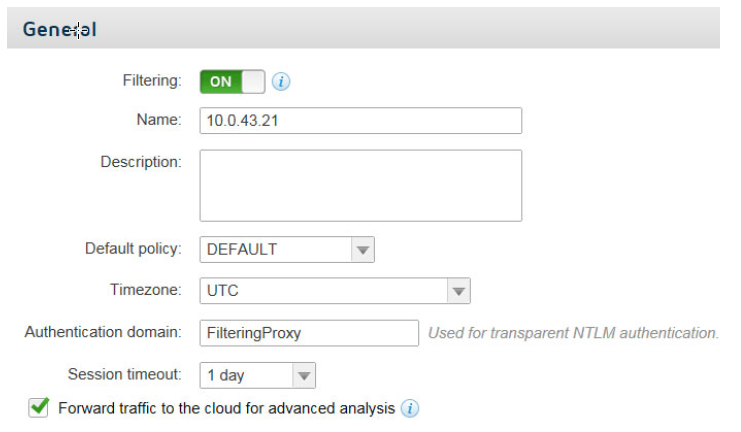
- Use the toggle at the top of the page to indicate whether this appliance is used for filtering (ON, the default). When filtering is set to OFF, the appliance can communicate with the cloud service, but allows all web traffic to pass through unfiltered.
- Under General, enter a unique appliance Name (1 - 512 alphanumeric characters) and Description (up to 1024 characters).
-
Select a Default policy for this appliance, and the Time zone used to apply policy settings.
You will have a chance to apply different policies to different internal networks managed by this appliance later.
-
If you are using transparent NTLM identification and your appliance is not connected to a local Active Directory instance, enter the domain that forms part of your users’ NTLM
identity. The NTLM domain is the first part of the domain\username with which users log on to their Windows PC; for example, MYDOMAIN\jsmith.
Important: You must configure your end users’ browsers to support transparent NTLM identification, either manually or via GPO or similar. For more information, see Deploying an I Series Appliance on the Forcepoint Support site.
If you have connected your appliance to a local Active Directory for NTLM identification, this field is not required because the appliance automatically retrieves this information from the local directory.
- Select a time period after which a user’s login and password must be revalidated from the Session timeout drop-down list. The default is 1 day.
- Forward traffic to the cloud for advanced analysis is selected by default. This means that appropriate web traffic is redirected to the nearest cloud service cluster for additional analysis. Deselect this option if you do not want any traffic to be forwarded to the cloud. All traffic will be analyzed through the appliance, but without any cloud analytics.