Administrator can configure expire session login policy to force the user to re-authenticate a session after a certain period of inactivity.
Steps
-
On the Login Policy tile, click the Add Action drop-down and then select the Expire Session action.

A default policy gets created for the Multi-Factor Authentication Login.

You can either Save the policy or you can edit the default policy variables.
-
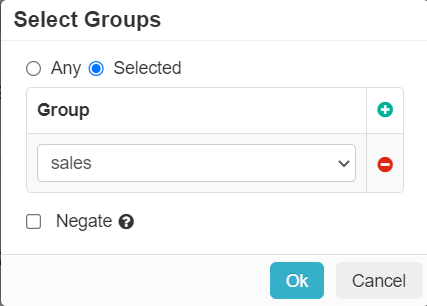
To specify which Groups the action applies to:
Groups can be locally defined groups, security groups and OUs pulled from active directory.Note: By default, Any is selected which means policy is applicable to all groups.
Available options are:
- Any
- Selected
-
To limit the policy to selected groups, click Selected option.
-
To specify which Device the action applies to:
Note: By default, Any is selected which means policy is applicable to all devices including unmanaged devices.
Available options are:
- Any
- OS & User-Agent
- Device Profile
If you want to select common operating systems and/or User-Agent Strings:-
Select the applicable operating systems.

Available options are Apple iOS, Apple Mac OS X, Google Android, Google Chrome OS, Microsoft Windows Phone, Microsoft Windows PC and Other OS.
If you want to select device profile:-
To limit the policy to selected device profiles, click Device Profile option.

-
Apply specific actions when a user is accessing from certain Location:
Available options are:
- Any
- Selected
-
To apply specific actions when a user is accessing from certain locations, click Selected option.

You can restrict or block users entirely from unsafe or untrusted locations and restrict or control where a user is accessing the cloud application from (either geographic location or IP).
-
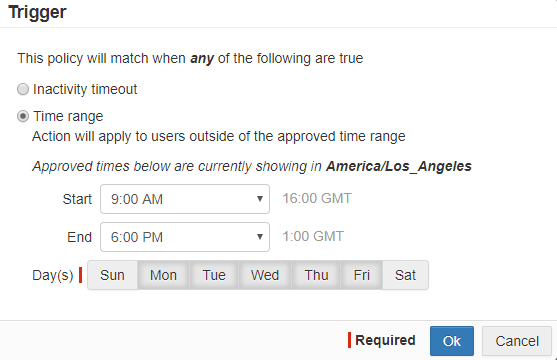
Select a Trigger when a session will expire.
Available options are:
- Inactivity timeout
- Time range
To automatically expire a user's session whenever they are inactive in an application for the specified amount of time:-
Select the Inactivity timeout option and then enter the duration in minutes (max 2 weeks) after when session should be expire.

To automatically expire a user session once they meet the time range criteria (expiring a session once they are outside of the work hour range):-
Select the Time range option to view approved range.
-
Click the default action to open Action dialog box.
