Installation steps
Note: If a version of FSAM is already present, a dialogue box will display, asking you if you would like to uninstall the existing FSAM version.
Steps
- Double-click the Installer (.exe) file to begin the installation. A progress dialog box appears as files are extracted.
- When the welcome screen displays, click Next.
-
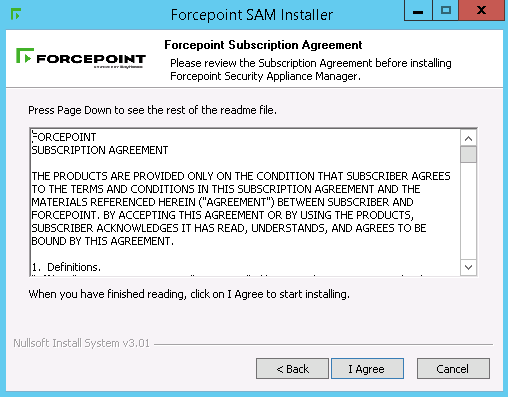
Read the Subscription Agreement. To accept the terms, click I Agree.

-
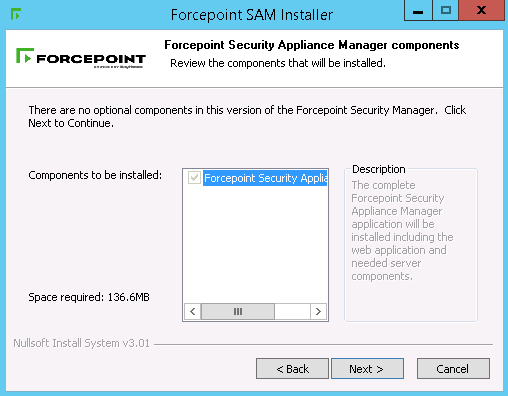
On the Choose Components screen:
- Verify that the required space for installation is available.
- Click Next.

-
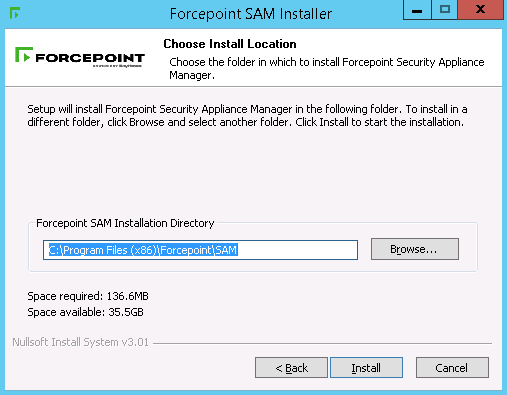
On the Choose Install Location screen, accept the default location or specify the location where you want the Security Appliance Manager to be installed.
- To accept the default location (recommended), click Install.
- To specify a different location, click Browse. Browse to the desired location and click Install.

A progress bar displays.
-
On the Port Selection screen, accept the default port or modify the port number. Click Install.
-
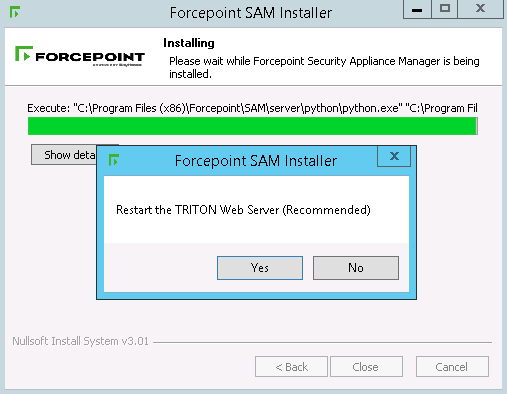
Once the installation is complete, a restart message displays. The TRITON Web Server must be restarted before the Security Appliance Manager will function.
Note: It is recommended that you restart the Web Server immediately. Restarting the Web Server takes several seconds.

- Click Yes to restart the Web Server (recommended). A message displays, confirming that the Web Server has been restarted. Click OK.
- Click No to continue without restarting the Web Server. You must restart the Web Server before using the Security Appliance Manager.
- A message displays, confirming that the Security Appliance Manager has been installed successfully. Click Show details for more information or click Close to exit the installer.
- Ensure that appliances are registered within the Forcepoint Security Manager (formerly named TRITON Manager) and that Single Sign-On (SSO) is enabled.