This section lists the configuration steps for setting Microsoft Entra ID as the directory server.
Steps
-
Register your system as an application in the Microsoft Entra admin center. In Azure Portal, go to and grant the following API permissions to enable the Microsoft Entra ID user directory import:
- Directory.Read.All
- Group.Read.All
- ProfilePhoto.Read.All
- User.Export.All
- User.Read.All
- User.ReadBasic.All
- User.read

-
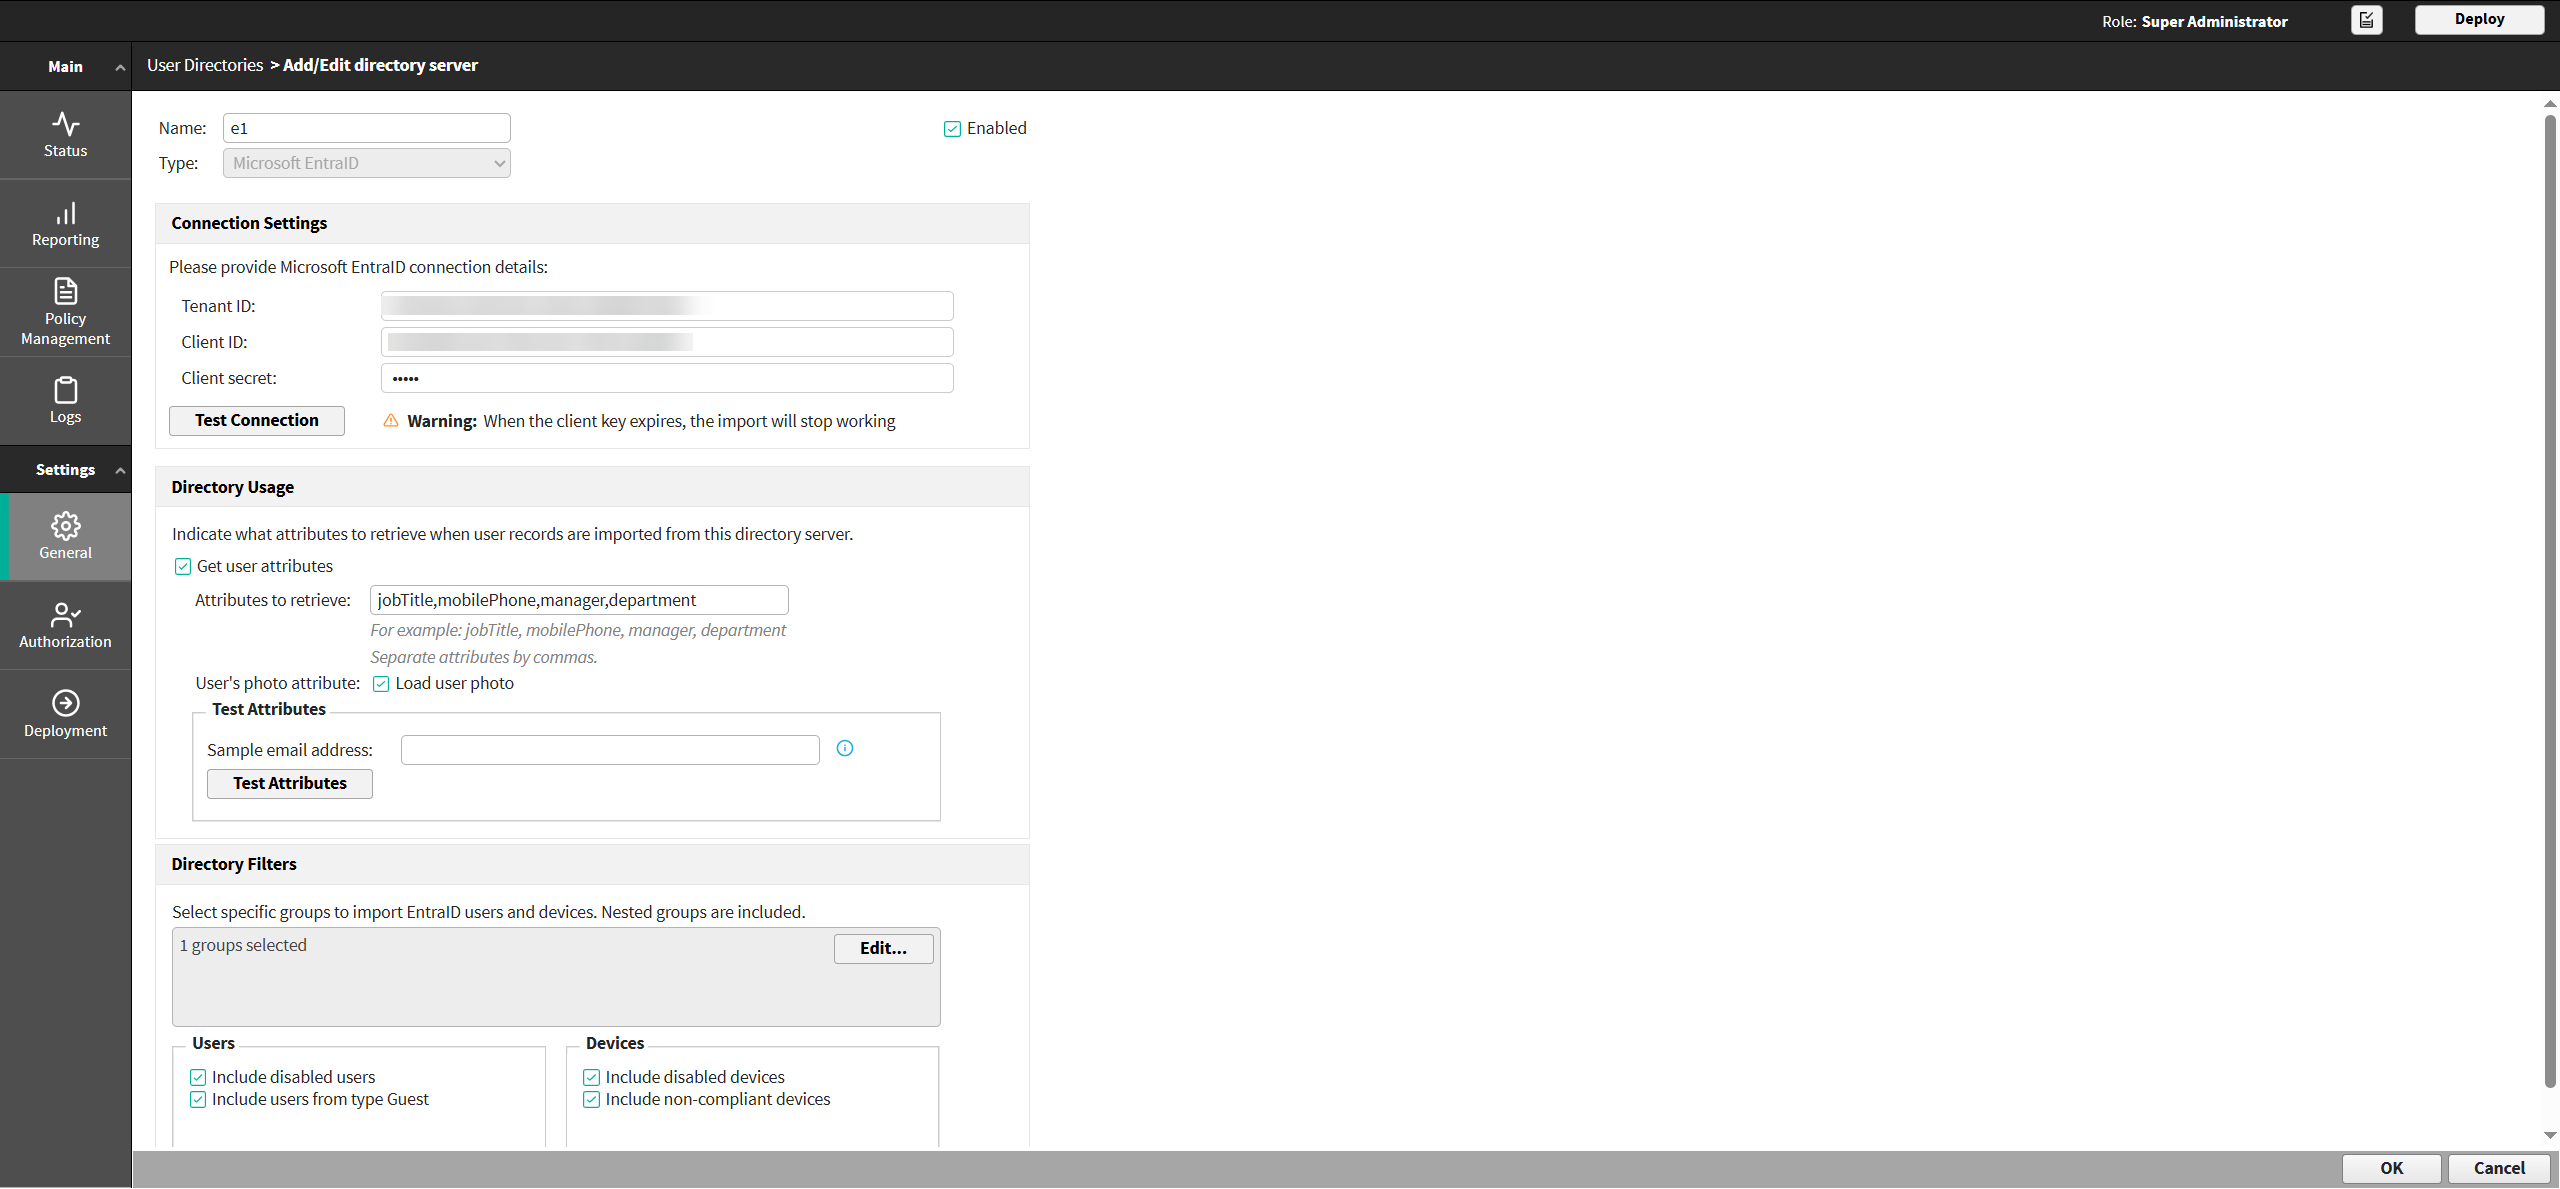
In Connection Settings, do the following:
-
Enter the following application details:
- Tenant ID
- Client ID
- Client secret
-
Click Test Connection to verify that Forcepoint DLP can connect to the directory server.
-
In Directory Usage, select Get user attributes to retrieve user attributes from the directory server, then:
- In Attributes to retrieve, define the attributes to be retrieved when we import the user entries (comma separated).
- If the directory includes photo attributes, use the User’s photo attribute check box to enter them in a comma-separated list.
- If you do not want to display a photo of the user, leave this field blank.
- If a photo does not exist for the user, an empty image displays.
- In the Test Attributes section, in the Sample email address field, enter a valid email address that can be used to test
whether Forcepoint DLP can retrieve the configured attributes from the user directory server.
- Click Test Attributes to retrieve user information.
To view the data that we can import and store in the database, you can click View
Results.
-
In the Directory Filters section, set filters to configure what actually needs to be imported by groups.
-
To import entities from a particular group, click Edit, and do the following:
- In the search box, enter display name or email address value.
- Add the desired group to the Selected list in the Directory Filters page, and then click
OK.
Note: By default, all users, devices, and groups are imported, including those that are not members of any group. When a specific
group is selected, only entities from that group will be imported.
-
To import one or more of the following options, select the corresponding check boxes:
- Disabled users
- Users from type Guest (If this option is not selected, only users from type 'Member' will be imported by default)
- Disabled devices
- Non-compliant devices (If this option is not selected, only compliant devices will be imported by default)
Note: The options are disabled by default.
-
Click OK.
-
Click Import Now.
-
Click OK to confirm the import.
The count of imported entries and last import details displays. You can view the entries in . The imported users can be selected in the enforcement of rules.