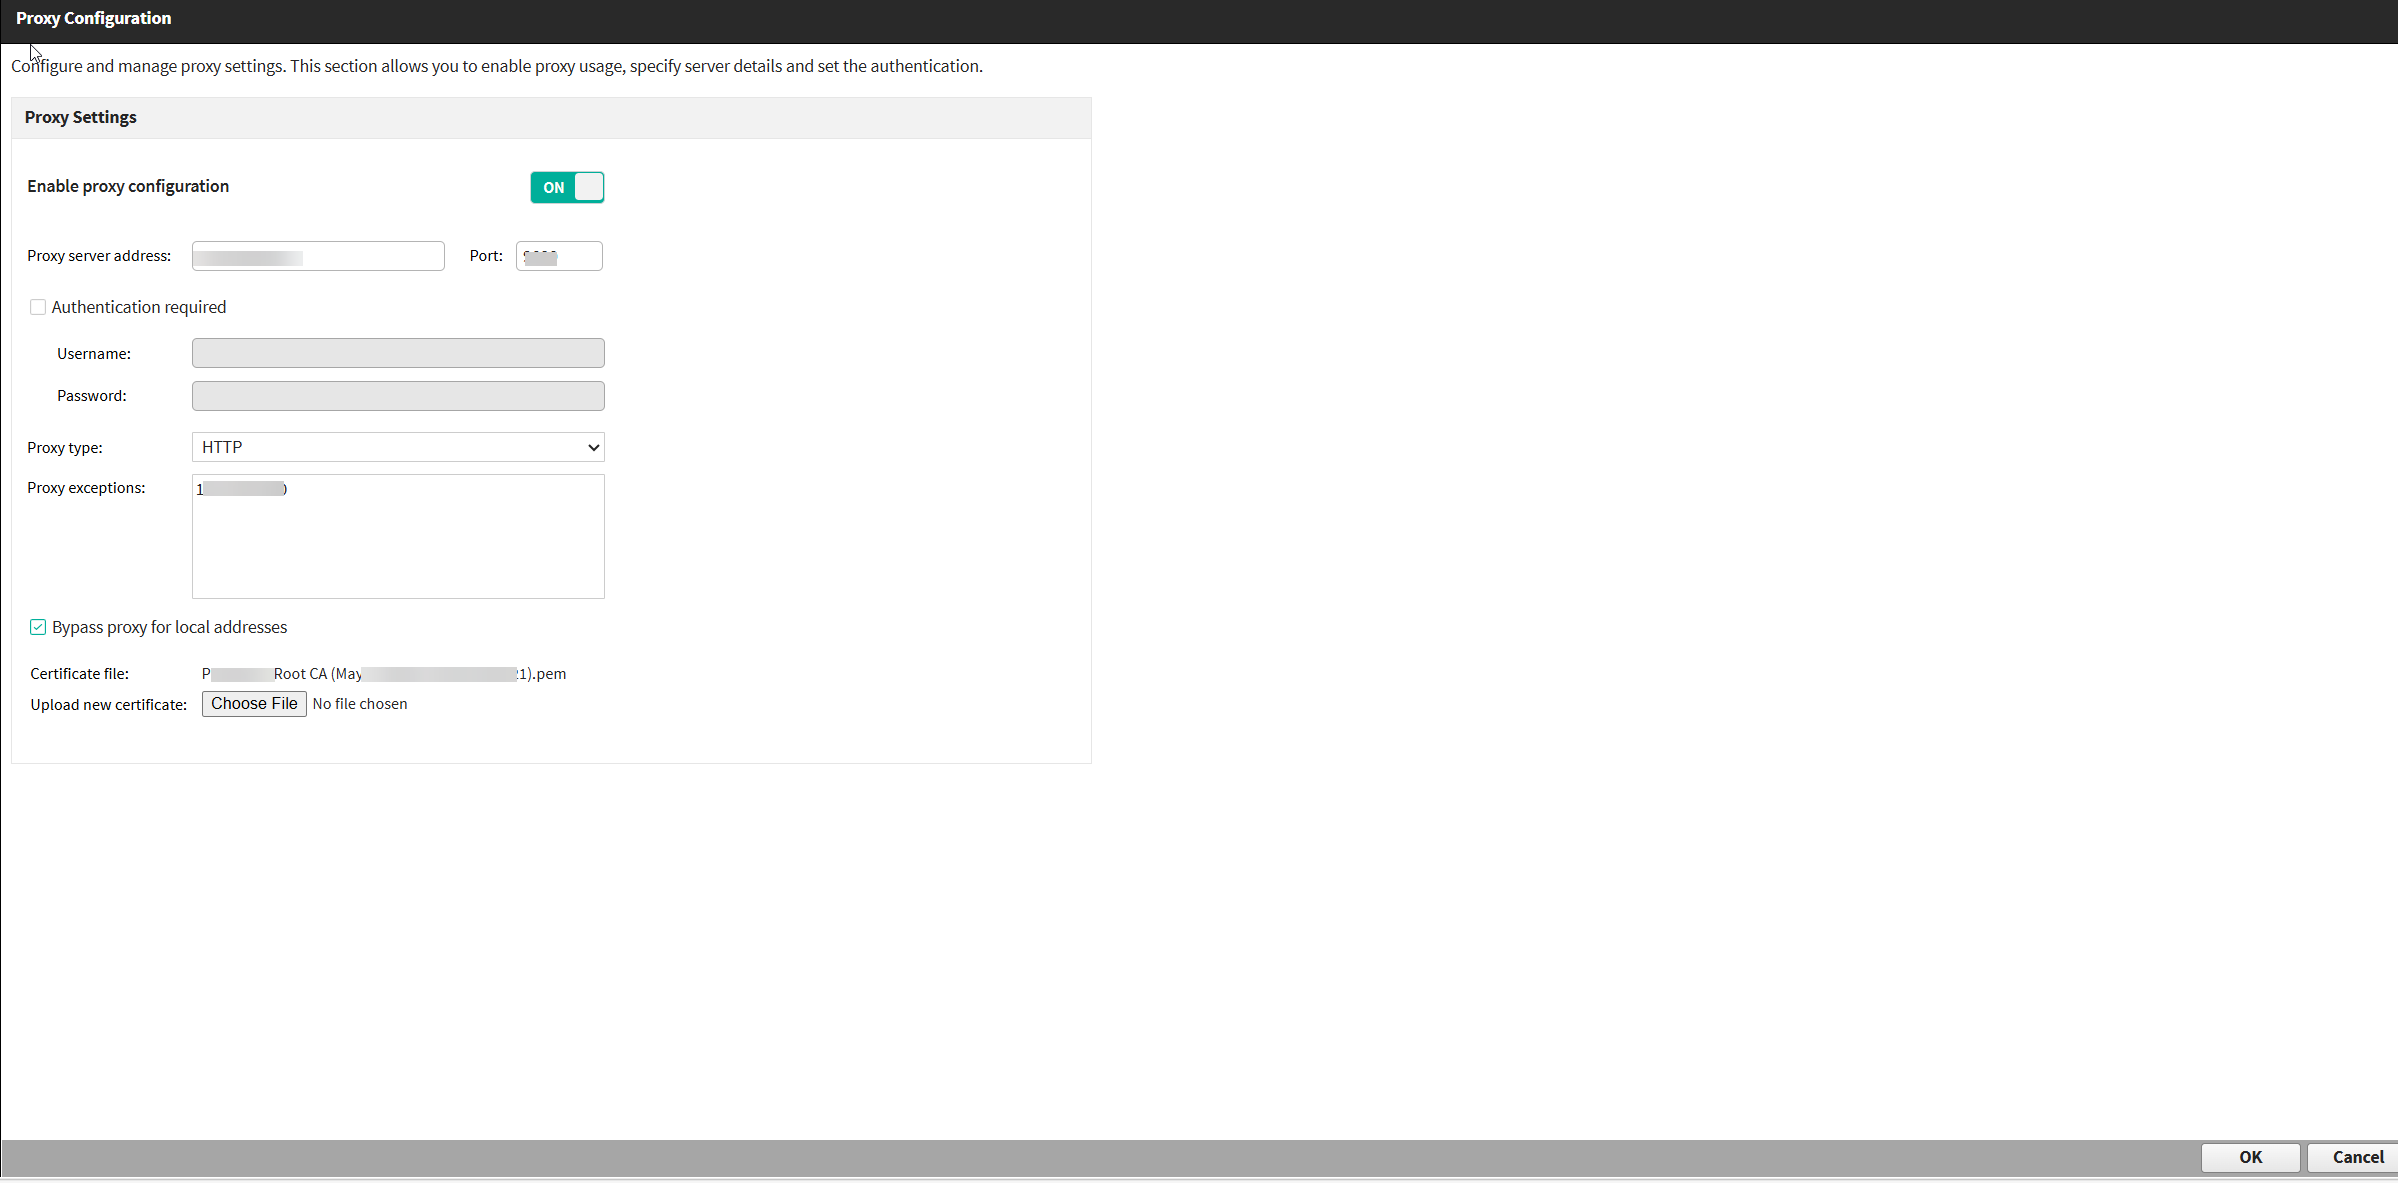
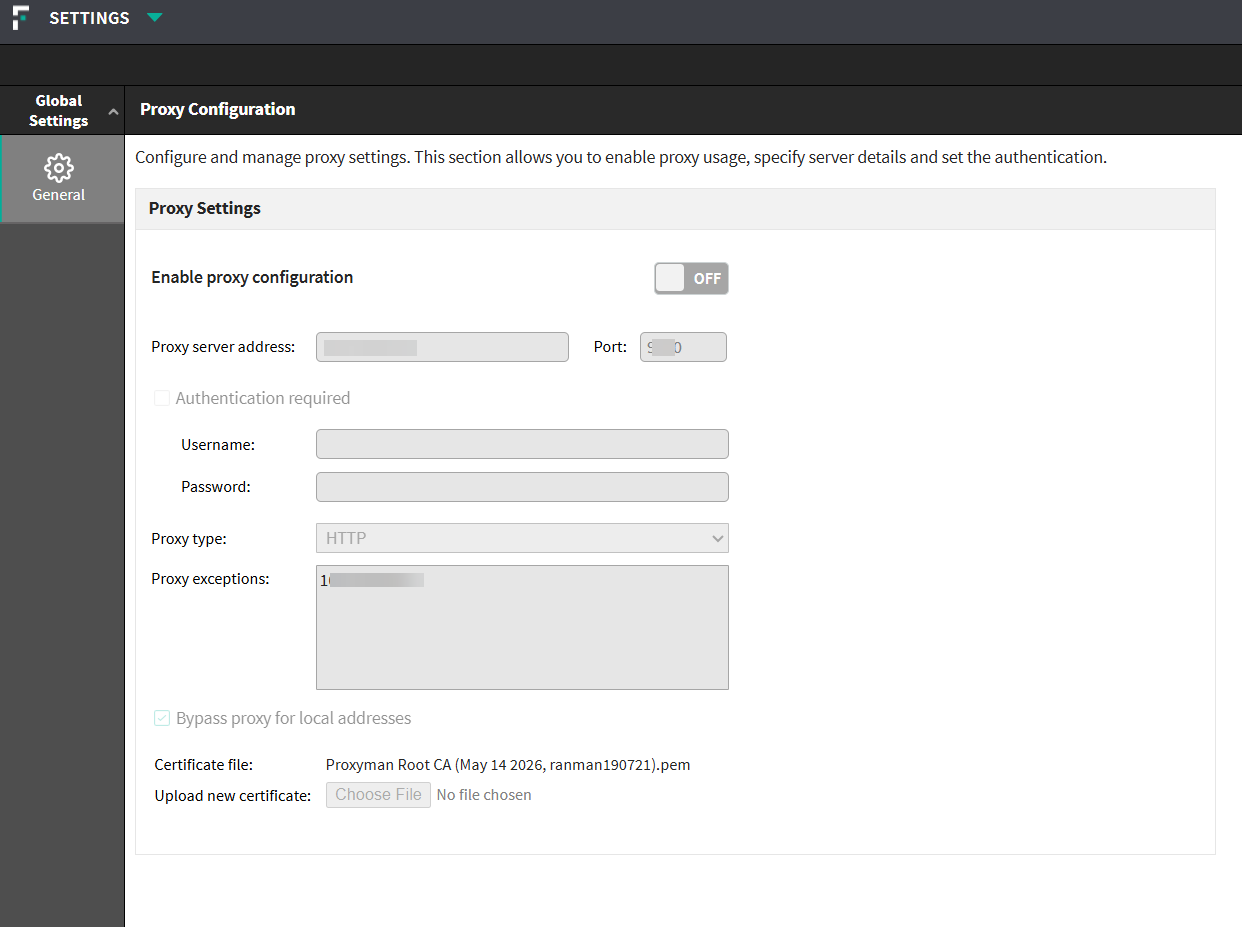
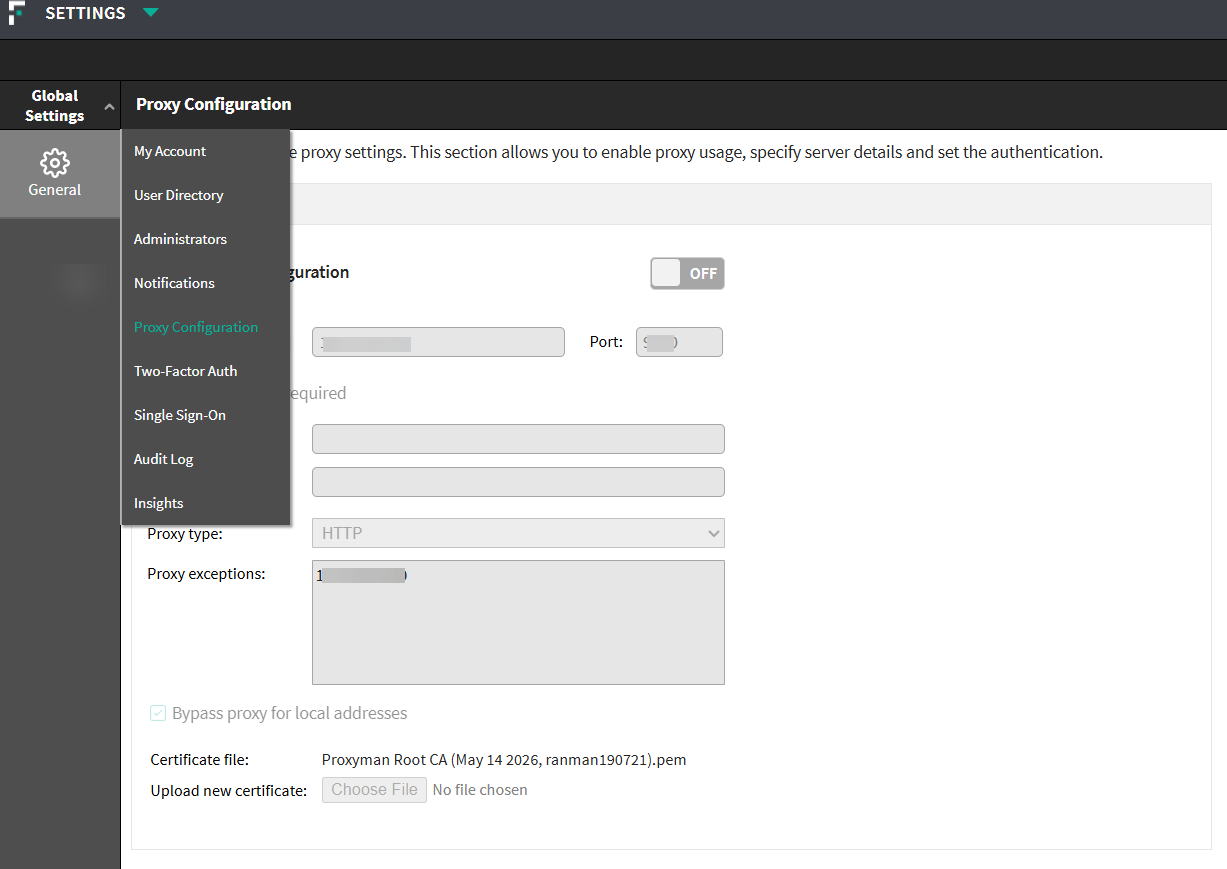
A Global Security Administrator can configure and manage proxy settings within Forcepoint Security Manager(FSM).
Note: This feature is available in Forcepoint DLP v10.4.1 and above. To keep enjoying the benefits of this feature when upgrading from 10.3.3 to 10.4, you must install immediately the
latest available 10.4.x maintenance release, since the feature is not supported in DLP 10.4 release.
The FSM module provides centralized proxy configuration settings that enable unified proxy usage across Forcepoint DLP.
Steps
-
In FSM, navigate to .
The
Proxy Configuration page opens.
-
Turn on the Enable proxy configuration toggle.
-
In the Proxy server address field, enter the hostname or IP address (for example, proxy.example.com or 192.168.1.100).
-
In Port, enter the proxy port number (for example, 8080 or 3128)
-
To enable authentication, select Authentication required, and enter the credentials in Username and
Password.
-
In Proxy type, select one of the following:
- HTTP: Standard HTTP proxy
- HTTPS: Secure HTTPS proxy
-
In Proxy exceptions, enter a comma-separated list of domains or IP addresses that should bypass the proxy. For example, localhost, 127.0.0.1,
internal.example.com
-
To route all local network traffic directly without using the proxy, Bypass Proxy for Local Addresses is turned on by default. If you want to disable this
setting, turn off this option.
-
To upload the certificate of the proxy setting, click Choose File, and then select the relevant file.
-
To save your proxy configuration settings, click OK.
The certificate gets uploaded and the proxy configuration will be saved. You will be notified to activate the proxy connection.
-
To activate the connection to the proxy, restart the following services in the Windows Services console:
- Websense Data Security Manager
- Websense Data Security Batch Server
- Websense TRITON Unified Security Center
Once the services restart, the connection will be activated and the notification disappears.
 The Proxy Configuration page opens.