Cloud Apps tab
The cloud service includes a database of cloud applications that can be used to allow or block user access to selected applications.
Click the Cloud Apps tab to configure a list of cloud apps to be blocked and a separate list of cloud apps to be allowed by this policy.
Steps
-
In the Block Access and Allow Access list, select specific cloud apps that should always be blocked, regardless of their risk
level.
-
Select the app or apps you wish to add to the blocked list by marking the check box next to the app name.
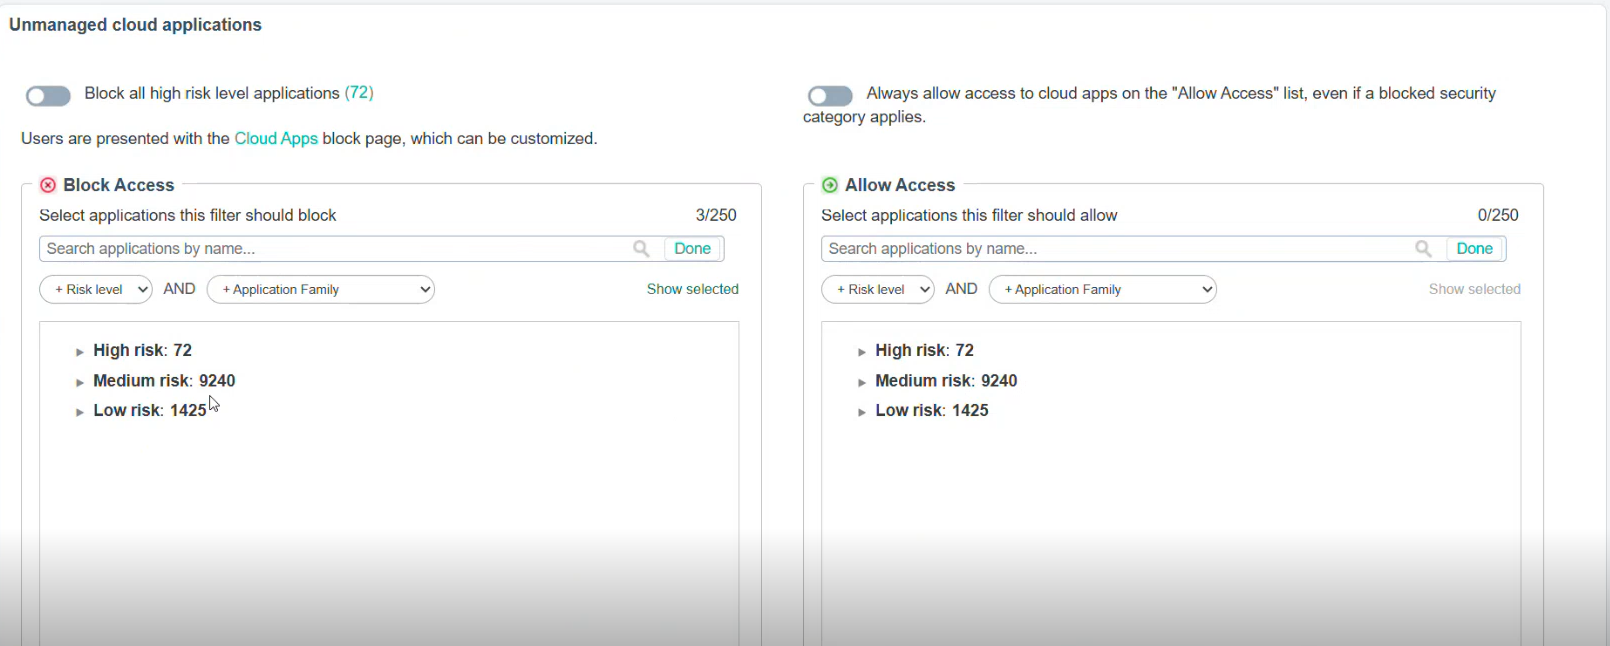
Important: Apps that have already been included in the Allow Access list cannot be selected. They must first be removed from that list.When you select an application for blocking, it becomes greyed out (deactivated) in the Allow Access section and vice-versa, ensuring that one application cannot be both blocked and allowed simultaneously.
The number of selected apps included in each risk level is provided next to the risk level name. Cloud apps in the list are sorted alphabetically within each risk level.
If Block all high risk level applications was enabled, the risk level and total is automatically included in the list. The actual apps are not listed. If one of the high risk apps is specifically selected in the Allow Access list, the count is reduced by the number of high risk apps allowed.
Important: The Block Access list takes precedence over actions assigned on the Web Categories tab. If a blocked cloud app is requested using a URL categorized in a category that is set to allow, access to it is blocked.A count of the number of selected apps is provided above the selection pane. The list is limited to 250 selections. When the limit is reached, search results no longer allow selection of additional apps. An app that was previously selected must first be removed from the list.
-
Select the app or apps you wish to add to the blocked list by marking the check box next to the app name.
-
Configure application exceptions to create temporary overrides for specific users, groups, or time periods.
-
On the Edit Application Exception page, configure the following:
- State: Check the box to enable the exception.
- Name: Enter a descriptive name for the exception (e.g., "HR Team ChatGPT Access").
- Description: (Optional) Provide additional details about the exception's purpose.
- Action: Select either Allow access or Block access from the dropdown.
- Time period: Choose when the exception applies:
- During: Select a specific time period (e.g., "Afternoon")
- Anytime: Exception applies at all times
- Outside: Exception applies outside the specified time period
- Expiry: Choose one:
- Do not expire: Exception remains active indefinitely
- Expire after: Specify a date (dd-mm-yyyy format) when the exception should automatically expire and be removed
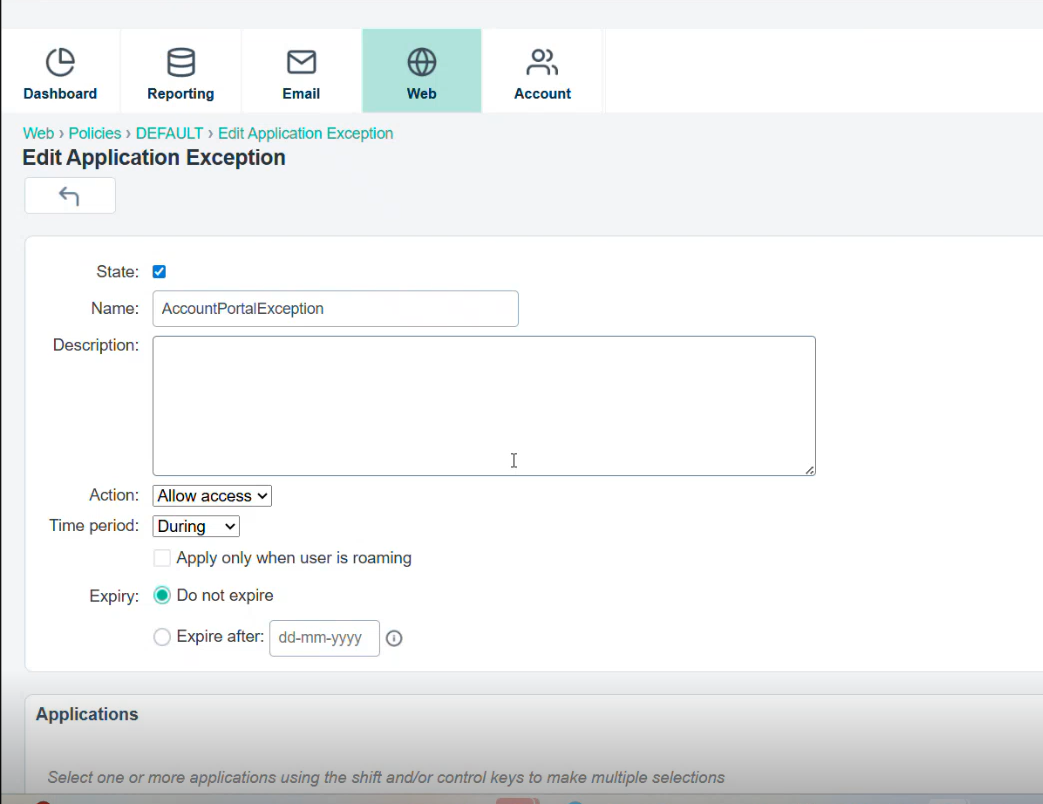
Example use case: You have blocked ChatGPT (a Generative AI application) for all users. However, the HR team requires access during afternoon hours for recruitment purposes. Create an exception named "HR Team ChatGPT Access" with Action set to "Allow access", Time period set to "During Afternoon", assign it to the HR group, select ChatGPT in the applications list, and set an expiry date if needed. The HR team will be able to access ChatGPT during the specified time period while the block remains in effect for all other users.
Note: Application exceptions are displayed in the Application Exceptions table showing Name, Applications, Users/Groups, Action, Applies (time period), Expiry date, and State (enabled/disabled toggle). Expired exceptions are automatically removed from the proxy configuration. -
On the Edit Application Exception page, configure the following: