A Site represents a corporate location from which traffic will originate. While creating a Site, you can configure IPsec tunnel through which traffic should be sent over to cloud and
create or add subnets groups within the site.
To create a new corporate Site, follow the steps below:
Steps
-
Navigate to .
-
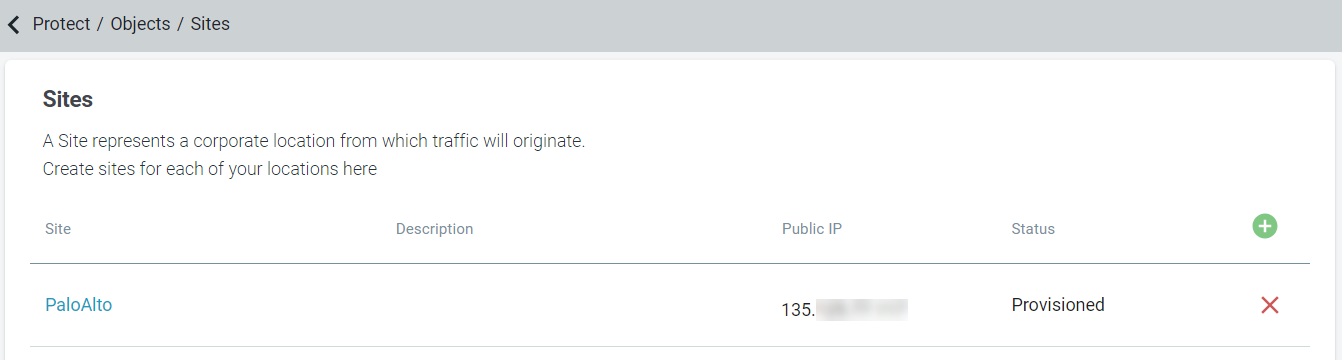
On the Sites page, click the green plus icon.
-
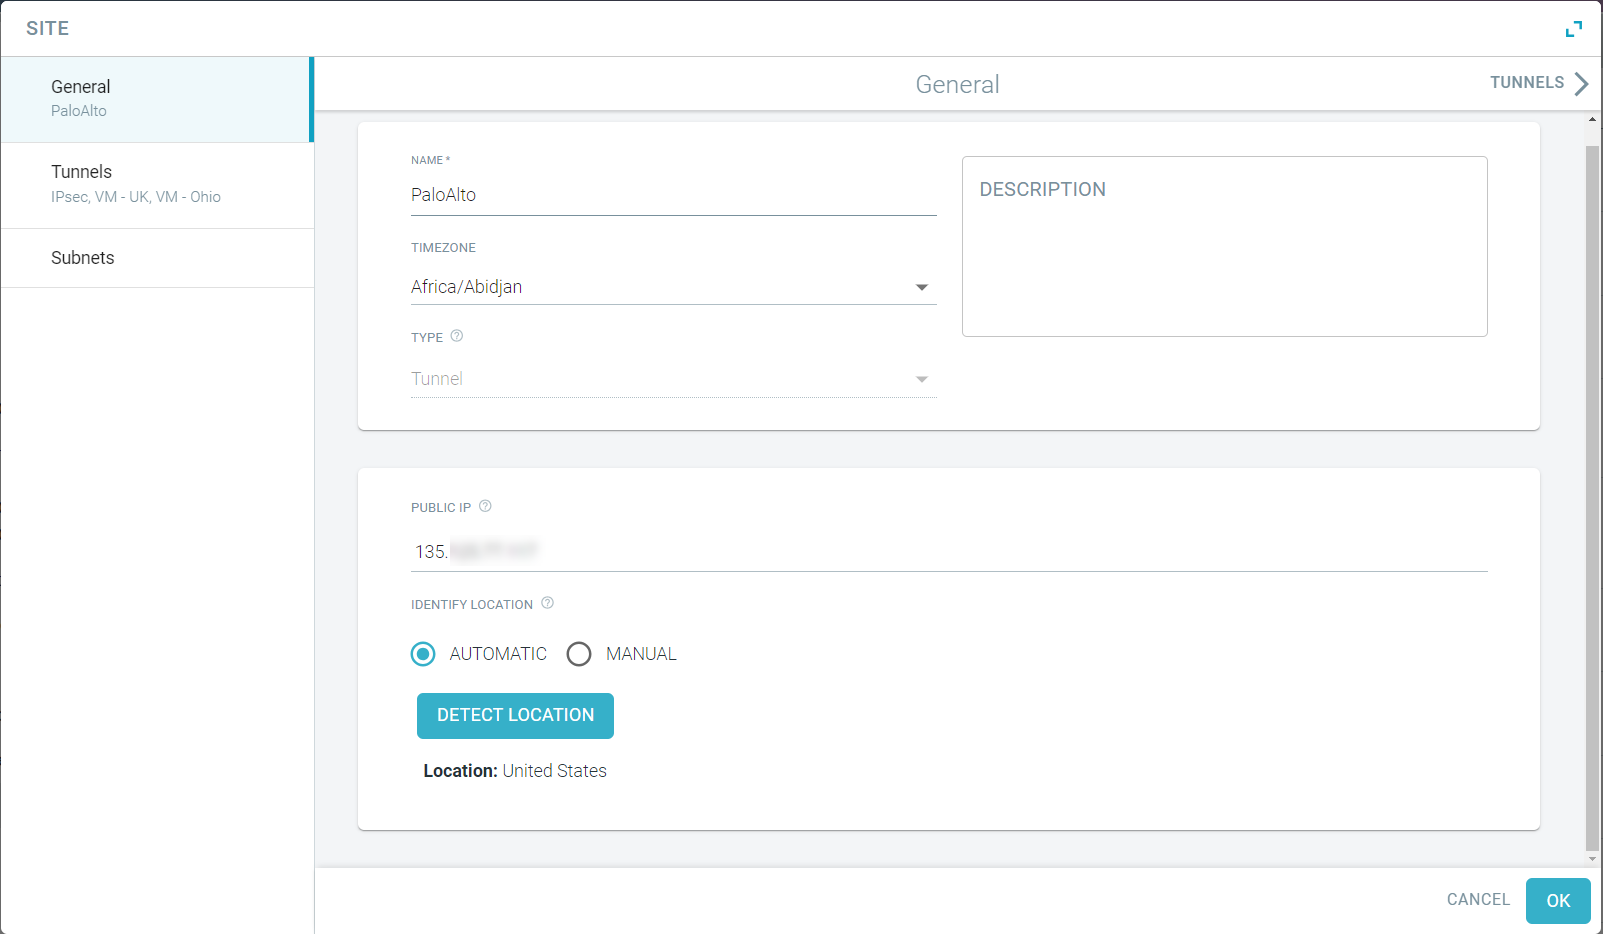
On the General tab:
-
Enter a unique Name of the Site.
-
Select the appropriate TimeZone of the corporate IP location.
-
Enter Description for the Site.
-
Select the Tunnel option from the Type of the site.
Available options are:
Note: The Type cannot be changed once a Site is created. You can delete and create new site with correct Type.
-
Enter the Public IP address of the site.
Forcepoint Data Security Cloud | SSE validates the IP address to make sure
that the value is actually an IP address and is not a duplicate of another site with same IP address that was already created.
Note: You can enter a Dynamic IP address, IP
address that was assigned dynamically by any one of the ISPs connected to the site, in the Site's Public IP field. This Dynamic IP address can
change over time and is simply used as a tag to match any Location Policies for the site on the page.
-
Set the Identify Coordinates to Automatic to identify the location of the site based on entered IP address when you click
Detect Location.
The Location field displays the location name of the entered IP address.
-
If you need a finer coordinates or Forcepoint Data Security Cloud | SSE is
unable to identify the location of the entered IP address, then:
- Set the Identify Coordinates to Manual.
- Select the applicable Country to which entered IP address belongs.
For existing Sites, where the country was not
available for selection, it is set to a special value (unknown) and displayed as a blank in the Country drop-down, so that you can select
it later.
- Enter the Latitude and Longitude.
-
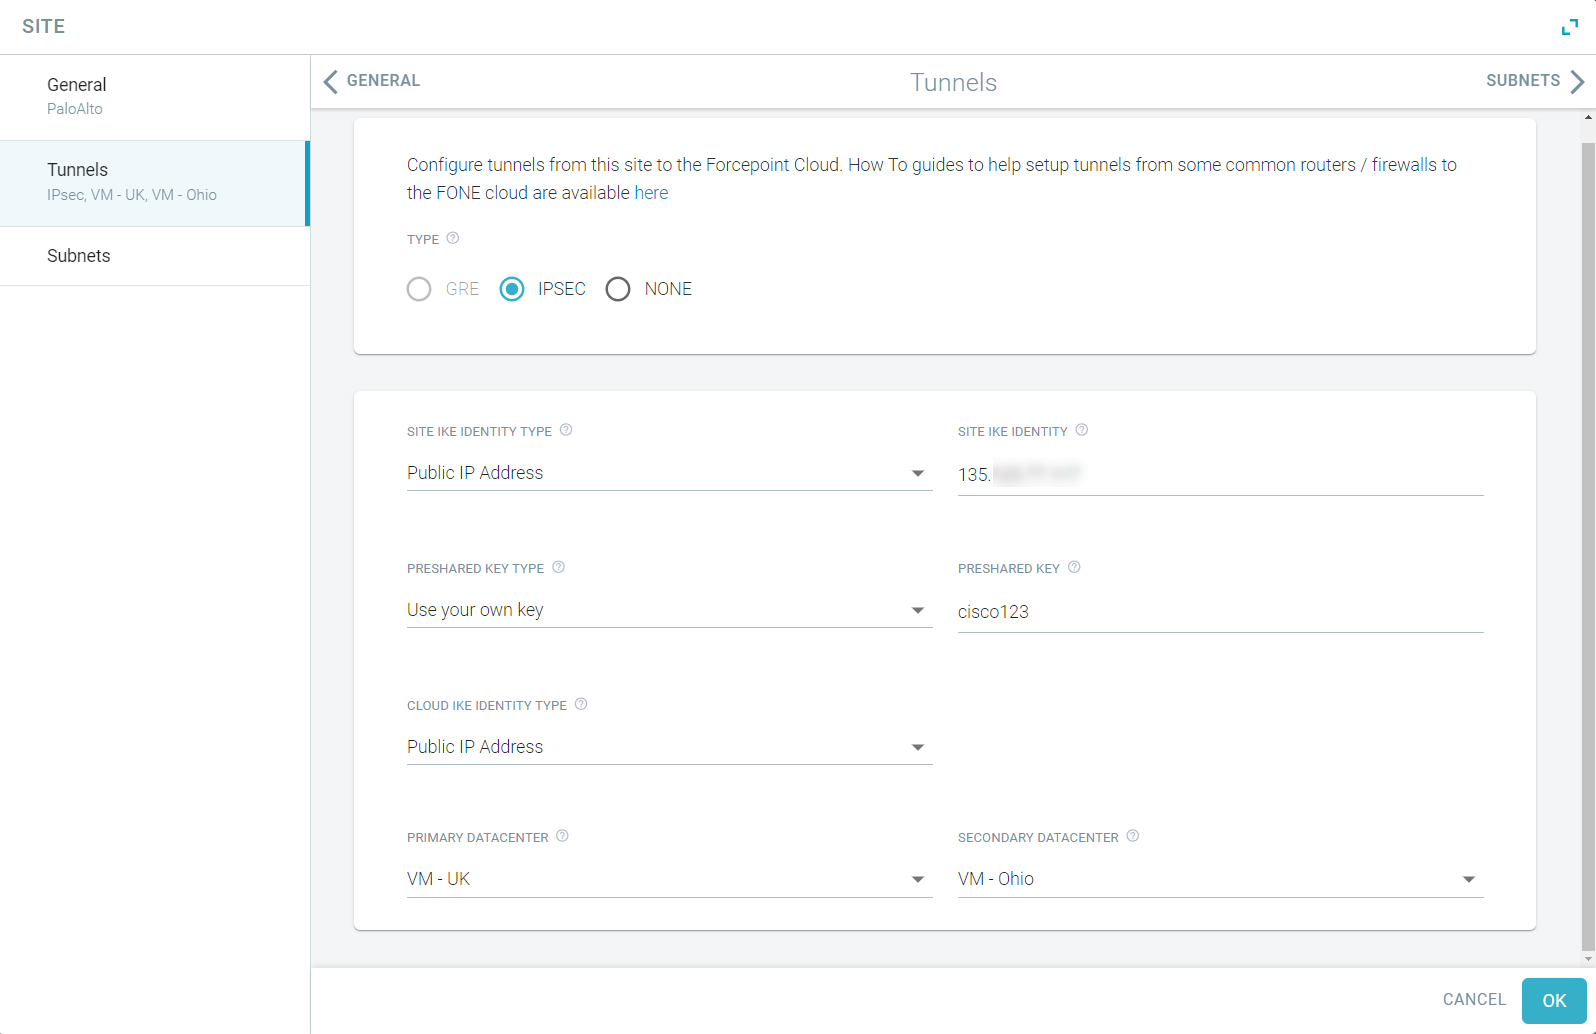
On the Tunnels tab, create tunnels to route the traffic from site to Forcepoint Data Security Cloud | SSE cloud:
To create an IPsec Tunnel, follow the steps below:
-
Select the Type as IPsec.
-
Select whether the Site uses its Public IP address or a FQDN from the Site IKE Identity Type.
-
Enter either public IP address or a FQDN of the site in the Site IKE Identity as per the Site IKE Identity Type
selection.
Note: When the Site IKE Identity Type is set to Public IP address, you can also enter a Dynamic IP address, IP address that
was assigned dynamically by any one of the ISPs connected to the site, in the Site IKE Identity field.
-
Select whether you will Use your own key or an Auto-generated key from the Preshared Key Type.
-
Enter the Preshared Key configured on the site router or firewall.
OR
Click Generate Key to auto-generated key and use the key while configuring the site router or firewall.
Note: The Preshared Key is case sensitive and must be minimum 8 characters long.
-
Select whether the Site uses Cloud Public IP address or Cloud FQDN as Cloud IKE ID from Cloud IKE Identity
Type.
By default, FQDN is selected
-
Select the datacenter where the primary tunnel from the site is terminated.
-
Select the datacenter where the secondary tunnel from the site is terminated.
Select a datacenter that is in a different Region or Zone than the Primary Datacenter. If you do not want to assign secondary data center, then
select None from the Secondary Datacenter drop-down list.
-
(Optional) On the Subnets tab, define subnets or reuse the configured subnets within the site:
Note: Subnets are unique within a site. However, in large cookie cutter network deployments, the same subnet may be used in multiple sites. Combination of Site and Subnet is
globally unique.
To add Subnet(s) defined in page:
- Click the green plus icon.
A Subset appears.
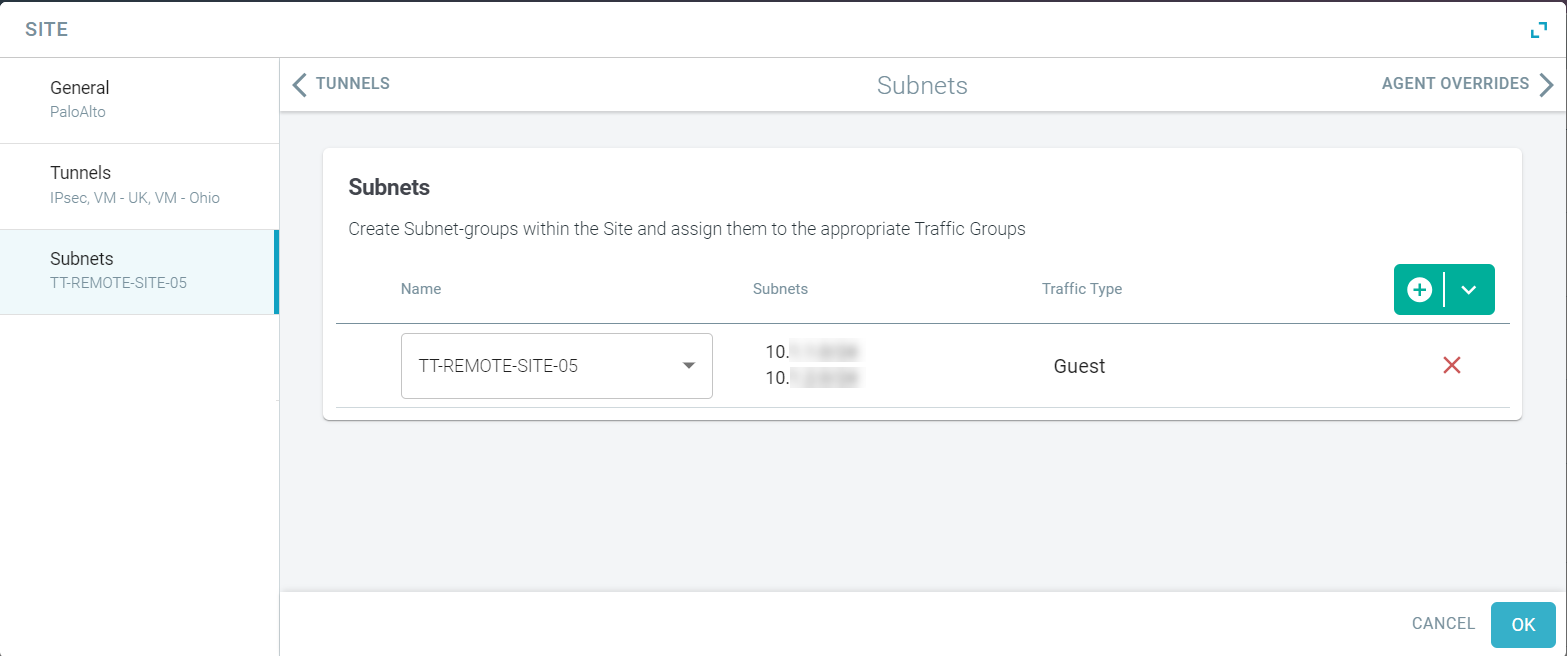
- From the Name drop-down list, select the applicable subset.
The details of selected subset appears.
You can add as many subsets as
required.
To create a new subset for the site:
- Click
 and select Create New.
Create Subnet dialog opens.
- Enter a unique Name of the location for easy identification.
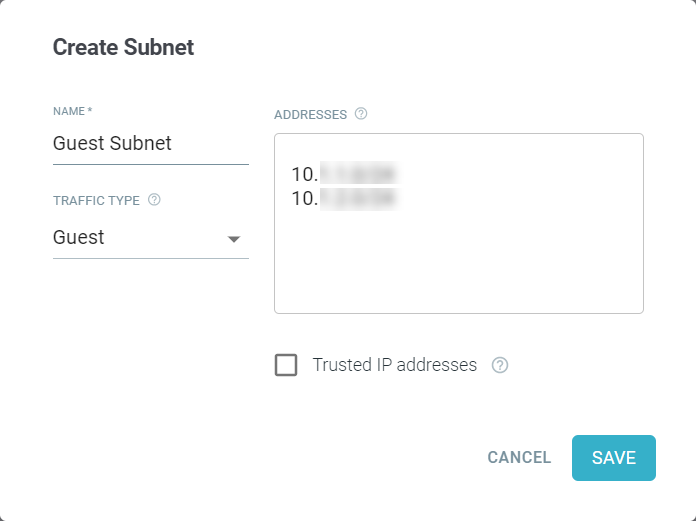
- Select the Traffic Type for the subnet addresses in the custom location.
- Enter the IP Address one per line in CIDR notation.
Custom locations should be external internet facing addresses and can be an IP address,
subnets, or ranges on individual lines.
- Leave the Trusted IP addresses checkbox unchecked.
- To save the custom location details, click Save.
-
To configure a site with selected information, click OK.
As soon as the Site is created, the status of Site will be Configuring. After some time, the status of the Site gets changes to
Provisioned or Failed.
Note: Tunnel typically takes approximately three minutes for it to be Provisioned.