Google Workspace: Deploying Forcepoint Data Security Cloud | SSE as a SAML IdP
This page will guide you through configuring Forcepoint Data Security Cloud | SSE as a SAML Identity provider for Google Workspace single sign-on (SSO) authentication. This will ensure visibility and access control of Google Workspace via Forcepoint Data Security Cloud | SSE CASB.
Before you begin
Steps
-
Start by logging into the Forcepoint Data Security Cloud | SSE admin portal and
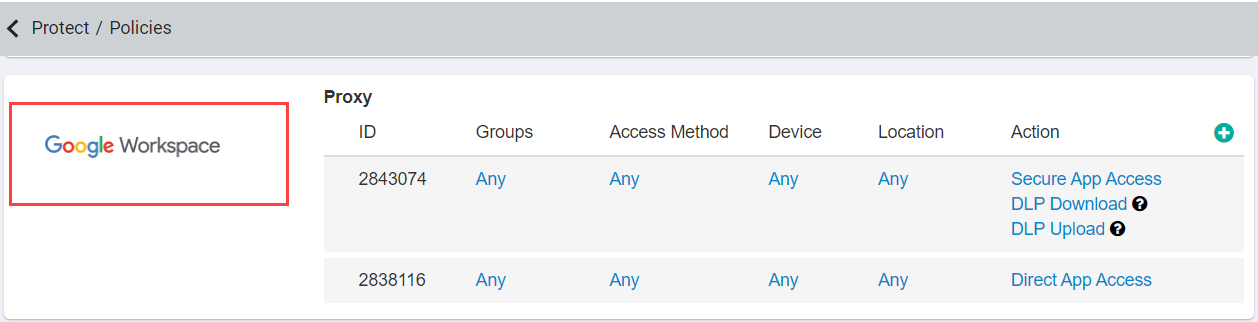
navigate to and click on Google Workspace to get to the Google Workspace settings page.
-
On the settings page you will first need to select the App instance to enable SAML SSO for Web, Client Apps.
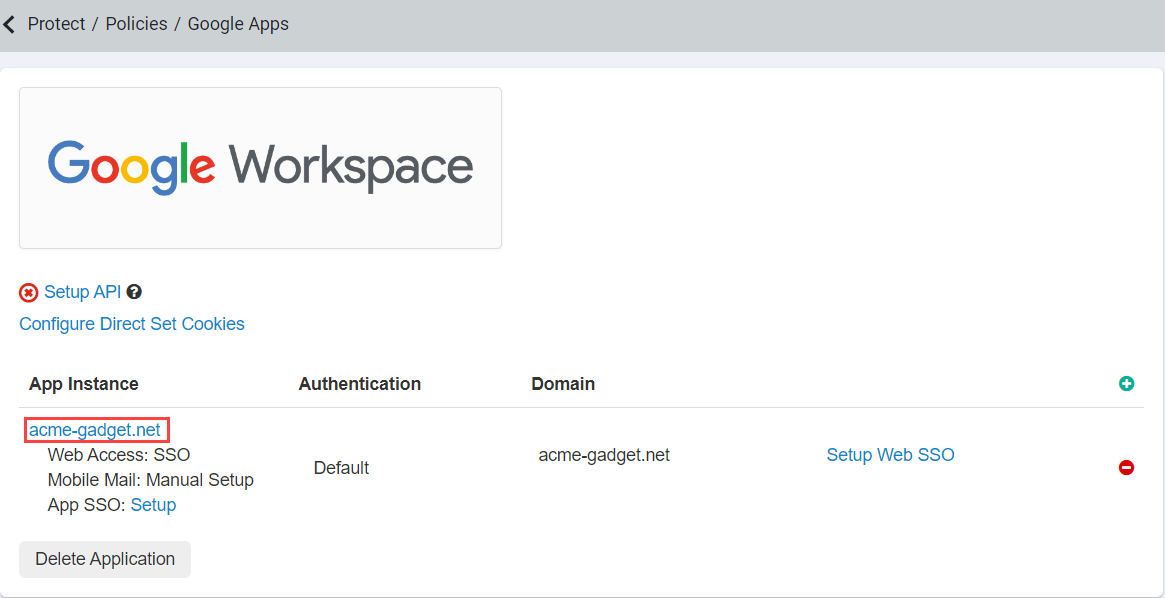
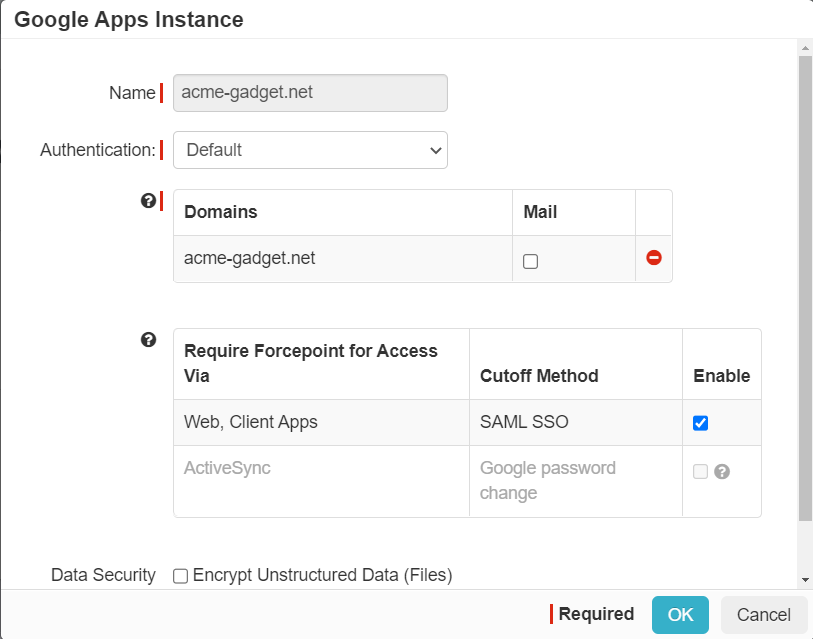
Note: The Google Workspace tile will be hidden from User Portal when the SAML SSO is disabled in the Google Apps Instance dialog. -
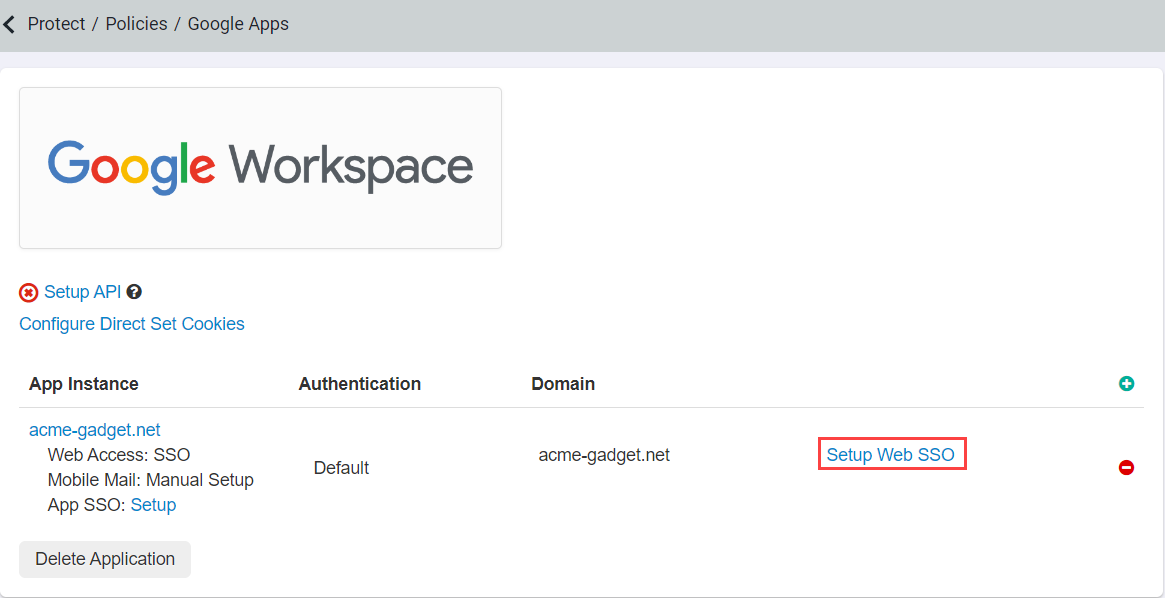
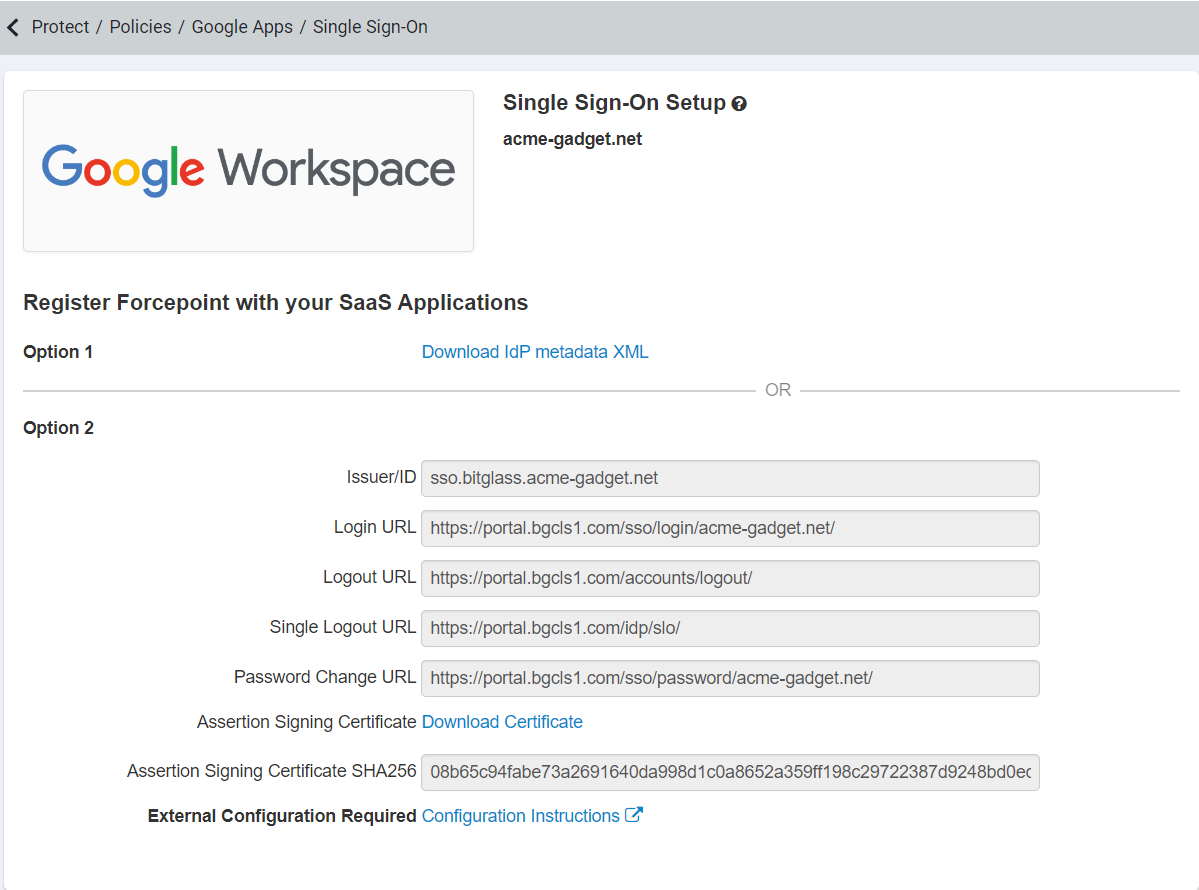
Back on the Google App settings page, select Setup Web SSO and keep this page open as you will need the information from this
page.
-
Open a new browser window or tab:
- Open any Google App and then navigate to to open Google Admin portal.
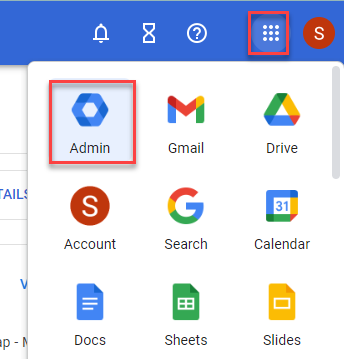
OR
- Login directly to https://admin.google.com.
- Open any Google App and then navigate to to open Google Admin portal.
-
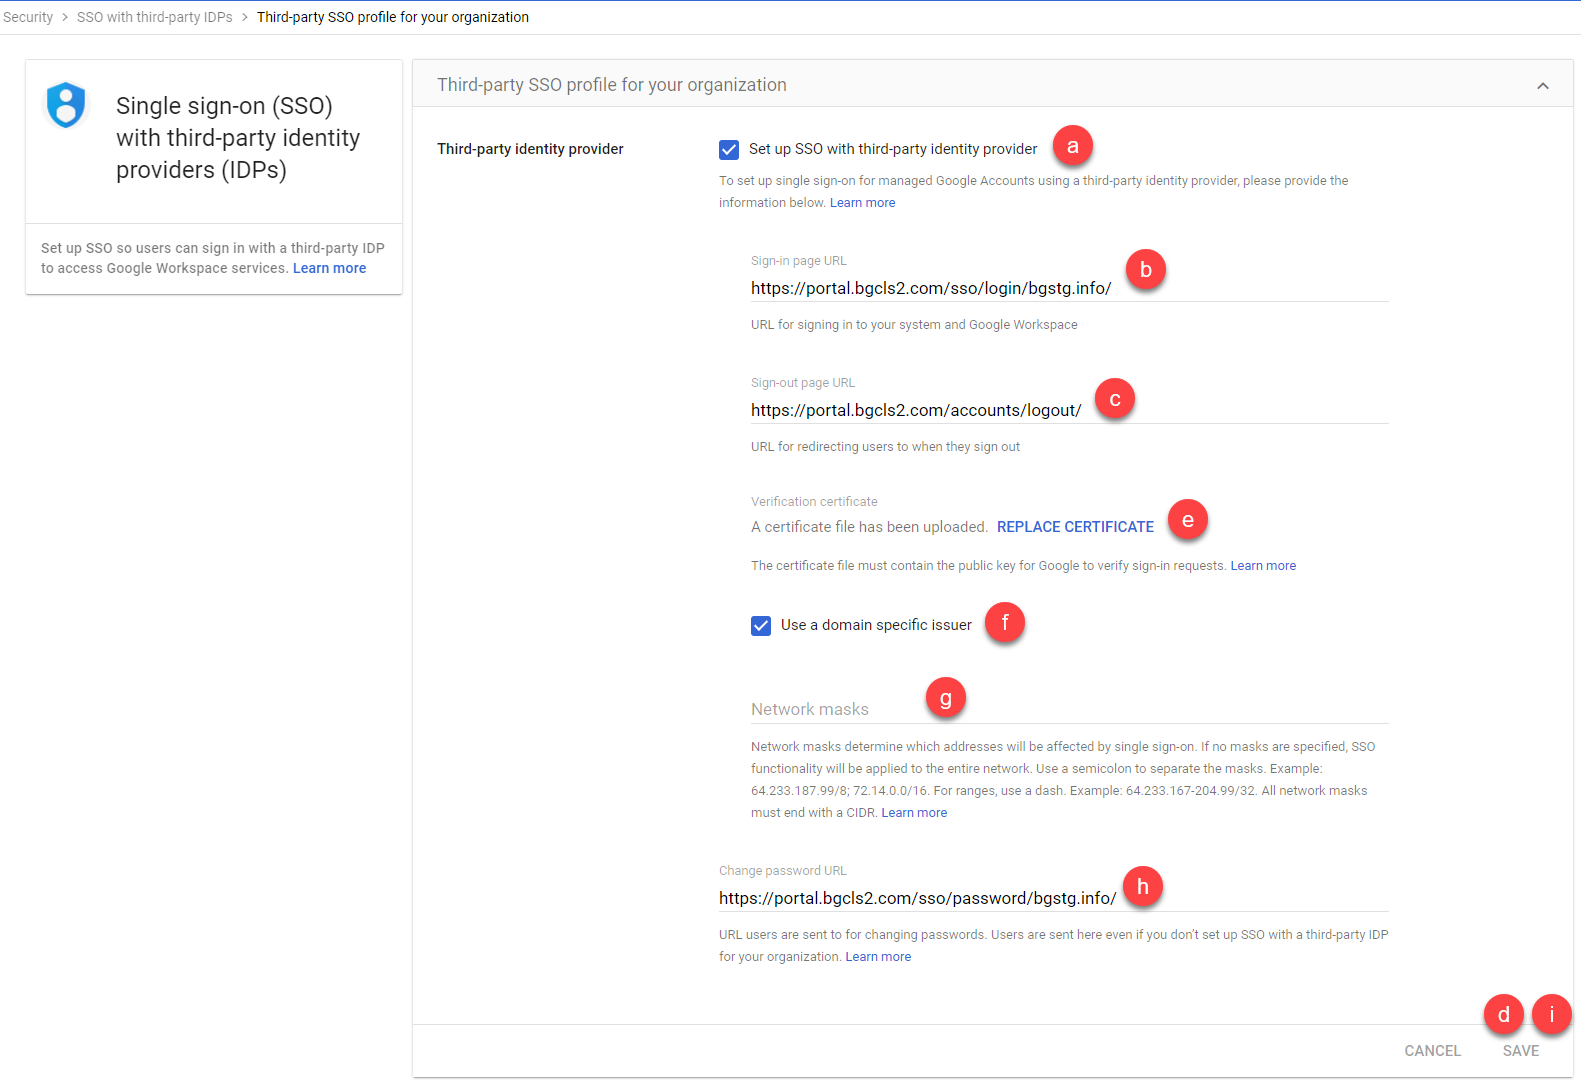
On the left navigation pane, navigate to page and then click on Third-party SSO profile for your Organization section to edit the fields.

- Follow the below steps:
-
Click Save.
-
Click Save.
-
If you are configuring SSO for specific Organizational Units (OUs) or Groups, then follow the below steps in Forcepoint Data Security Cloud | SSE:
-
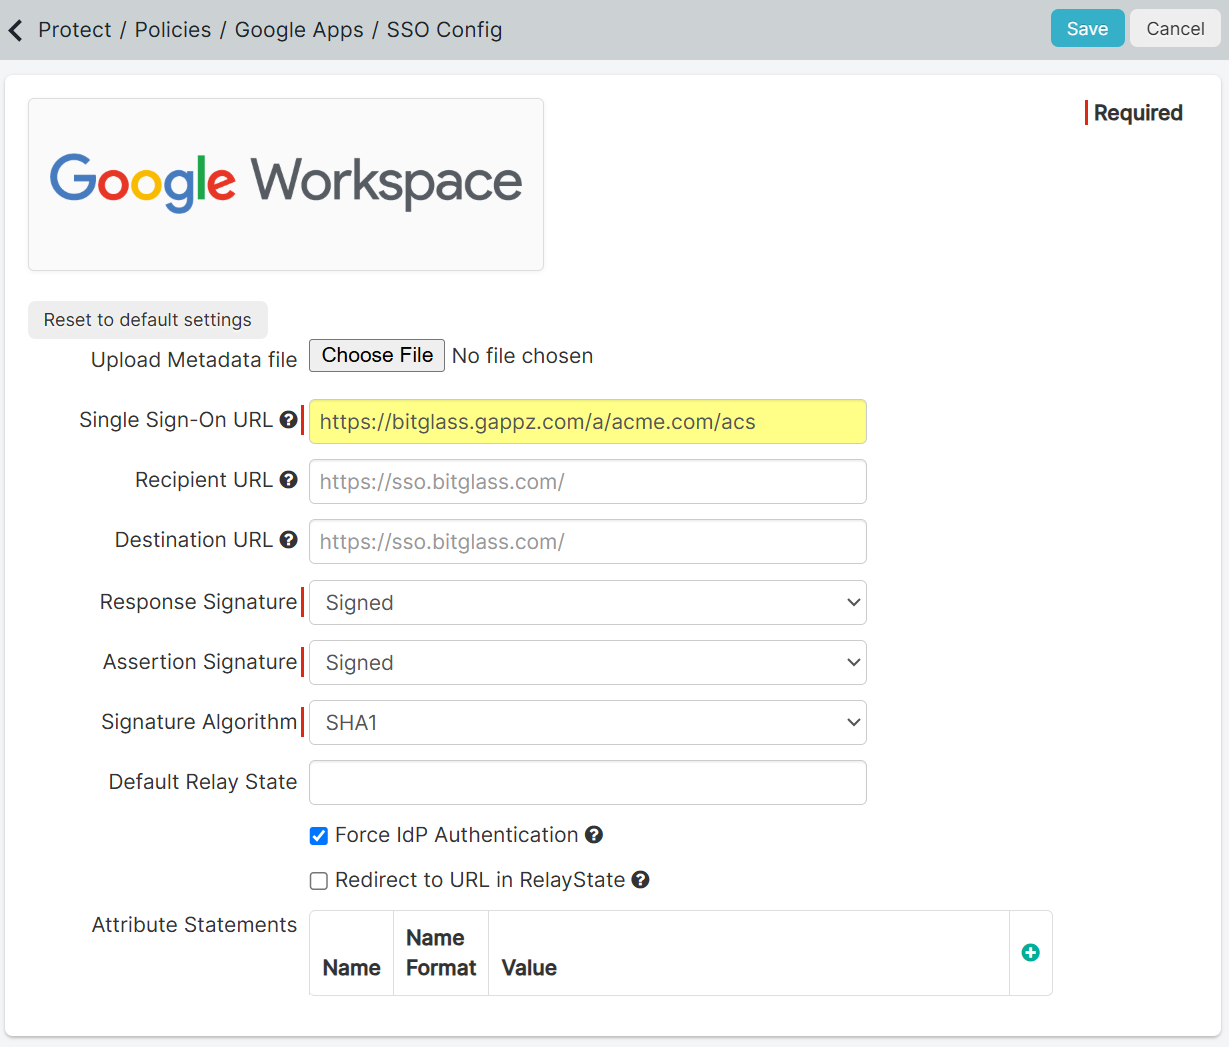
On the settings page, click App SSO: Setup link to update the details.
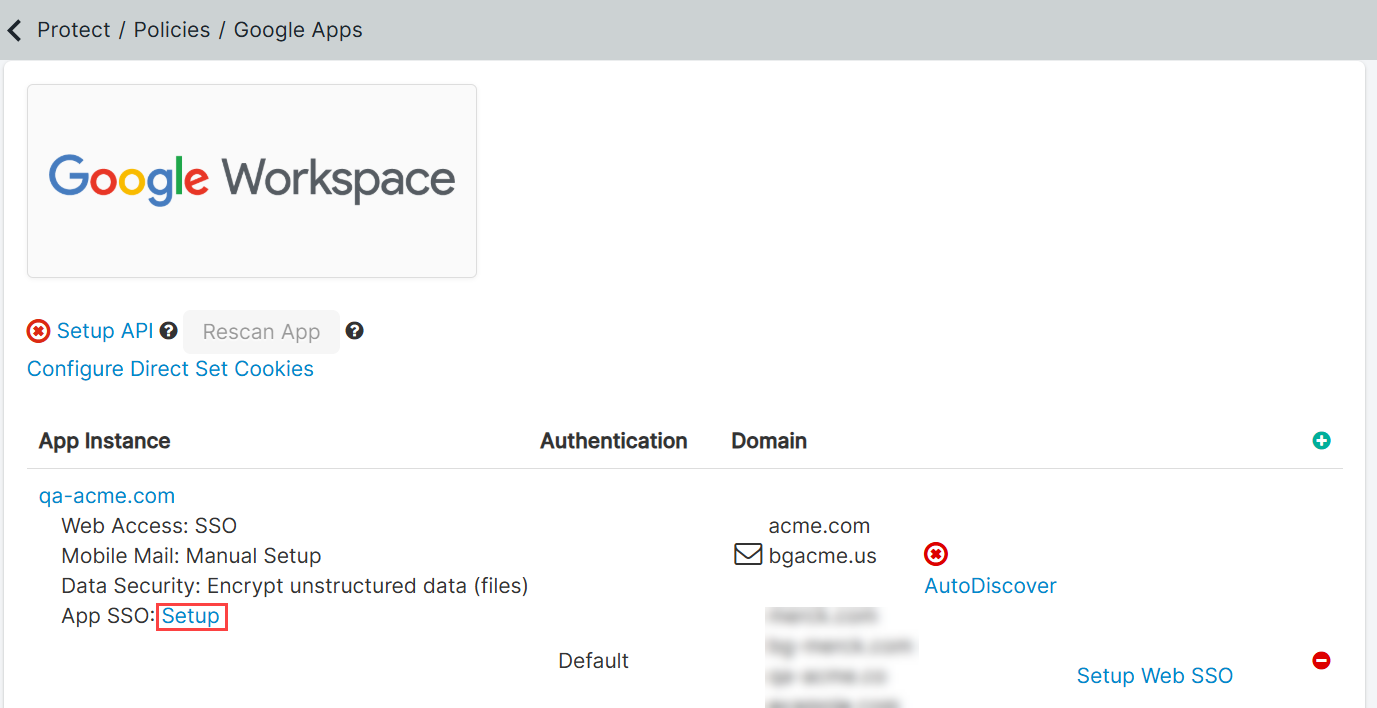
The SSO Config page opens.
-
On the settings page, click App SSO: Setup link to update the details.