The Directory Synchronization Client includes a configuration wizard that leads you through the process of creating or editing a configuration.
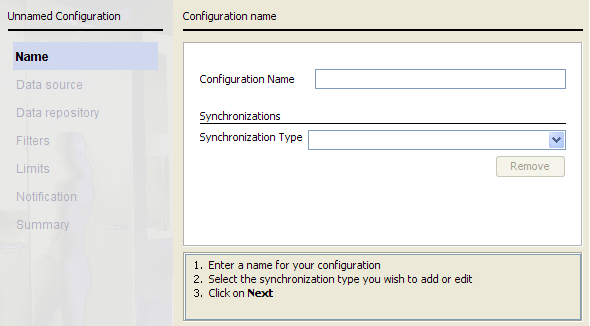
To create a configuration profile, click New Configuration on the client’s landing page. This launches the configuration wizard to the Name
screen.
Steps
-
Enter a unique Configuration Name for your profile, using alphanumeric characters.
Note:
To later modify an existing profile, select , then:
- Use the Configuration drop-down list to make a selection.
- If your configuration contains multiple synchronization types, click the tab for the type you want to edit.
- Click Modify.
To copy a profile that you are editing, enter a new configuration name and click Save.
-
If the Synchronization Type list appears, select a type.
- This list is not displayed for those only configuring Mail.
- If you are configuring Groups+Users, select Users first, then configure Groups afterward.
Existing configurations appear in the list with the appended text (configured). To delete the current configuration for a specific synchronization type, select the entry
from the drop-down list and click Remove.
-
Click Next to continue.
Next steps
See Step 2: Selecting your data source.