Your administrator contacts can be given a portal login, and permissions to manage certain features as well as policy-level permissions, allowing them to view or modify settings for
particular policies. This allows you to delegate responsibility for administration to particular departments.
Steps
-
On the Web Security portal, go to page.
-
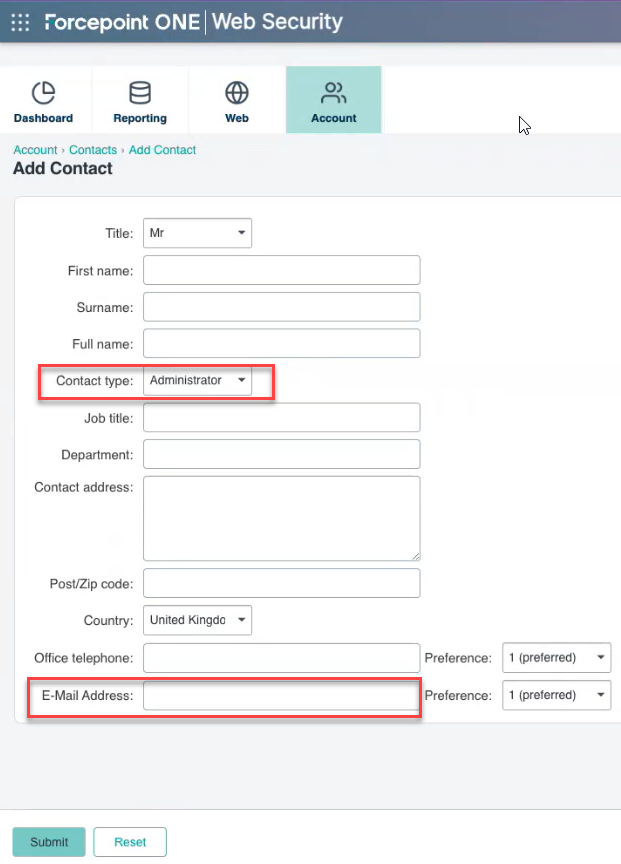
Click Add in the Contacts section.
-
In the Add Contact window, enter the contact person details. Ensure that the Contact Type is selected as Administrator and
an email address has been added.
-
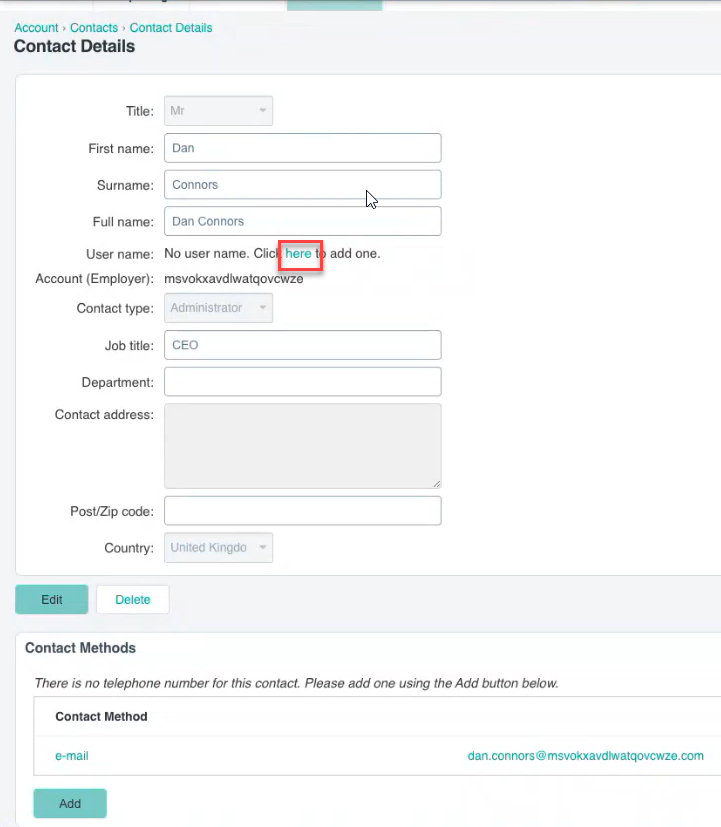
Click Submit. You will get a Contact Details window.
-
Click here to add the username to the created contact details.

Note: This username must match the username that is used to sign-in to the Forcepoint Data Security Cloud Portal.
-
Update the following information on the Login Details page:
- Under the Log On Details section, click Generate Password and save that new password. This will not change your password for accessing the
Forcepoint Data Security Cloud portal.
- Under the Account Permissions section, tick the Manage Users, Data Security Reports, View All
Reports, Log Export, and Modify Reports check boxes.
- Under the Policy Permissions section, tick the Modify Configuration, View Configuration, and View
Configuration Audit Trail check boxes.
- Click Save.
Now your administrator contact has been created successfully, you can see the new contact name on the portal as a profile ID.

