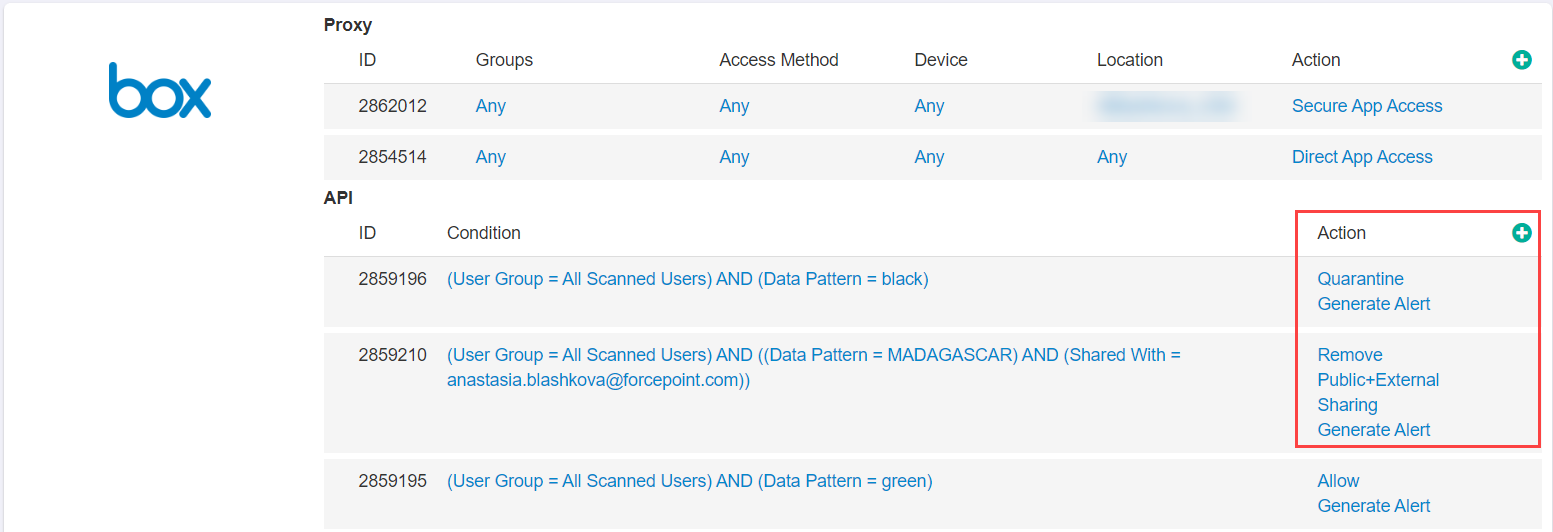
Adding actions to the API policy
The configured action takes place when an API scan matches the conditions. Actions include Allow, Quarantine, Create Copy, Remove Share, and Encrypt (for Microsoft 365 only).
Allow
Selecting this action makes no change to the file in any way.
Quarantine
Allows you to replace a file violating the policy with a custom file. The file violating the policy can be moved to any application you have added and configured for API in Forcepoint Data Security Cloud | SSE under a defined legal hold or quarantine account. This will allow for a central repository for admins to review/investigate quarantined files across all applications in one location. You will need to setup a notification file that will replace the quarantined file, setup an admin (quarantine) account and a folder location in your application.
Notification File
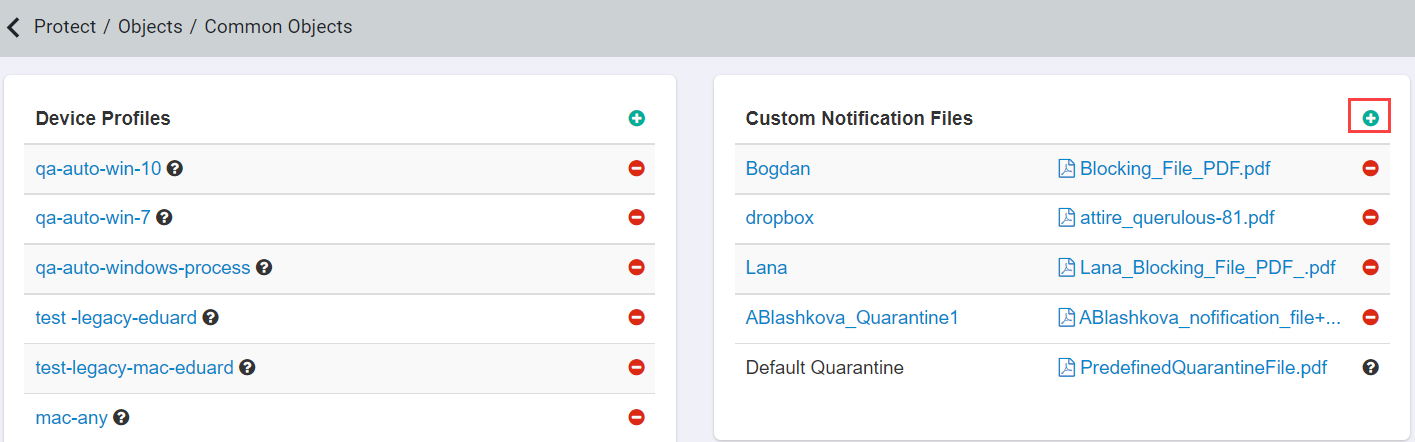
Notification files can be uploaded on the page in the Custom Notification Files card.
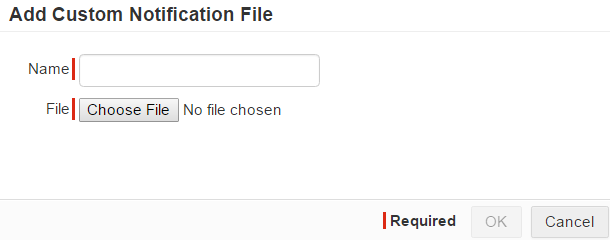
- You can use default notification file or create your own file. Clicking on the green plus icon brings up the dialog to upload a custom file. Only PDF files can be uploaded as
custom notification files.
Note: The notification file that replaces the original file is renamed as <original_filename>_quarantined.pdf. The original file that is placed in the quarantine account is renamed to <username>_<original_filename>.
Quarantine Action Setup
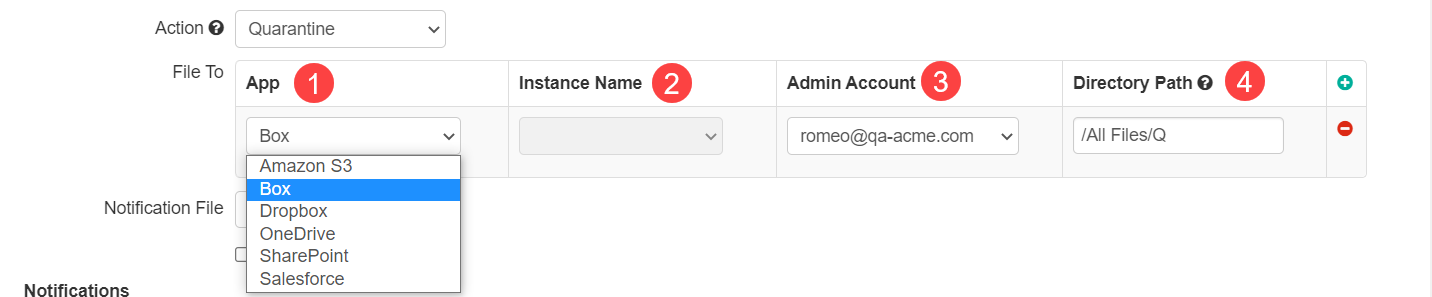
When you select the action Quarantine, you will see a table appear with fields to configure for where the file will be sent to.
- App: This dropdown will you let you choose any other sanctioned application you have already setup in Forcepoint Data Security Cloud | SSE with API integration to send the file to.
- Instance: If you have multiple instances in the app, please select the one you wish to send the file to.
- Admin Account: Select the admin account (quarantine account) that will receive the quarantined file. The quarantine account should be an admin account in Forcepoint Data Security Cloud | SSE.
- Directory Path: The location of the folder within the application. Formatting will differ based on the application you are using:
- SharePoint - https://<customer-domain>.sharepoint.com/<site-collection-name-with-directory-path>
Example for tenant acme.com: https://acme.sharepoint.com/sites/examplesite/Shared Documents/Quarantine
- OneDrive - /Files/<directory_path>
- Google Drive - /My Drive/<directory_path>
- Box - /All Files/<directory_path>
- Dropbox - /<directory_path>
- ServiceNow - /<table_name>
- S3 - Bucket: <bucket_name> Folder Path: Optional
- GCP - Bucket: <bucket_name> Folder Path: Optional
- SharePoint - https://<customer-domain>.sharepoint.com/<site-collection-name-with-directory-path>
- The Preview button lets you see a preview of 20 files matching the condition. This is not an exhaustive list of all the files matching the condition.
- As a best practice, you should create a separate quarantine group, add the quarantine user to it and exclude it from Selective Scanning. This will ensure that your quarantined files are not scanned.
Create Copy
Works similarly to Quarantine except instead of moving the original file to a designated (quarantined) location, you create a copy of the file to move to a designated location for later inspection. This allows the original file to remain undisturbed, however the admin can review the copy of the file to ensure that it meets compliance and then take a manual action on the original file if needed. Setup is similar in that you can select a specific app, app instance, admin account, and folder path that the file will be placed in.

Encrypt
For Microsoft 365, you can select Encrypt to encrypt all data-at-rest matching your chosen condition inside of OneDrive and Sharepoint.
- Files are protected using format preserving encryption and must be downloaded through the Forcepoint Data Security Cloud | SSE proxy to gain access to the decrypted content.
Encrypted files can still be previewed through the web and will display a message informing the user to download the file for full access.
- In most situations this will be used in deployments where there was already data-at-rest that needs to be encrypted. In this instance the static data was not captured with the
in-line DLP rules to be encrypted during upload and can now be encrypted based on the defined API policy.
For example, a user on a managed device with direct app access with a thick client application will be able to upload a file bypassing the proxy and the in-line policy actions. The configured API policy can catch those files at rest and apply the appropriate action (such as encrypt).
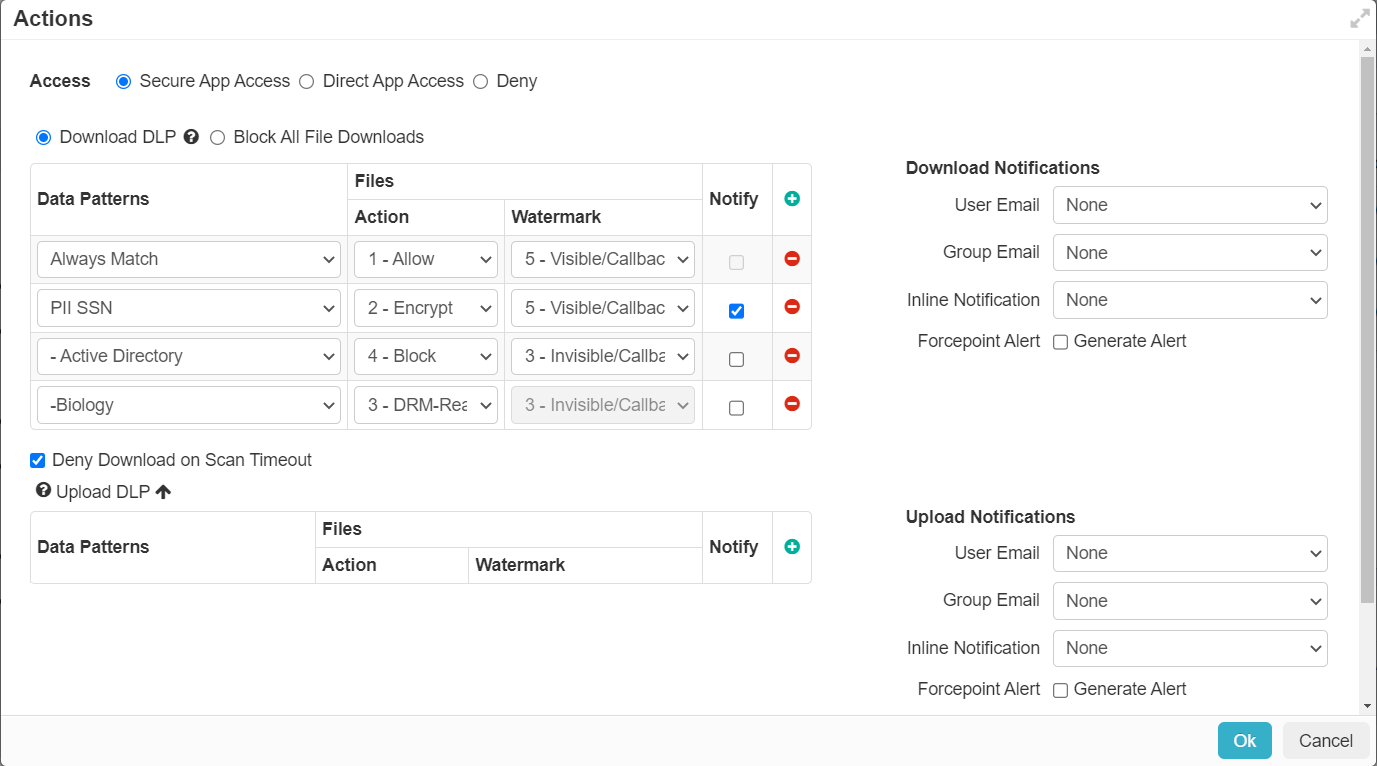
 Note: When configuring to have data-at-rest encrypted, you must have a download DLP rule set to Always Match and Allow in order to allow a user with proper access to download those files and for the files to be decrypted.
 - With the addition of encrypt action to API Policy, Forcepoint Data Security Cloud | SSE
have removed the feature under the Office 365 app to apply bulk encryption. If you have data that was previously encrypted with this option, it will be decrypted with the
Always Match and Allow download rule covered in point 1.
Classify
Forcepoint Data Security Cloud | SSE can apply a custom metadata classification tag to files via API. Classification tags are applied based on the configured API policy you have created. For files that are scanned, when they match the configured policy they will be applied the custom tag that you configure (with custom name and matching value.
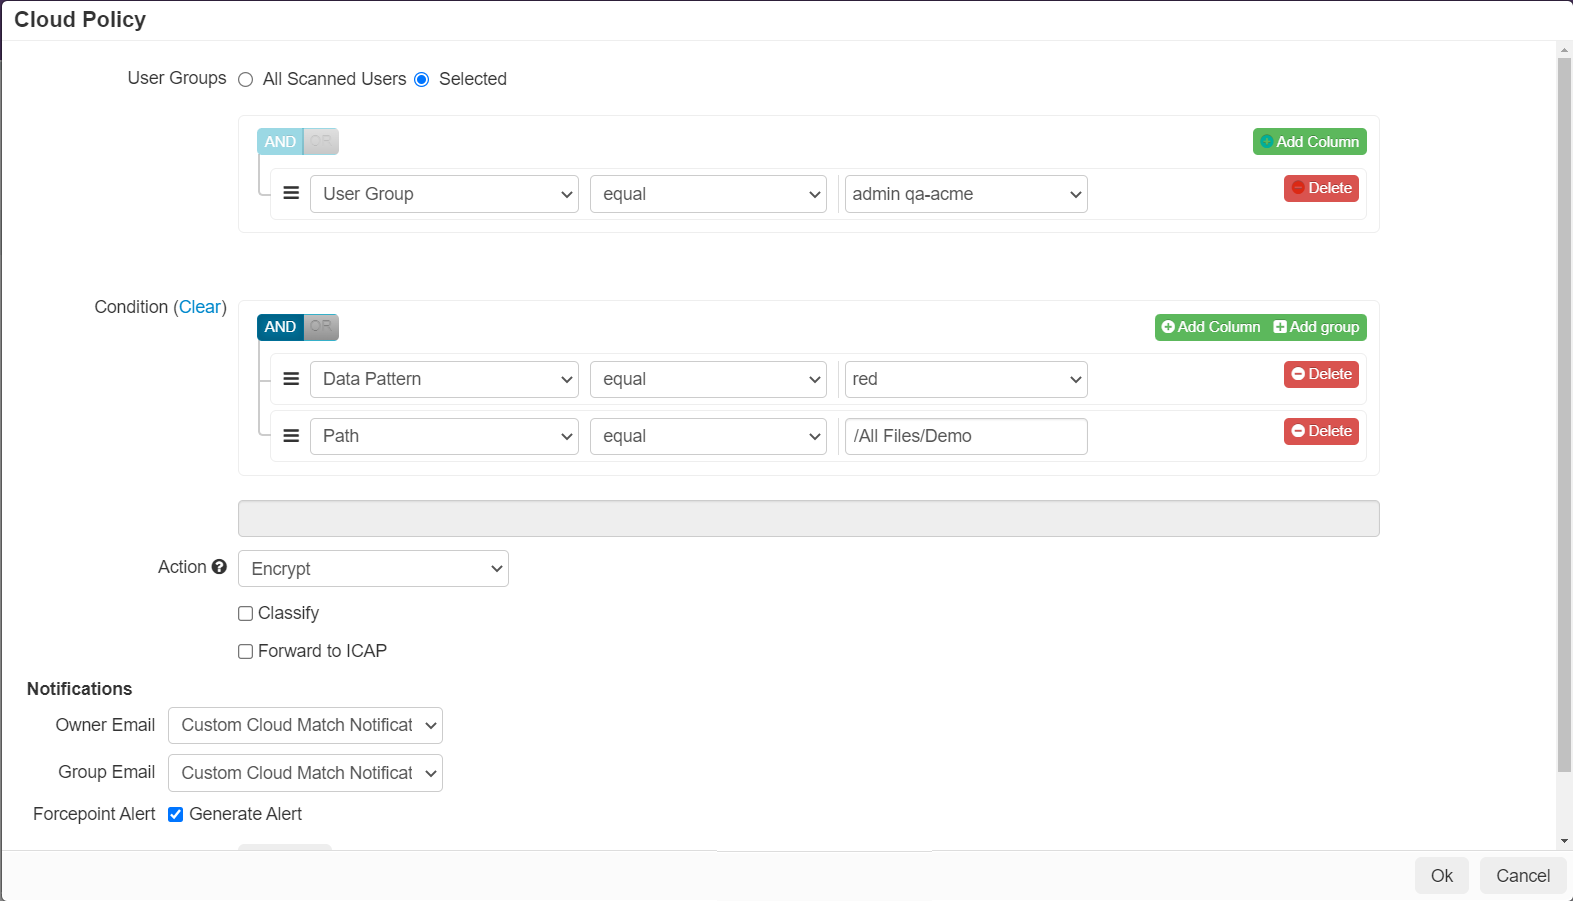
- From the Policies page, modify or add a new API policy line to the application.
- In the Cloud Policy dialog, start by configuring your conditions for which files will be applied your custom classification tag. Below the
Action dropdown, you will see a checkbox for Classify. Select it to open up the Classification table.
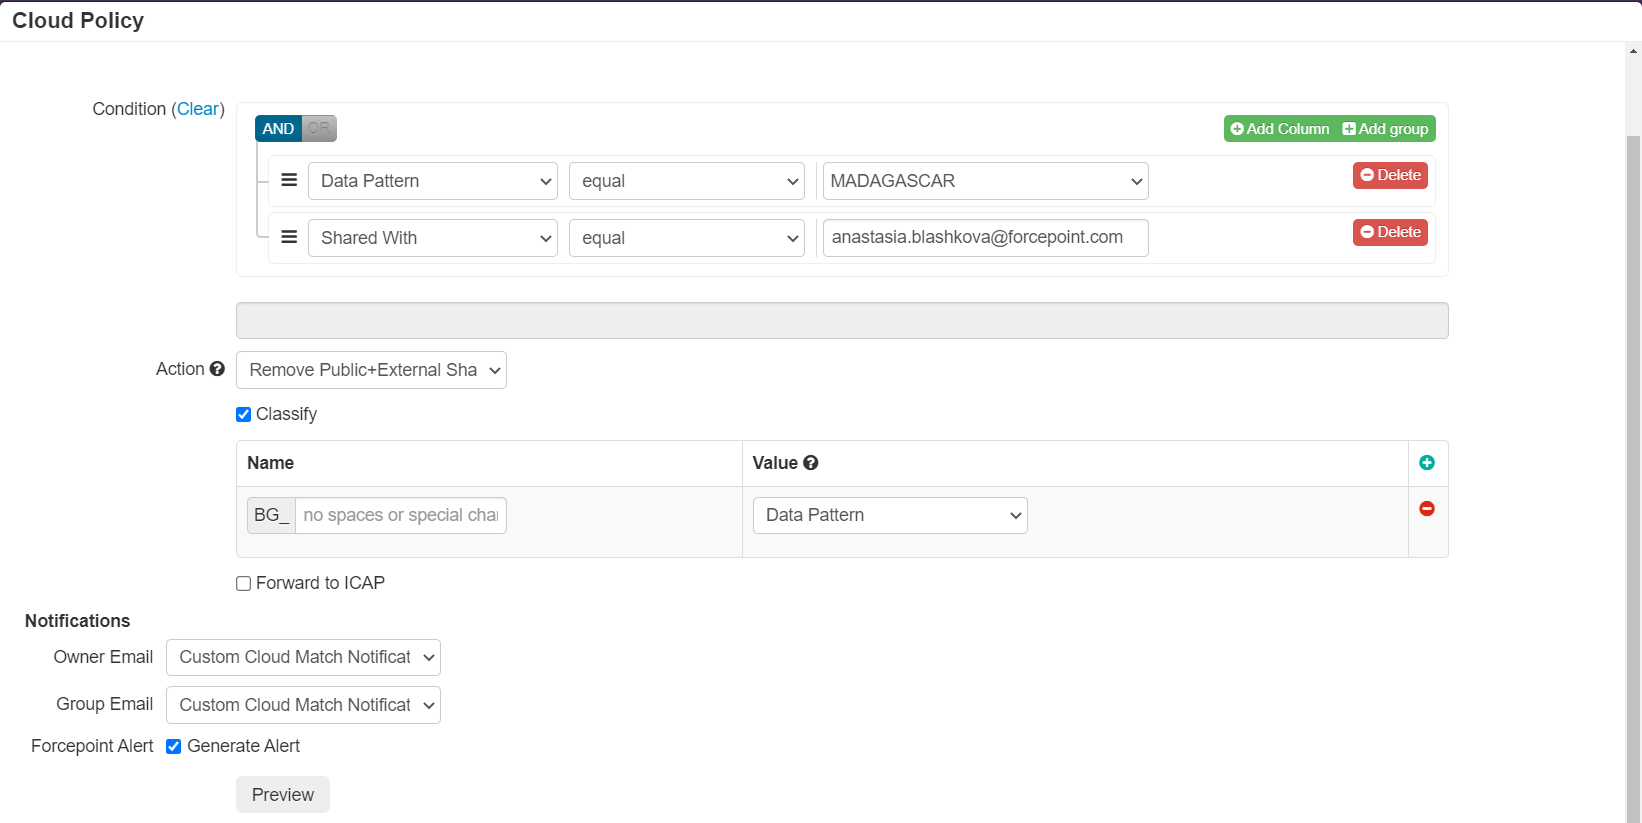
- In the Classification table under the name column, provide a name that you wish to call your tag (for example "Classified"). The tag that is applied will be
named BG_(name you entered) with the value that is matched.
- Data Pattern: Select Data Pattern will add to your tag the value of any data patterns that appear in the file that you configured under the Setup API page you would have gone over in the first section of this guide page.
- Custom Value: For customers that want more granular control over their tags can select Custom Value. This will instead apply whatever value you enter into this field alongside the name to your metadata tag.
- You can add as many metadata tags per policy line by adding to the Classification table. You can also vary your tags by policy by creating different API policies to apply different tags based on different conditions.
- Save your policy when done and classification tag setup is complete. Now during API scans Forcepoint Data Security Cloud | SSE will apply your customized metadata tag to files matching your policy lines. These tags can then be used in future policies. For example a common use case is to configure API scans to tag various files matching different conditions and data patterns that should be confidential. Then you can configure an inline policy to block the download of any file matching confidential.
Remove Sharing
Forcepoint Data Security Cloud | SSE offers the ability to remove various states of sharing from a file.
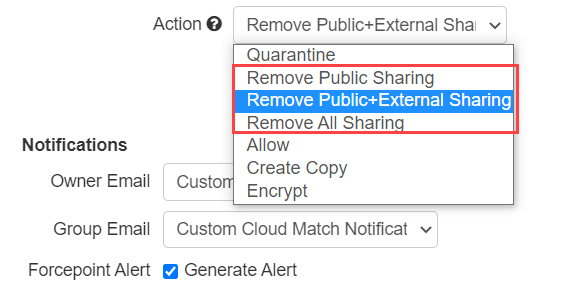
- Remove Public Sharing: Removes the publicly shared link that is generated when a file is set to publicly accessible with a generated link that can be sent to anybody.
- Remove Public+External Sharing: Removes the above publicly shared link as well as any specific external users that the file was shared with leaving the file shared internally only.
- Remove All Sharing: Removes the entirety of the sharing states on the file marking it as private.