Single Sign-On

Forcepoint Security Manager supports Single Sign-On (SSO) via SAML 2.0 protocol. This feature allows the user to login to the Forcepoint Security Manager using Single Sign-On (SSO). It improves Forcepoint Security Manager user access experience and facilitates the cross-platform login.

Currently supported SAML Identity providers include:
  • Okta
  • Azure

Users who choose Okta as identity provider, can login to the Forcepoint Security Manager from their Okta portal. To do so, you must complete the configuration of the Okta for SAML 2.0 protocol, and must complete the SSO configuration in Forcepoint Security manager. Fore more information about the Okta configuration, see Configuring Okta SSO with SAML 2.0 protocol section.

Users who choose Azure as identity provider, can login to the Forcepoint Security Manager from their Azure portal. To do so, you must complete the configuration of the Azure for SAML 2.0 protocol, and must complete the SSO configuration in Forcepoint Security manager. Fore more information about the Azure configuration, see Configuring Azure AD SSO with SAML 2.0 protocol section.

Note: If the Two-Factor Auth is enabled, the user cannot configure the Single Sign-On. To enable the Single Sign-On, you must first disable theTwo-Factor Auth from Global settings > General.
After completing the configuration, the standard users can login to the Forcepoint Security Manager using SSO by clicking Sign in with Single Sign-On on the login page. Global Security Administrator can login with SSO by clicking Sign in with Single Sign-On as well as with User name and Password by clicking Log in as Global Security Administrator on the login page.
Note:
  • Global Security Administrator can use Forcepoint Security Manager's password authentication as a fallback method, in case of Single Sign-On authentication failure.
  • Only Global Security Administrator can use User name and Password when SSO is enabled.

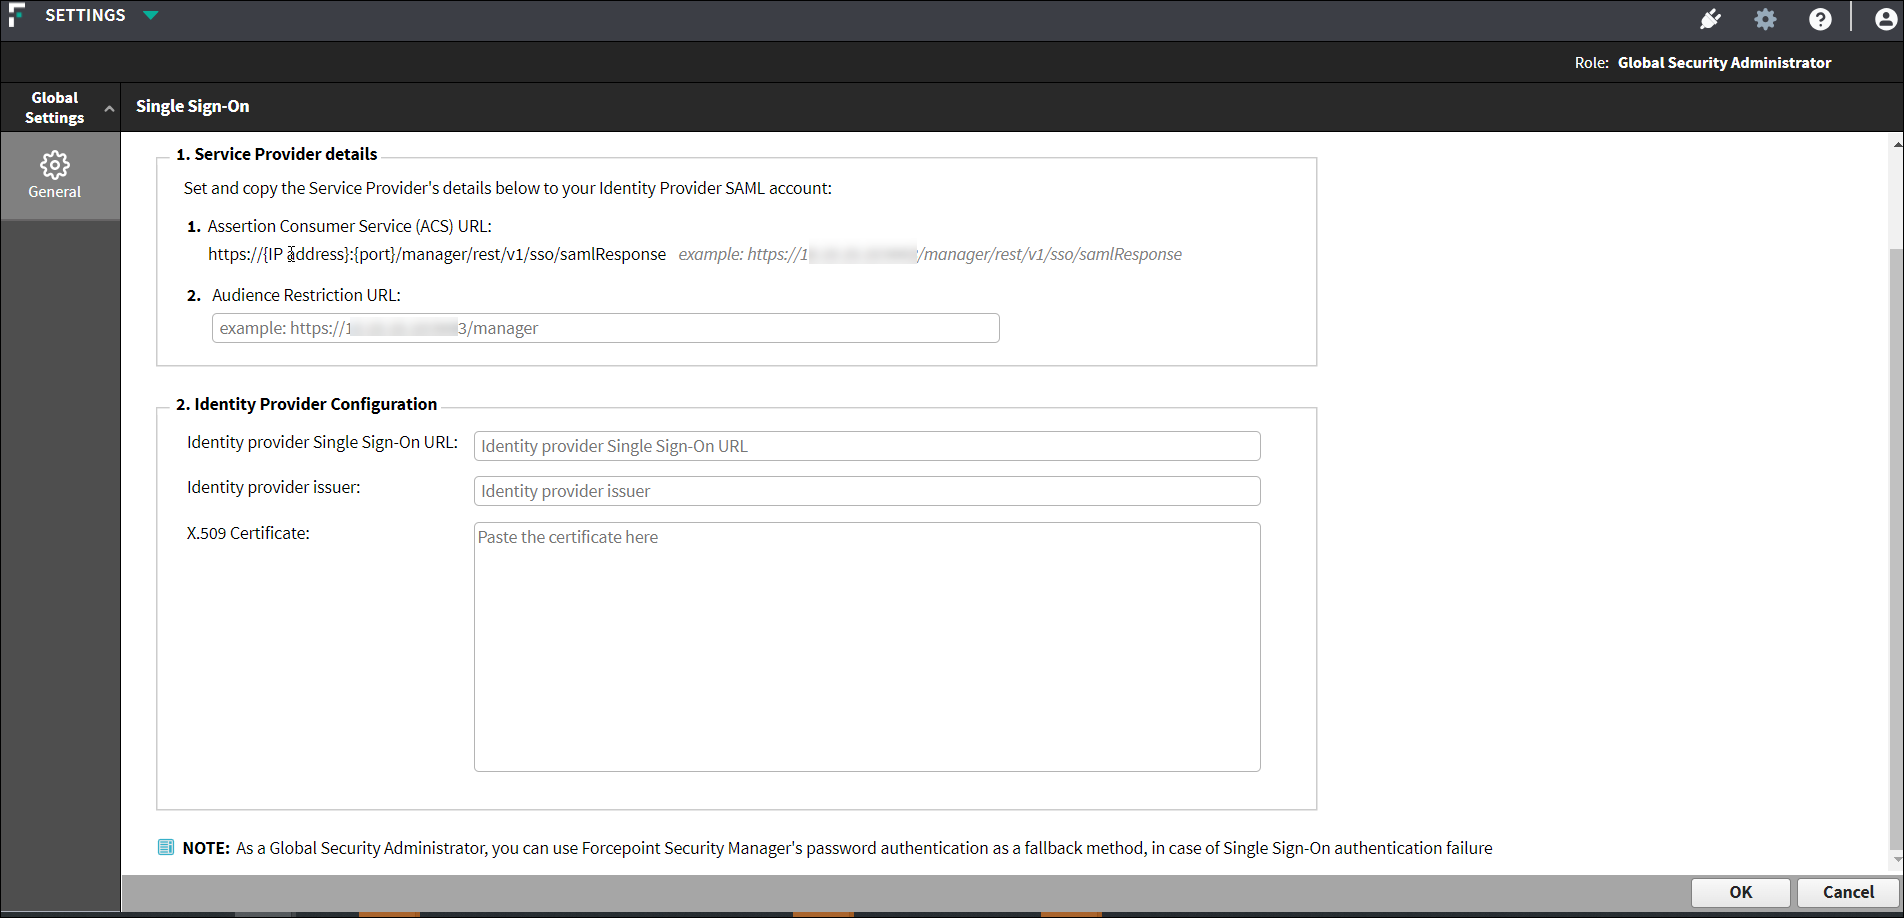
To configure SSO in Forcepoint Security manager, complete the steps below:

Steps

  1. Navigate to Global Settings > General, and select Single Sign-On.
    Note:
    • Only Global Security Administrators can access Single Sign-On feature from Forcepoint Security Manager.
    • Make sure that each administrator has a unique email address before enabling the Single Sign-On (SSO). When SSO is enabled, administrators with duplicate emails will not be able to access Forcepoint Security Manager.

      When SSO is enabled, Forcepoint Security Manager displays a notification about duplicate emails for local and network accounts. In case of duplicated emails within network groups, the notification will not be displayed, and the administrator will be able to login according to the existing permission mechanism in the system.

    • When SSO is enabled, all local accounts will not be able to configure their passwords. Only Global Security Administrator can have a password configured.

    • When SSO is disabled, make sure to configure passwords for local accounts. The local account will be able to generate a temporary password by clicking Forgot password? link on the login page.

    • When SSO is enabled, only the Global Security Administrator can generate a temporary password by clicking Log in as Global Administrator from SSO login page and selecting the Forgot password link, in case the login password is forgotten.
  2. To enable the SSO feature, select Enable Single Sign-on with SAML 2.0 protocol checkbox.

    To disable the SSO feature, unselect Enable Single Sign-on with SAML 2.0 protocol checkbox.

  3. Copy the following link to your identity provider, for example Okta, and enter the Forcepoint Security Manager IP address or hostname and Port number.

    Format: https://{IP address}:{port}/manager/rest/v1/sso/samlResponse

    Example: https://xx.xx.xx.xx:xxxx/manager/rest/v1/sso/samlResponse

  4. Set and copy the Audience Restriction URL to your Identity Provider, for example Okta.

    Example: https://xx.xx.xx.xx:xxxx/manager

  5. Copy Identity Provider Single Sign-On URL from your identity provider, for example Okta, and paste it into Identity provider Single Sign-On URL field under Identity Provider Configuration section in Forcepoint Security Manager.
  6. Copy Identity provider issuer from your identity provider, for example Okta, and paste it into Identity provider issuer field under Identity Provider Configuration section in Forcepoint Security Manager.
  7. Copy X.509 Certificate from your identity provider, for example Okta to X.509 Certificate field under Identity Provider Configuration section in Forcepoint Security Manager.
  8. Click OK to save the details.
    After completing the configuration on your identity provider, for example Okta, and the configuration of SSO in Forcepoint Security manager, the user can login to the Forcepoint Security Manager from their Okta portal.