Configuring Azure AD SSO with SAML 2.0 protocol
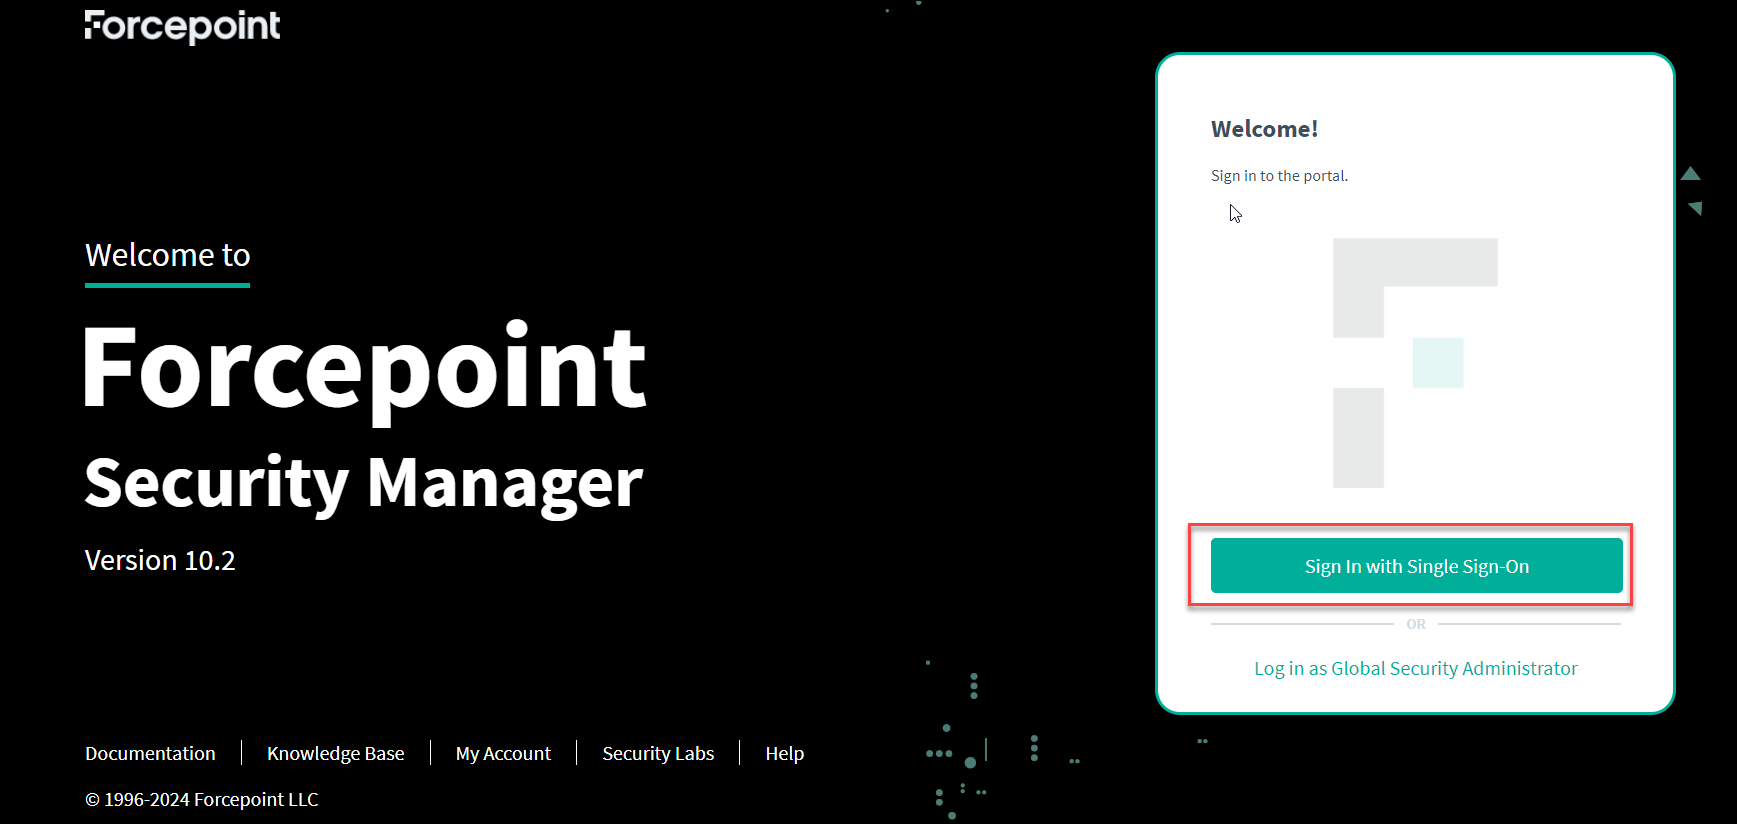
You can configure Azure AD Single Sign-On (SSO) to log in to the Forcepoint Security Manager.
Complete the following steps to configure Azure as a SAML identity provider.
Steps
-
From the Azure services section, click Enterprise applications.
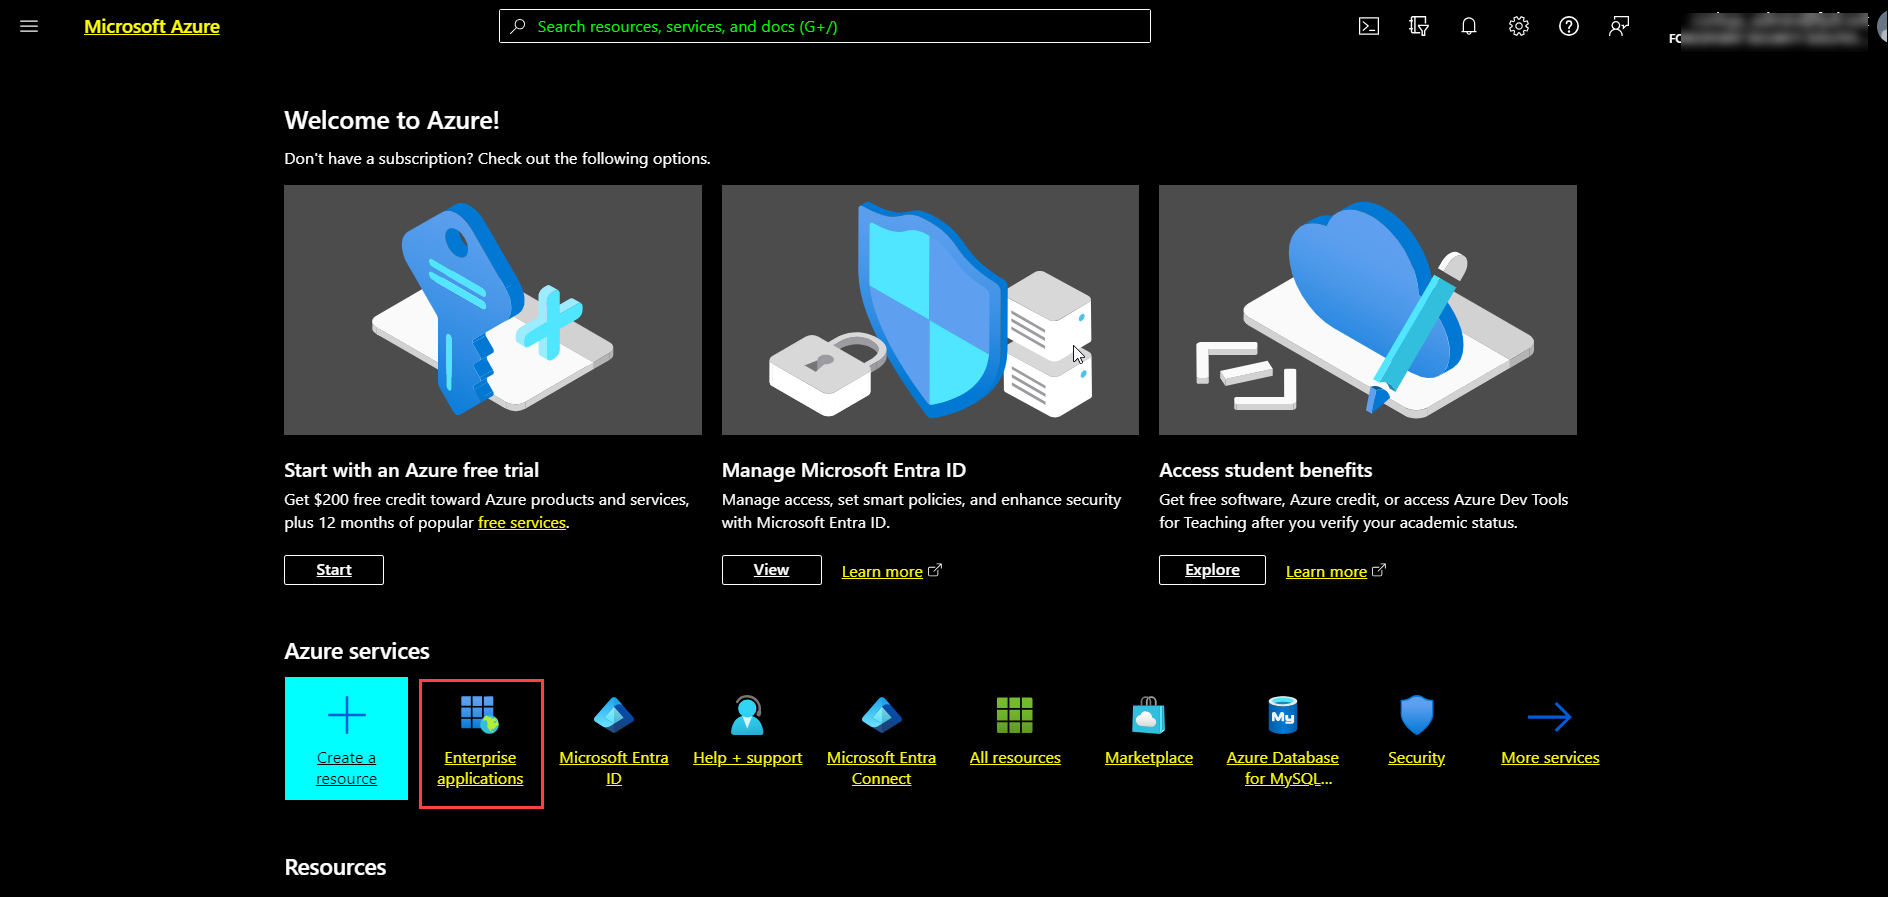
The All applications page opens.
-
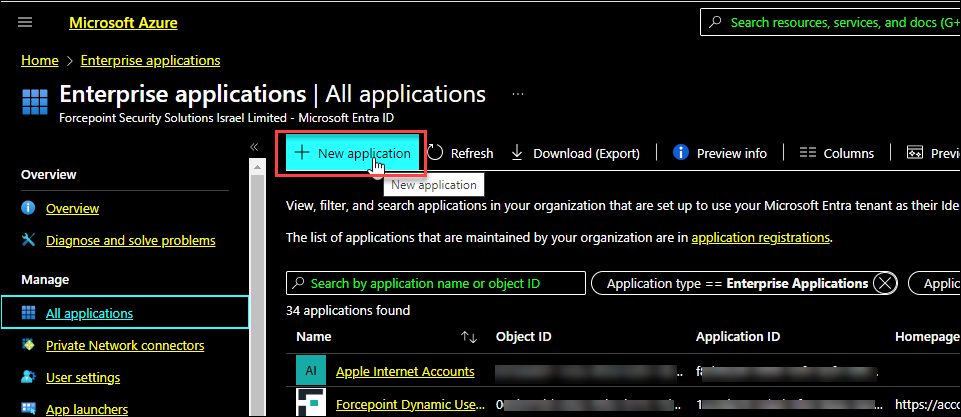
On the All applications page, click New application.
-
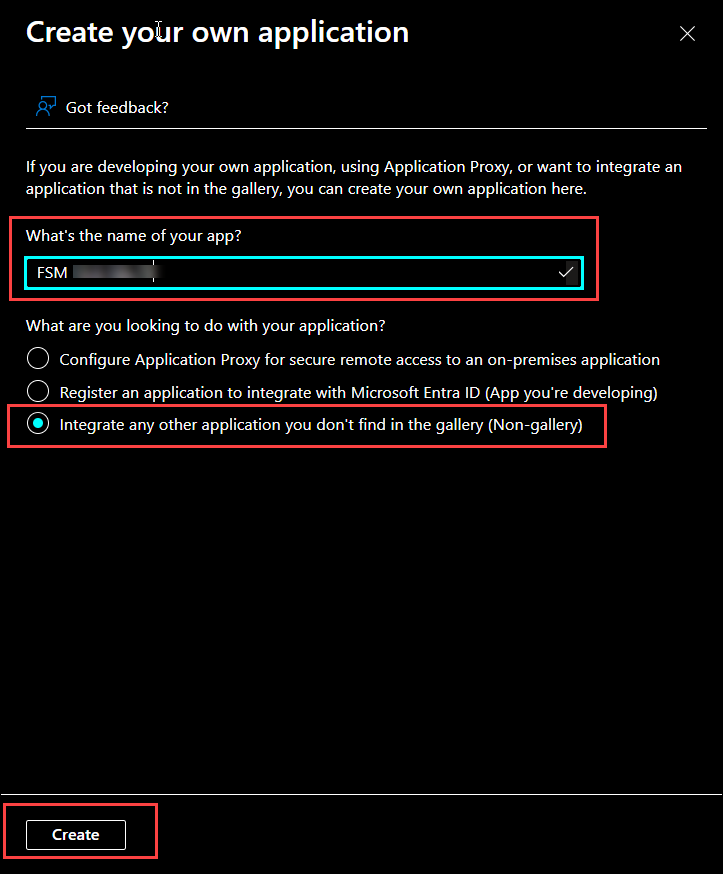
Click Create your own application.

-
Under the Create your own application dialog, do the following:
- In the What’s the name of your app? field, enter the name of the application, for example, FSM.
- Select the Integrate any other application you don’t find in the gallery (Non gallery) radio button.
- Click the Create button.
-
Under the Getting Started section, in the Set up single sign on option, click Get started.

The Single sign-on page opens.
-
In the Select a single sign-on method section, click the SAML option.
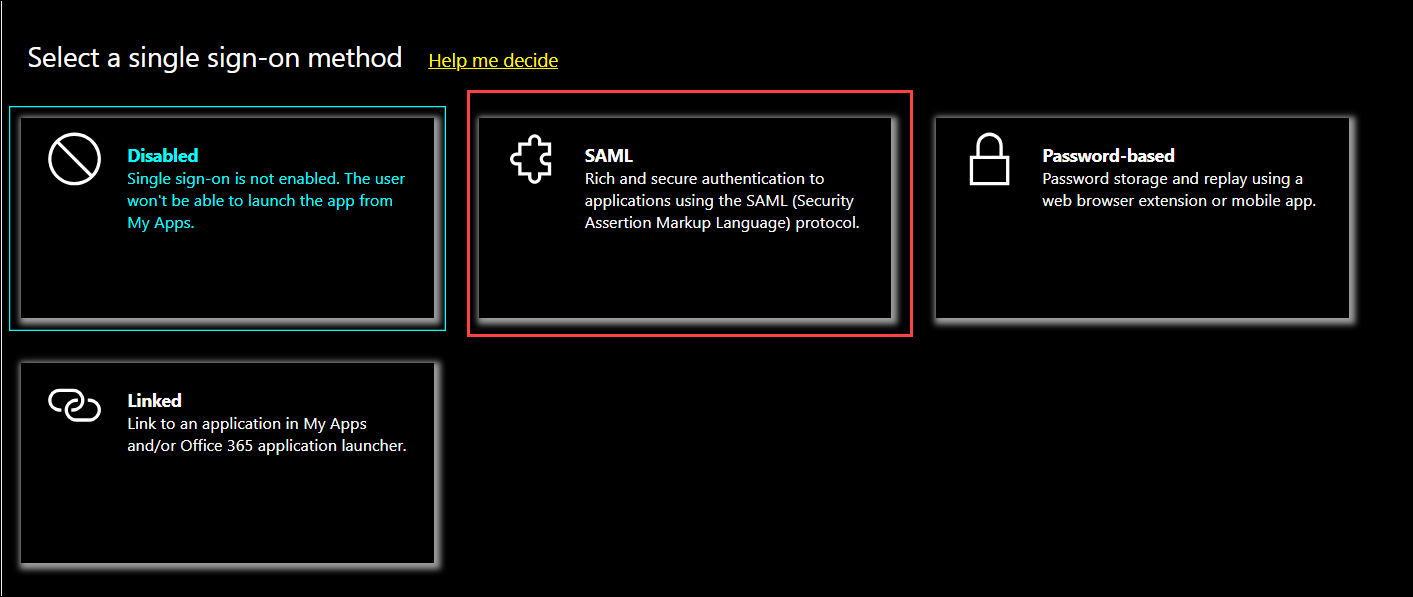 The SAML-based Sign-on dialog opens.
 -
Under the Set up Single Sign-On with SAML section in Azure AD portal, do the following:
- In the Basic SAML Configuration section, click the Edit button.
The Basic SAML Configuration dialog opens.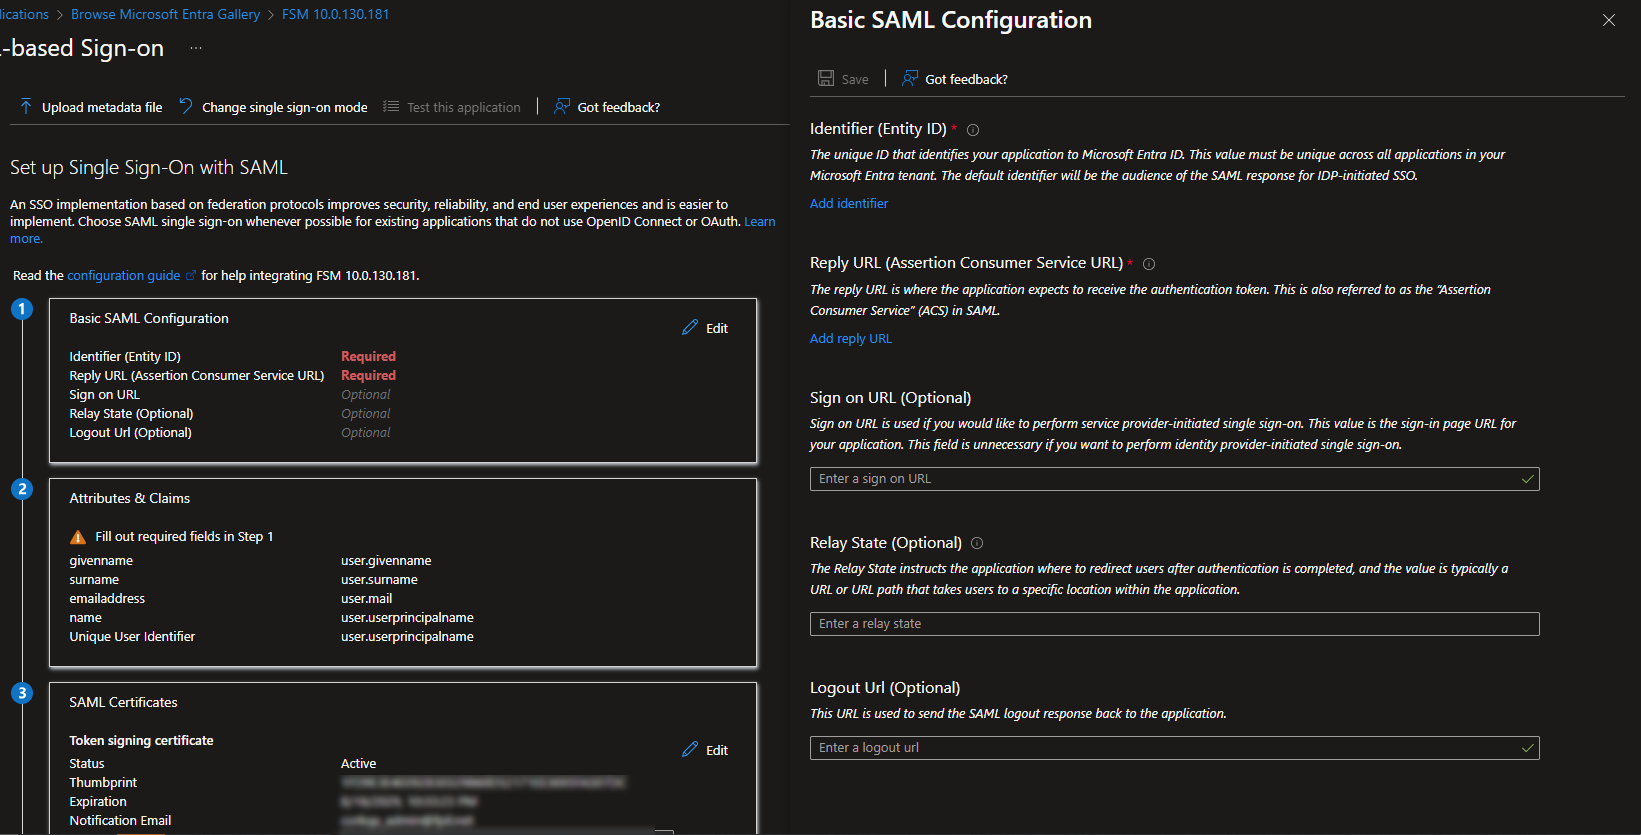
-
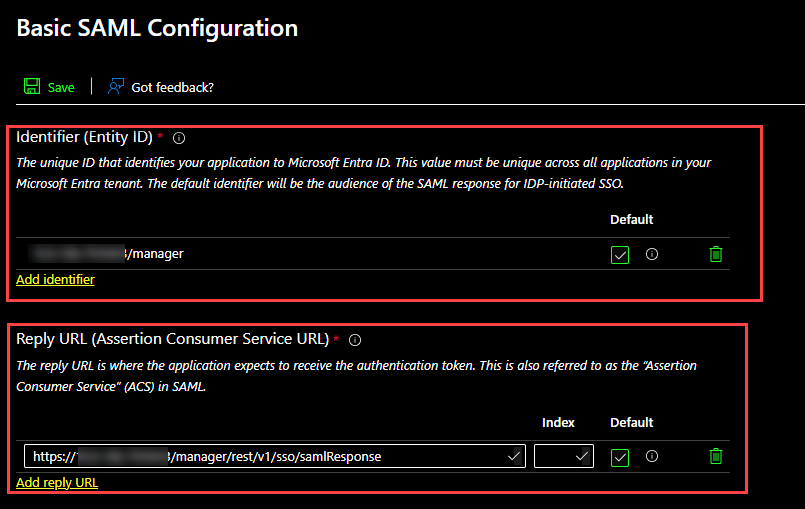
- In the Identifier (Entity ID) section:
- Click the Add identifier button to add a new row.
- In the Identifier (Entity ID) field, enter the Entity ID.
Example: {IP address}:{port}/manager (without "https://" prefix).
- In the Reply URL (Assertion Consumer Service URL) section:
- Click the Add reply URL button to add a new row.
- In the Reply URL (Assertion Consumer Service URL) field, enter the Assertion Consumer Service URL.
Format: https://{IP address}:{port}/manager/rest/v1/sso/samlResponse
Example: https://xx.xx.xx.xx:xxxx/manager/rest/v1/sso/samlResponse
- Ensure the Sign on URL field is empty.
- Click the Save button on the top left corner.
- In the Identifier (Entity ID) section:
-
In Forcepoint Security Manager, navigate to , and select Single Sign-On.

- Select the Enable Single Sign-on with SAML 2.0 protocol option to enable the SSO feature.
- Copy Identifier (Entity ID) from your identity provider, for example Azure, and paste it into Audience Restriction URL in the Service Provider details section in Forcepoint Security Manager.
-
Go back to Azure portal, in the Attributes & Claims section, click the Edit button on the top right corner.
The Attributes & Claims page opens.
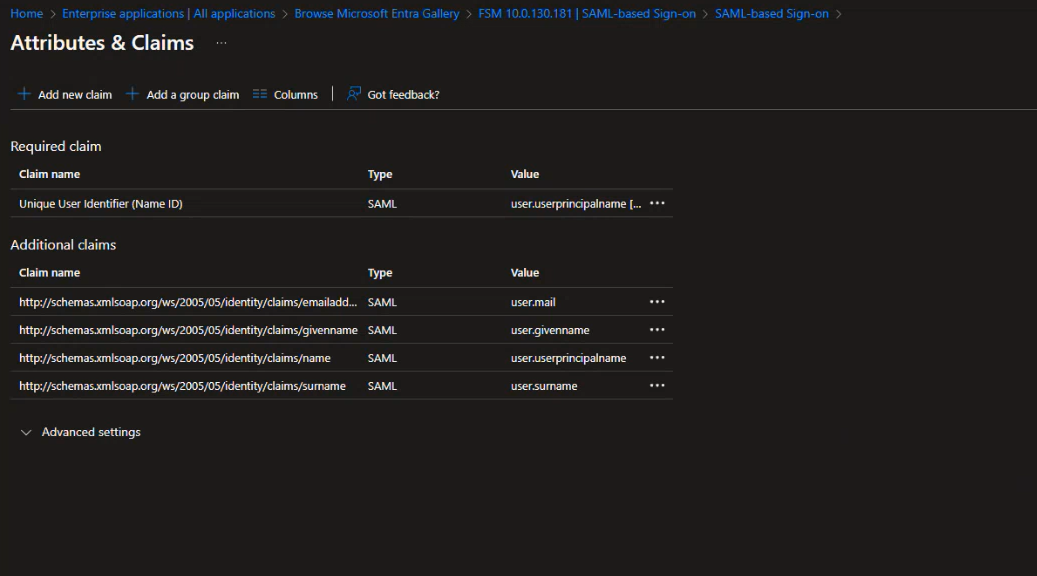
- Click Add new claim.
The Manage claim page opens.
- Enter Name as email.
- In Source, turn on Attribute.
- In Source attribute, enter user.mail or select user.mail from the list.
- Click Save, and go back to SAML SSO page.
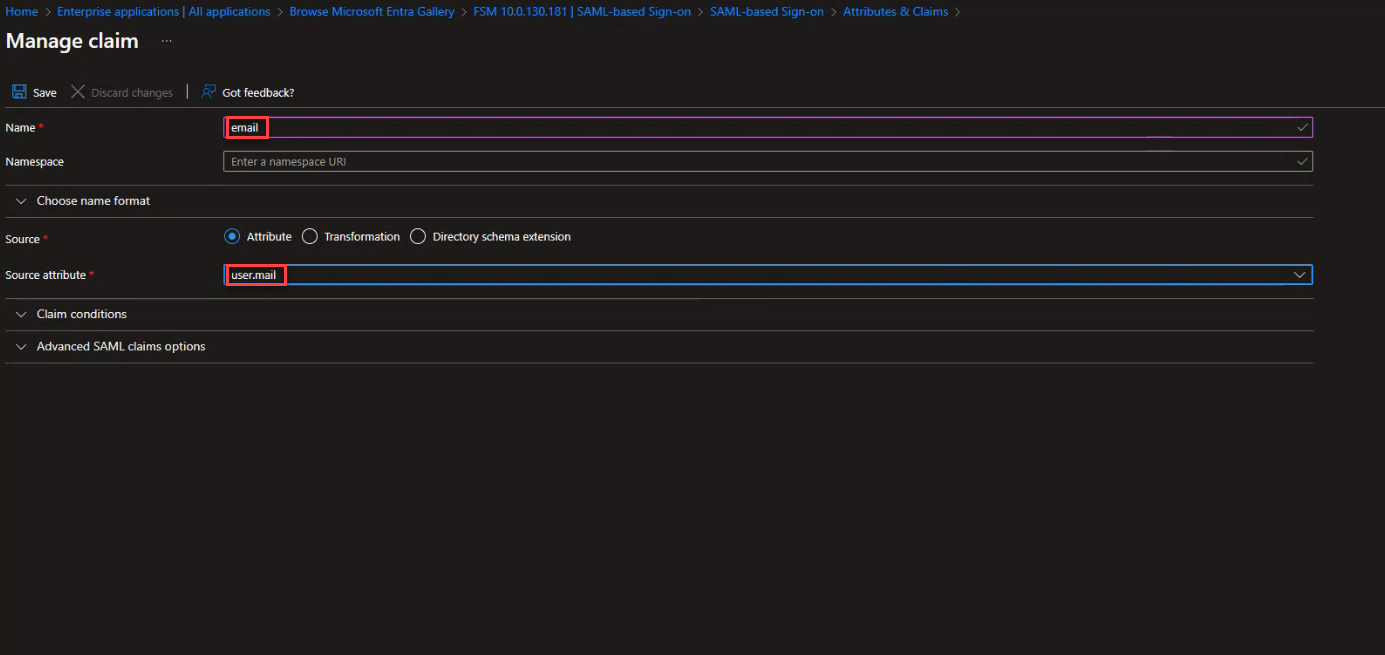
- Click Add new claim.
-
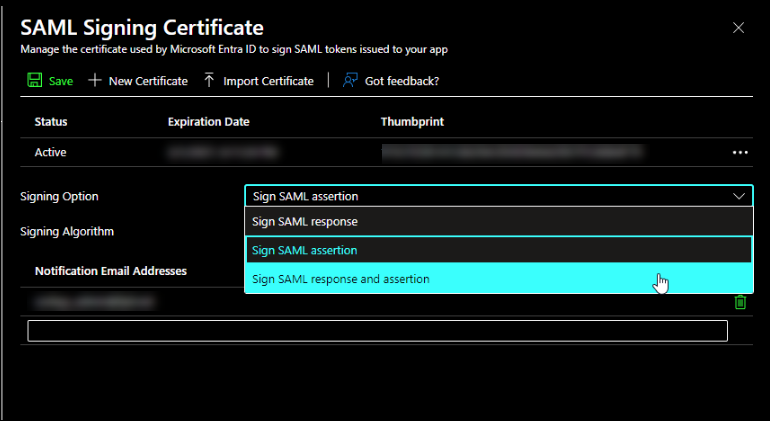
Navigate to SAML Certificates, and then click Edit.
Select Signing Option as Sign SAML response and assertion, and then click Save.
-
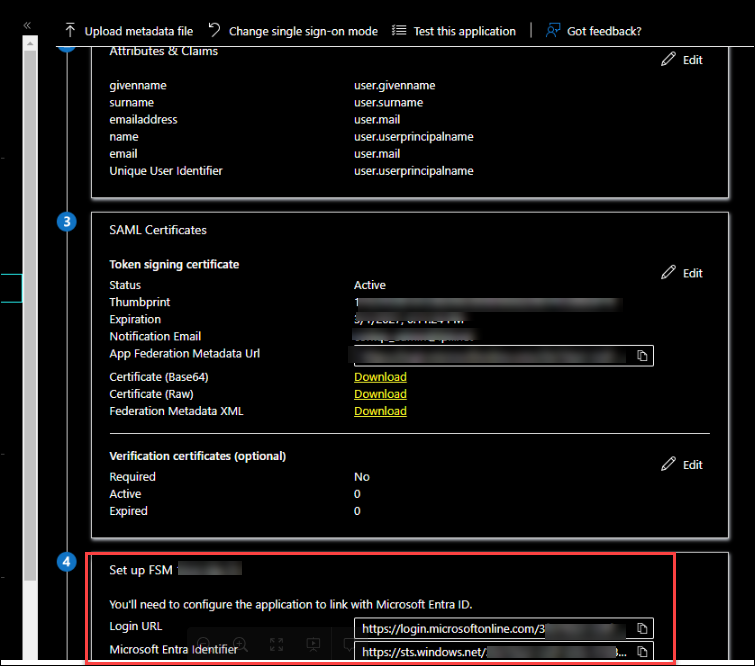
From Azure portal, copy the Login URL and Microsoft Entra identifier from the Set up section.
-
Paste the copied URL from previous step into the Identity provider Single Sign-On URL field and Identity provider issuer,
respectively in the Identity Provider Configuration section in the Single Sign-On page of Forcepoint Security Manager.

Click OK to save details.
-
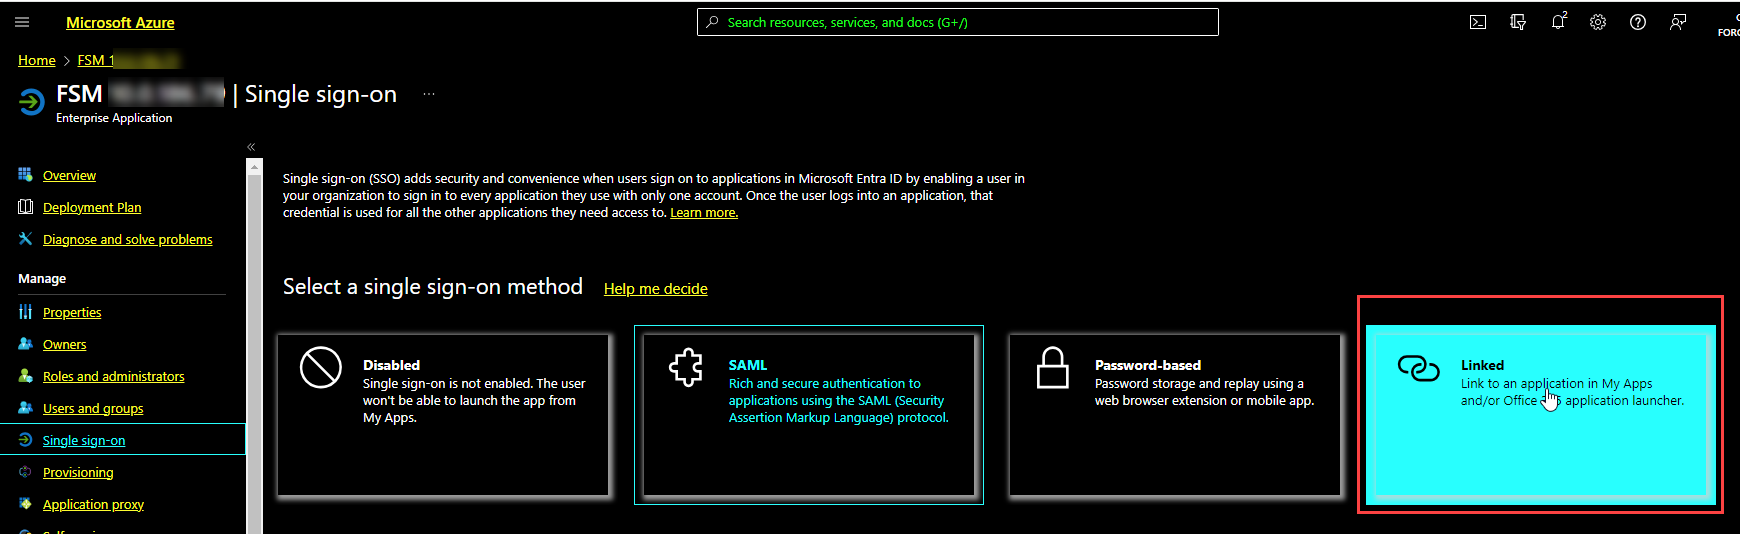
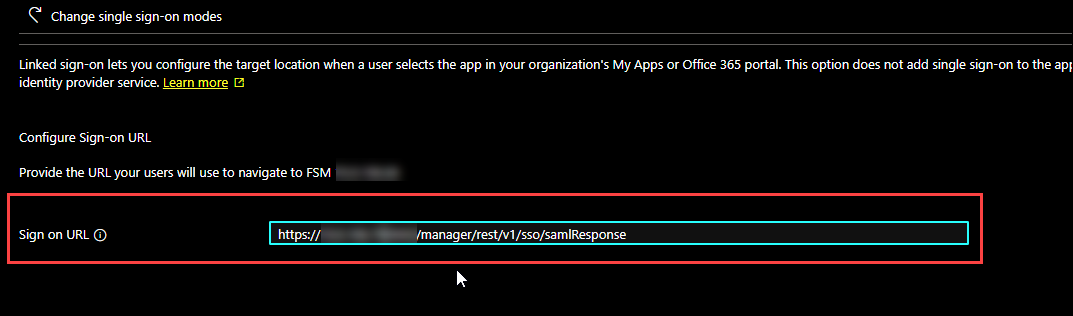
From Azure portal, click Change single sign-on
mode

-
Click Linked.
-
Paste the Assertion Consumer Service (ACS) URL copied in previous step into the Sign on URL field in the
Linked section in Azure portal.
-
Remove Sign on URL from the Basic SAML Configuration section to avoid the IDP connection issue.

-
To login into Forcepoint security Manager from Azure using SAML SSO, go to , and then click the FSM application from Apps dashboard.
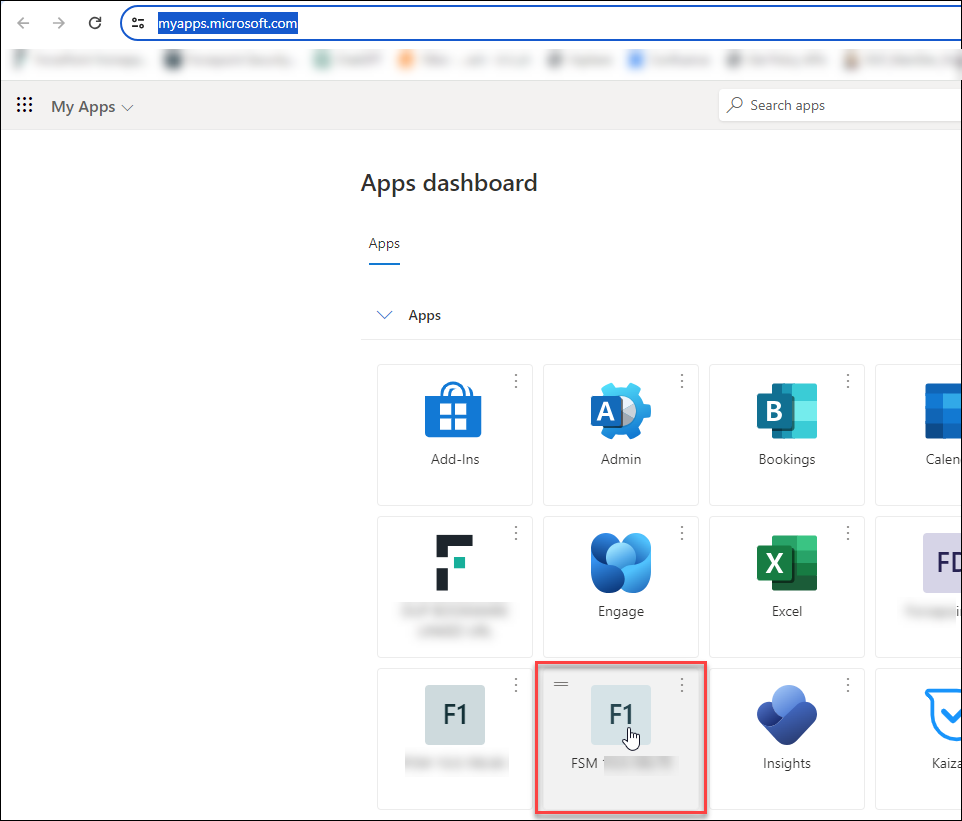
When the user click on the newly added Forcepoint Security Manager application from the Azure account, the system redirects you to the Forcepoint Security Manager portal.