Creating a Custom Continue Page

Note: Starting from version 25.12, customer can create multiple continue pages and assign them to different policies.

To create a custom continue page

Steps

  1. Navigate to Web> Block & Notification in the admin portal.
  2. Click New Page.
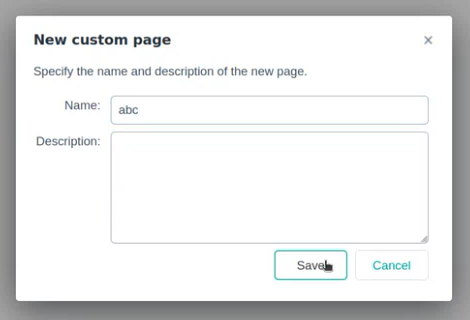
  3. In the New custom page dialog:
    1. Enter a Name and Description.
    2. Click Save.

  4. Hover your mouse over the page content to highlight the sections that are editable. To edit a line of text or block of content, click its section to open a text editor window.
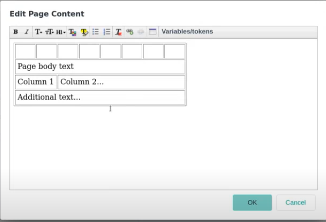
  5. You can add an additional row and, under the Variable/Token tab, insert the Confirm Button.
    • You can select all or part of the text and use the text formatting buttons to add bold, italic, color and other formatting. Hover over each text formatting button to see its function.
    • To add a variable to the section, click Variables/tokens, and select from the drop-down list. See Notification page variables, page 120.

    Click OK when done.

  6. To edit the page footer:
    1. Click the footer section to open a text editor window.
    2. If you have already specified Default footer text, clear the Use default footer text box.
    3. Enter the footer text to use for this notification page. You can select all or part of the text and use the text formatting buttons to add bold, italic, color and other formatting.
    4. Click OK when done.
  7. To see how the page appears to end users, click Preview. The page appears in a separate window.
    Note: Your browser may warn you that you are switching to an unsecured connection.
  8. Click Save when done.