Configuring the ZTNA connector
Once you are done with installation the ZTNA package (either via OVA Virtual Appliance or the ZTNA Deployment Script), you will now need to run the ZTNA setup script for configuration.

Note: If you used the installation script option, then the setup command will already be run and take you to the below configuration page. You will not need to run sudo
./setup_ztna.sh.
Steps
-
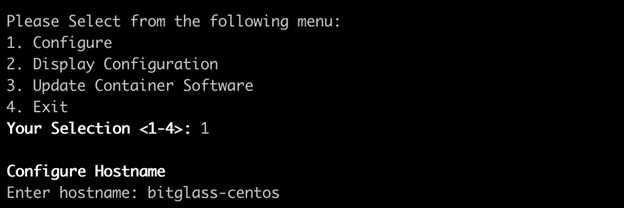
Configure Hostname.

-
Configure DHCP/ Static IPv4 Address
Enter D to enable DHCP (default) or S to enable Static IP [current: D/S]. If you choose to enable Static IP, then you will be prompted to enter IPv4 Address, Netmask, and Default Gateway.

-
Configure DNS Resolvers
You can enter up to 6 DNS Server IP addresses separated by commas.
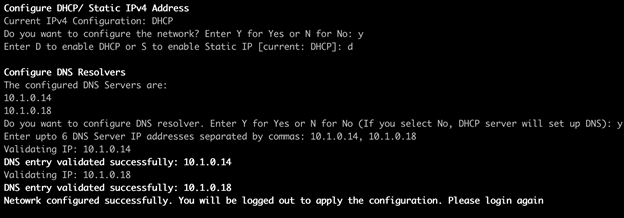
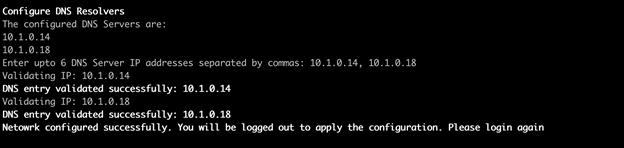
Note: If you plan to use DNS tunneling, ensure that the configured DNS servers can resolve the DNS queries. -
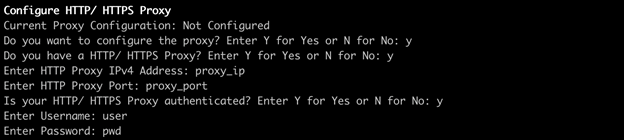
Configure HTTP/ HTTPS Proxy
If your network required use of a proxy for internet access, enter "Y" for yes and then configure the Proxy IPv4 Address, Proxy Port, and then select if it's authenticated and enter the username and password for authentication.
Note: If you are using another proxy with a self-signed certificate, this will prevent the ZTNA connector from accessing our ZTNA servers preventing Forcepoint Data Security Cloud | SSE from SSL inspection. This means users will not be able to access the internal protected app since the ZTNA connector cannot trust the self-signed cert trying to do the decryption. -
Configure Data Center Name and Installer Key
Enter a Data Center name to identify this location of install (more important if you have multiple office locations with ZTNA installations at each location) and then enter the Installer Key associated with this connector in the portal ().

-
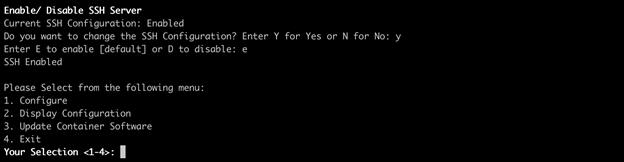
Enable/ Disable SSH Server
Decide whether you wish to enable SSH.