Creating simple data pattern
Simple patterns allow you to set specific keyword triggers, create regular expressions, or use special keywords to match custom properties.
Steps
-
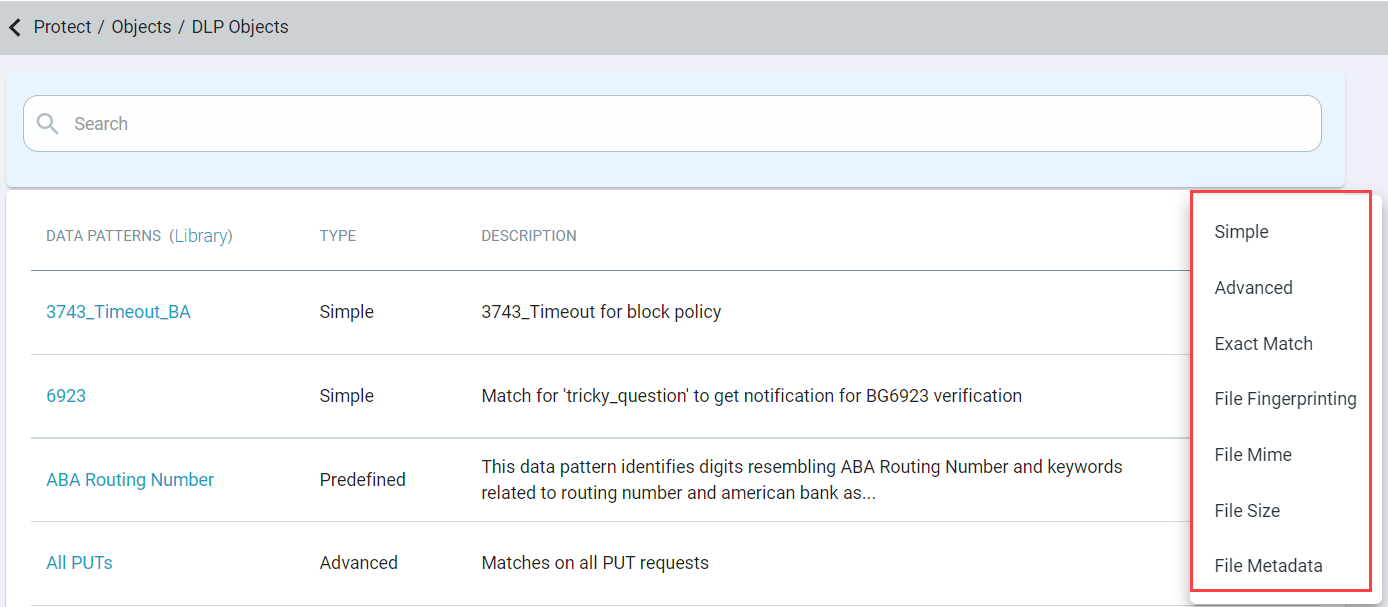
Click the green plus icon and select Simple to create the data pattern.
-
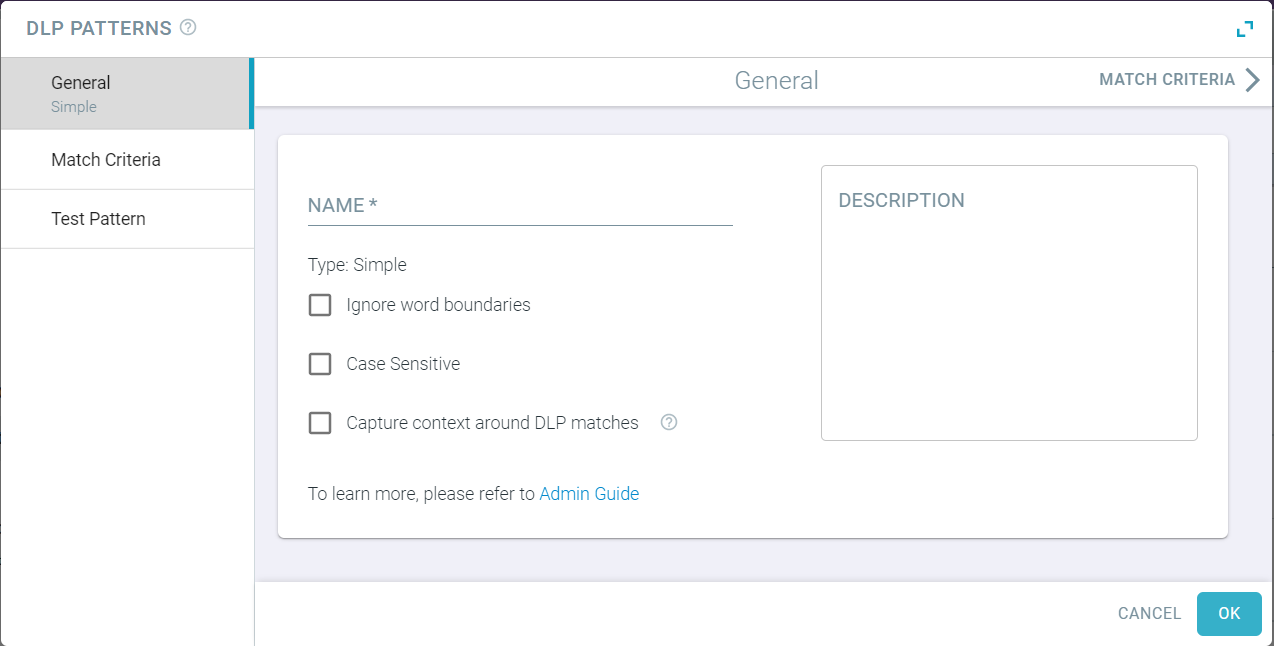
On the General tab:
-
On the Match Criteria tab, enter keywords, expressions and data validators to build a data pattern.
- Up to 10K characters can be used for each keyword or regex pattern field.
- You can use special keywords for matching custom properties set in Office documents that were created by systems such as Boldon James or Titus. To do so, you will need to use the syntax
fileproperty_custom__<property name> <value>Example:
fileproperty_custom__Classification confidential
- You can use special keywords for matching custom properties set in Office documents that were created by systems such as Boldon James or Titus. To do so, you will need to use the syntax
- Include Criteria will be evaluated to identify content containing sensitive information.
All Include Criteria matches which overlap with Exclude Criteria matches will be ignored. All Include Criteria matches will be masked when a match occurs in an email subject or body.
- Including Unicode characters as a keyword or as part of a regular expressions will also match.For example, creating a DLP pattern based on a sensitive keyword across multiple languages.
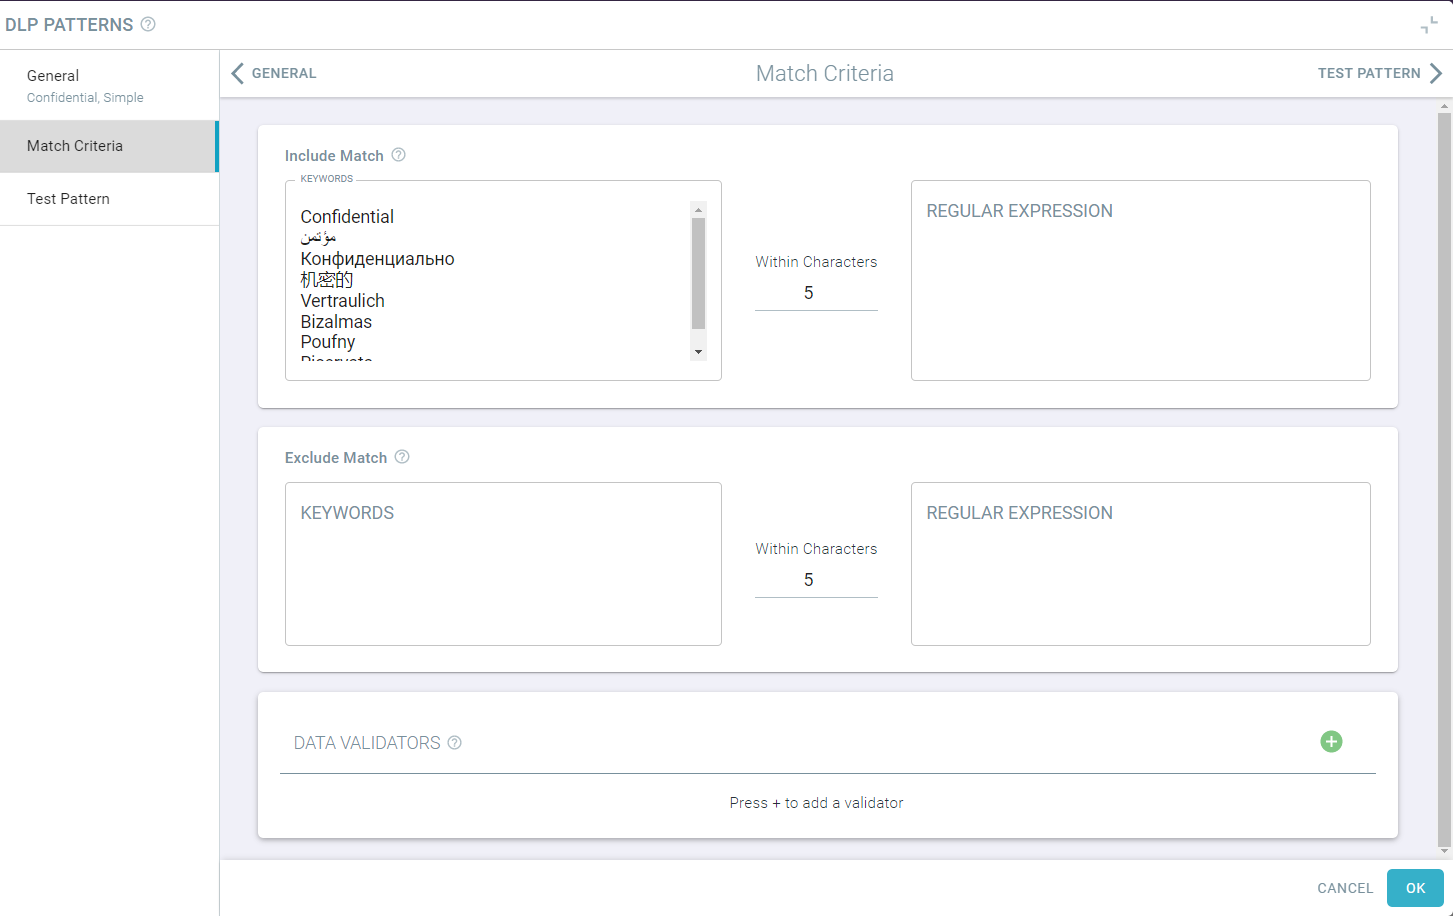
- Content whitespace, tabs, newlines, carriage returns, etc will all be collapsed to a single space.
- Up to 10K characters can be used for each keyword or regex pattern field.
-
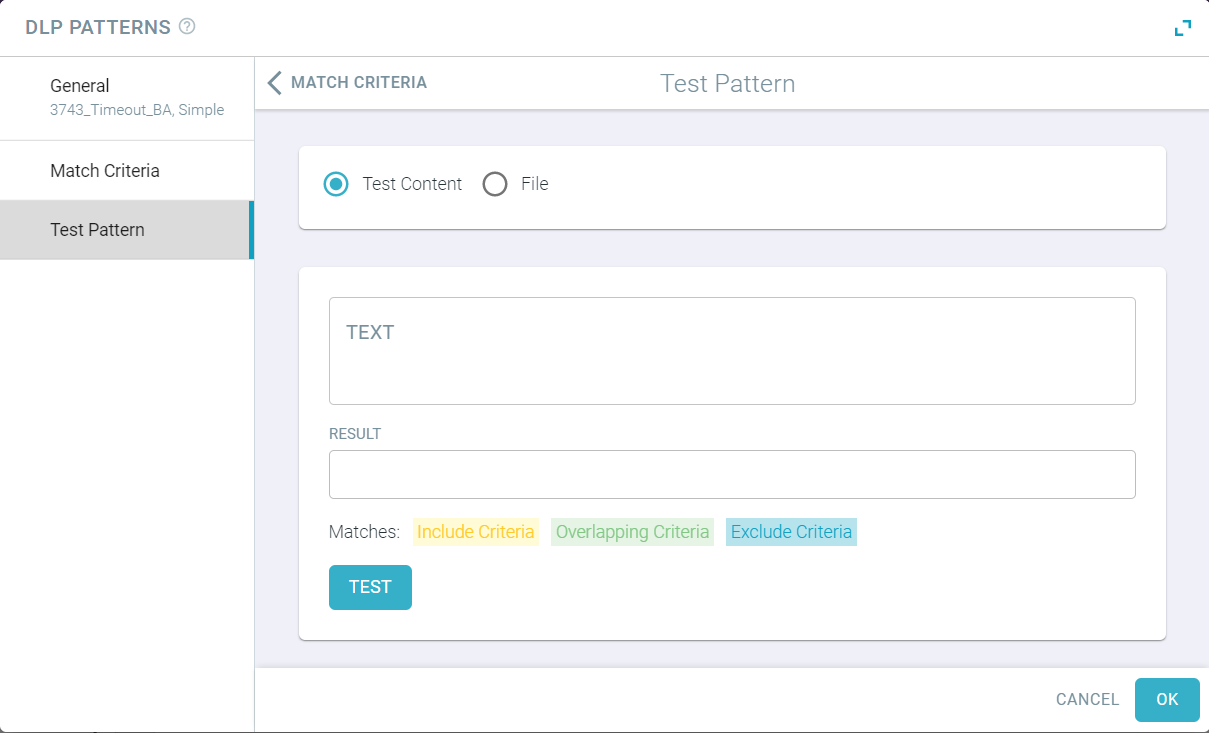
(Optional) Click on the Test Pattern tab to verify if pattern was configured properly.