Setting up PingFed for ACS Proxy configuration
To setup an ACS Proxy working with Forcepoint Data Security Cloud | SSE, PingFed, and 0365 using Active Directory 2019 as the directory store, you need to create Data Store, Password Credential Validator and Active Directory Domains/Kerberos Realms.
Steps
-
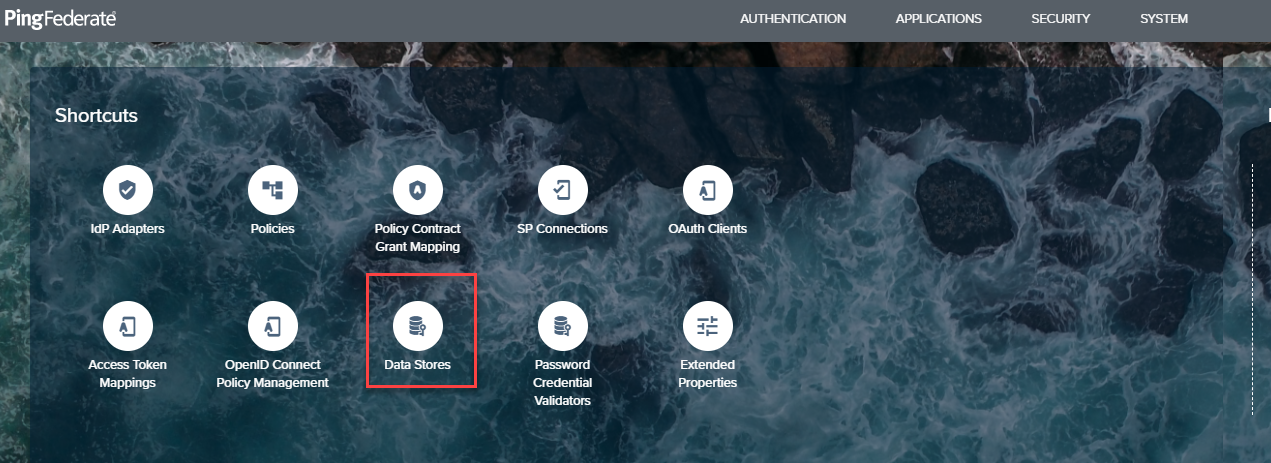
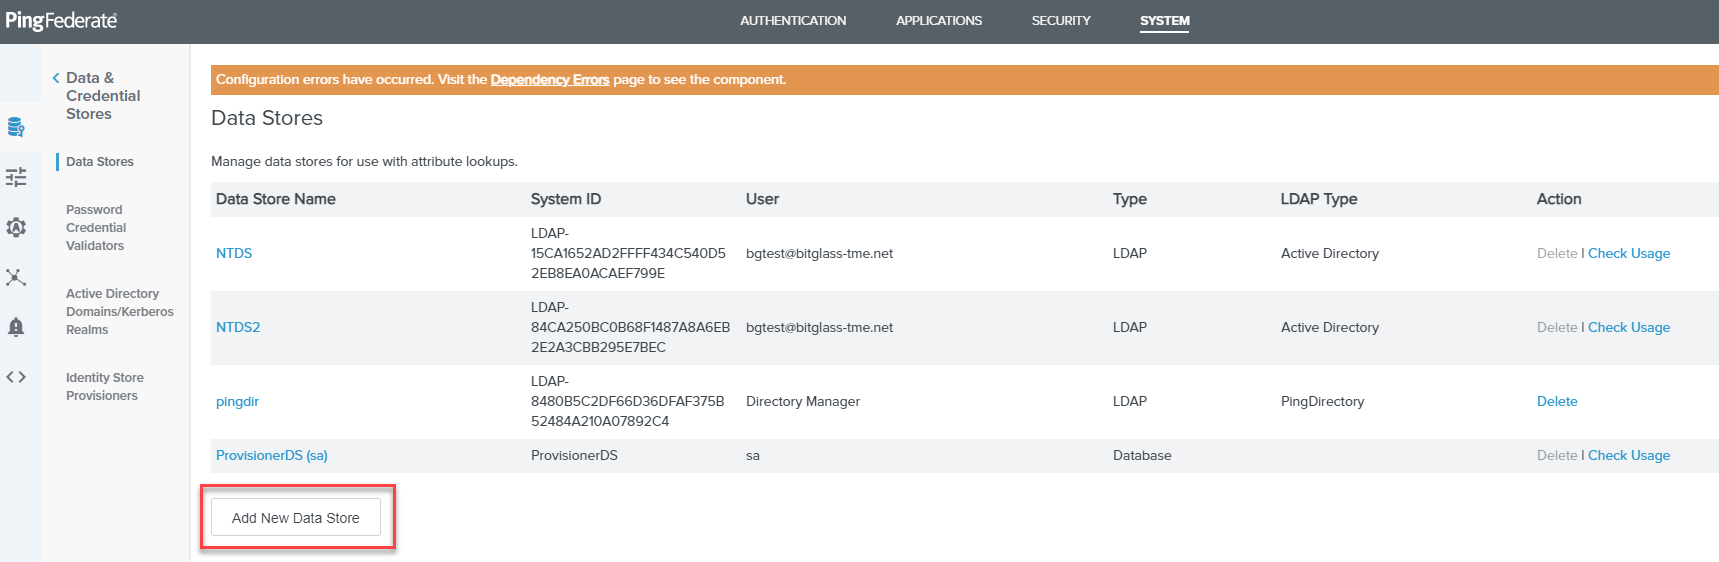
On the homepage, select Data Stores and then click Add New Data Store.
-
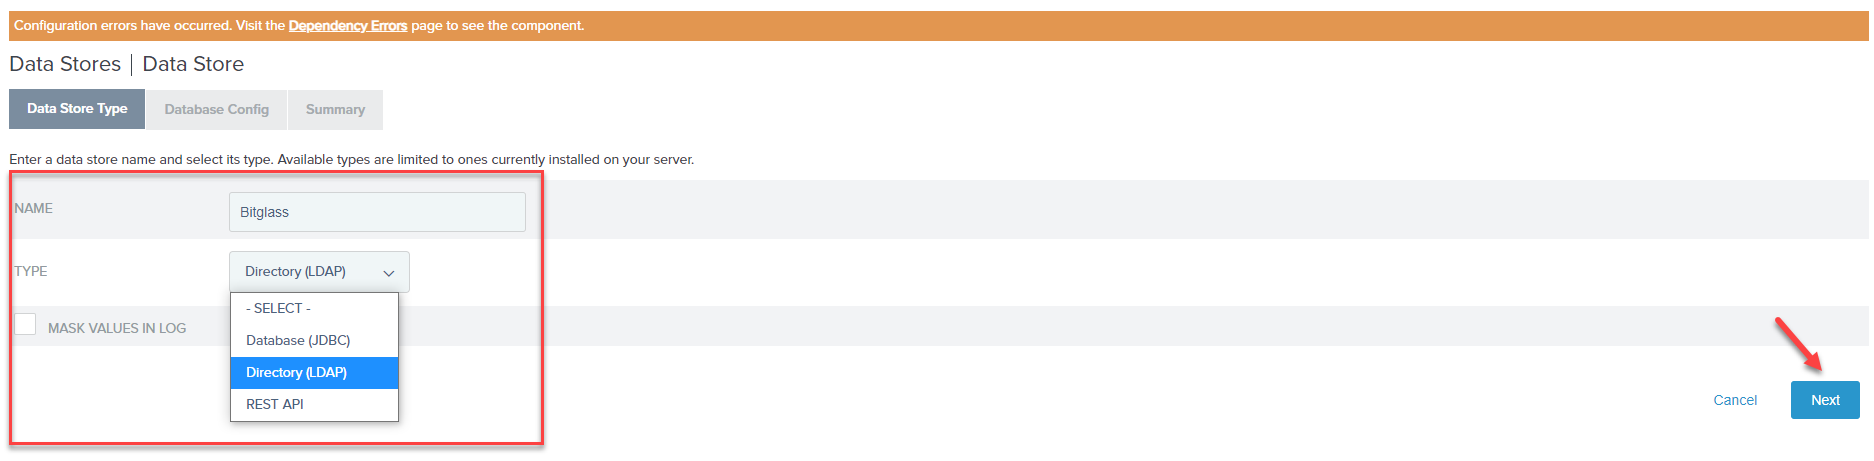
Provide a recognizable Name for your Datastore and then select the Type. In this case, you should select Directory
(LDAP). Click Next to proceed.
-
Enter the Hostname of your server your AD system is on, give it a Tags for recognition and click Add to add
it. Further down, enter the user account information that has access to your AD system. Click Test to test the configuration and then click
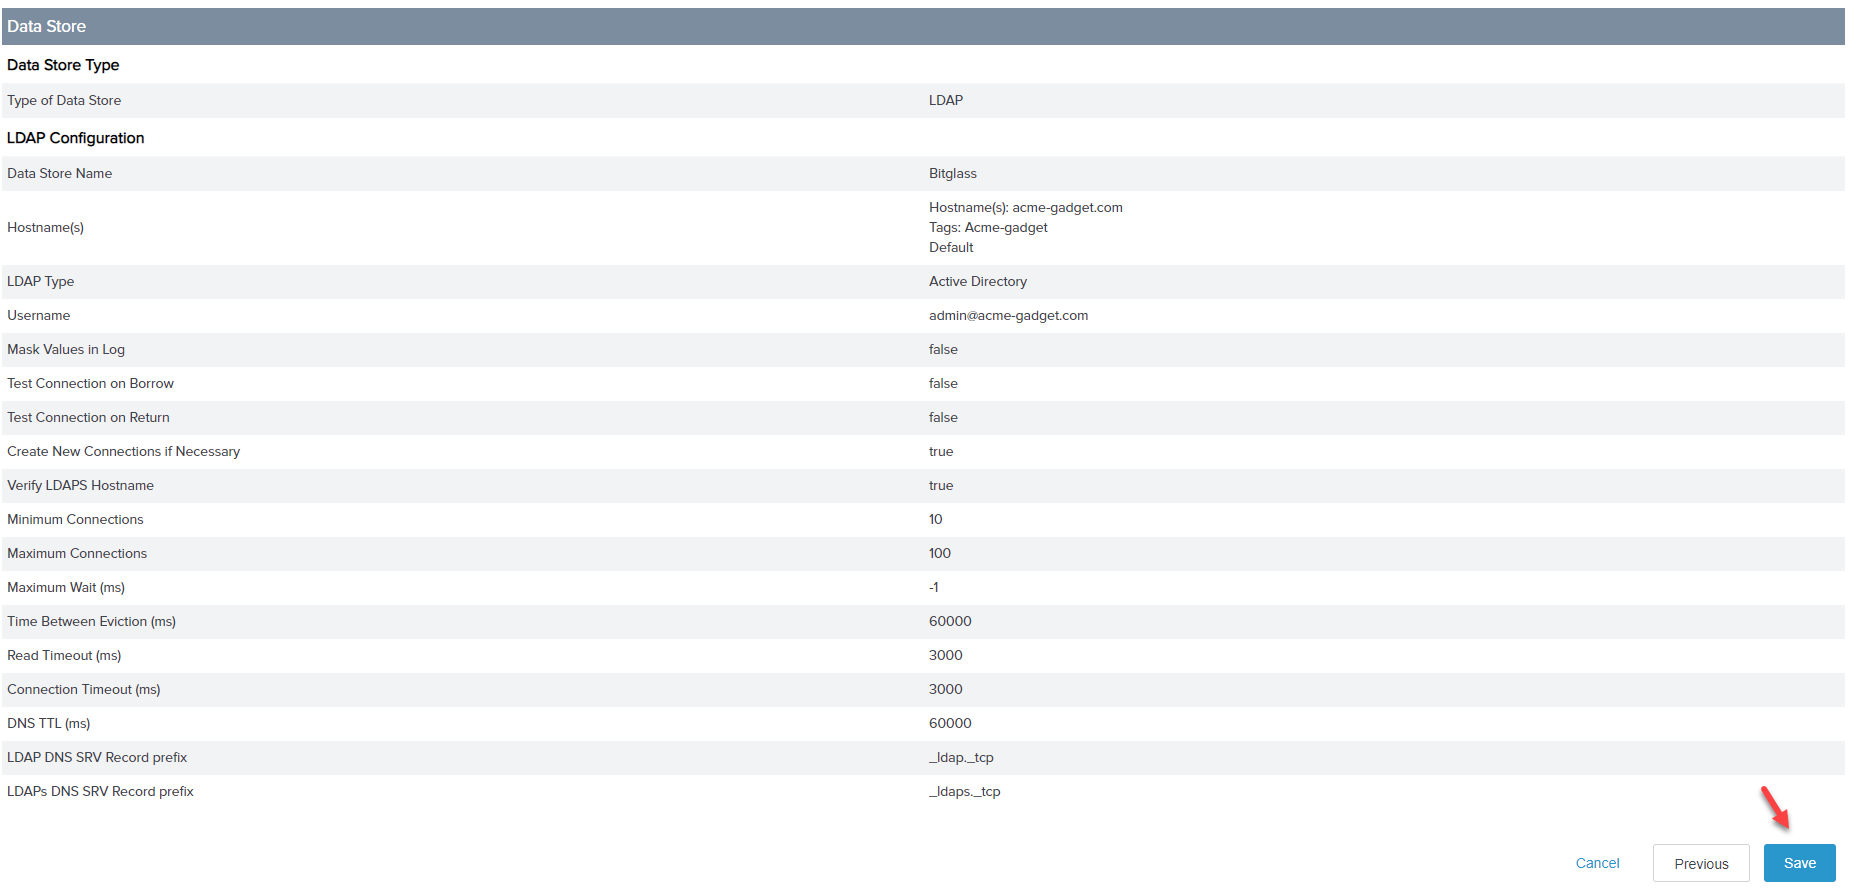
Next to move to the Summary page.
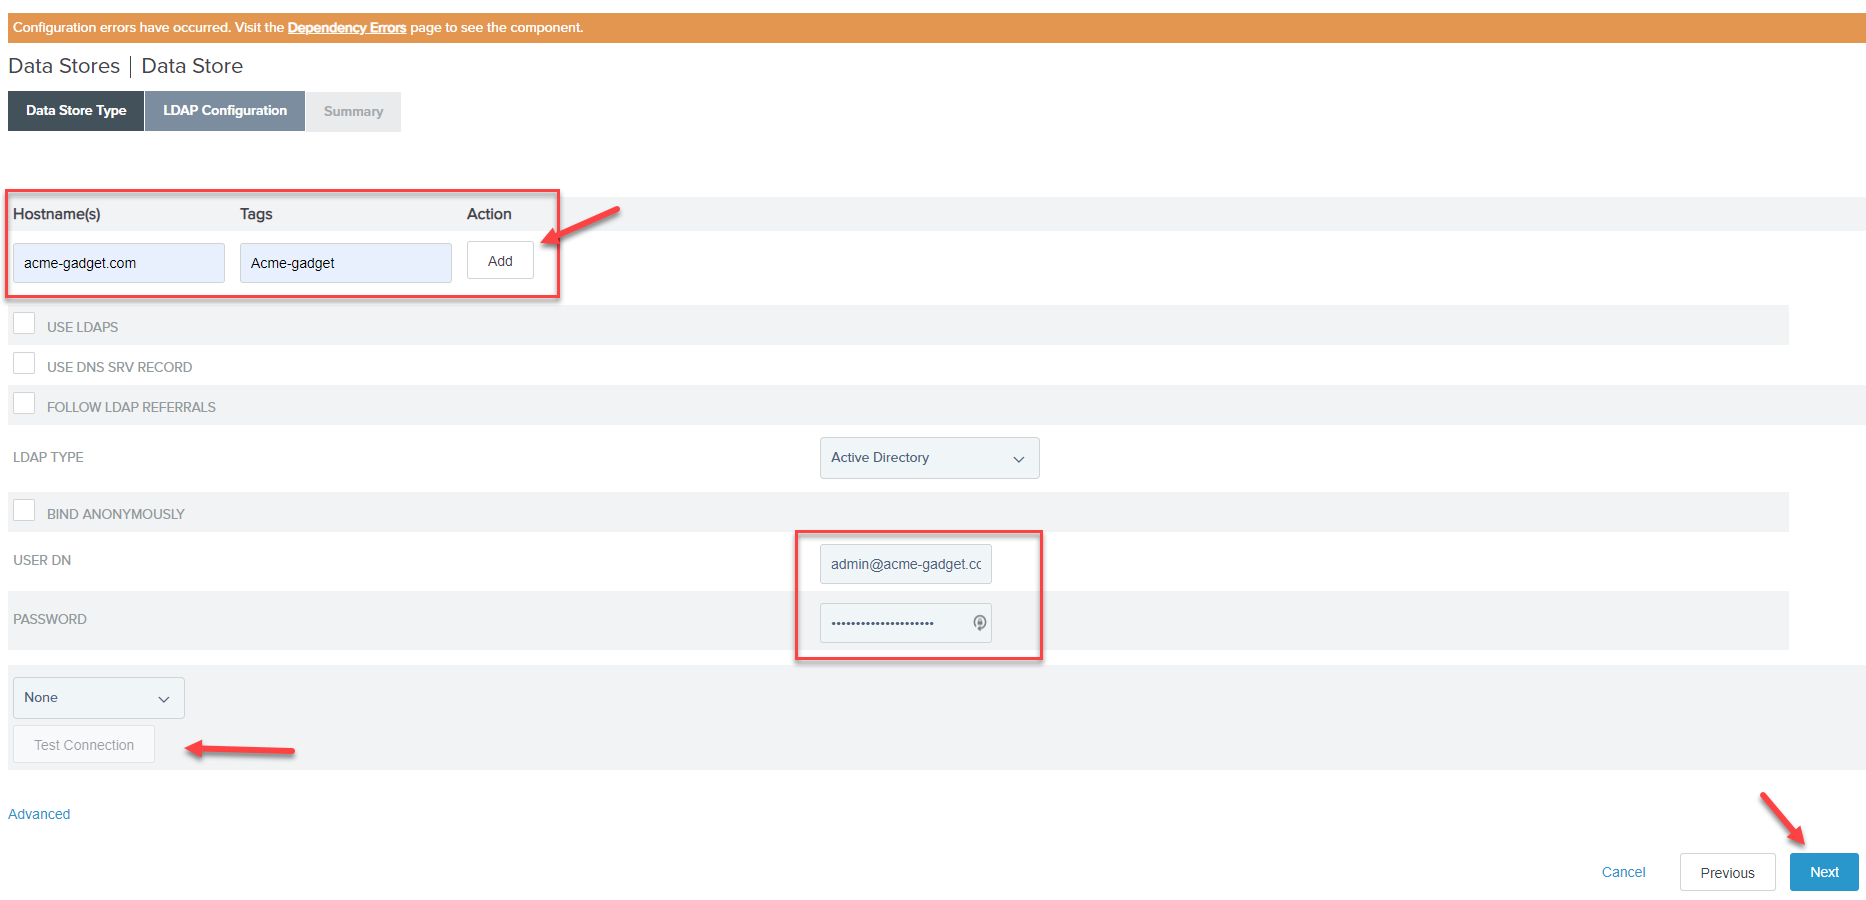
Click Save after verifying everything looks good.
-
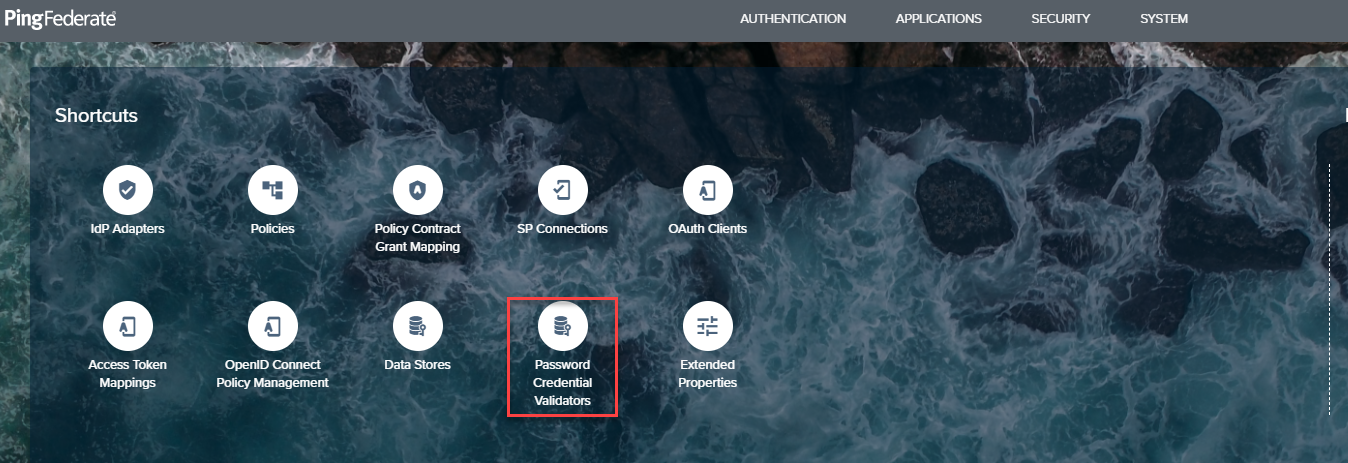
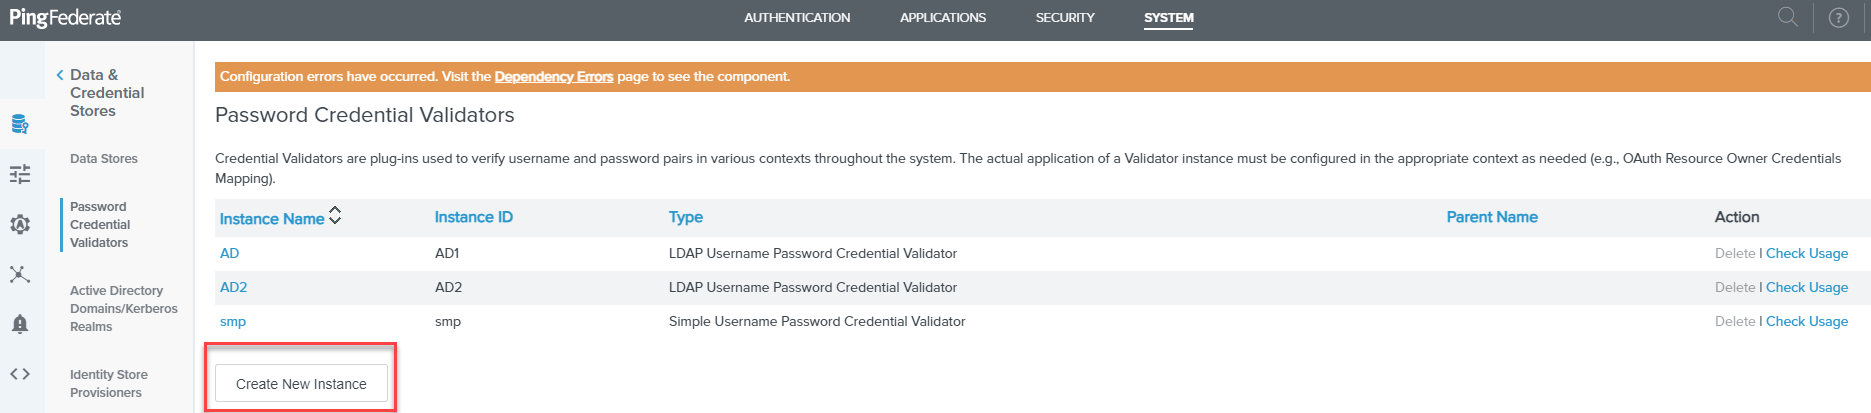
Navigate back to the admin portal home page and select Password Credential Validator. On the next page, click Create a new
instance.
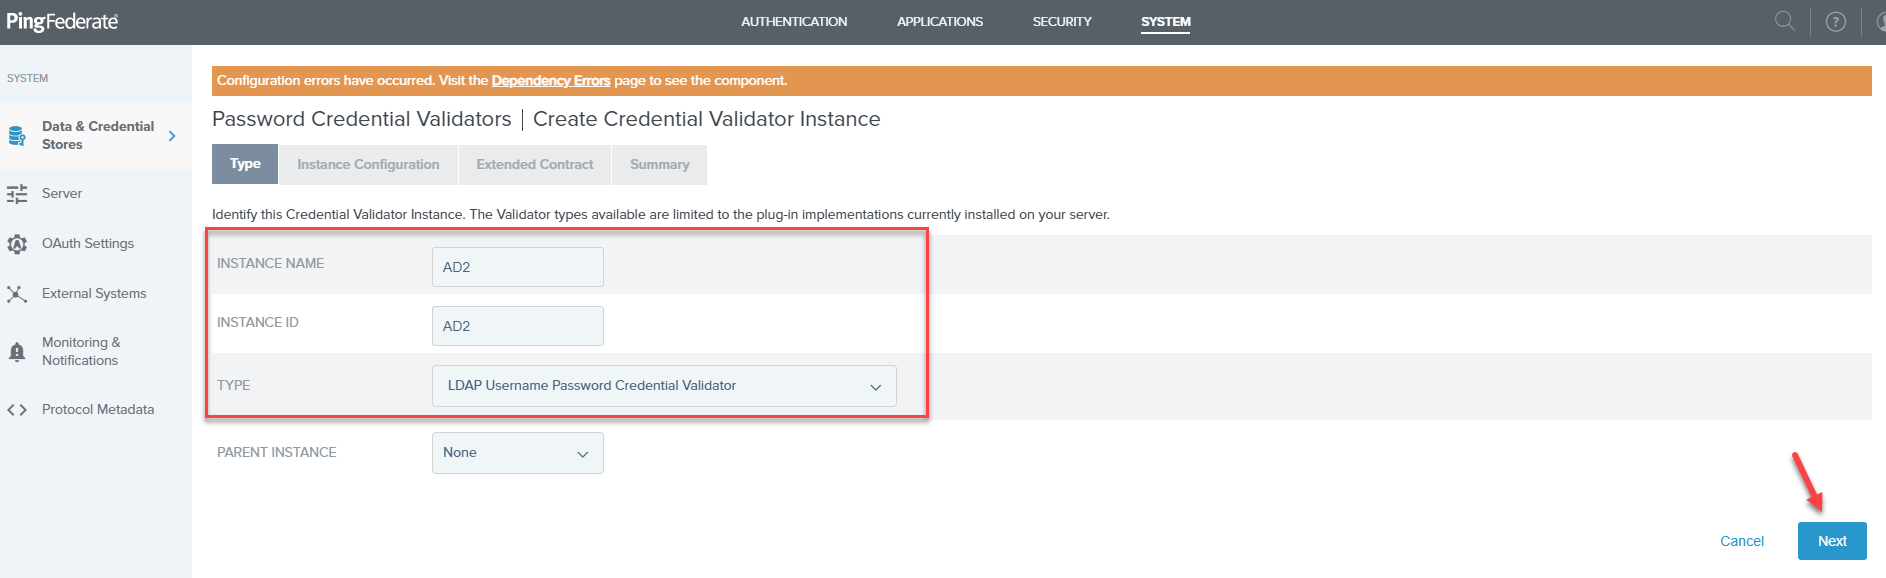
-
Provide an Instance Name, Instance ID and then select LDAP Username Password Credential Validator for the
Type. You can leave Parent Instance set to None. Click Next to move to the next
page.
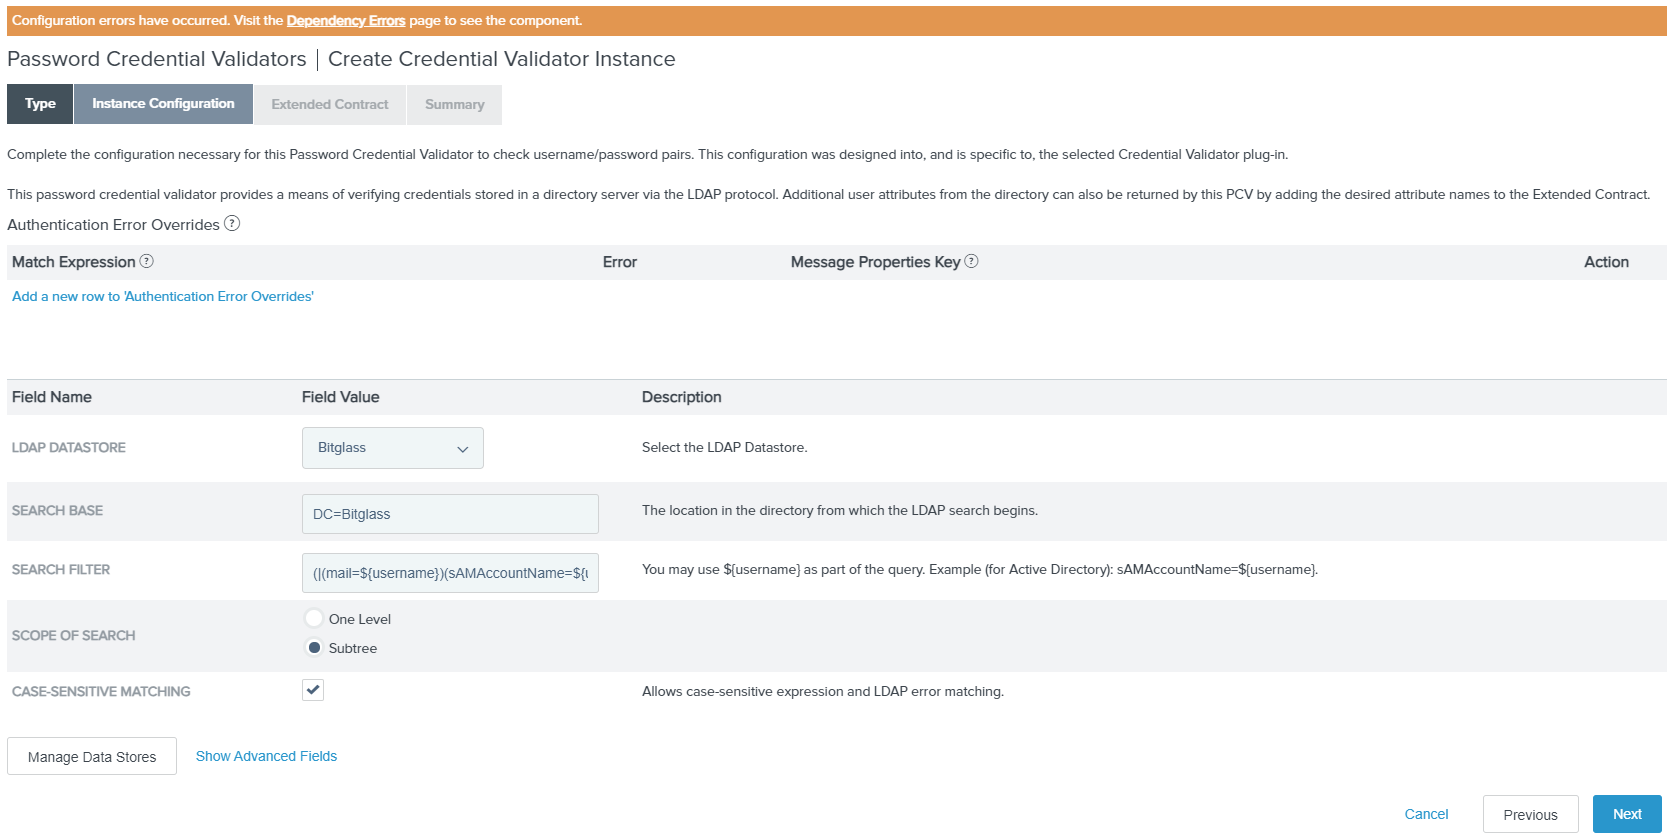
-
Fill out the fields for LDAP Search Base, Search Filter, and Scope of Search according to how your LDAP
configuration is setup. Check the box for Case-Sensitivity Matching if relevant/applicable. Click Next to proceed.
-
Add ImmutableID for an additional attribute on the Extended Contract page. Add any other additional attributes you wish to sync over.
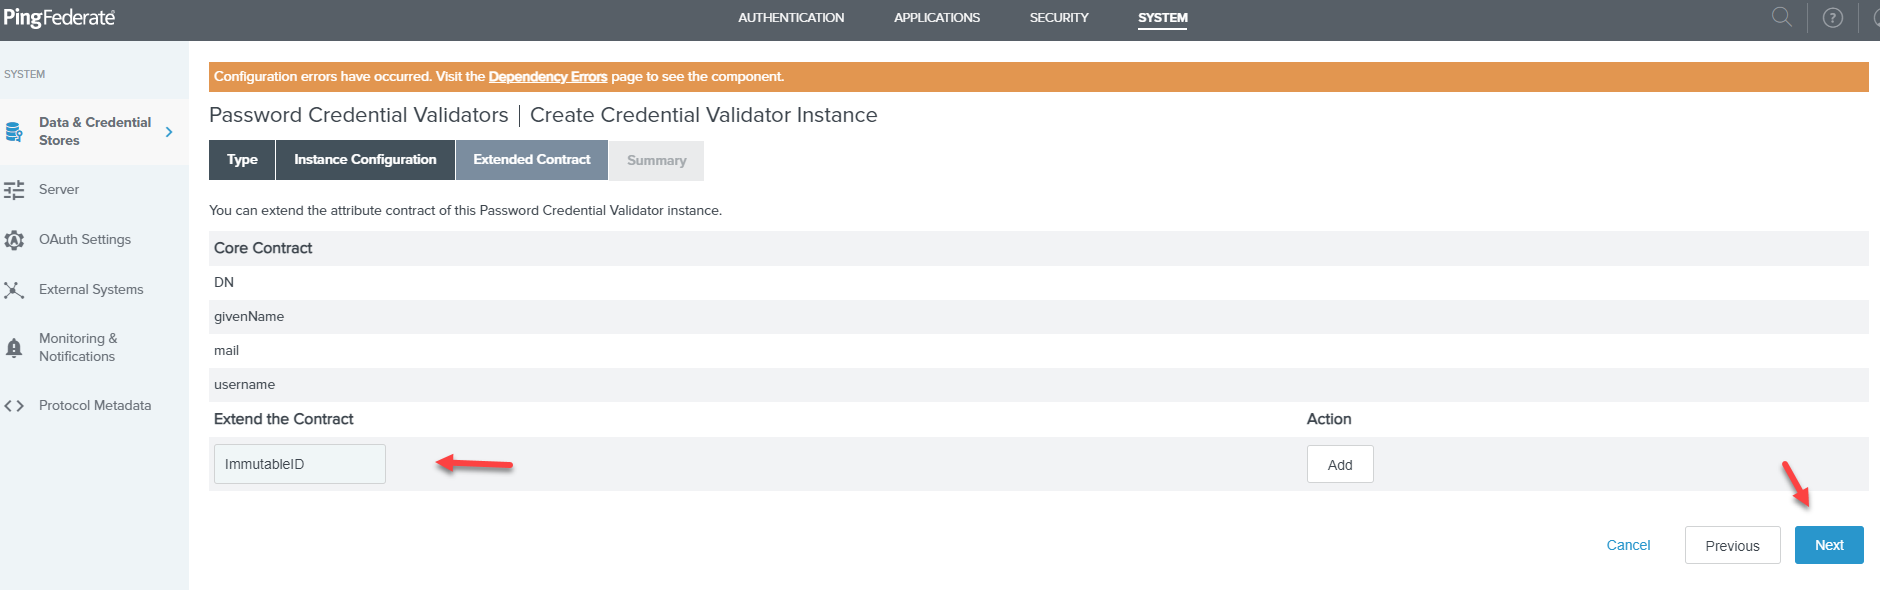
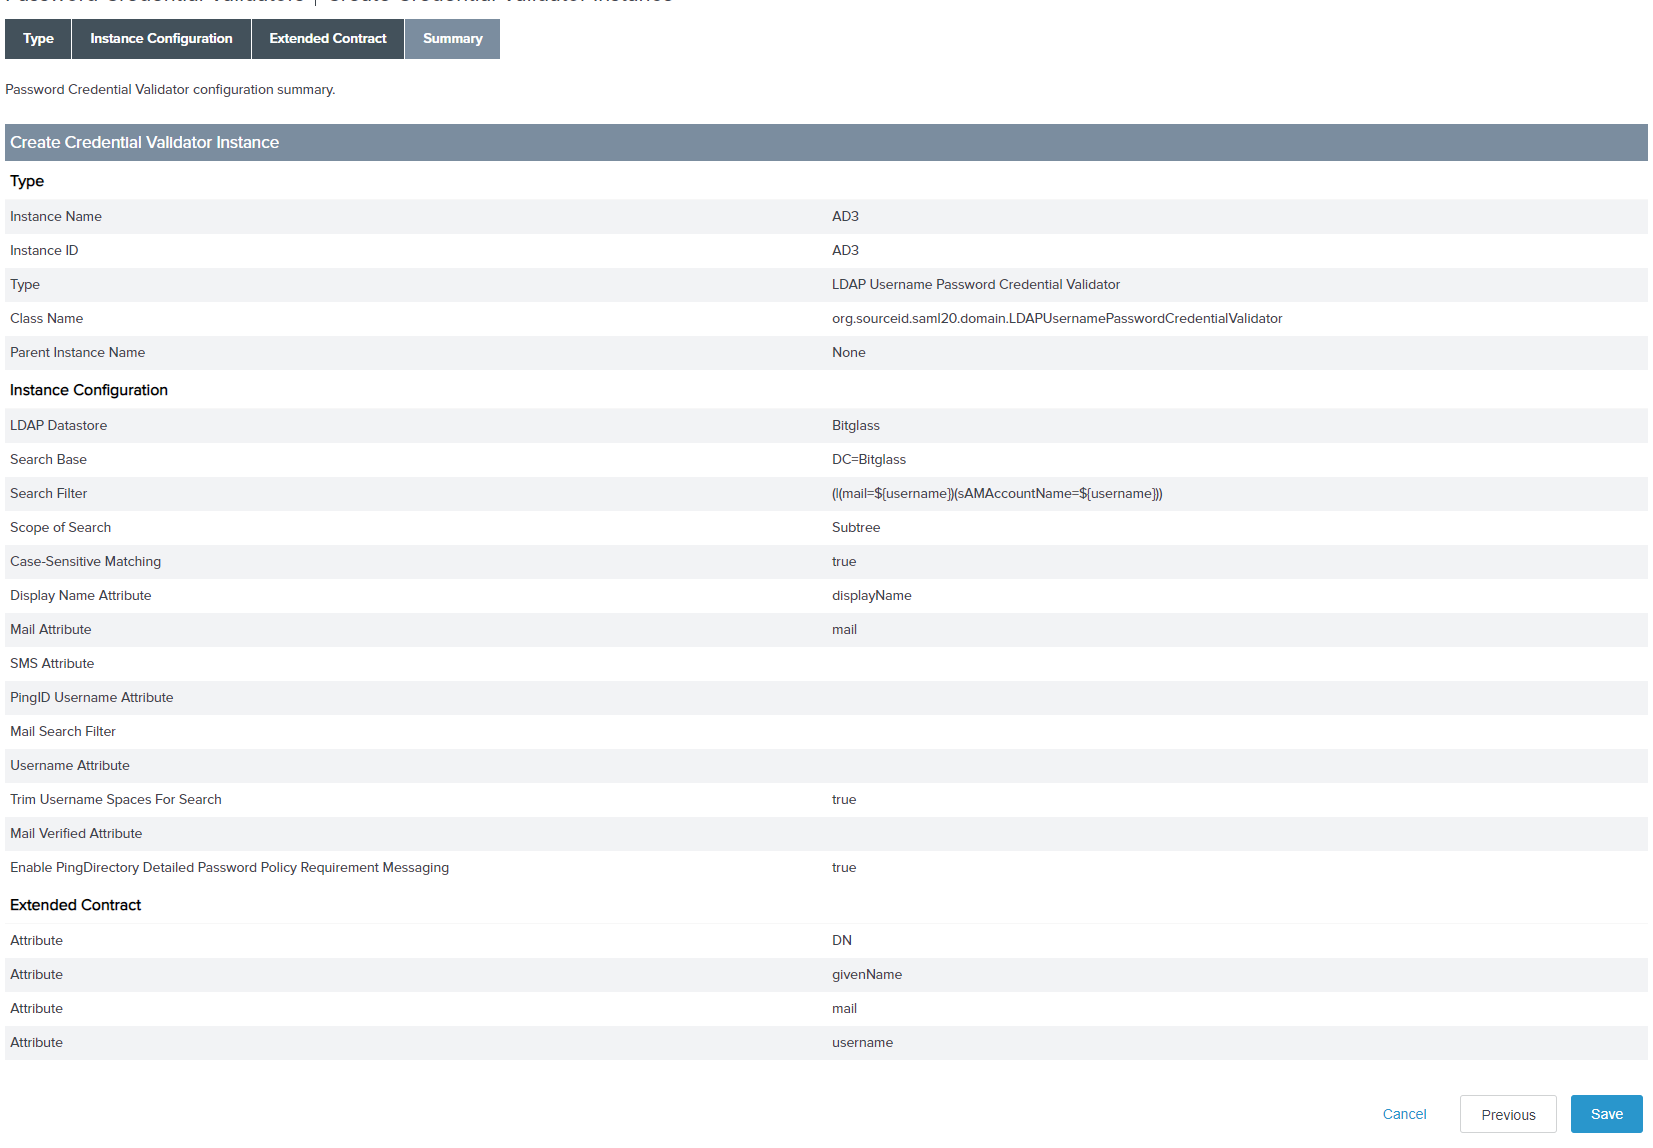
Click Next to move to the Summary page and confirm your setup.
-
Back on the homepage of your admin portal, select Data Stores again.
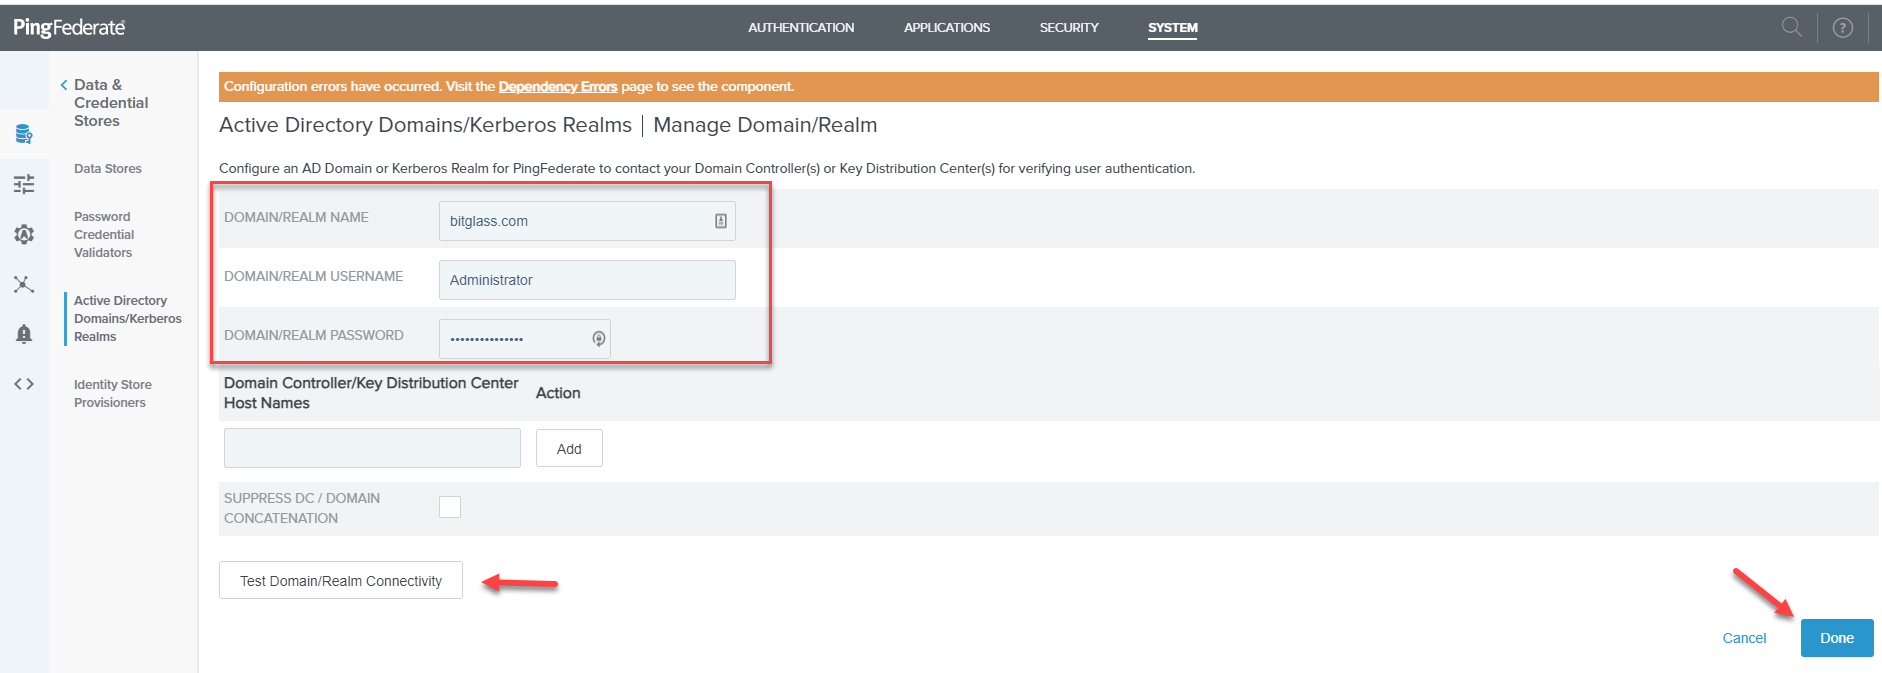
On the left column, select Active Directory Domains/Kerberos Realms and then click Add Domain/Realm.
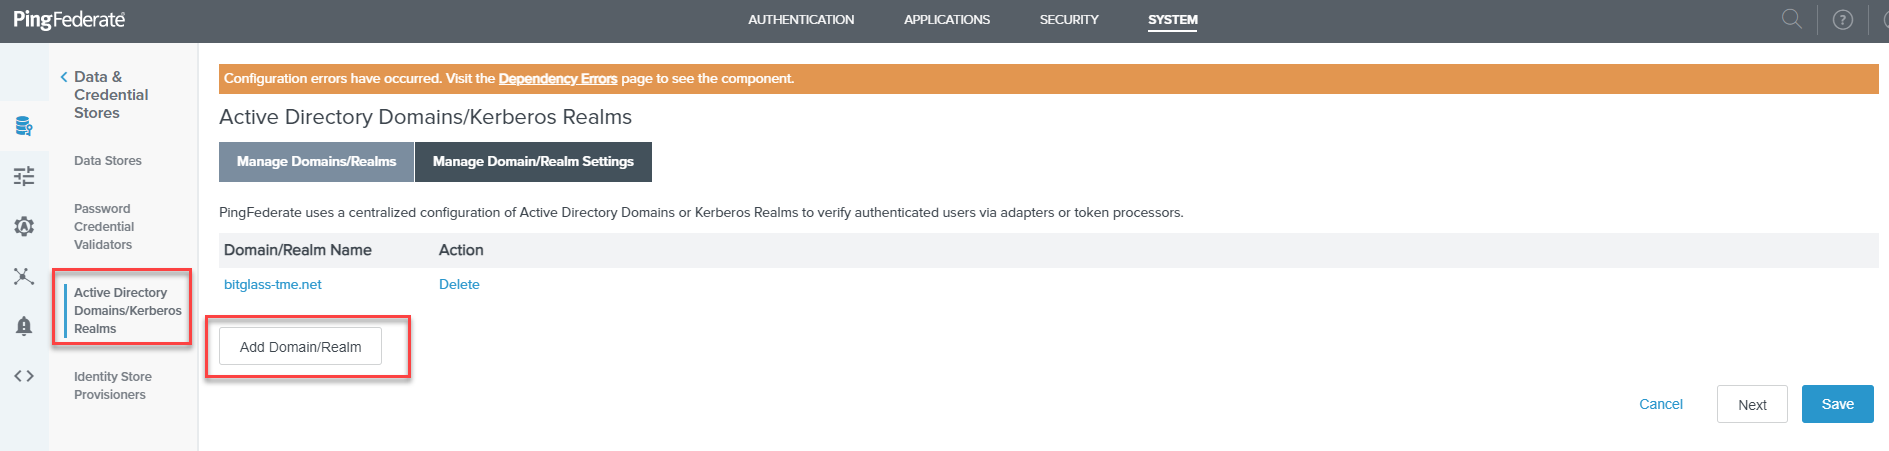
-
Enter the domain of your system here and then add your admin account. Click Test Connectivity and then click Done to finish.