Integrating Splunk application with Forcepoint Data Security Cloud | SSE using Bitglass application
Forcepoint Data Security Cloud | SSE provides a Splunk app on Splunkbase for easily integrating with Forcepoint Data Security Cloud | SSE's REST API for pulling Forcepoint Data Security Cloud | SSE logs.
Before you begin
Steps
-
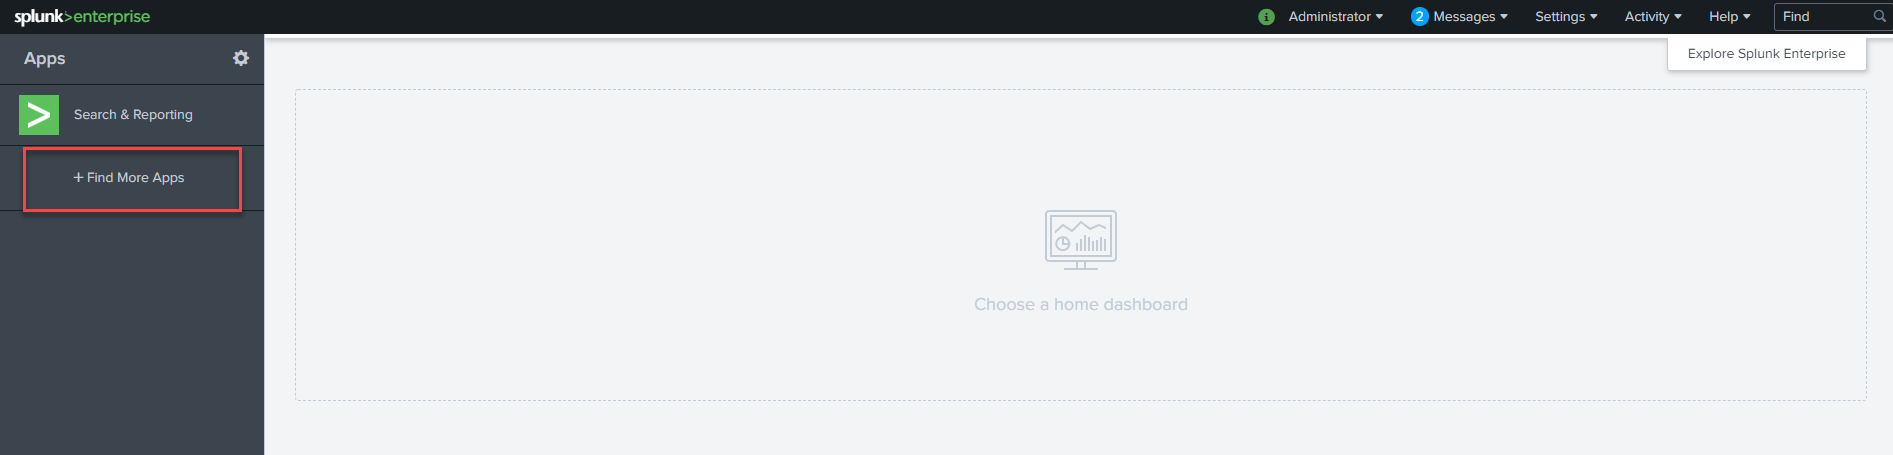
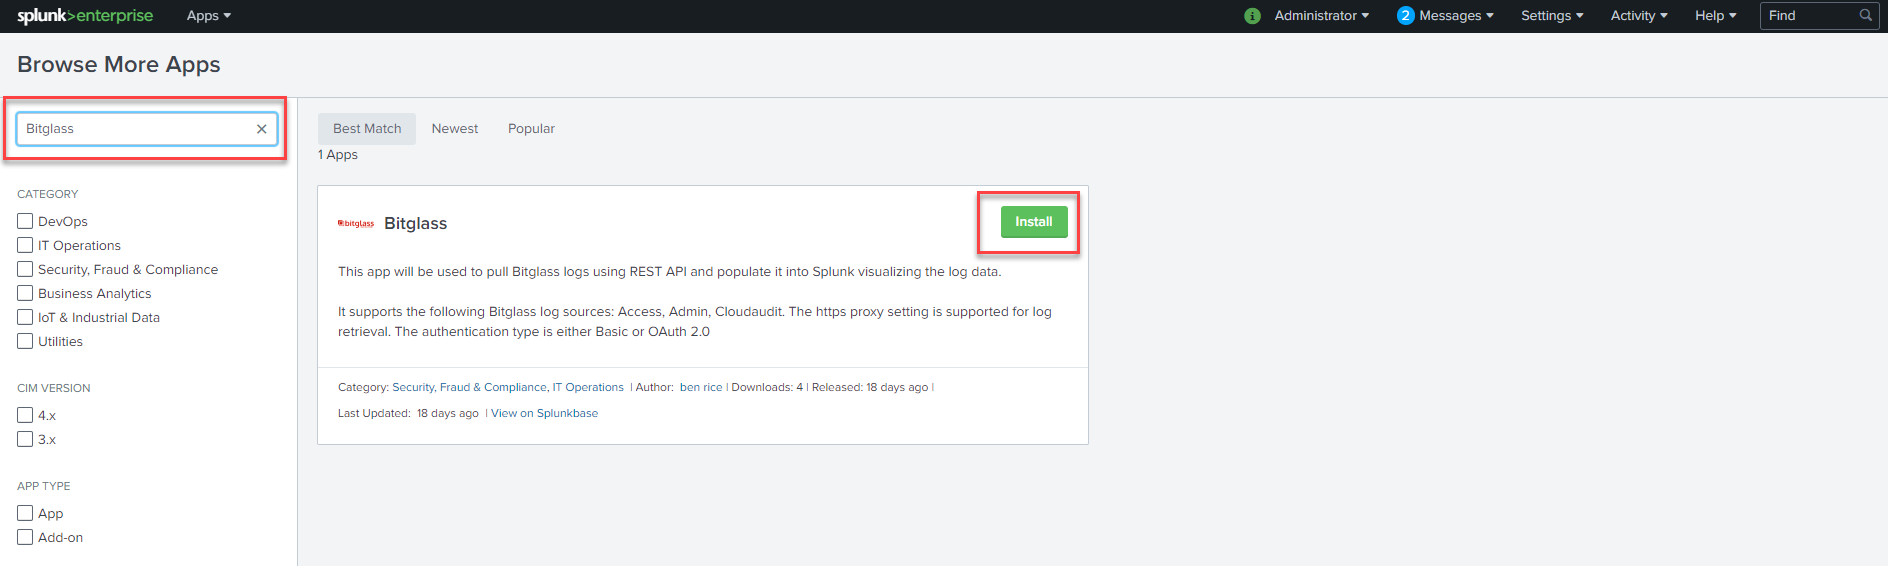
You can either download the app first and then install manually in Splunk or you can login to your Splunk instance and then search for and install the Bitglass app directly. From your
Splunk homepage, click Find More Apps from the left column. Then search for Bitglass and click Install on the app that
appears.
-
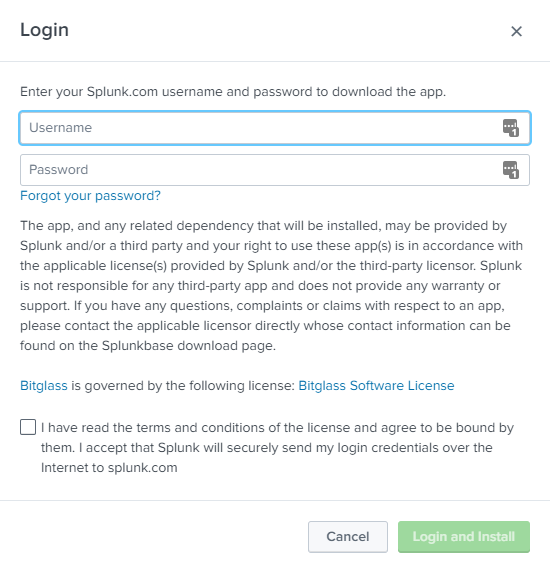
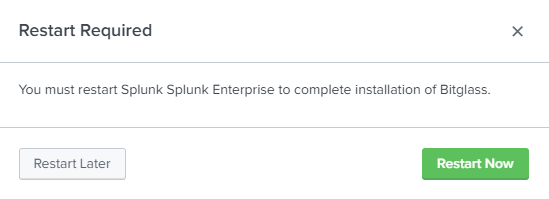
On the next page, enter your Splunk.com account info to login and check the I have read the T&C... checkbox at the bottom then click Login and
Install. It will require you to restart your Splunk instance.
-
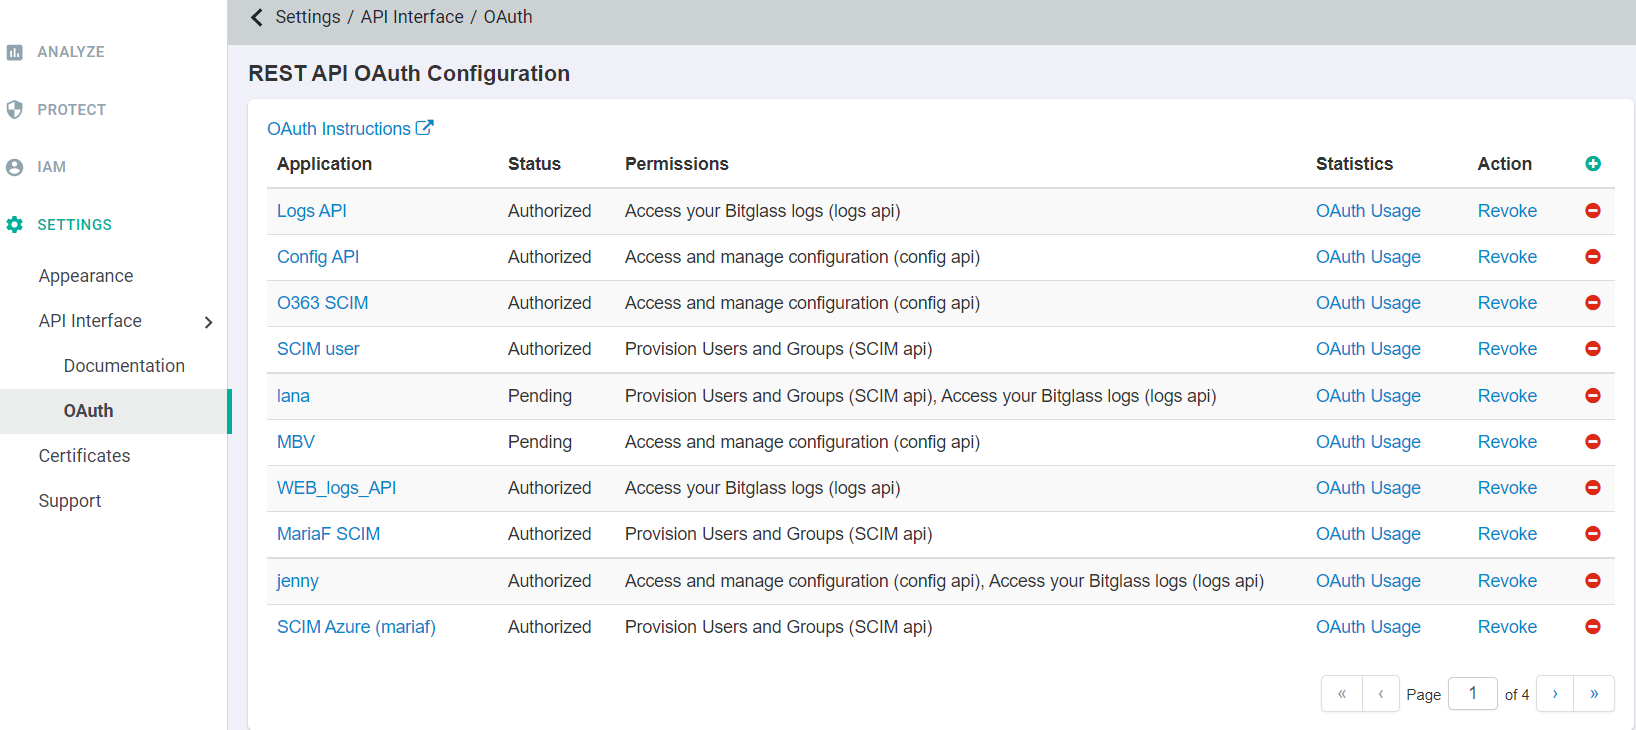
While Splunk is restarting, open a new browser tab or window and login to the Forcepoint Data Security Cloud | SSE portal as your admin account. Navigate to to create a new OAuth token. Click on the green plus icon to create a new token.
-
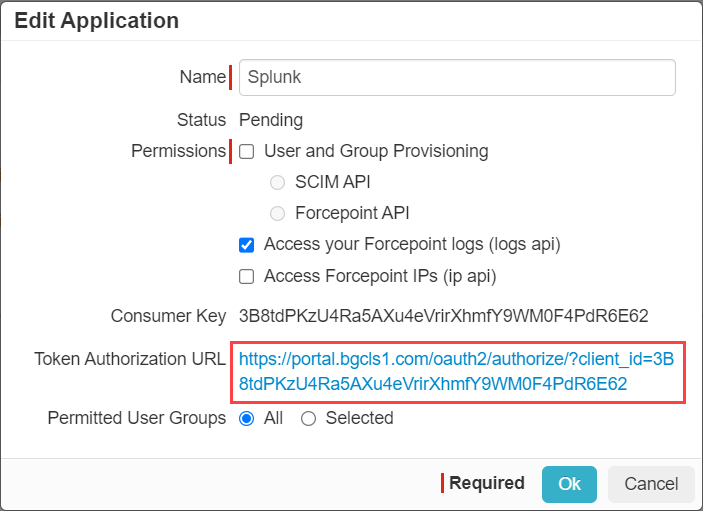
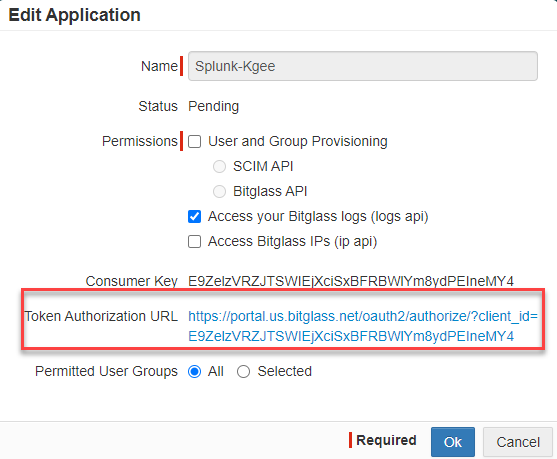
In the Edit Application window, provide a recognizable name and then select the checkbox for Access your Bitglass logs (logs api) option. Click
Ok at the bottom.
-
Now that the application has been created, back on the OAuth page select the app token you just created and then click on the Token Authorization URL to authorize
the app.

-
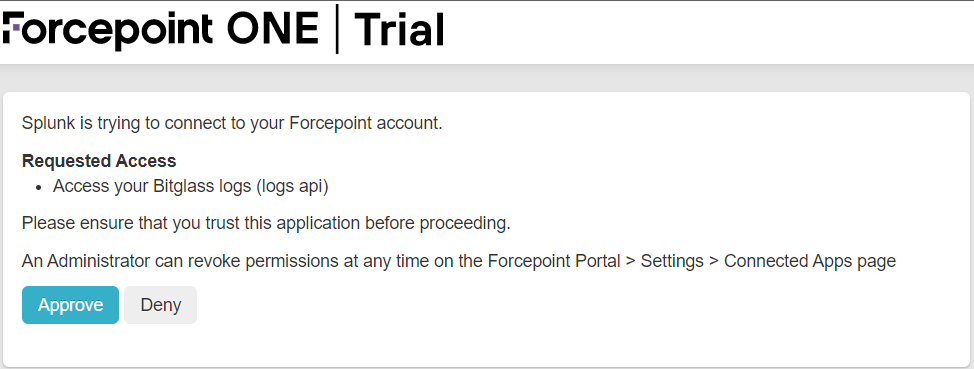
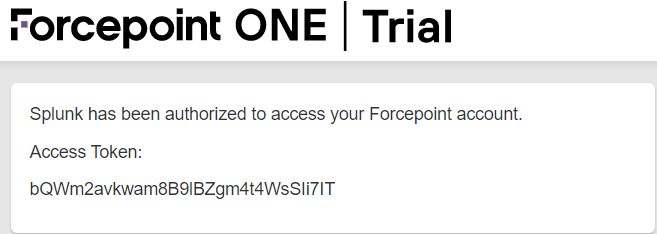
You will be taken to a page to Authorize the app. Once done, you will then see the Access Token you will need for finishing the setup in Splunk. Either leave this
page open or copy the token to be used later in step 8.
Note: When setting up the Bitglass app in Splunk in the next steps, you will be prompted to authenticate. You can either use Basic Auth or OAuth (which we created above). It is recommended to use the OAuth token as it is more secure, but you can use either or. -
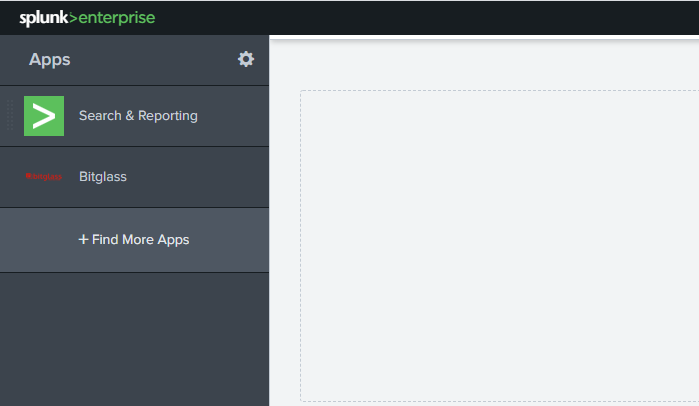
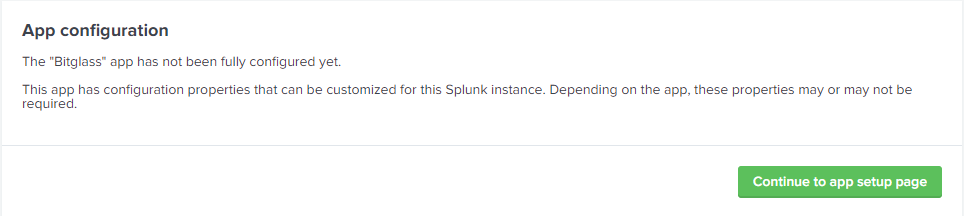
Now navigate back to your Splunk instance that restarted after step 2 and log back in (while keeping the above Forcepoint Data Security Cloud | SSE window open). You will now see the Bitglass app
in the left column. Select it and then click Continue to app setup page on the next window that pops up to configure the settings.
-
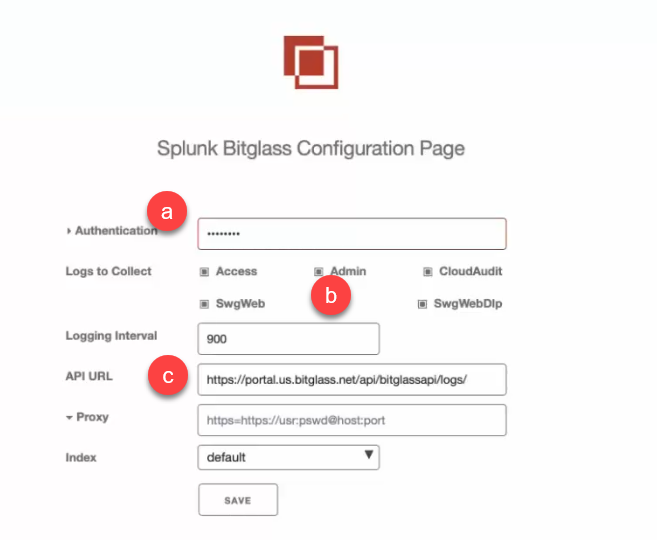
Fill out the fields on the Setup page.
-
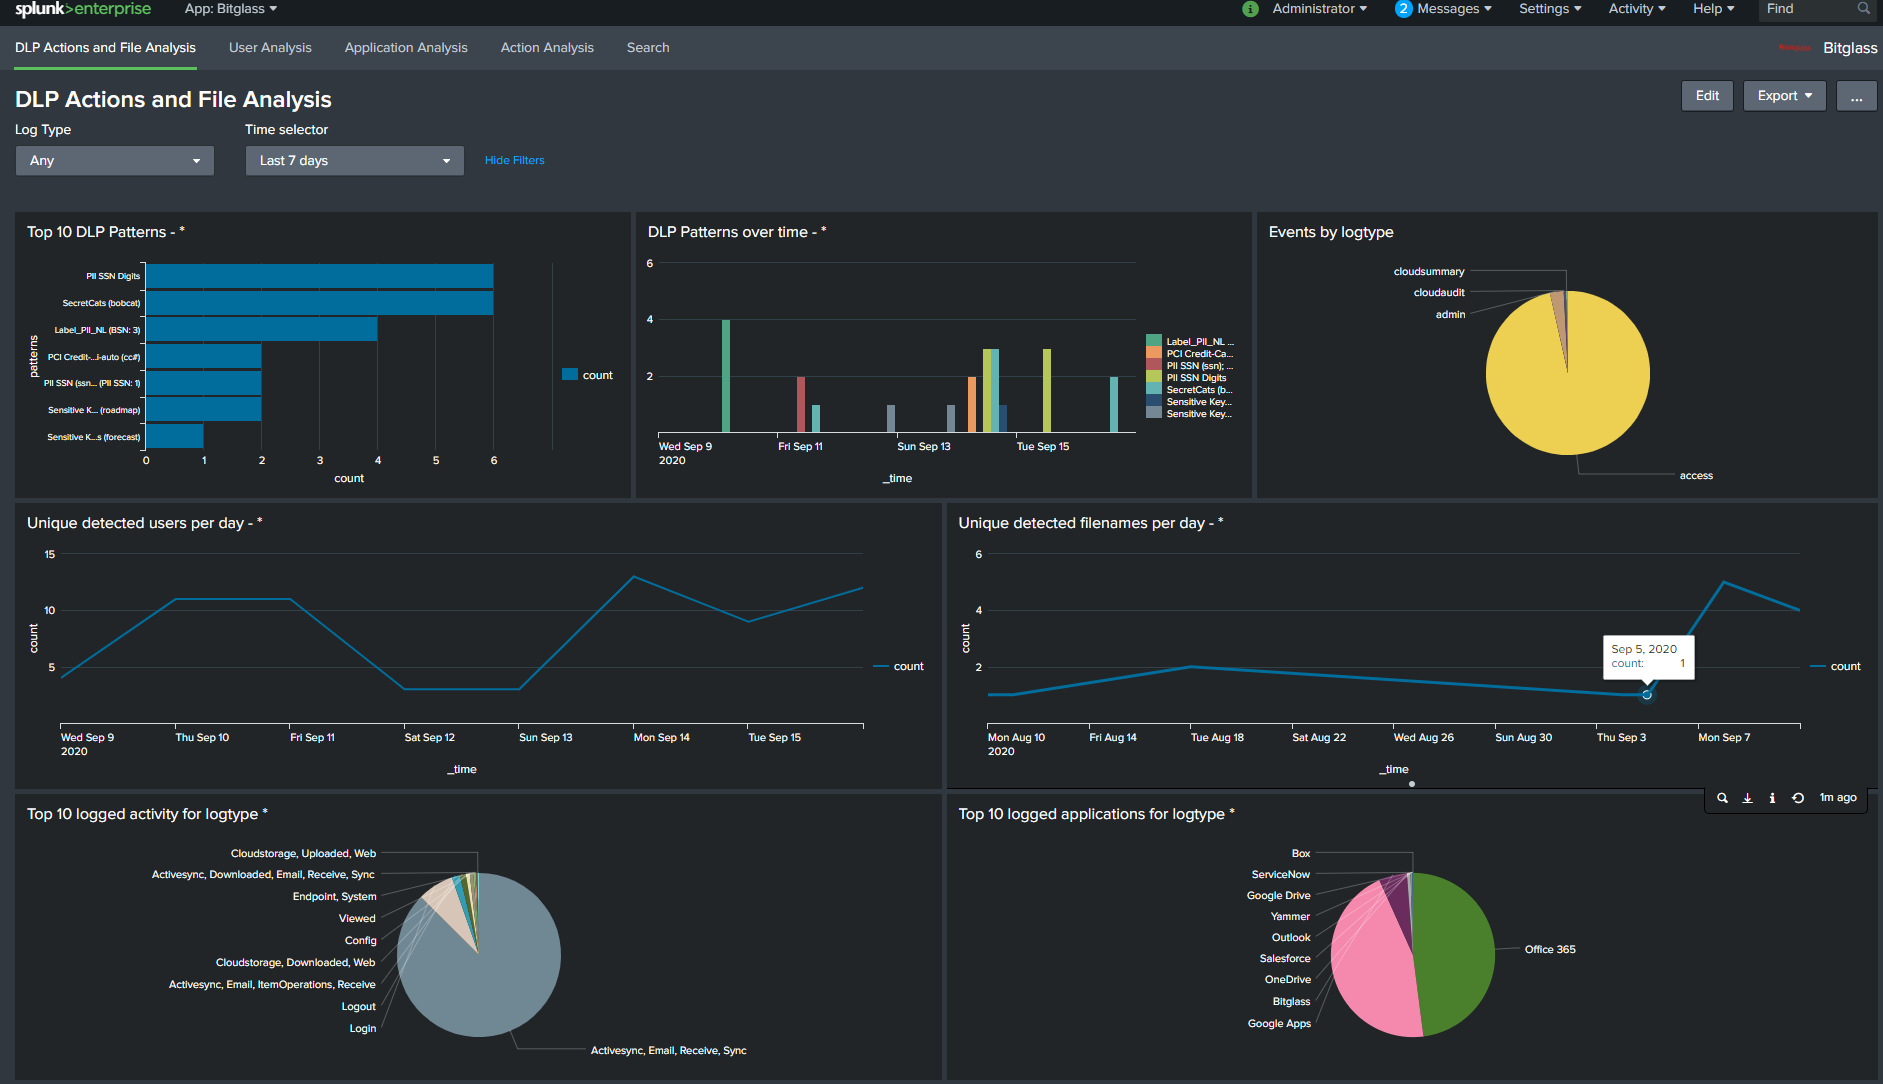
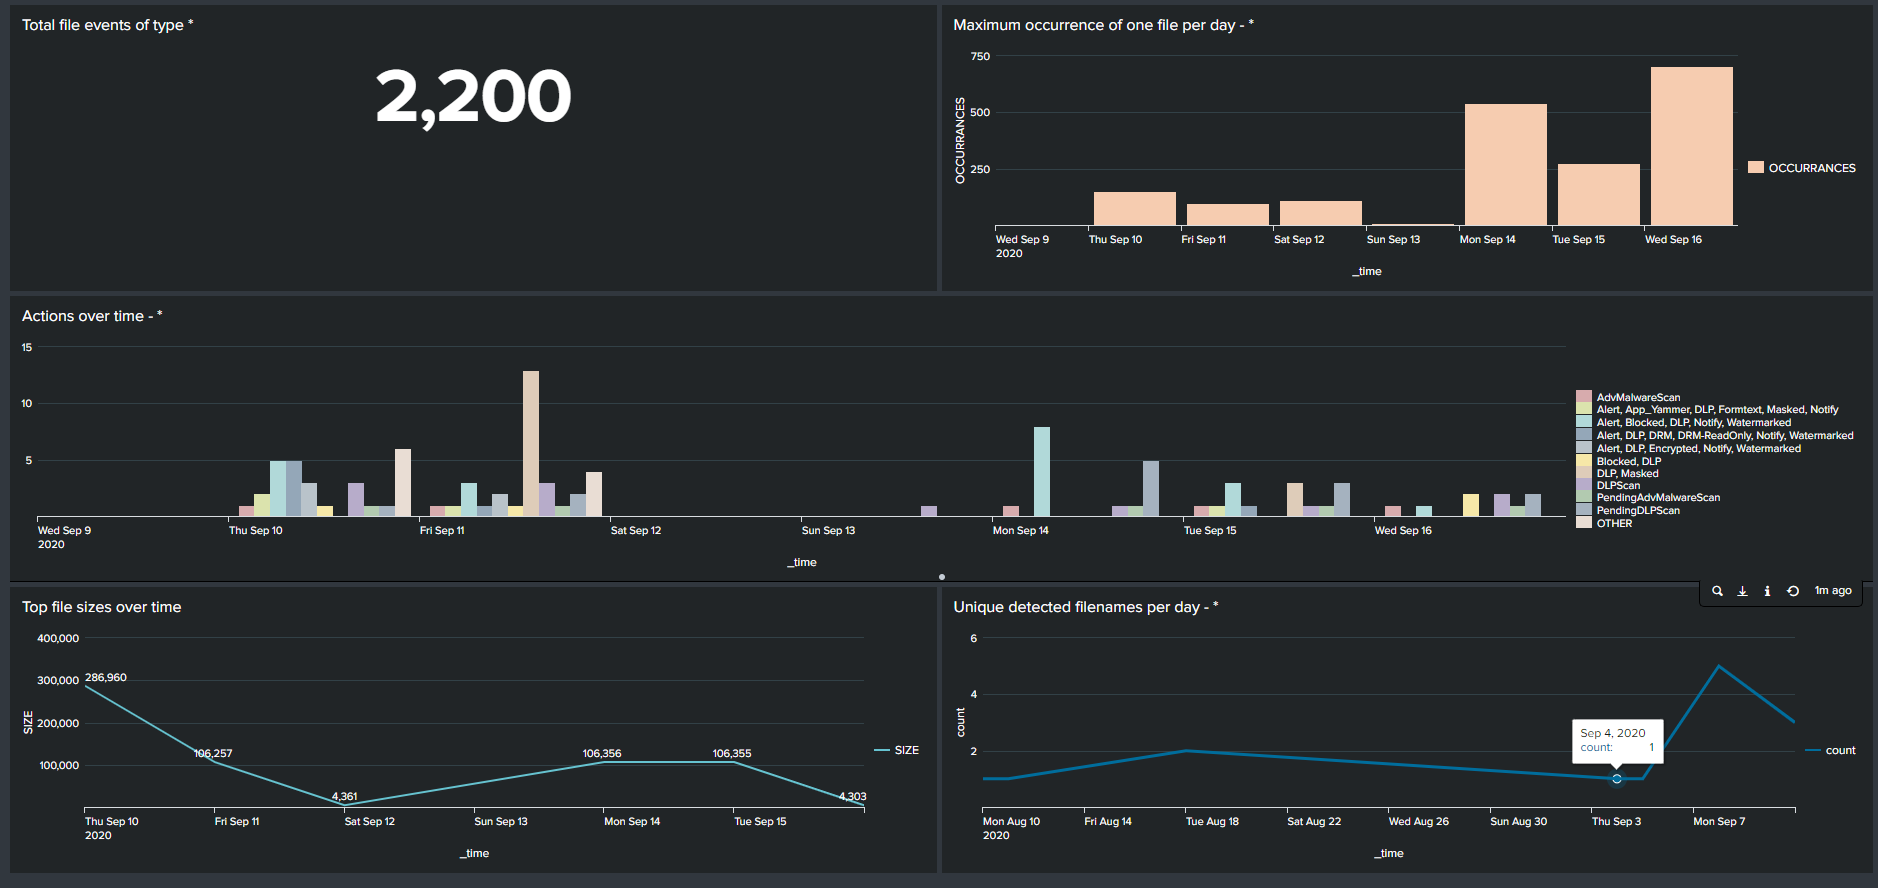
Once you click Save you will be taken to the Bitglass app Dashboard. Give it a few minutes before logs are pulled over and you see log results.