Adding SCIM application in Azure
After creating an access token, you should create the SCIM application in Microsoft Entra ID. To learn more about using SCIM with Azure AD, refer to the Microsoft Guide.
Before you begin
Steps
-
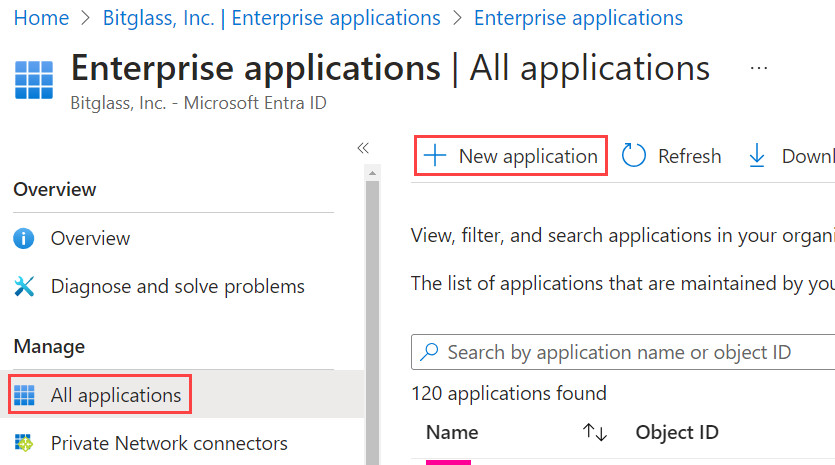
On the Enterprise Applications page, navigate to .
-
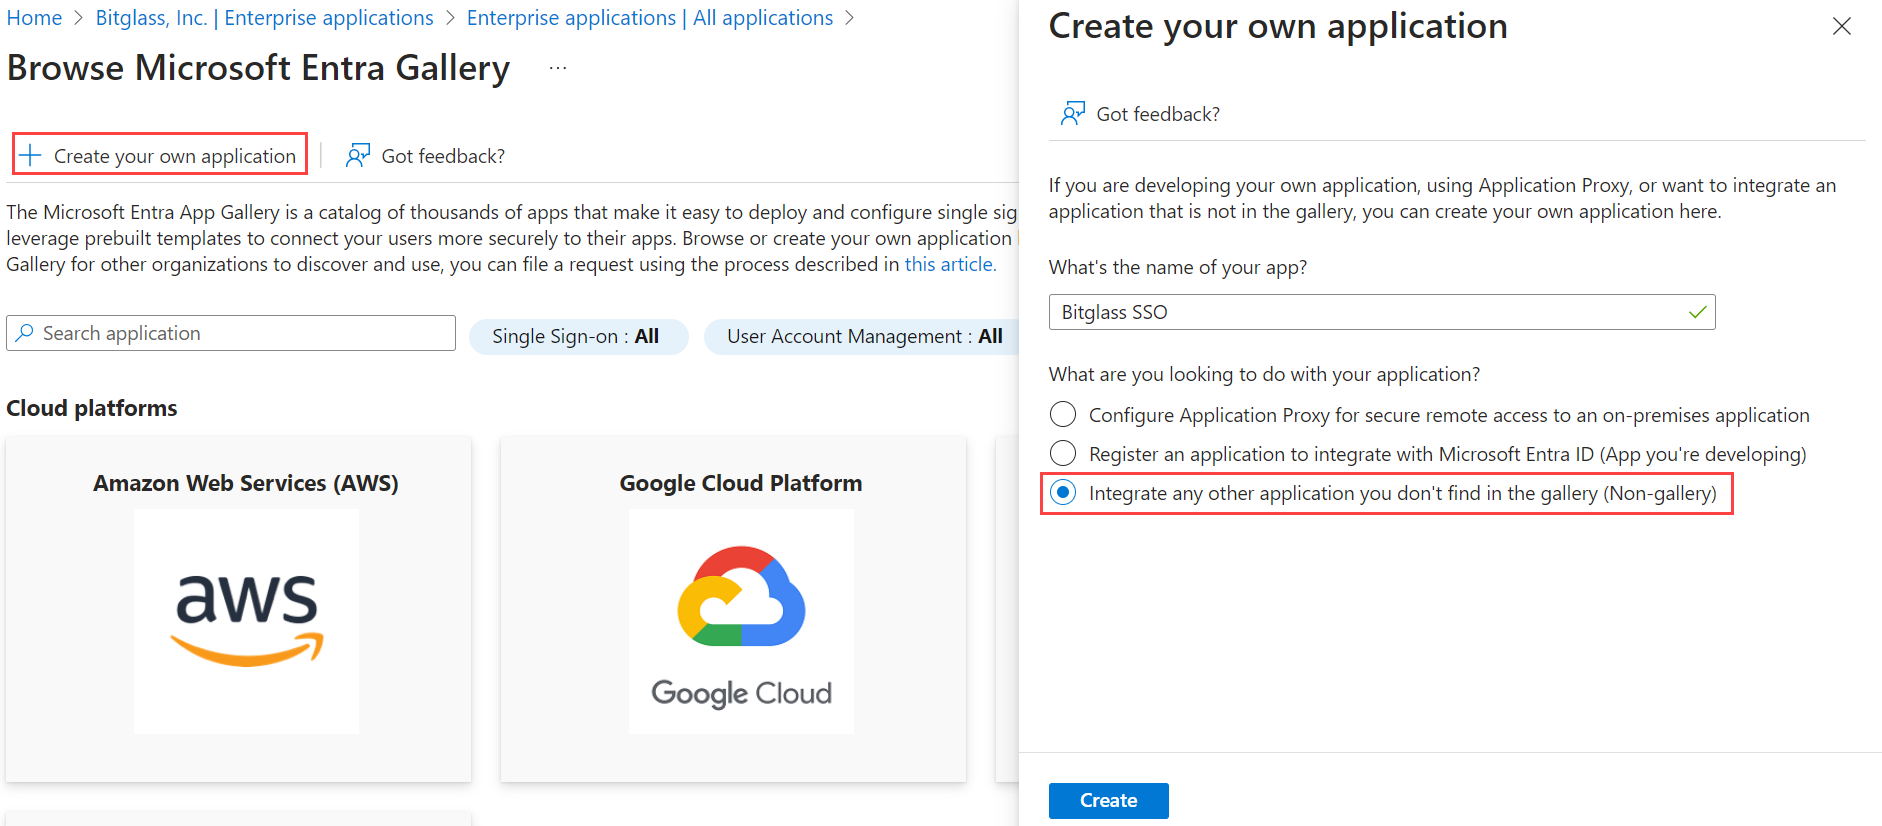
On the Create your own application dialog that appears on the right:
- Enter a recognizable application name.
- Ensure Integrate any other application you don't find in the gallery (Non-gallery) is selected.
- Click Create. It may take a few moments for the app to be created.
-
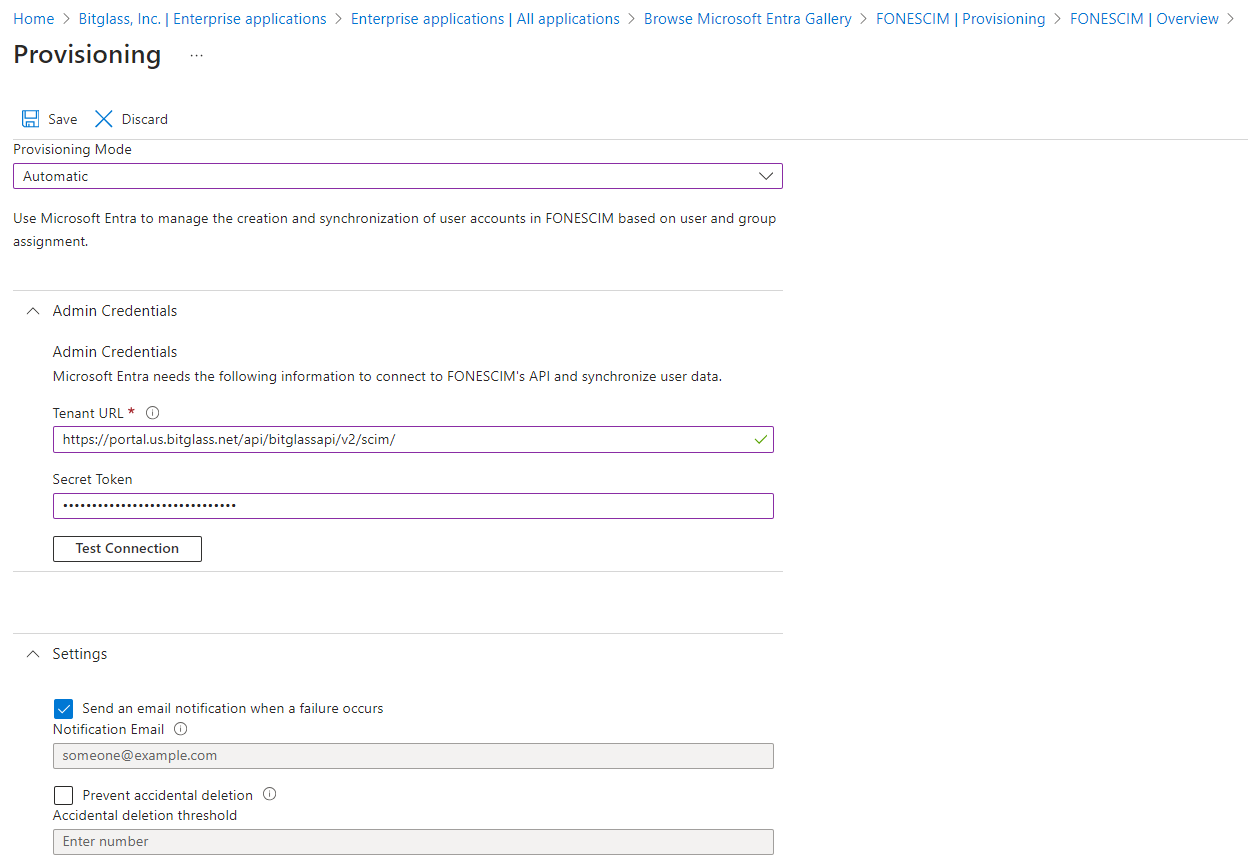
Expand the Settings section, select the Send an email notification when a failure occurs checkbox and then enter an email to notify
you if a failure occurs.
-
Once you save, configure what users or groups are going to be provisioned as well as which attributes.

To learn more about Microsoft Entra ID and SCIM, refer to the Microsoft guide.
Note: Microsoft Entra allows to map only unique Target Attribute value with each Source attribute. For example, the Target Attribute drop-down will not display the externalid option as externalid is mapped to some other source attribute by default. So, you have to remove the existing mapping for externalid and then re-map to Target Attribute.-
Under the Mappings section, there are two options (Group and Users) to select which attribute properties are used to match the users and groups in
your app. You will need to make adjustments to the User mapping fields.
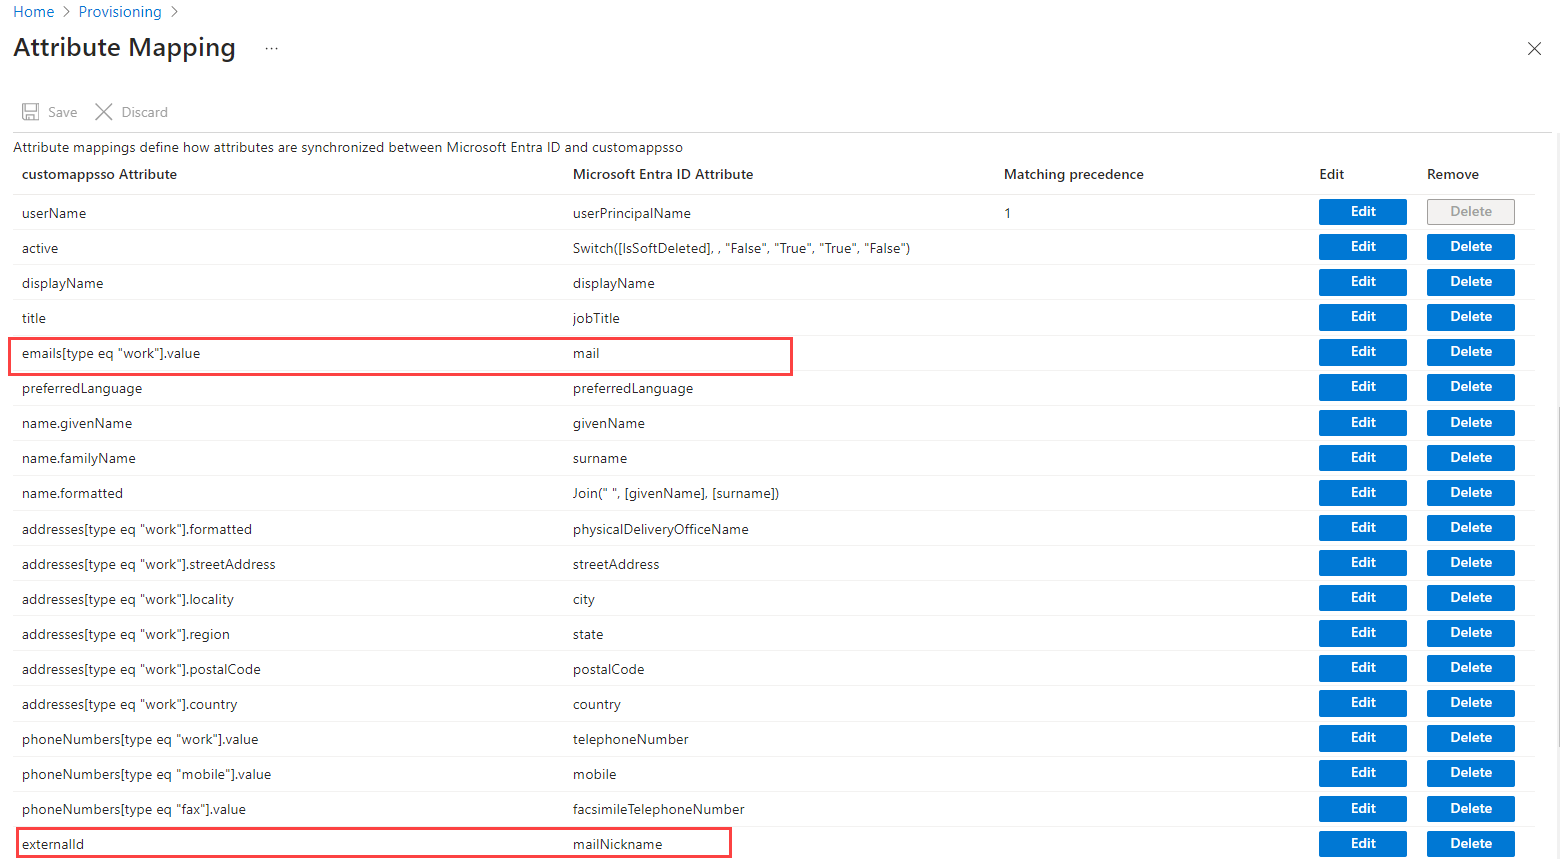
- Click the Provision Microsoft Entra ID Users link to view the Attribute Mappings section and delete the following:
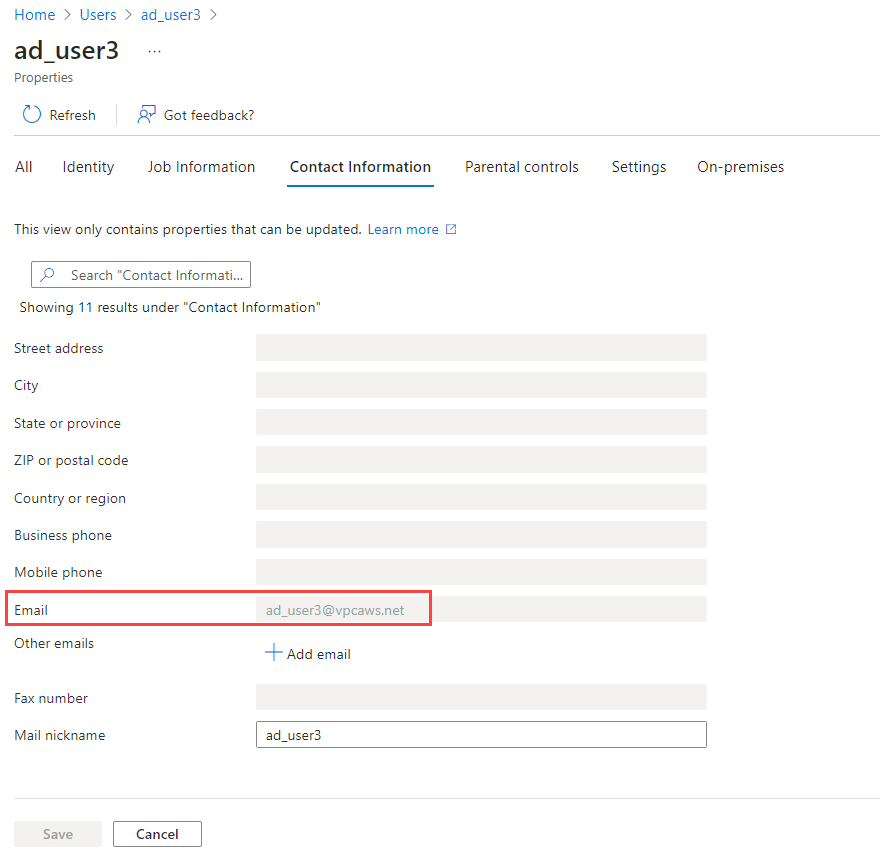
- Field name mail field with customappsso Attribute equal to emails[type eq "work"].value.
- Field name MailNickname with customappsso Attribute equal to externalID value.

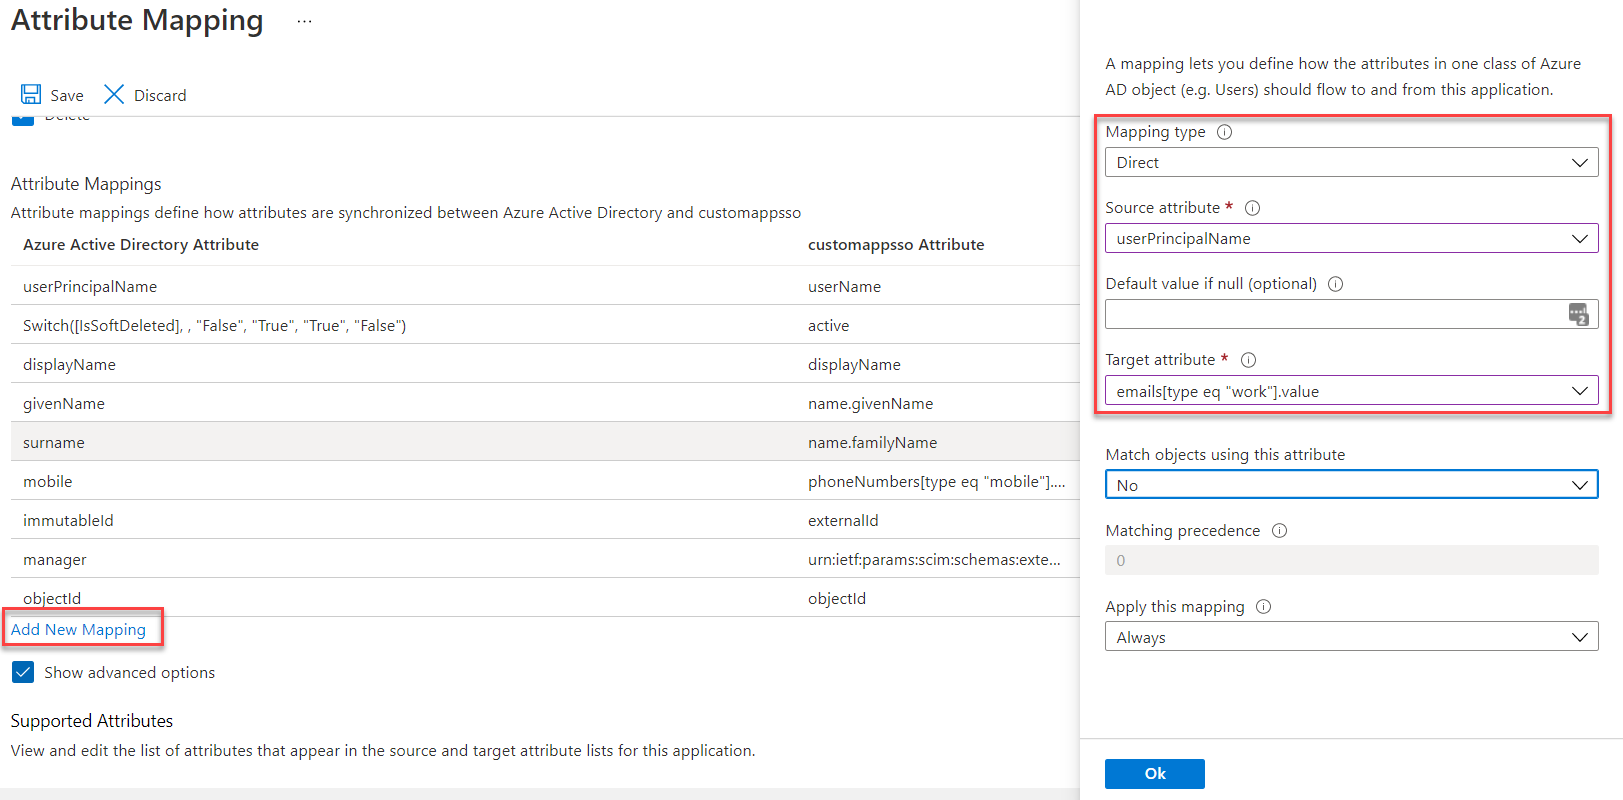
- Click Add New Mapping to add a new map and then set the Mapping Type to Direct,
Source Attribute to userPrincipalName, and Target Attribute to emails[type eq
"work"].value. Click Ok.
- Add another new mapping for the immutable ID with Mapping Type to Direct, Source Attribute to
ImmutableID, and Target Attribute to externalid and then click OK.
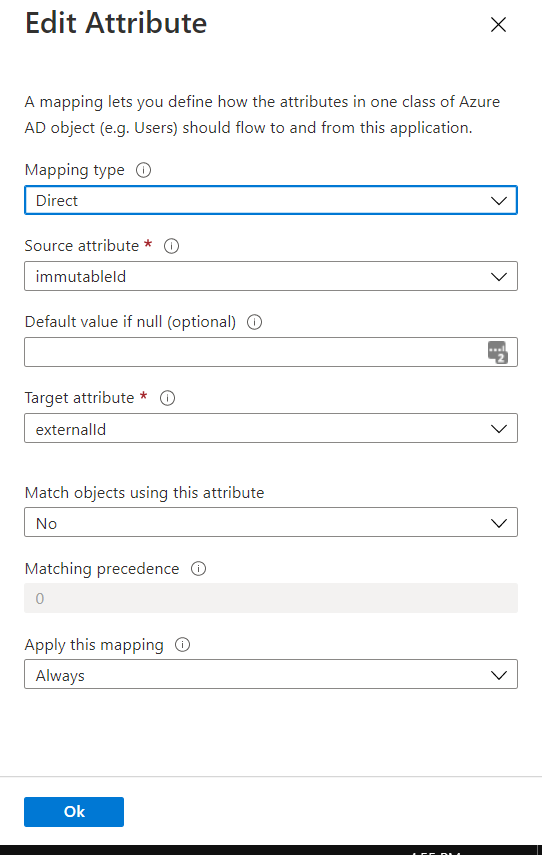
Note: The Target Attribute drop-down may not display the externalid option as externalid is mapped to some other attribute by default. So, you have to remove the existing mapping for externalid and then re-map to Target Attribute.Once that is set, you can back out to the Provisioning page.
- Click the Provision Microsoft Entra ID Users link to view the Attribute Mappings section and delete the following:
-
Under the Mappings section, there are two options (Group and Users) to select which attribute properties are used to match the users and groups in
your app. You will need to make adjustments to the User mapping fields.
-
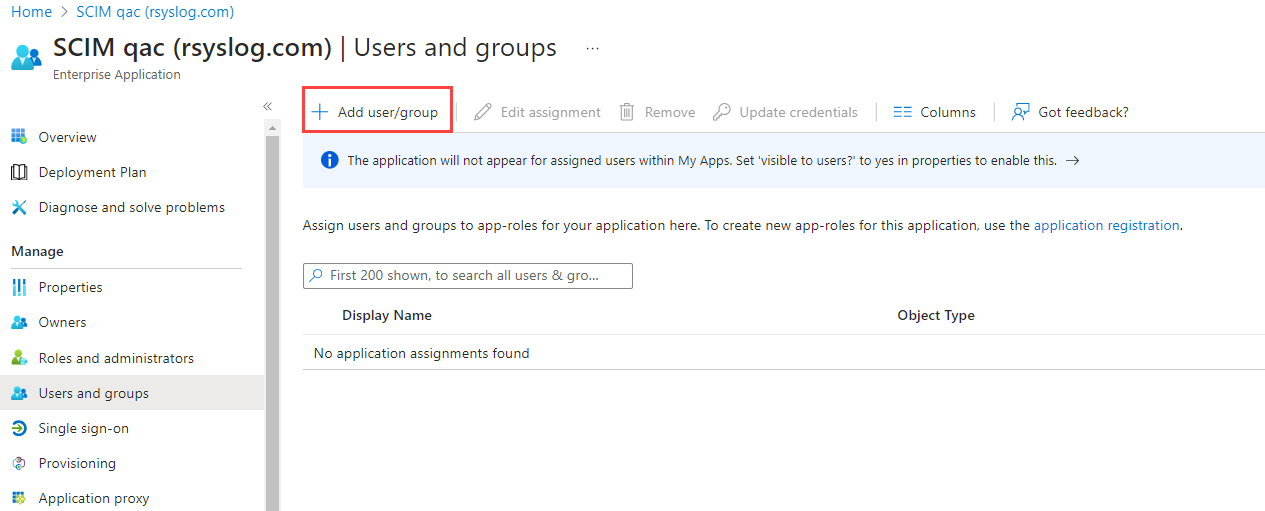
To only sync over specific users or groups, you will need to add them to the application. In the left column, select Users and groups and then click
Add user/group.
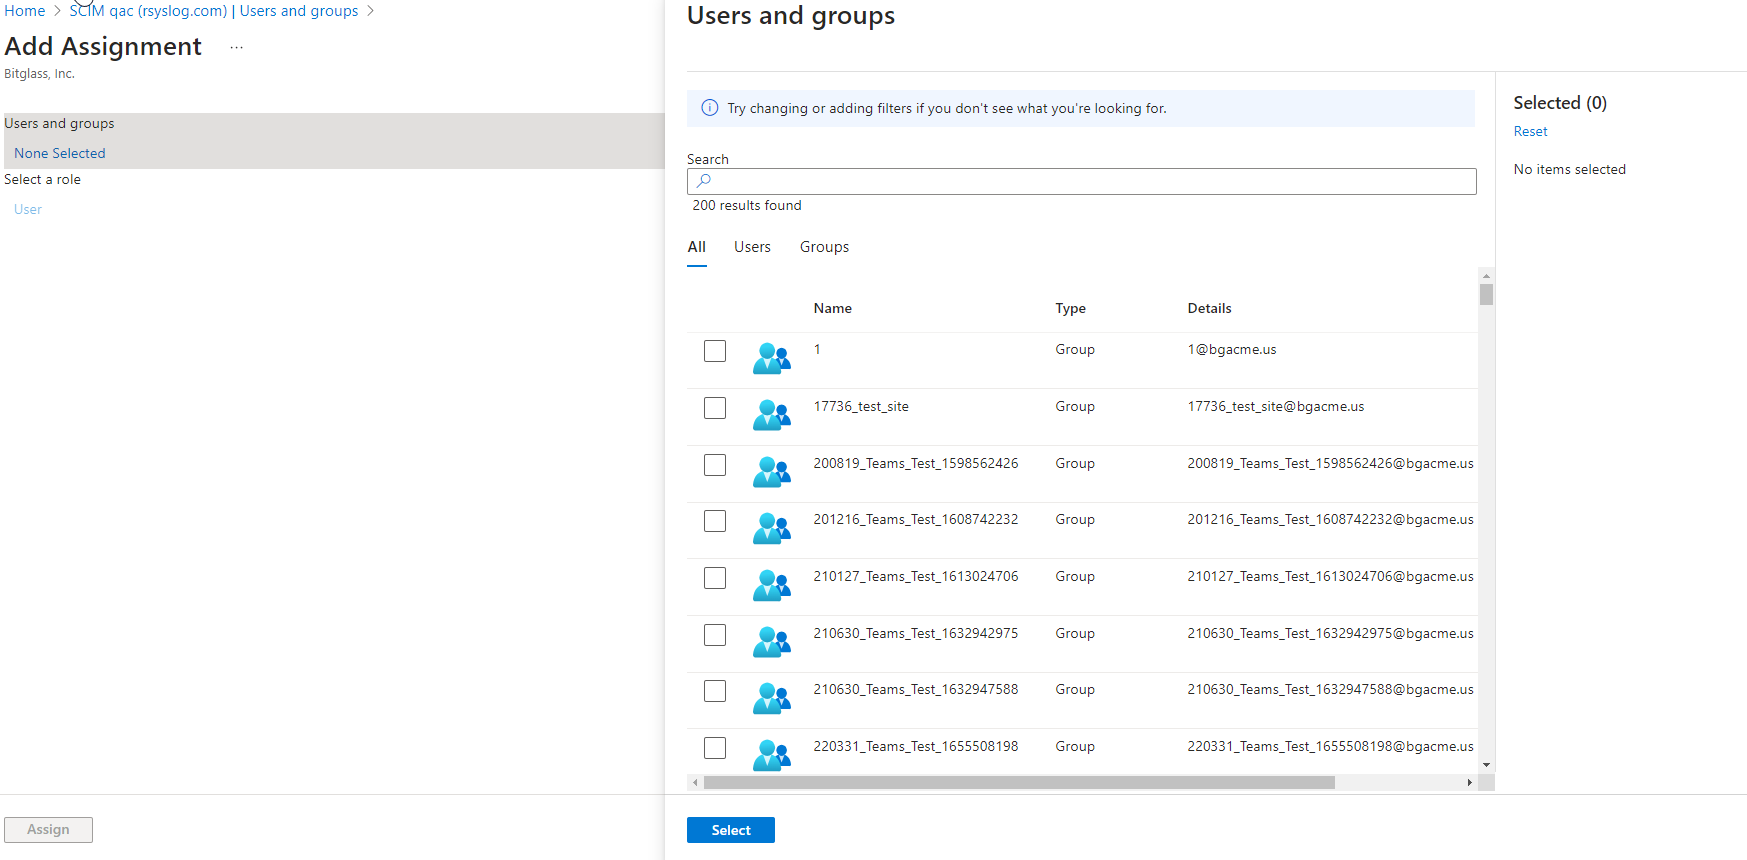
-
On the Add Assignment page, select the Users and groups option to select the specific user(s) and/or group(s) that you want to
provision. Once you have made all of your selections, click Select at the bottom.
-
Once your users and groups are assigned, navigate back to Provisioning.
