Creating Sites

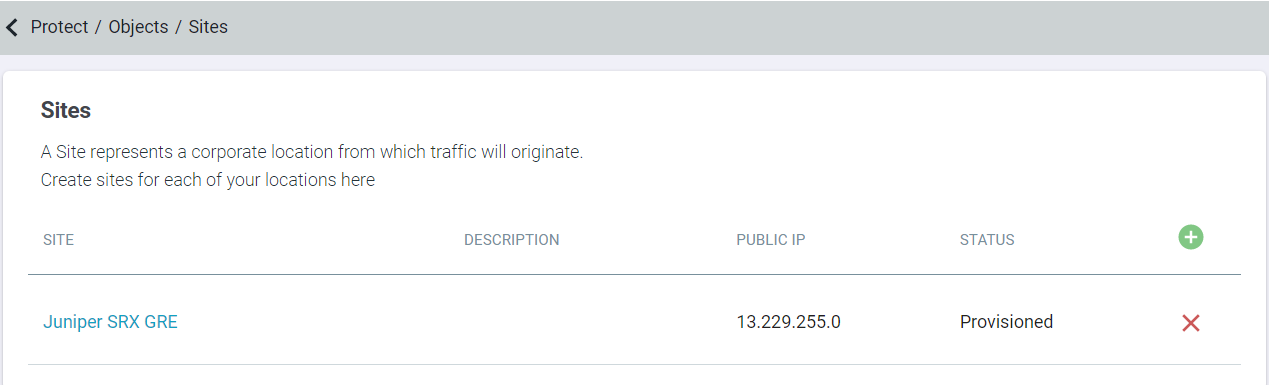
A Site represents a corporate location from which traffic will originate. While creating a Site, you need to configure GRE tunnel through which traffic should be sent over to cloud and create or add subnets groups within the site.

To create a new corporate Site, follow the steps below:

Steps

  1. Navigate to Protect > Objects > Sites.
  2. On the Sites page, click the green plus icon.
  3. On the General tab:
    1. Enter a unique Name of the Site.
    2. Select the appropriate TimeZone of the corporate IP location.
    3. Enter Description for the Site.
    4. Select the Tunnel option from the Type of the site.

      Available options are:

      • Tunnel (default) - Select Tunnel if you want to create GRE or IPSec tunnels so that web traffic from the site is forwarded to Cloud SWG via tunnels.
        Note: When Type is set to Tunnel, then the Tunnel tab is available.
      • Explicit Proxy - Select Explicit Proxy if you want to forward the web traffic from the site to Cloud SWG using a PAC file.
      • None - Select None if the Site is with an on-premise proxy that sends traffic direct to the internet (without sending it to the Cloud SWG).
      Note: The Type cannot be changed once a Site is created. You can delete and create new site with correct Type.
    5. Enter the Public IP address of the site.
      Forcepoint ONE SSE validates the IP address to make sure that the value is actually an IP address and is not a duplicate of another site with same IP address that is already created.
    6. Set the Identify Coordinates to Automatic to identify the location of the site based on entered IP address when you click Detect Location.

      Location displays the location name of the entered IP address.

    7. If you need a finer coordinates or Forcepoint ONE SSE is unable to identify the location of the entered IP address, then:
      • Set the Identify Coordinates to Manual.
      • Select the applicable Country to which entered IP address belongs.

        For existing Sites, where the country was not available for selection, it is set to a special value (unknown) and displayed as a blank in the Country drop-down, so that you can select it later.

      • Enter the Latitude and Longitude.
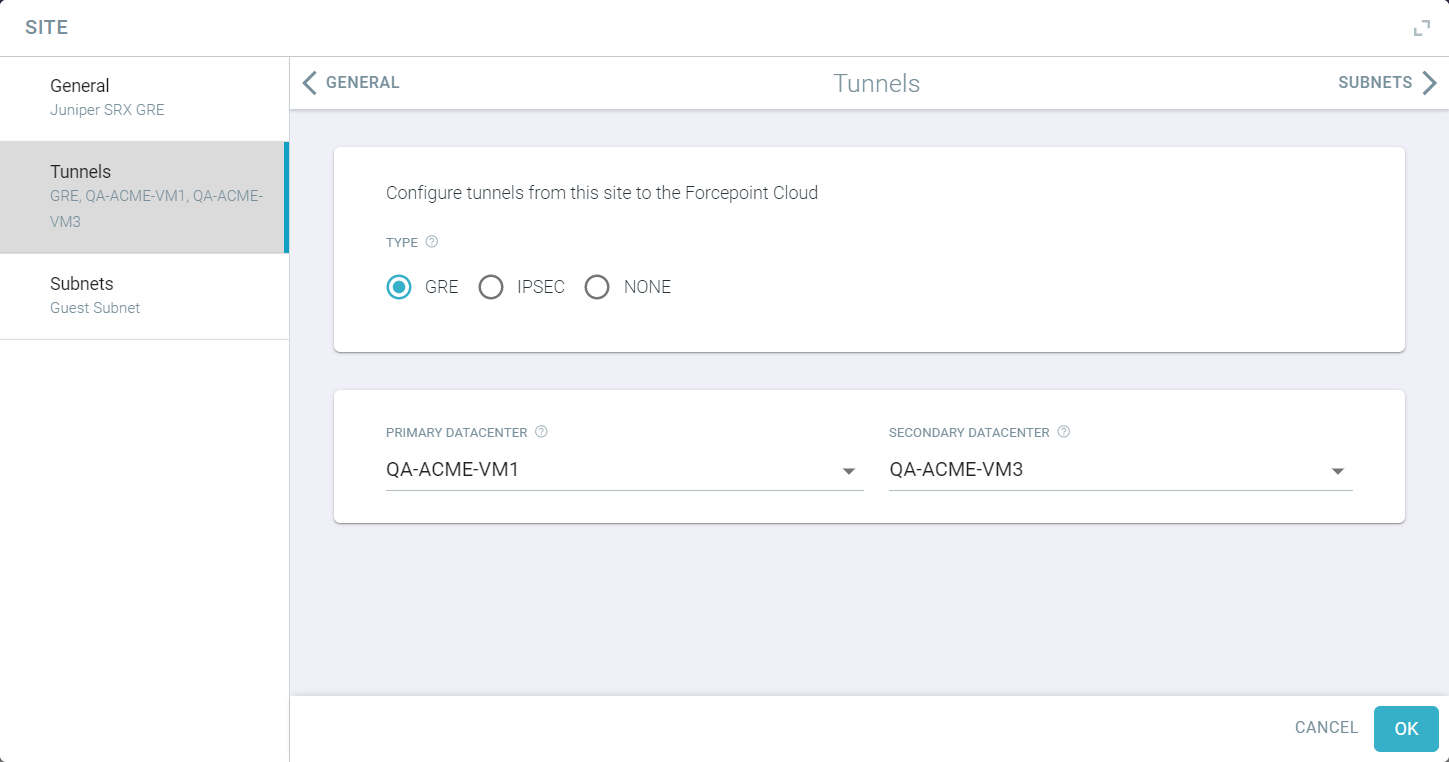
  4. On the Tunnels tab, create tunnels to route the traffic from site to Forcepoint ONE SSE cloud:
    To create a GRE tunnel, follow the steps below:
    1. Select the Type as GRE.
    2. Select the data center where the primary tunnel from the site is terminated.
    3. Select the data center where the secondary tunnel from the site is terminated.
      Select a data center that is in a different Region or Zone than the Primary Datacenter. If you do not want to assign secondary data center, then select None from the Secondary Datacenter drop-down list.
  5. (Optional) On the Subnets tab, define subnets or reuse the configured subnets within the site. This is an optional step.
    Note: Subnets are unique within a site. However, in large cookie cutter network deployments, the same subnet may be used in multiple sites. Combination of Site and Subnet is globally unique.

    To add Subnet(s) defined in Protect > Objects > Custom Locations page:

    1. Click the green plus icon.

      A Subset appears.

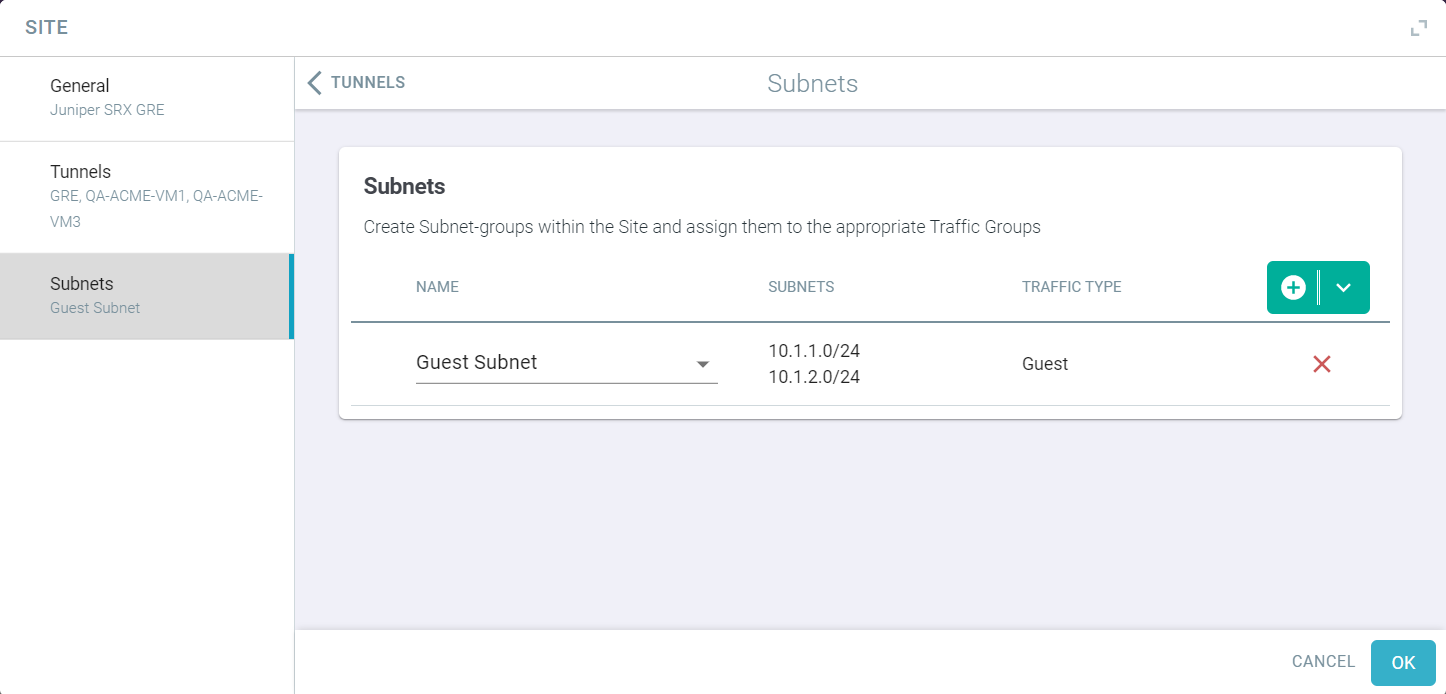
    2. From the Name drop-down list, select the applicable subset.

      The details of selected subset appears.

      You can add as many subsets as required.

    To create a new subset for the site:
    1. Click and select Create New.

      Create Subnet dialog opens.

    2. Enter a unique Name of the location for easy identification.

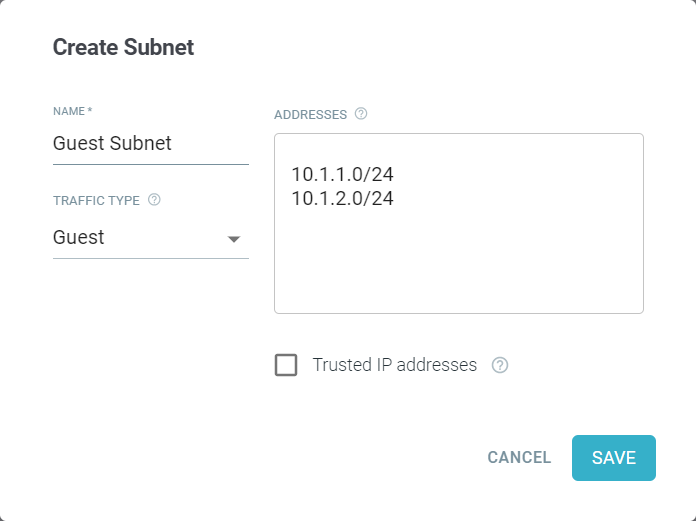
    3. Select the Traffic Type for the subnet addresses in the custom location.
    4. Enter the IP Address one per line in CIDR notation.

      Custom locations should be external internet facing addresses and can be an IP address, subnets, or ranges on individual lines.

    5. Select the Trusted IP addresses checkbox if the IP addresses are trusted.
    6. To save the custom location details, click Save.
  6. To configure a site with selected information, click OK.

    As soon as the Site is created, the status of Site will be Configuring. After some time, the status of the Site gets changes to Provisioned or Failed.

    Note: Tunnel typically takes approximately three minutes for it to be Provisioned.