Setting up your cloud service connection
Important: When you first run the Directory Synchronization Client, you synchronize directory information to a file. This enables you to confirm that the synchronization is
configured to your requirements before you upload your data to the cloud portal.
The Directory Synchronization Client connects to your cloud account using HTTPS.
Create a dedicated administrator account in the cloud portal with directory synchronization permissions to use solely for the synchronization process. Consider extending the password expiration date for this account, to avoid having to regularly update it. For more information, see “Working with LDAP Directories” in the portal Help.
To set up your connection in the Sync Client settings window:
- In the left panel, select Portal.

- Do not change the default value in the Access URL field unless instructed to do so. If necessary, click Reset Defaults to restore the original value of the field.
- Enter the cloud portal administrator account user name and password, then click
Apply.
When you click Apply, the Directory Synchronization Client attempts to connect to the cloud service using your settings. If you receive an error message, you may need to define proxy settings.
- From the HTTPS Proxy drop-down list, select Manual.
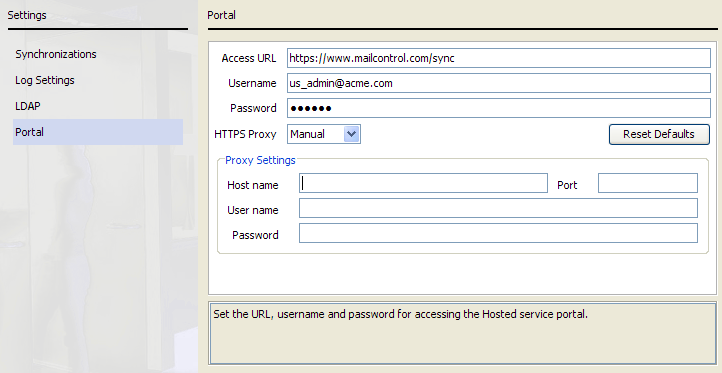
- Enter the connection details for your proxy server, then click OK.Note: If the proxy server supplies its own certificate to decrypt and monitor traffic between the client and the server, see Java Certificate Store for more information.
Continue with Creating and Modifying Configuration Profiles.