You can use custom or third party signed certificate for generating the endpoint ssl identity files.
Steps
-
To generate a new key in .pem format and Certificate Signing Request (CSR) of the localhost.config file, generate the following request in the built-in
openssl installed in Forcepoint Security manager (FSM).
C:\Program Files (x86)\Websense\EIP Infra\apache\bin\openssl" req -newkey rsa:4096 -keyout key.pem -out server.csr -config
                                localhost.config -sha256 -nodes
-
Sign the CSR using third party certificate authority (CA).
You can use Web Server default template to sign in Base 64 encoded format.
-
Convert the .cer file to .pem by running the command:
C:\Program Files (x86)\Websense\EIP Infra\apache\bin\openssl" x509 -in certnew.cer -out
                            server.pem
.
Server.pem and key.pem files are generated.
- Optional:
To review the certificate before re-packaging them into the installer, do the following:
-
Run the command:
C:\Program Files (x86)\Websense\EIP Infra\apache\bin\openssl x509 -in server.pem -text -noout
-
Ensure all the specifications defined in the config file being present in the certificate as below:
- Signature Algorithm: sha256WithRSAEncryption
- RSA Public-Key 4096 bit
- X509v3 extensions:
- X509v3 Key Usage: critical
-
Digital Signature, Key Encipherment
- X509v3 Subject Alternative Name:DNS:localhost
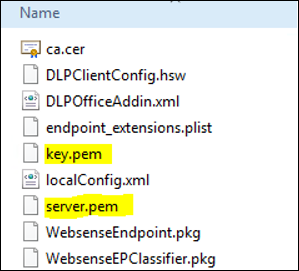
-
Add the key.pem and server.pem files into extracted Endpoint installer path below, and extract to zip
(FORCEPOINT-ONE-ENDPOINT-Mac.zip
- \FORCEPOINT-ONE-ENDPOINT-Mac\EndpointInstaller\
Note: You can perform a manual installation of the Endpoint on a test MAC machine before Jamf packaging.