Endpoint Settings
Endpoint Settings
- Log in to the Forcepoint DSPM portal.
- Navigate to .
Explanation of the fields
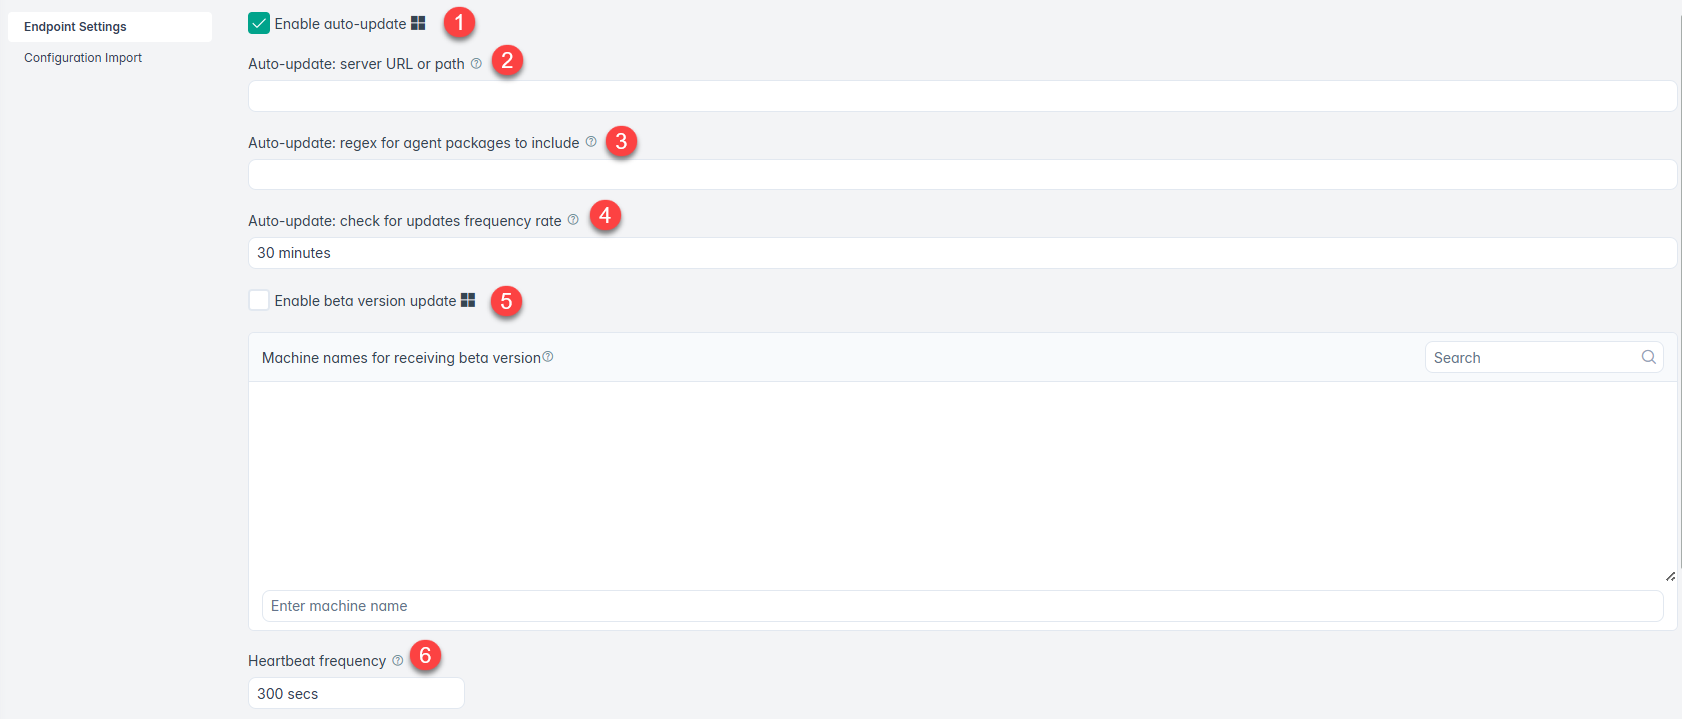
1 Enable auto-update: Auto-update feature of the agent allows the distribution of new versions of the agent without reinstalling it on a user's machine. By default, the agent will look in https://{cluster}/static-server/static/agent/stable/for new artifacts to update from. If the user would like to use a specific URL or path to look for the artifacts, it should be configured here. An example format is as follows:- URL: https://path/to/web/server/containing/binaries/
- Path: C:\path\to\artifacts\folder\
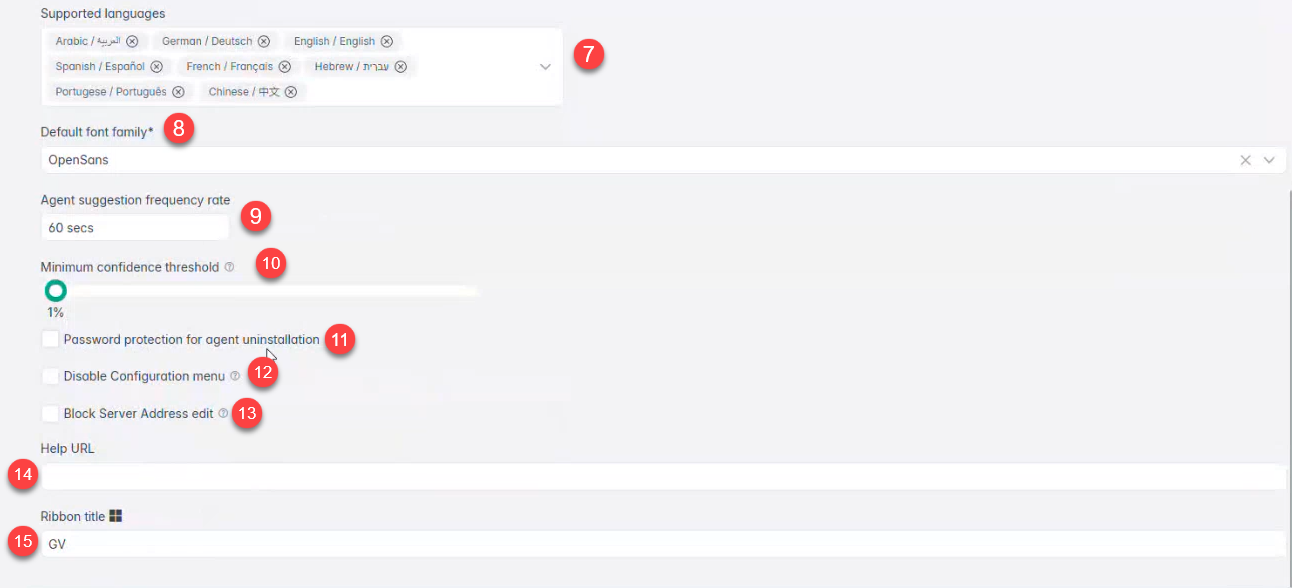
2 Auto-update: server URL or path: Server address where auto update artifact is hosted. By default this field should be left empty. Default: 'https://www.example.com', //. If value is not provided then the following value will be used: https://{cluster_address}/static-server/static/agent/stable/ 3 Auto-update: regex for agent packages to include: Regular expression which is executed to search for packages to apply. By default, the agent will use a regex pattern to look for artifacts that meet the same naming (\d+\.\d+\.\d+|\.zip)(e.g. AgentClassifier.4.0.5-Forcepoint-windows.msi will continue to look for Forcepoint-flavoured installers. An example format is as follows:(flavour|\d+\.\d+\.\d+|\.zip)4 Auto-update: check for updates frequency rate: How often should the agent look for new updates to apply. 5 Enable beta version update: This option will allow the agent to monitor for new beta releases, and install them if available. 6 Heartbeat frequency: This determines how often the agent will send a ping to the backend to report it’s alive. 7 Supported languages: On the administration side, select the supported languages from the dropdown menu.
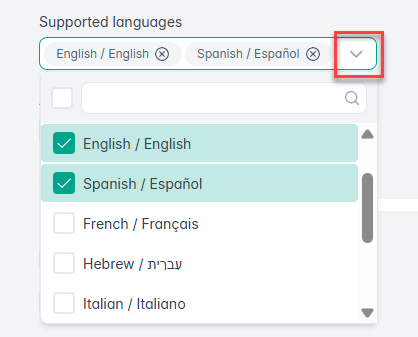
On the client side, languages set here will appear as options to select from the configuration section on the agent’s tray bar icon.
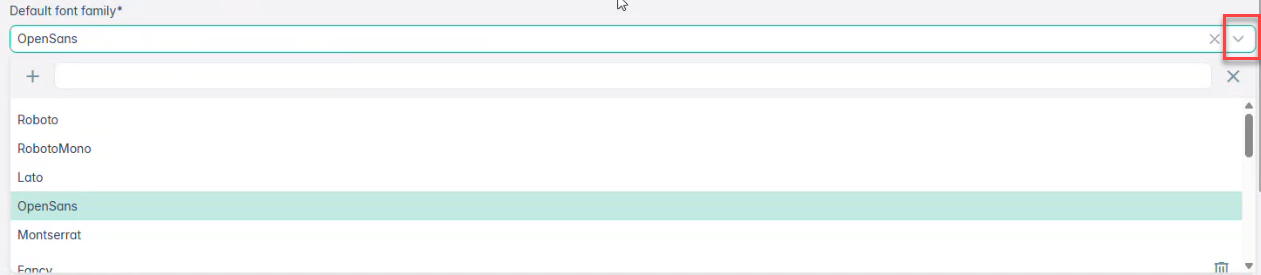
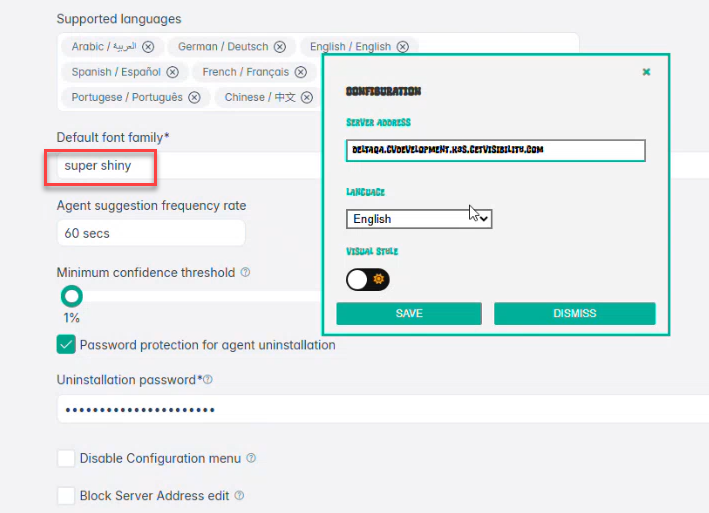
8 Default font family*: Set the font from default options provided in the dropdown as shown below,
To upload a custom font,
1 - Click the + icon on the Default font family section to start adding a custom font.
2 - In the Upload custom font dialog box, type the name of your custom font in the Custom Font Name field.
3 - Click the CHOOSE FONT FILE button to browse and upload your font file.Note: Supported font file format is: .ttf.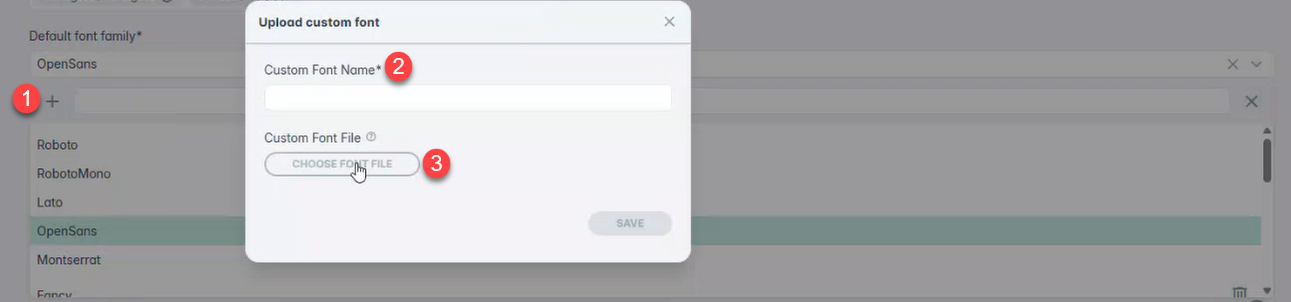
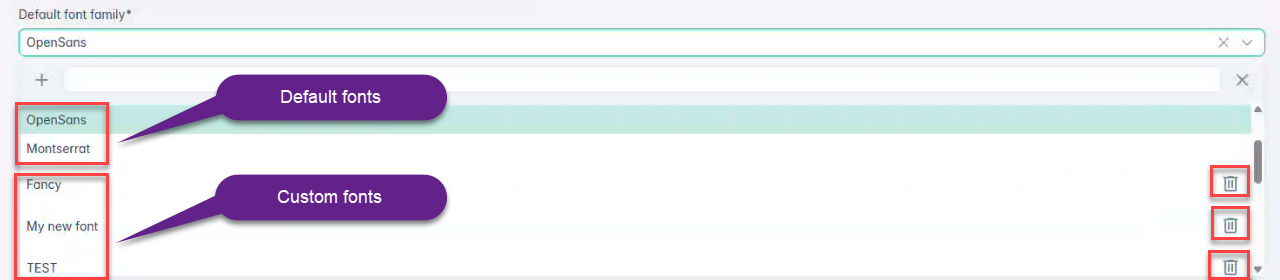
After a successful upload, the custom font will be listed in the dropdown.
Administrators can delete custom fonts they have added earlier but default fonts can not be deleted.
Upon selecting and submitting either the default font or a custom font, you will notice that the font has been updated across all dialog boxes, such as configuration dialogs, agent UI, suggestion panels, and any pop-up messages.

The font change also works for different languages, but you must ensure the font supports the language your organization uses. For example, if your company uses Arabic and the selected font does not support Arabic characters, it will not display correctly. So, always upload a font compatible with your organization’s languages.
Finally, this functionality works consistently across all supported platforms, including Windows and Mac.
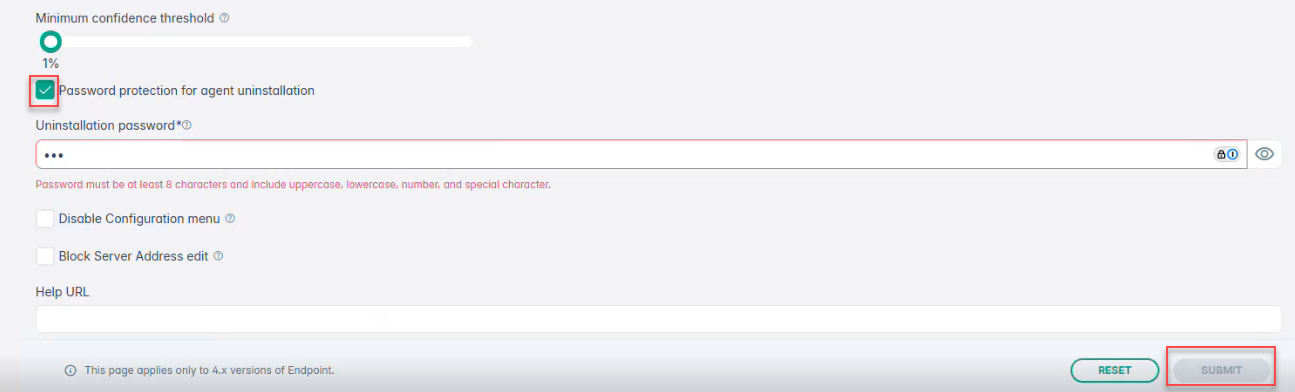
Note: You can also watch the accompanying video for additional details.9 Agent suggestion frequency rate: Determines how frequently the agent sends text to the backend for analysis and feedback. It is expressed in seconds, with valid values starting from 1. The default value is 15. Note that lower values may lead to performance issues, while very high values (e.g., 300) could result in no suggestions being received. 10 Minimum confidence threshold: ML suggestions always come with a confidence value. If the confidence value of the suggestion is higher than the threshold, it will be displayed. If the confidence value of the suggestion is lower than the threshold, no suggestion will be displayed. 11 Password protection for agent uninstallation: - Enable Password protection for agent uninstallation.Note: By default, Password protection for agent uninstallation is disabled.
- Enter the Uninstallation password.Note: Password must be at least 8 characters and include uppercase, lowercase, number, and special character.
- Click SUBMIT.
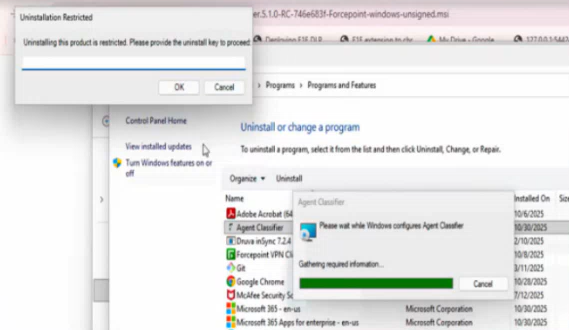
During agent uninstallation on the endpoint machine, enter the uninstall password provided by the administrator when prompted.
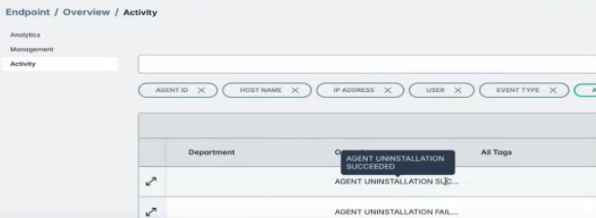
To verify that the agent has been successfully uninstalled or not, navigate to the page and check the Operations column.
 Note: You can also watch the accompanying video for additional details.
12 Disable configuration menu: If this option is checked, the 'configuration' menu will not be displayed when right-clicking on the agent's tray bar icon. 13 Block Server Address edit: If selected, the 'Server Address' field will be grayed out, rendering it non-editable. 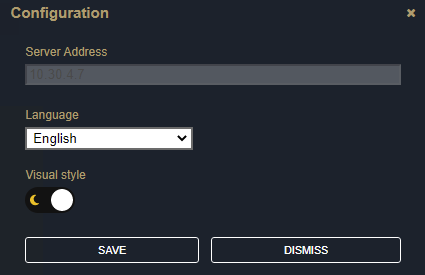
14 Help URL: A Question Mark will be displayed on Agent UI when URL is filled in this field. Clicking on the Question Mark will then navigate to the entered help URL. 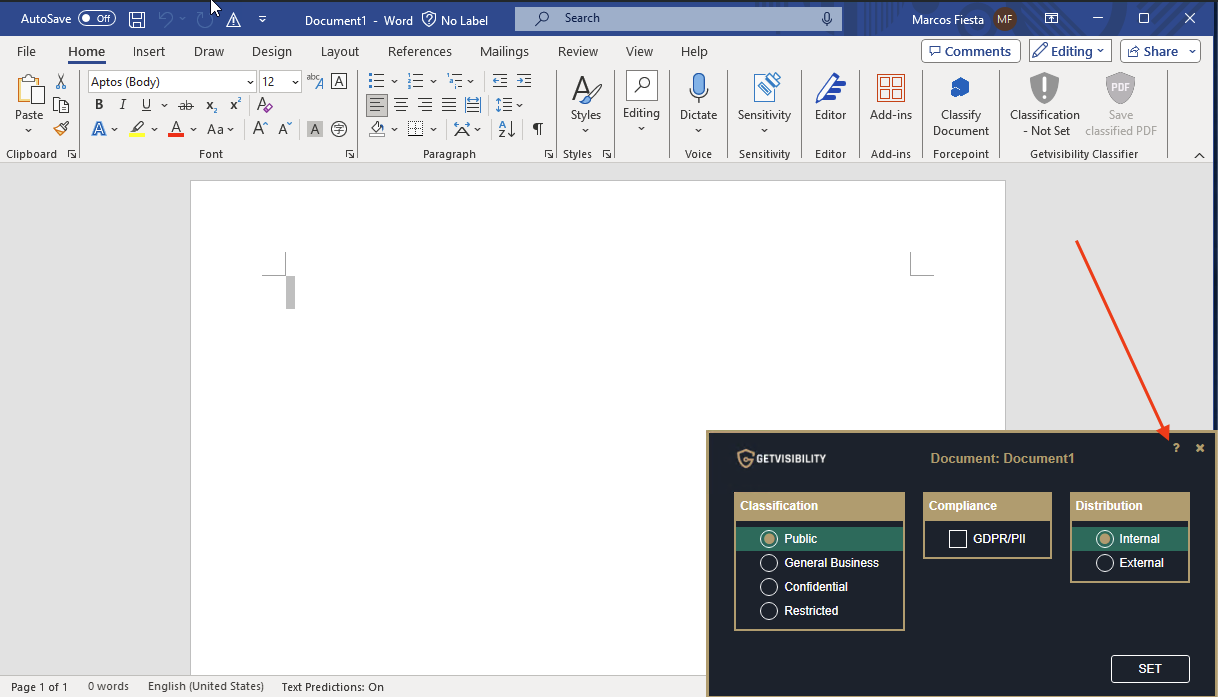
15 Ribbon title: User can set the custom ribbon title using this property. If the field is left empty, will be displayed default title Classification. 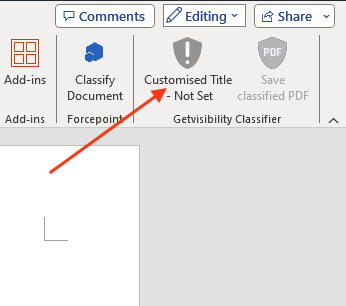
To download current configuration or import a new Agent configuration file navigate to Configuration Import section.