Deploying Forcepoint Email Security in Azure with Forcepoint Security Manager on-premises
- Create a site-to-site VPN. See Microsoft documentation for more information.
- Log on to the Azure Marketplace, or use a direct link:
- Forcepoint Email Security v8.5.7 in Azure
- Forcepoint Email Security v8.5.5 in Azure
- Forcepoint Email Security v8.5.4 in Azure
- If you are installing in the Azure Government cloud:
- Log into Azure Government, then click Create a resource.
- In the Search bar, search for and select Forcepoint Email Security.
- Click Create. All other steps are the same as in the Azure portal.
- In the Search bar, type Forcepoint, then select the version you want to install (version 8.5.4 or later).
- To create a new Forcepoint Email Security solution, click Get it now.
- Review the terms of use and privacy policy, then click Continue to proceed to the Azure portal.
- From the Azure portal, click Create.
The Basics tab displays for configuring the email appliance settings.
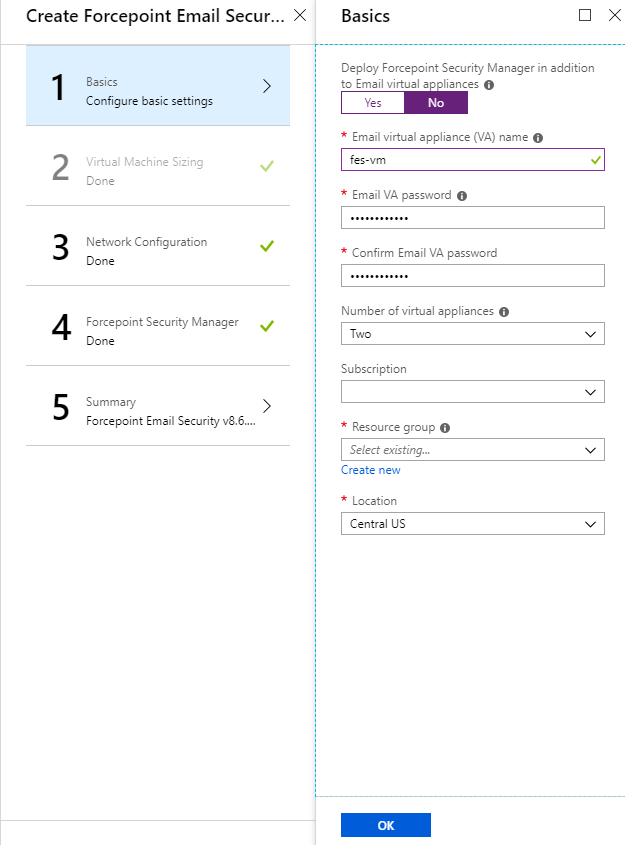
- From Deploy Forcepoint Security Manager in addition to Email virtual appliances, click No.
Options for Forcepoint Security Manager in Azure are removed from the tab.
- In the text field Email virtual appliance (VA) name, enter a name for the Forcepoint Email Security virtual appliance (VA).
The name must be between 3 and 30 characters long and contain only numbers, letters, and hyphens.
- In the text fields Email VA password and Confirm Email VA password, enter and confirm the password for
connecting to the host.
The username is always “admin” on first login to Forcepoint Email Security. Additional accounts can be added later. The password must be a minimum of 12 characters and contain at least one number, one lowercase letter, one uppercase letter, and one special character.
- From the pull-down menu Number of virtual appliances, select the number of VAs to use; between 1 and 8.
Forcepoint recommends using at least two VAs to ensure high availability. If only one VA is selected at this time, it is not possible to add additional VAs after deployment is complete. If two or more VAs are selected, additional VAs can be added at any point. See Add virtual machines to a Forcepoint Email Security in Azure deployment.
Load balancers are deployed by default when two or more VAs are used.
- From the pull-down menu Subscription, select your subscription.
- From Resource group, click Create new and enter a name for the new resource group.
A resource group is a container that holds related resources for an application. It will hold the Forcepoint Email Security VA. You must create a new resource group; using existing resource groups is not currently supported.
- From the pull-down menu Location, select the location for the VA.
- Click OK.
The settings are saved and the Virtual Machine Sizing tab displays.
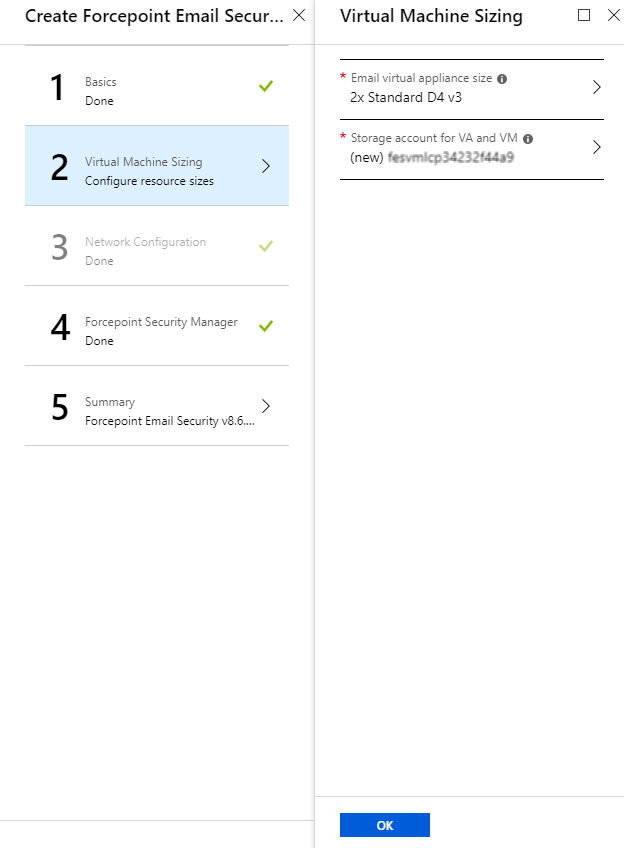
- From Email virtual appliance size, select the size of the VA you will need based on anticipated email volume, then click
Select.
Use the Search fields if you need to find a different size.
- From Storage account for VA, to use an existing storage account, click Use existing and select the storage
account and disk type for the VA.To create a new storage account,
- Click Create new. The Create storage account tab displays.
- On the Create storage account tab, configure the Name, Account kind, Performance, and Replication settings and click OK. The new storage account is added.
- From the Virtual Machine Sizing tab, click OK.
The settings are saved and the Network Configuration tab displays.
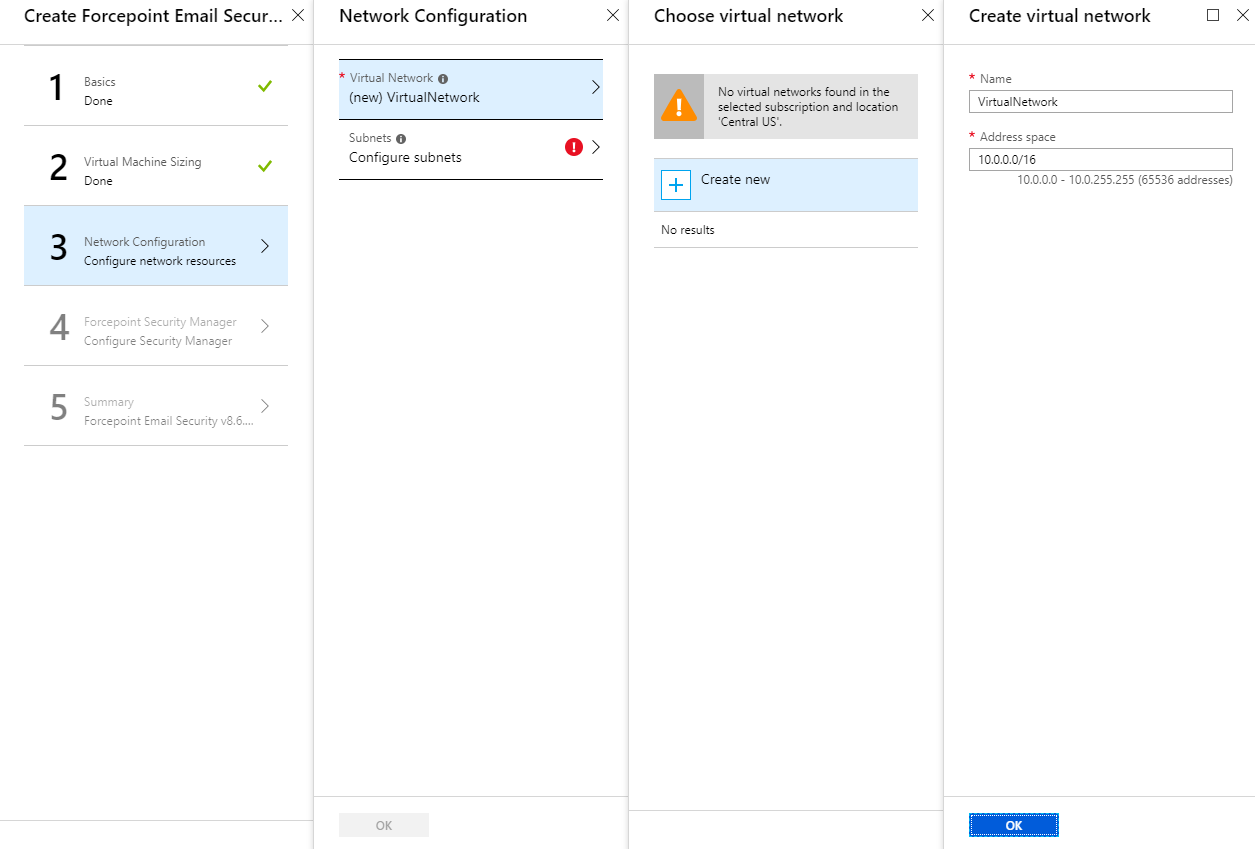
- From Virtual Network, select your existing virtual network with site-to-site connectivity to the on-premises Forcepoint Security
Manager and SQL Server, or create a new virtual network.To create a new virtual network,
- Click Create new. The Create virtual network tab displays.
- On the Create virtual network tab, configure the Name and Address space.
Following successful deployment, configure your new virtual network to connect with your on-premises components.
- From Subnets, select your existing subnet with site-to-site connectivity to the on-premises resources, or create a new subnet.
The minimum supported size is /28 for the virtual network and subnet. See Requirements.
Following successful deployment, configure your new subnet to connect with your on-premises components.
- From the Network Configuration tab, click OK.
The settings are saved and the Forcepoint Security Manager tab displays.
- This tab is blank because the contents are only applicable when deploying Forcepoint Security Manager in Azure. Click OK.
The Summary tab displays.
- From the Summary tab, review a summary of the Forcepoint Email Security solution you are building, then click
OK.
To change any configured settings, click one of the completed tabs. You will return to the Summary tab again after completing configuration.
Final validation is performed and the Buy tab displays.
- On the Buy tab, review the Forcepoint Terms of Use, EULA, and Privacy Policy.
- To create the Forcepoint Email Security solution in the Azure cloud infrastructure, click Create.
Forcepoint Email Security is a bring-your-own license VA, so there is no additional Azure Marketplace charge. The system reports that it is creating the Forcepoint Email Security solution in the configured network. This process may take a few minutes. The following image displays the resource group for a typical Forcepoint Email Security in Azure deployment.
