Configuring mail flow in Office 365
Following deployment, it is necessary to configure Office 365 to transfer email to Forcepoint Email Security in Azure.
- Log on to Microsoft 365 Admin Center.
- From the left navigation pane, select .
- From the left navigation pane, select Mail Flow.
- Create a connector that routes mail from Office 365 to Forcepoint Email Security in Azure:
- From the top of the page, click Connectors, and then click the plus sign + to add a new connector.
- In the field From, select Office 365; in the field To, select Your organization’s email server.
- Click Next.
- Enter a name and description for the connector. (This is a new name being assigned to the Forcepoint Email Security appliance.)
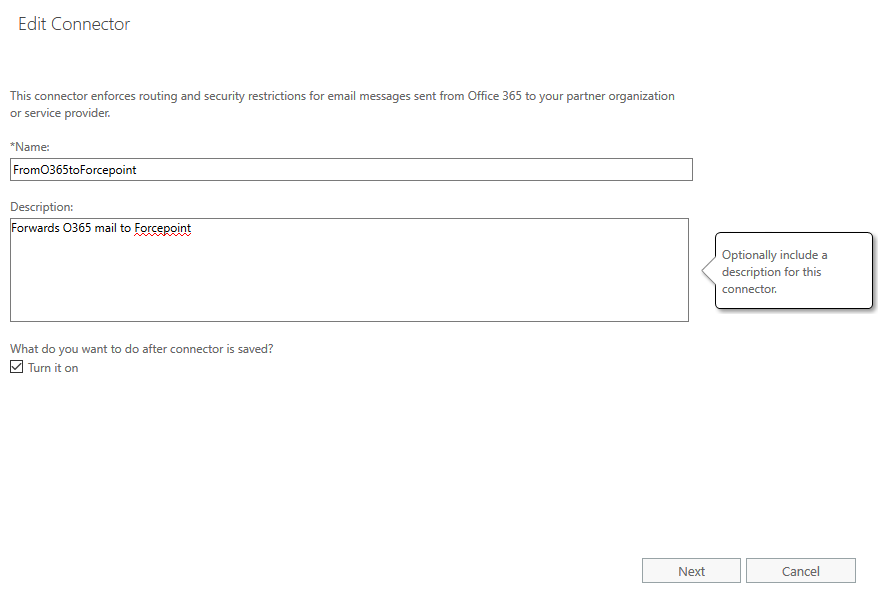
- Click Next.
- From When do you want to use this connector, select Only when I have a transport rule set up that redirects messages to this
connector.
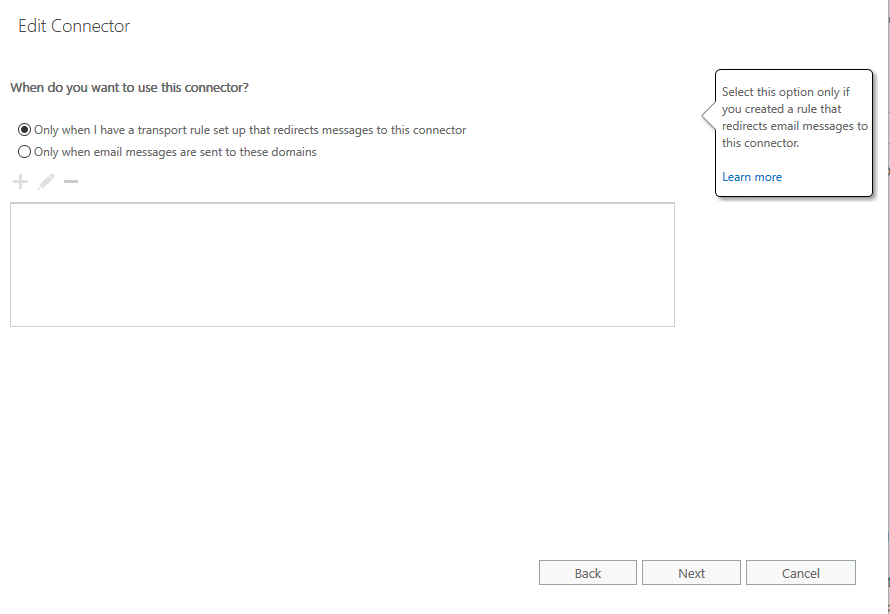
- Click Next.
- From How do you want to route email messages, select Route email through these smart hosts.
- Click the plus sign + and enter the public IP address for the Forcepoint Email Security VA in Azure appended with your domain name.
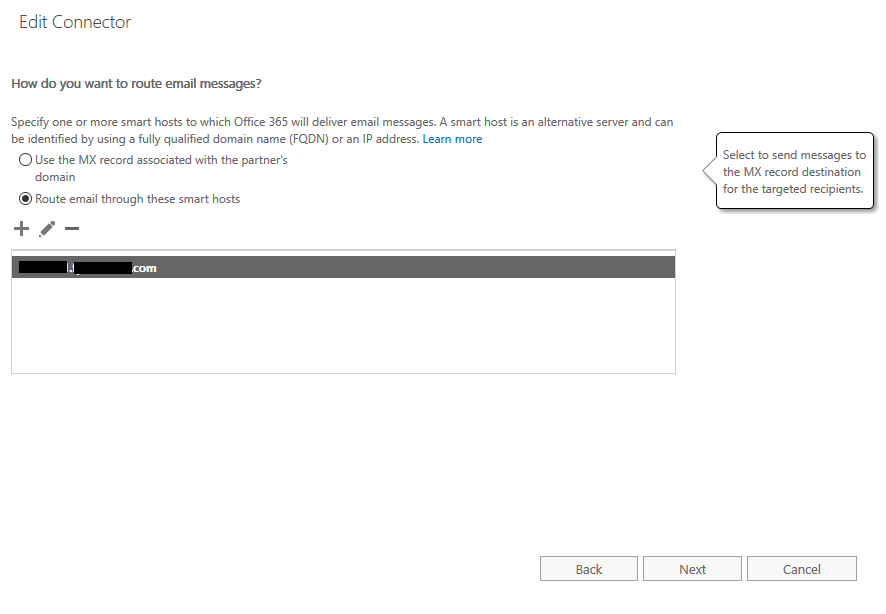
- Click Next.
- From How should Office 365 connect to your email server, select Always use TLS to secure the connection.
- Select Any digital certificate, including self-signed certificates.
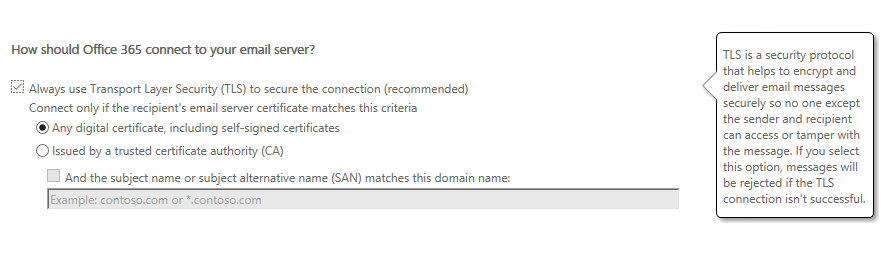
- Click Next.
A summary screen displays.
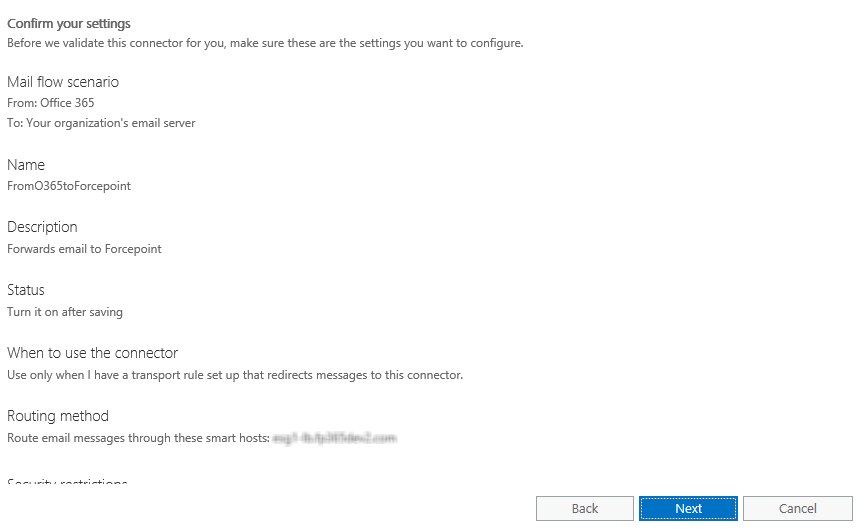
- Confirm that your settings are correct, then click Next.
- From Validate this connector, click the plus sign + and then enter a test email address.
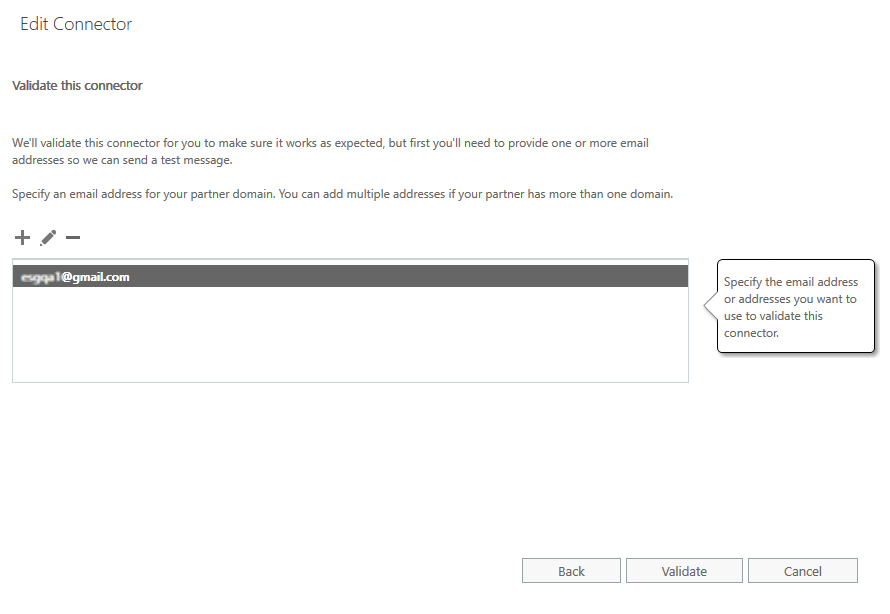
- Click Validate.
The system validates the new connector and sends a test email. A success message displays when validation is complete.
The validation may return a Failed result. If this happens, a warning message displays with a prompt to save the connection. Despite the failed validation, the connection can be saved and used.

- Click Close. The validation window closes.
- Save the connector; click Save. The connector is saved.
- Create a second connector that routes mail from Forcepoint Email Security in Azure to Office 365.
- From the top of the page, click Connectors, and then click the plus sign + to add a new connector.
- This time, in the field From, select Your organization’s email server and in the field To, select Office 365.
- Click Next.
- Enter a name and description for the connector.
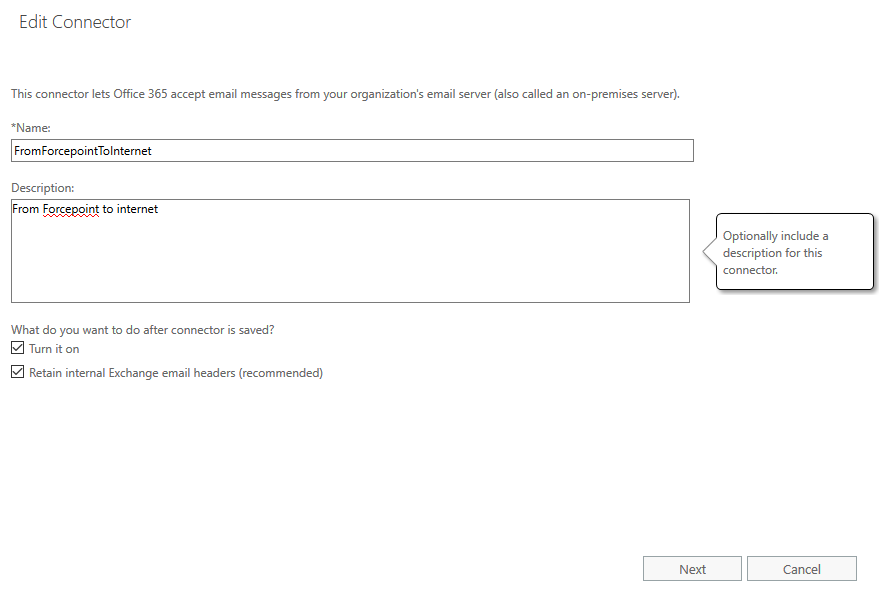
- Click Next.
- From How should Office 365 identify email from your email server, select one of two options.
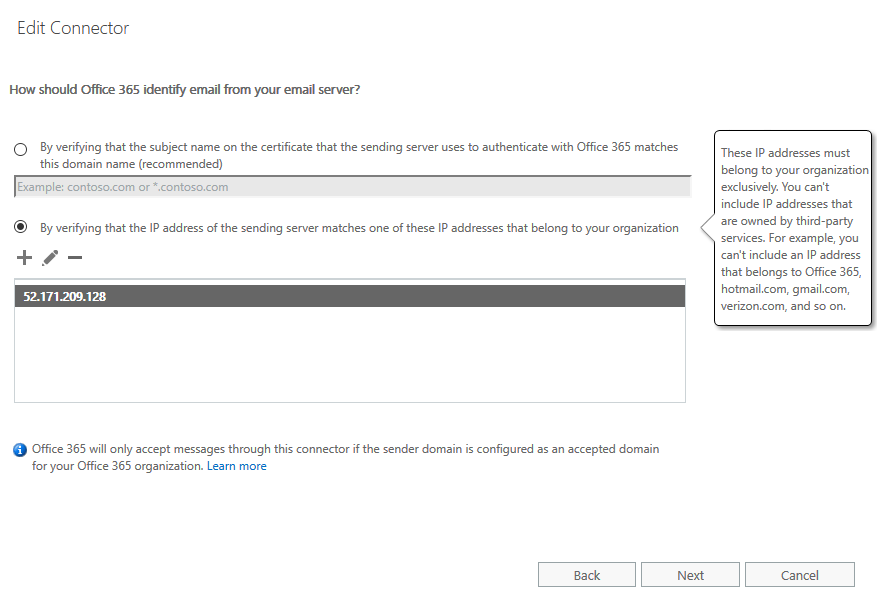
- For best practice, select By verifying that the IP address of the sending server..., and enter all public IP addresses for the Forcepoint Email Security VA in Azure. It is recommended to use a static public IP address. If you use a dynamic public IP address, the public IP address will change if you reboot your machine.
- Alternatively, select By verifying that the subject name on the certificate... and enter the CN of a signed certificate purchased through a vendor like Godaddy or Digicert. For more information on setting up certificate validation, refer to Configuring Exchange Online to use certificate validation in the Forcepoint Knowledge Base.
- Click Next. A summary screen displays.
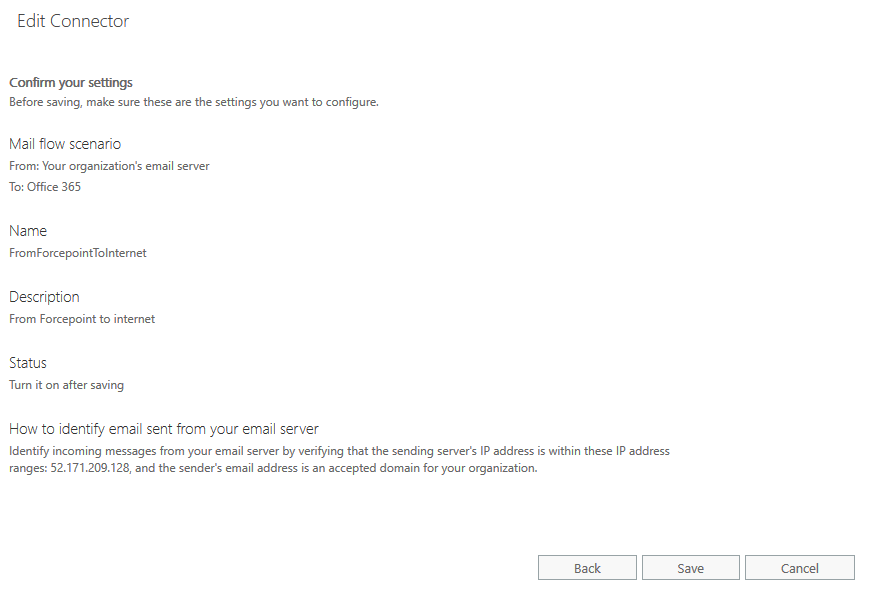
- Confirm that your settings are correct, then click Save. The connector is saved.
- Create rules that forward traffic to Forcepoint Email Security in Azure.
- From the top of the page, select Rules, then click the plus sign + to create a new rule.
- Assign a name to the rule.
- Click More options.
To audit outbound-only email messages:
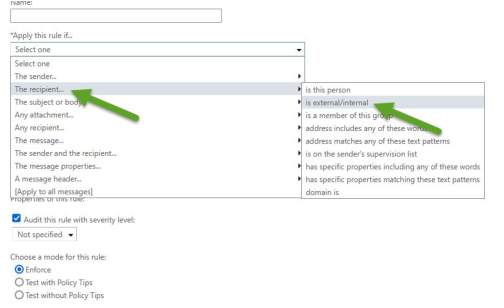
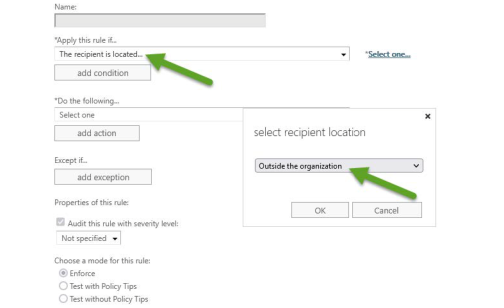
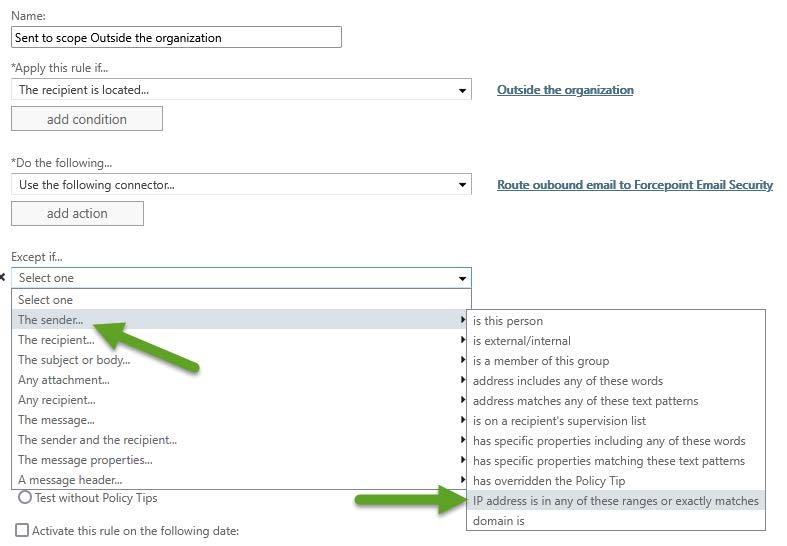
- Select the condition Apply this rule if the recipient is outside the organization, as shown in the following images.
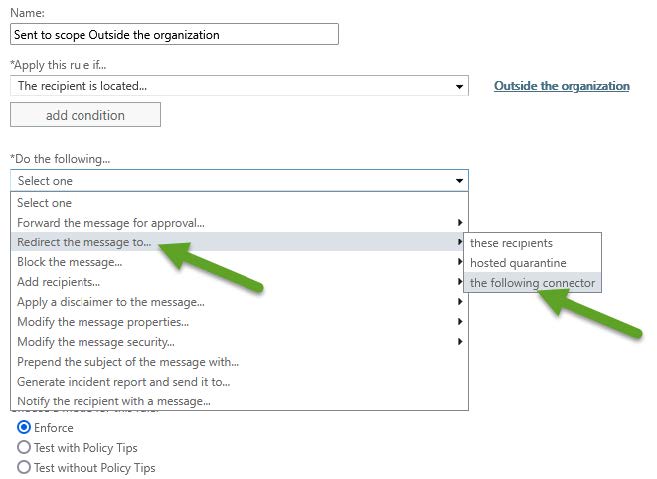
- Select the action Redirect to... the following connector.
- Add the exception Except if the sender IP address is in any of these ranges or exactly matches.
It is recommended to select the option Stop processing more rules. If this option is not selected and there are additional rules, email messages are evaluated against the additional rules, then redirected to the connector. If the option is selected and there are additional rules, email messages are not evaluated against the additional rules, but simply returned to the connector.
Usually, Forcepoint Email Security appliances relay email messages back through Office 365, so Exchange Online repeatedly processes the same email message and applies rules, but in this case, email messages are not sent through the email appliance.
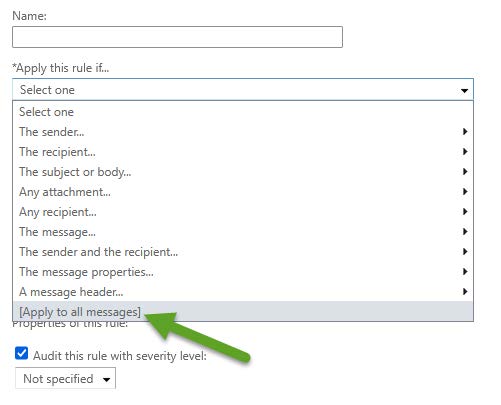
To audit both internal and outbound email messages, the process is the same, except for the condition:
- Select the condition Apply this rule [Apply to all messages].
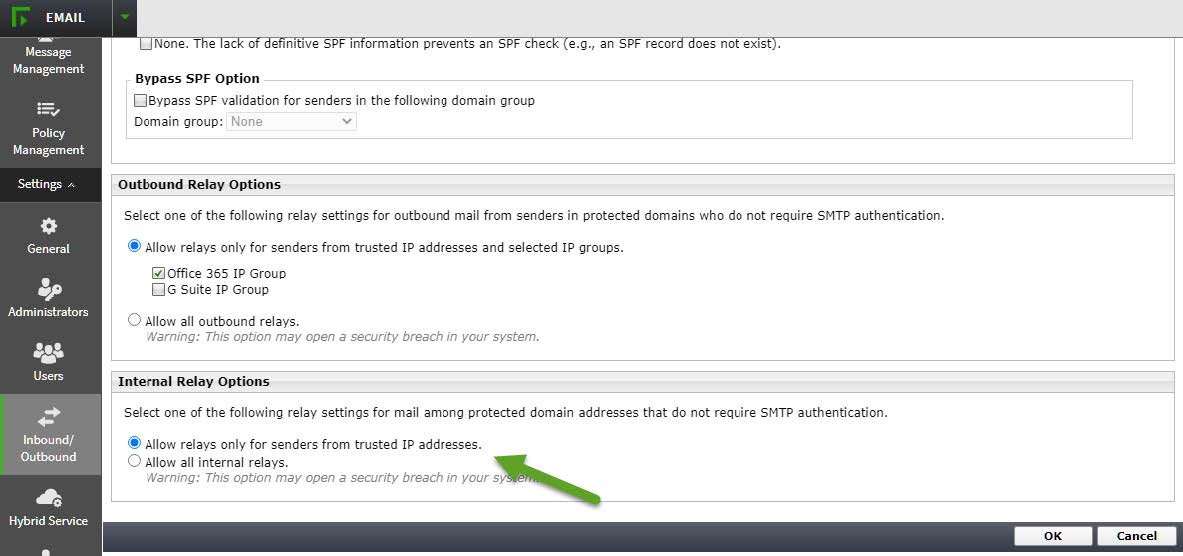
- If you select [Apply to all messages], go to Forcepoint Security Manager and configure your email appliance to accept relays on internal
email messages, by adding the IP ranges from Exchange Online to the Trusted IP group. If this step is not done, internal email messages will not be accepted by the
appliance. See Adding an IP address group in
Forcepoint Email Security Administrator Help for more information.
- Save the rule; click Save. The rule is saved.
- Make sure none of the public static IPs used by Forcepoint Email Security in Azure is listed in SpamHaus and thus blocked by Office 365, likely in the Policy Block List (PBL).
- Go to http://www.spamhaus.org/lookup.lasso and enter each IP.
- If any is listed, follow the instructions to remove it.
For more information, read https://www.spamhaus.org/faq/