Profiles
Profiles are a set of attributes that define the endpoint agent behavior. The Default profile can be configured by each tenant to support its specific needs. Profiles can also be used to set different behavior for different segments in the same tenant.
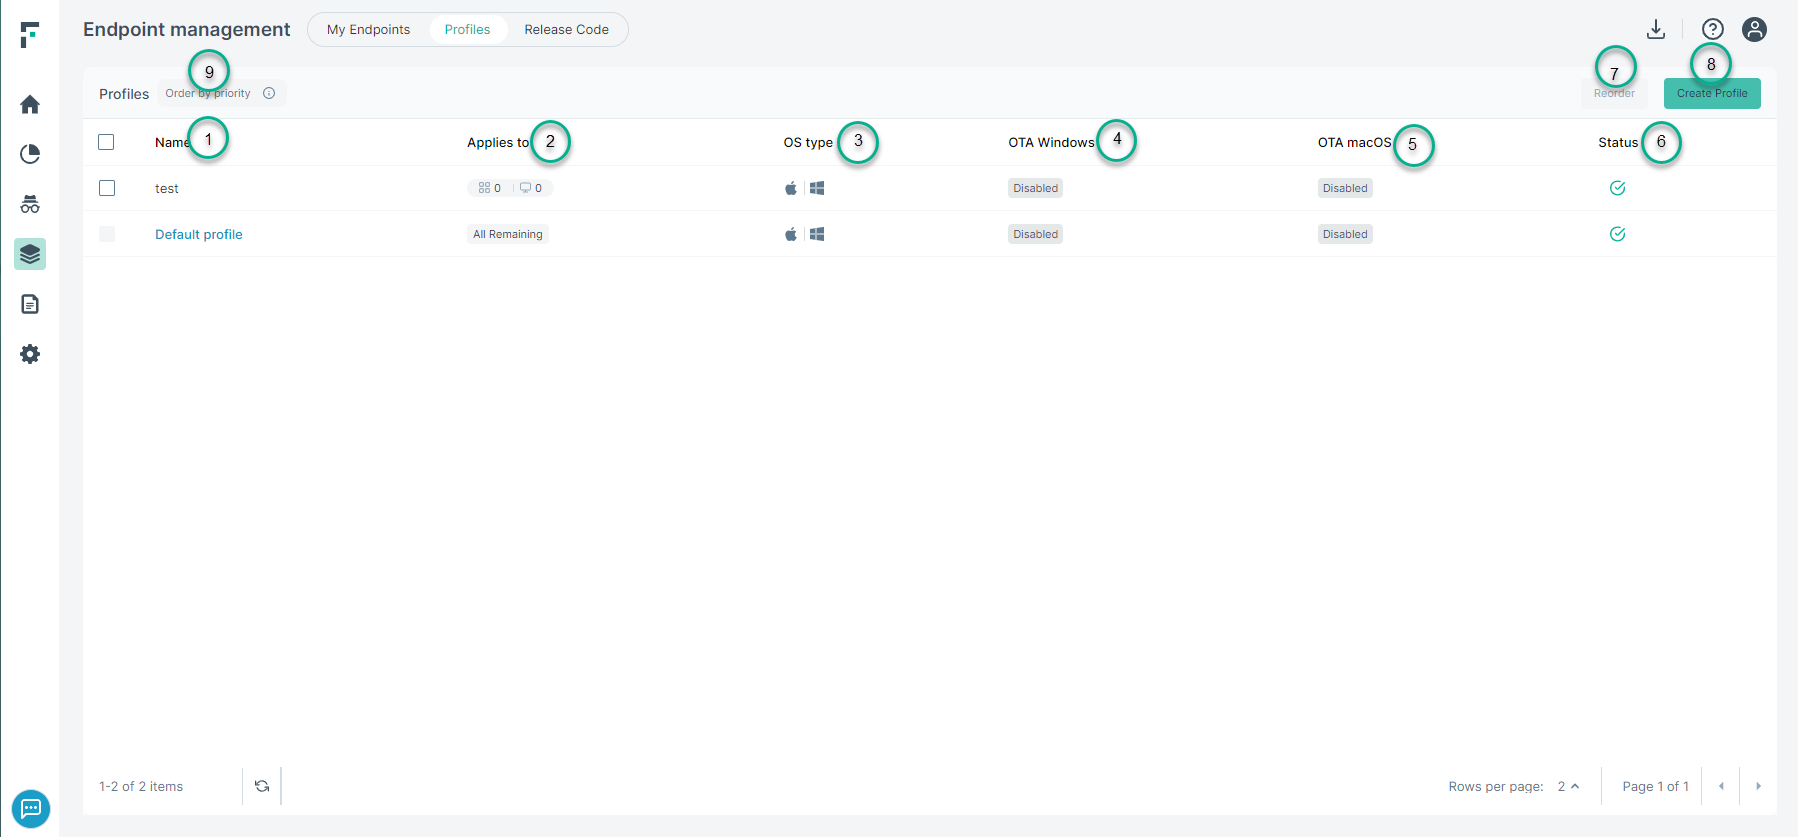
The Profile tab on the Endpoint management dashboard provides options for defining profiles for each tenant to support specific needs.

- 1
- Name: Each profile entry is stored using the specified name.
- 2
- Applies to: Specifies the endpoint or the organization unit to which the profile applies.
- 3
- OS type: Specifies whether the operating system running on the endpoint machine is Windows or macOS.
- 4
- OTA Windows: Displays the version of the agent running on Windows endpoint machine.
- 5
- OTA macOS: Displays the version of the agent running on macOS endpoint machine.
- 6
- Status: Indicates whether the profile is enabled or disabled.
- 7
- Reorder: For a tenant there can be more than one profile created. The order of the profile sets its priority. Click the Reorder and then drag
the profiles up or down and then click Save.
- For example, say in a tenant following profiles have been created:
- A profile for the finance organization unit (enables them to see financial data that others are not allowed to).
- A profile for the IT department (OU) that enables them to see network related data.
- A profile for Mac users.
- A default profile (used for all users/endpoints that do not match the above criteria).
- For example, say in a tenant following profiles have been created:
- 8
- Create Profile: Administrators can create new profiles using the Create profile widget.
- 9
- Order by priority: Users can move the profiles up or down the list. Based on position in the list, the applicable profiles are applied. If no match is found, then Default profile is applied.