Editing user details
Edit the details for a user or an administrator on the Users page.
Steps
-
From the left Navigation Pane, click Users.
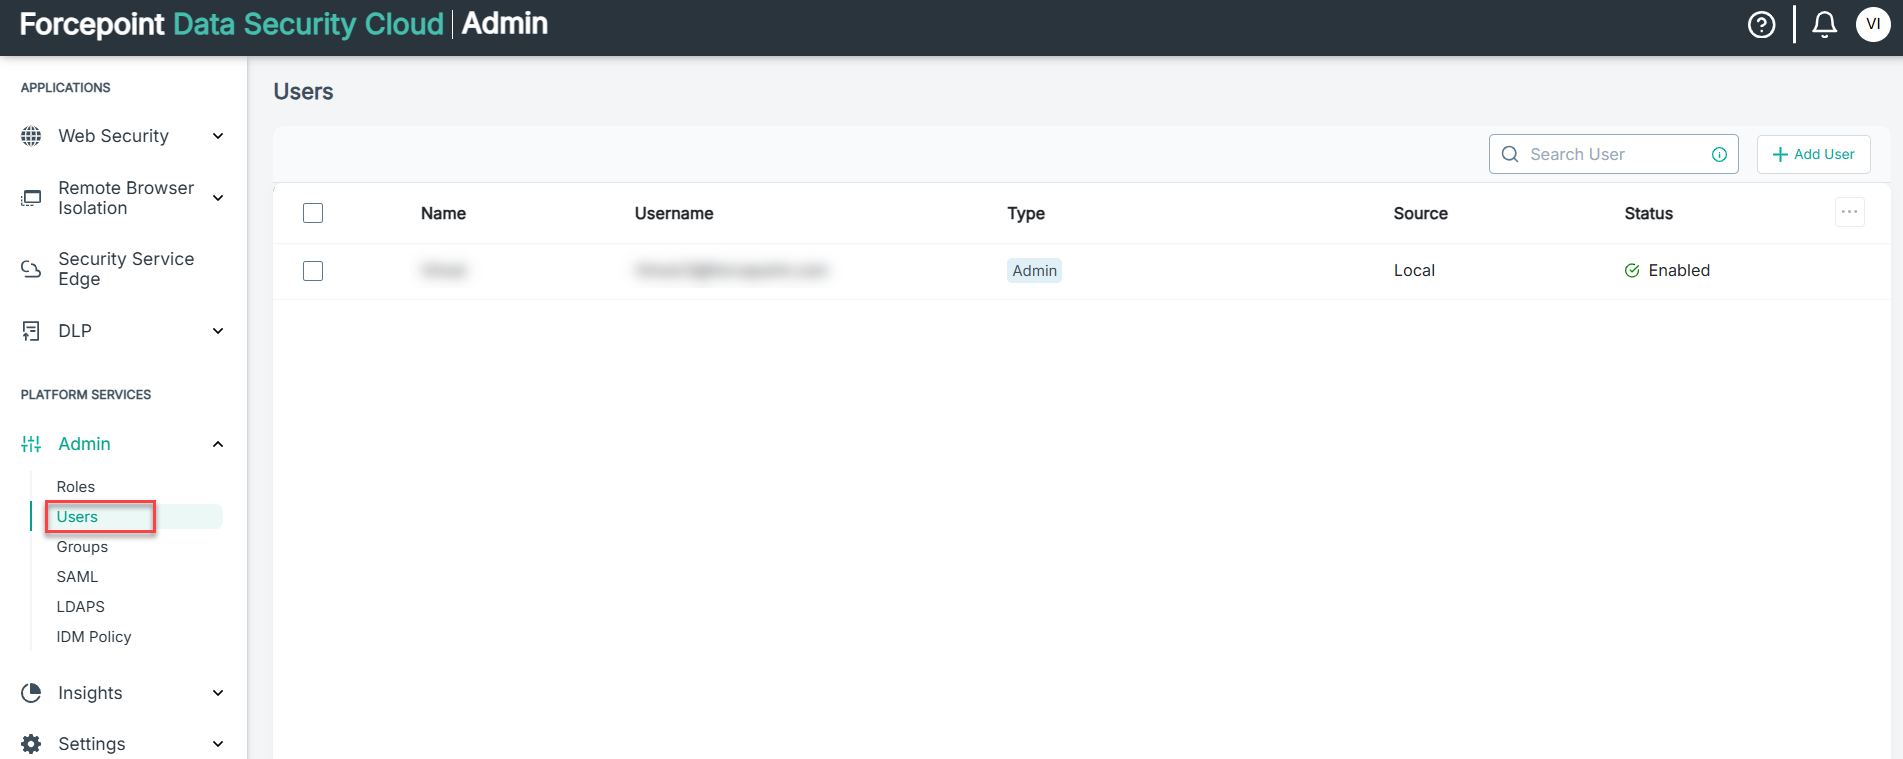
-
Click the user account that you want to modify from the displayed list of users. Under the Personal Information section, change the following details:
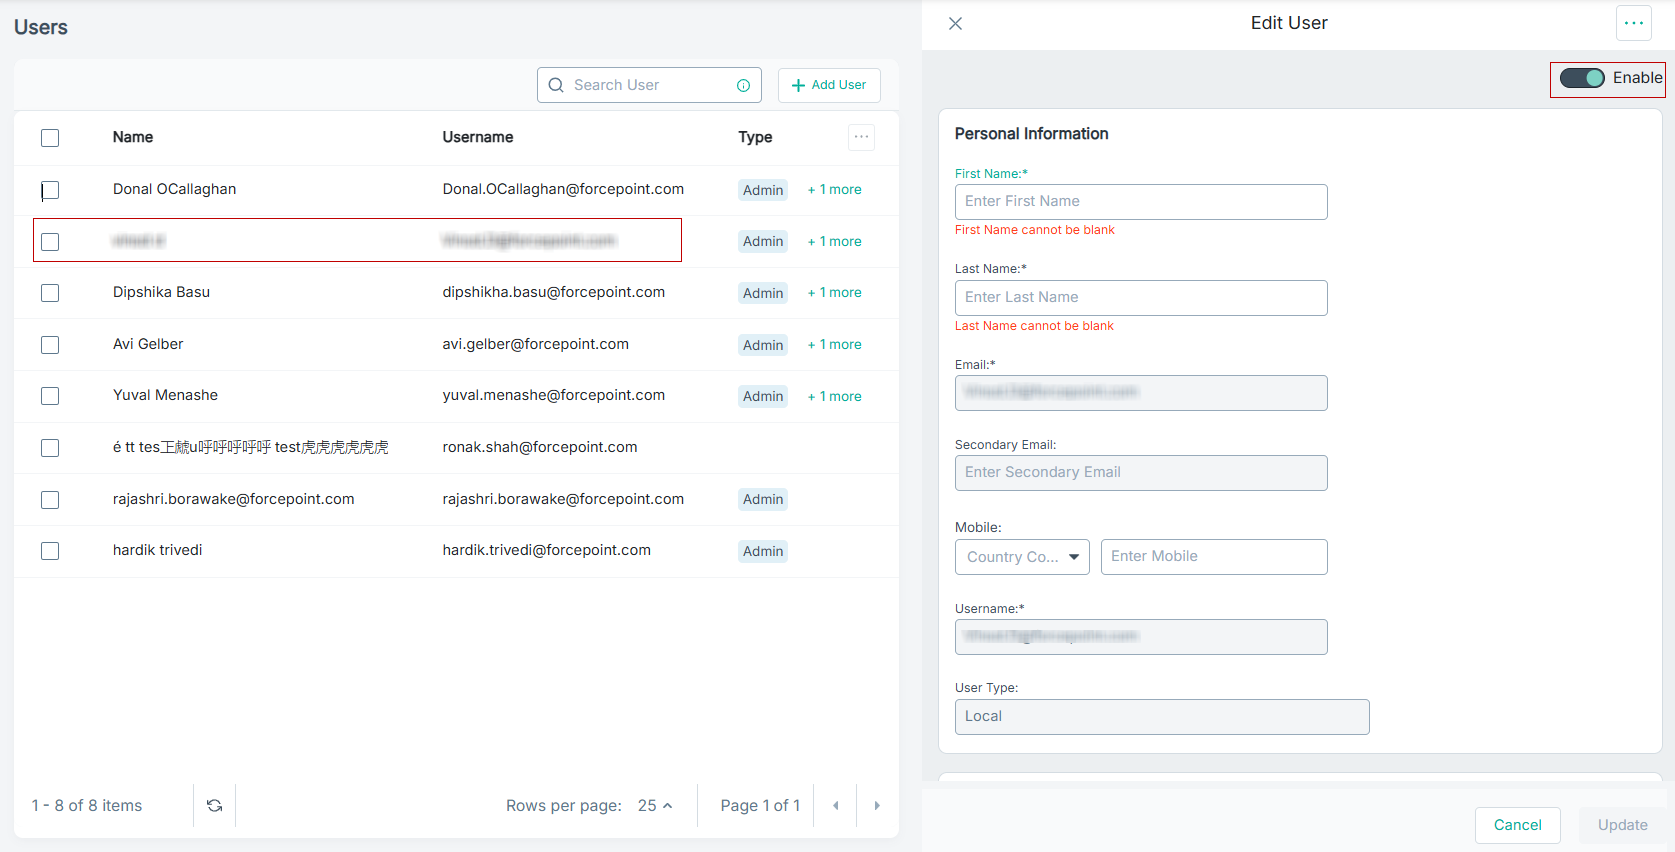
- First Name and Last Name (required): The name shown for the user within Forcepoint Data Security Cloud.
- Mobile: Select the specific country code and enter the mobile number.
- Enable User (required): Select this toggle to enable the user. If you do not enable the user, then they cannot sign in using these credentials.
-
Under the Additional Information section, change the following details if required:
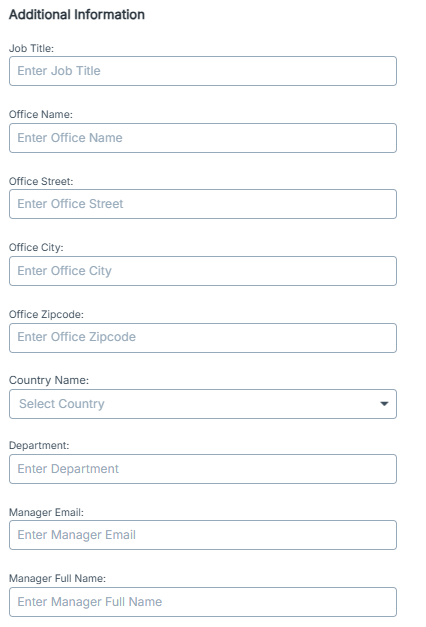
- Job Title: Enter user's designation in your organization.
- Office Name: Enter door number of the building to which user is mapped.
- Office Street: Enter street name of your organization to which user is mapped.
- Office City: Enter the city of your organization to which user is mapped.
- Office Zipcode: Enter the postal code of your organization to which user is mapped.
- Country Name: Select the country of your organization to which user is mapped.
- Department: Enter user's department in your organization.
- Manager Email: Enter user's reporting manager email.
- Manager Full Name: Enter user's reporting manager full name.
-
Under the Groups section, add user to a group.
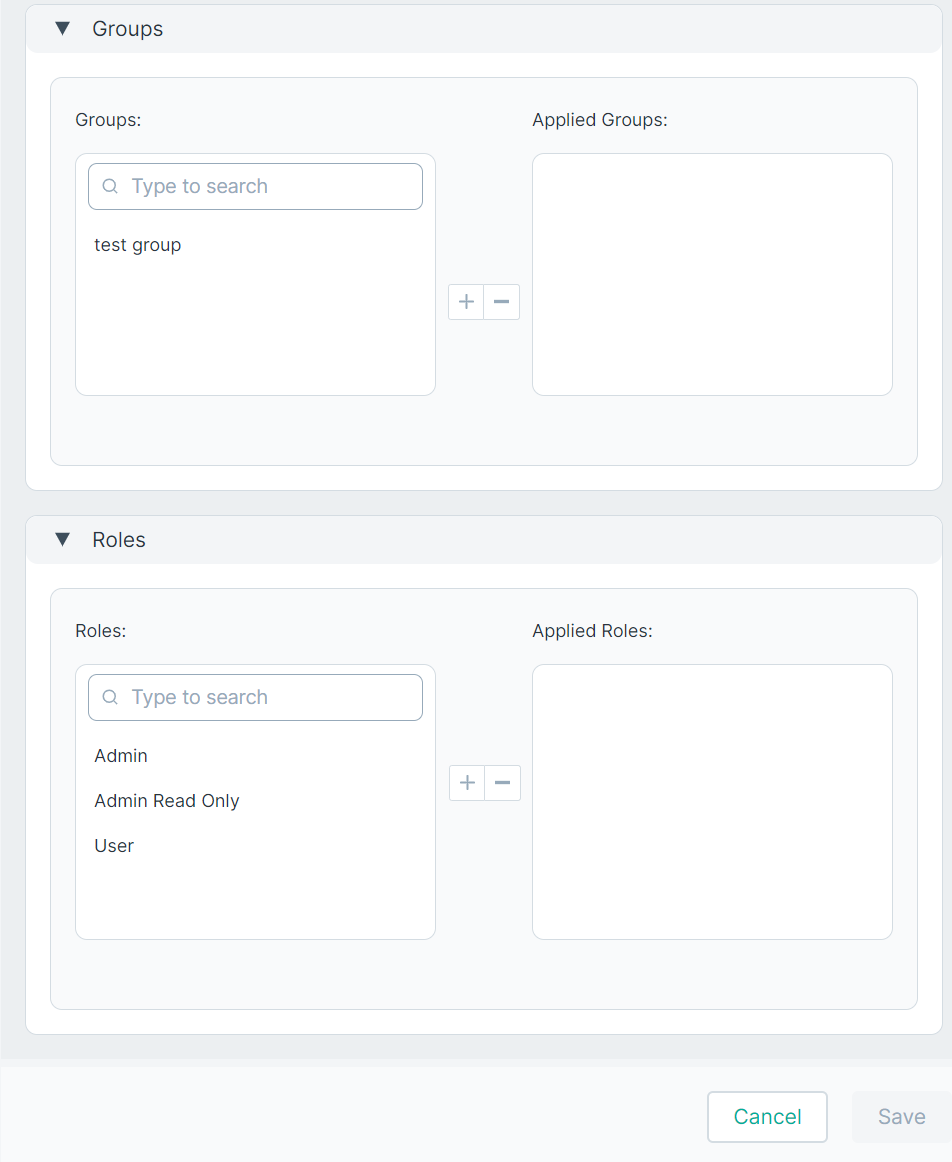
- To add a new user group, click the group name under Groups, then click + icon to add them to the Applied Groups field.
- To remove a user group, click the group under Applied User Groups, then click - to remove them from the Applied Groups field.
Note: Removing a group also removes any role that the user inherited from that group. Roles inherited from a group are marked with a lock icon in the Roles section and cannot be removed directly from there; click the information icon next to an inherited role to see which group it is inherited from.