Creating a new user

Add new users or administrators through the Users page.

Steps

  1. From the left Navigation Pane, click Users.
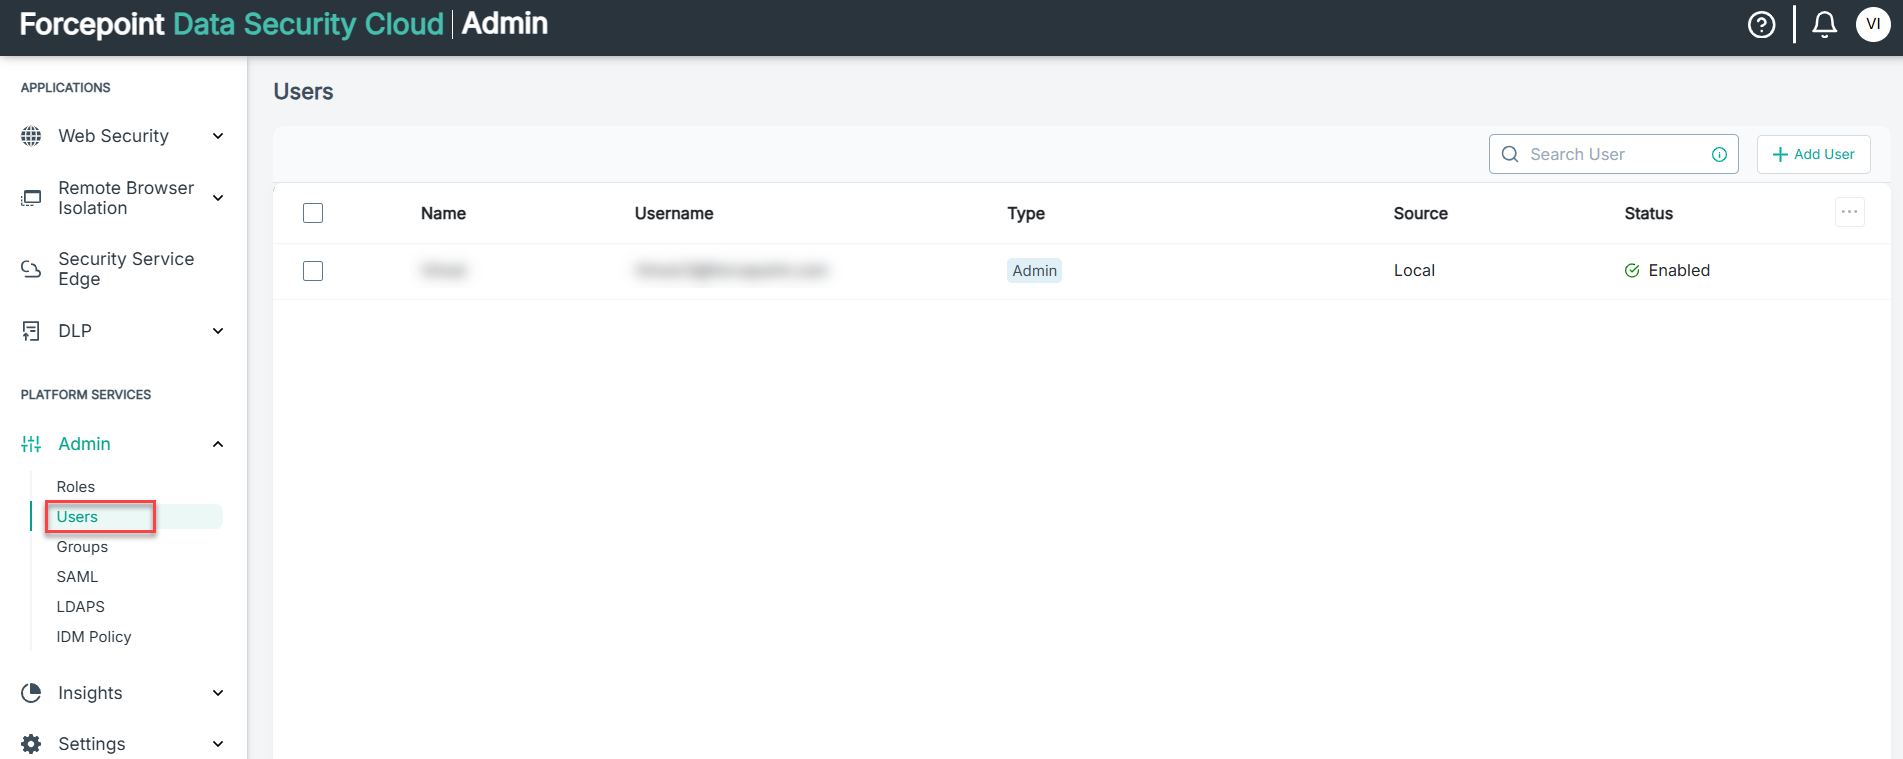

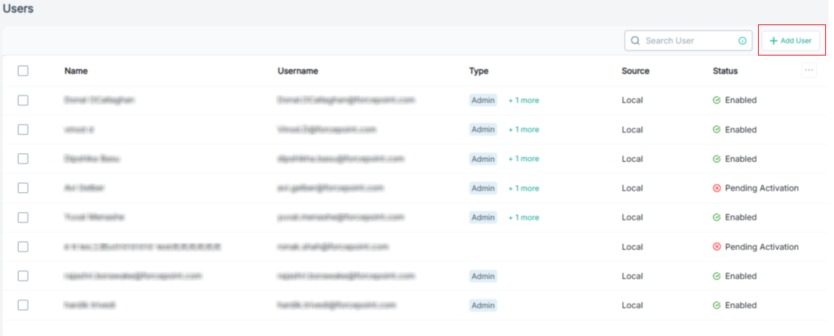
  2. To add a new user locally, click +Add User.
  3. Select the Add a User Manually option from the How do you want to add users to Forcepoint? section to create a users manually by entering required details.
    Available options are:
    • Invite Users - To create multiple users by sending an invitation email with a link.
    • Add a User Manually (default) - To create a user by manually entering all the required details for the user.
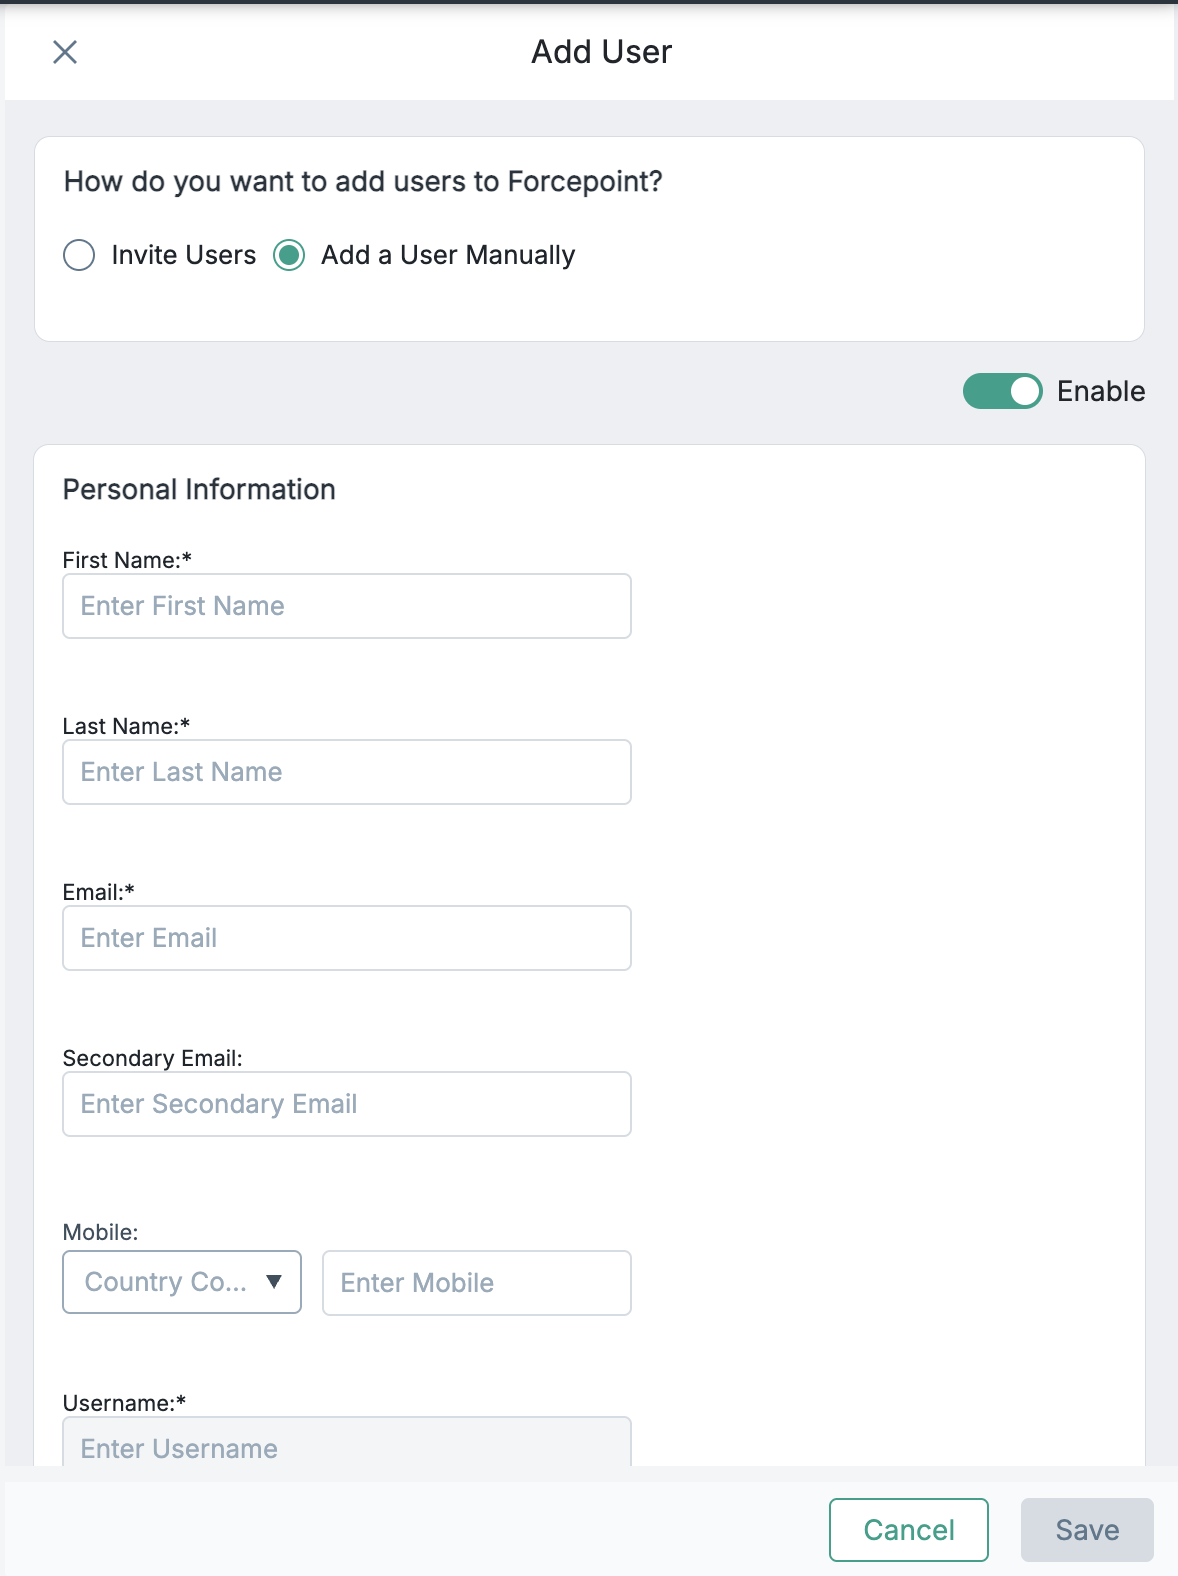

  4. Under the Personal Information section, enter the following details:
    • First Name and Last Name (required): The name shown for the user within Forcepoint Data Security Cloud.
    • Email (required): The email address of the user. The user will use this user name to sign in to Forcepoint Data Security Cloud.
    • Secondary Email: The secondary email address of the user.
    • Mobile: Select the specific country code and enter the mobile number.
    • Username (required): Auto-populates the Email address from the Email field. The user will use this user name to sign in to Forcepoint Data Security Cloud.
    • Password (required): The password used to sign in to Forcepoint Data Security Cloud. The password must contain the following:
      • Minimum 8 characters and maximum 20 characters
      • At least one upper and one lower case letter
      • At least one digit
      • At least one special character from the following set. ! @ # $ % & ? = [ ] < > { }
      Note: Enabling the Auto Generate Password toggle when creating a new local user triggers an automatic mail to the user with a generated password. When this toggle is turned off, the admin is required to manually notify the user.
    • Confirm Password (required): Enter the password a second time to verify that you entered the correct password.
    • Enable User (required): Select this toggle to enable the user. If you do not enable the user, then they cannot sign in using these credentials.
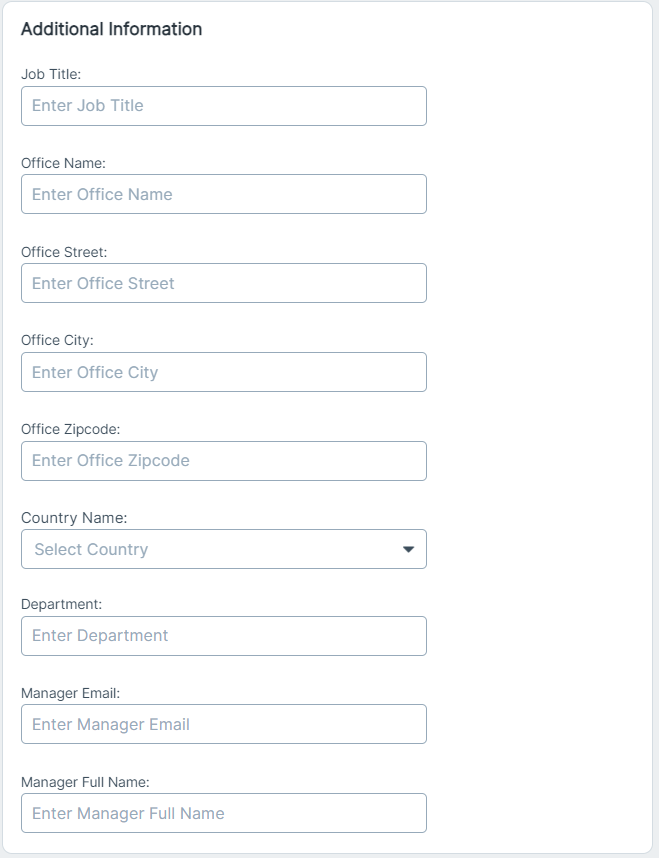
  5. Under the Additional Information section, enter the following details:


    • Job Title: Enter user's designation in your organization.
    • Office Name: Enter door number of the building to which user is mapped.
    • Office Street: Enter street name of your organization to which user is mapped.
    • Office City: Enter the city of your organization to which user is mapped.
    • Office Zipcode: Enter the postal code of your organization to which user is mapped.
    • Country Name: Select the country of your organization to which user is mapped.
    • Department: Enter user's department in your organization.
    • Manager Email: Enter user's reporting manager email.
    • Manager Full Name: Enter user's reporting manager full name.
  6. Under the Groups section, add user to a group.
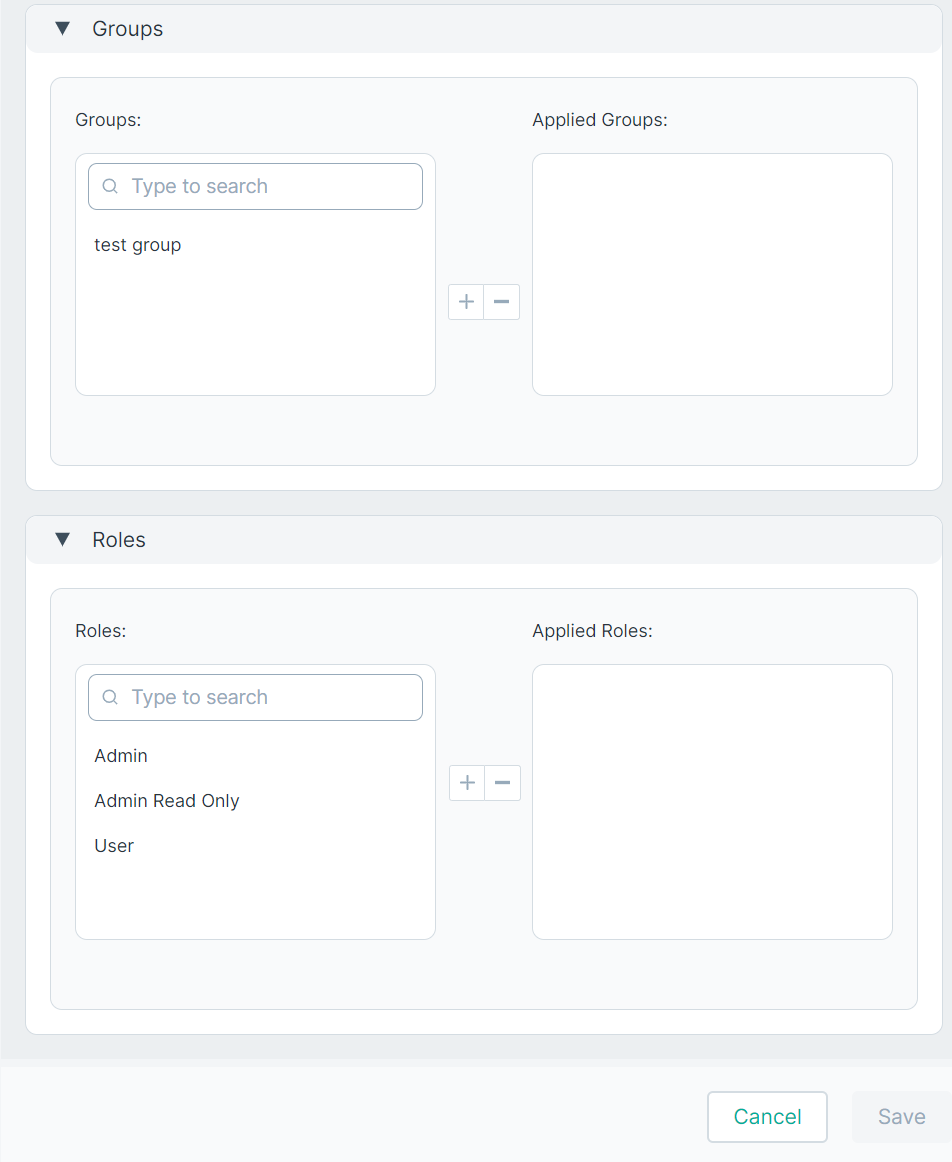

    1. To add a new user group, click the group name under Groups, then click + icon to add them to the Applied Groups field.
    2. To remove a user group, click the group under Applied User Groups, then click - to remove them from the Applied Groups field.
    Note: Removing a group also removes any role that the user inherited from that group. Roles inherited from a group are marked with a lock icon in the Roles section and cannot be removed directly from there; click the information icon next to an inherited role to see which group it is inherited from.
  7. Under the Roles section, assign role to the user.

    The Applied Roles field shows the user's effective roles:

    • Directly assigned roles can be added or removed using the + and - icons.
    • Inherited roles are displayed with a lock icon and an information icon. Hover over the information icon to see which group the role is inherited from. Inherited roles cannot be removed from this panel — to remove an inherited role, remove the role assignment from the source group.
    Note: If the user has no directly assigned role, an inherited role always appears here. If the user already has a directly assigned role, an inherited role appears alongside it only when Apply Group Roles to Group Users is enabled on the Roles page. When this setting is disabled, the directly assigned role takes precedence and inherited roles from groups are not shown.
    1. To add a new role, click a role under Roles, then click + icon to add them to the Applied Roles field.
    2. To remove a role, click the role under Applied roles, then click - to remove them from the Applied Roles field.
  8. To create user with entered details, click Save.