Deploy agent via Microsoft Intune
This section explains how to deploy Forcepoint Mobile Endpoint Agent to Android devices using Microsoft Intune. These steps include adding the application and provisioning devices with an app configuration policy.
Note: Forcepoint has validated the steps below using Microsoft Intune. While similar configurations may be possible with other MDM solutions, Forcepoint has not verified them.
Steps
-
Step 1: Configure Mobile Endpoint Agent application.
-
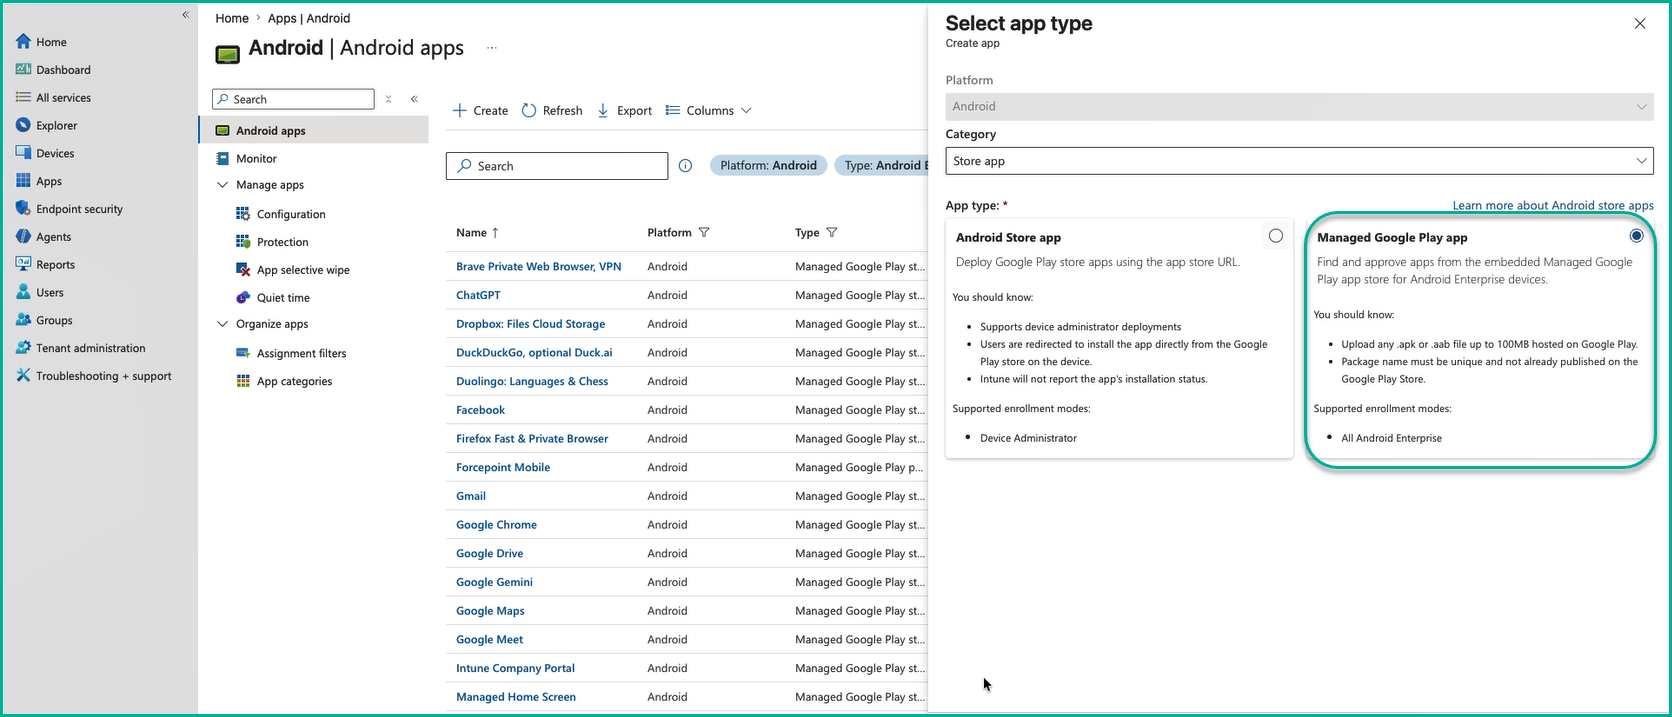
From the Category dropdown, select Store app, then select the Managed Google Play app radio button.
Click Select.
-
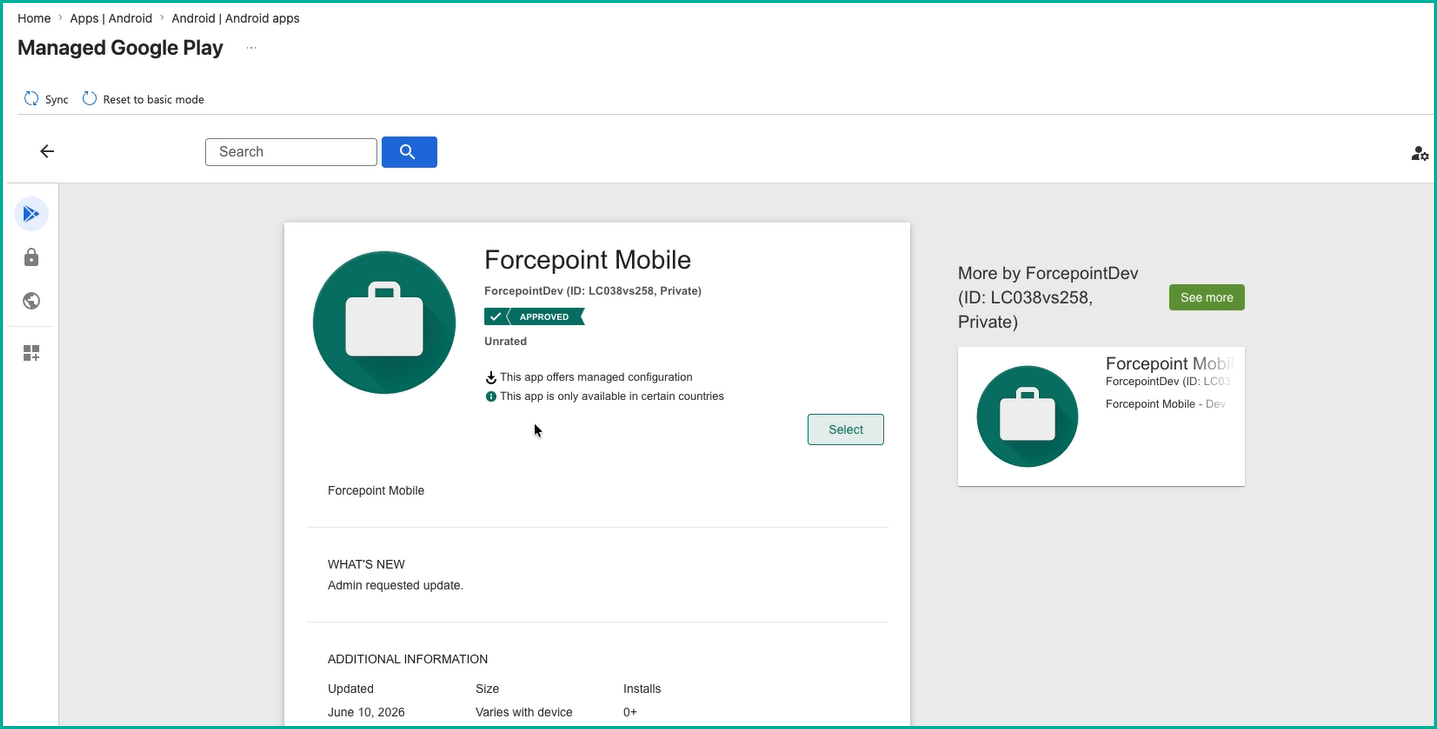
On the Managed Google Play page, search for and select the Forcepoint Mobile, then click
Select.
-
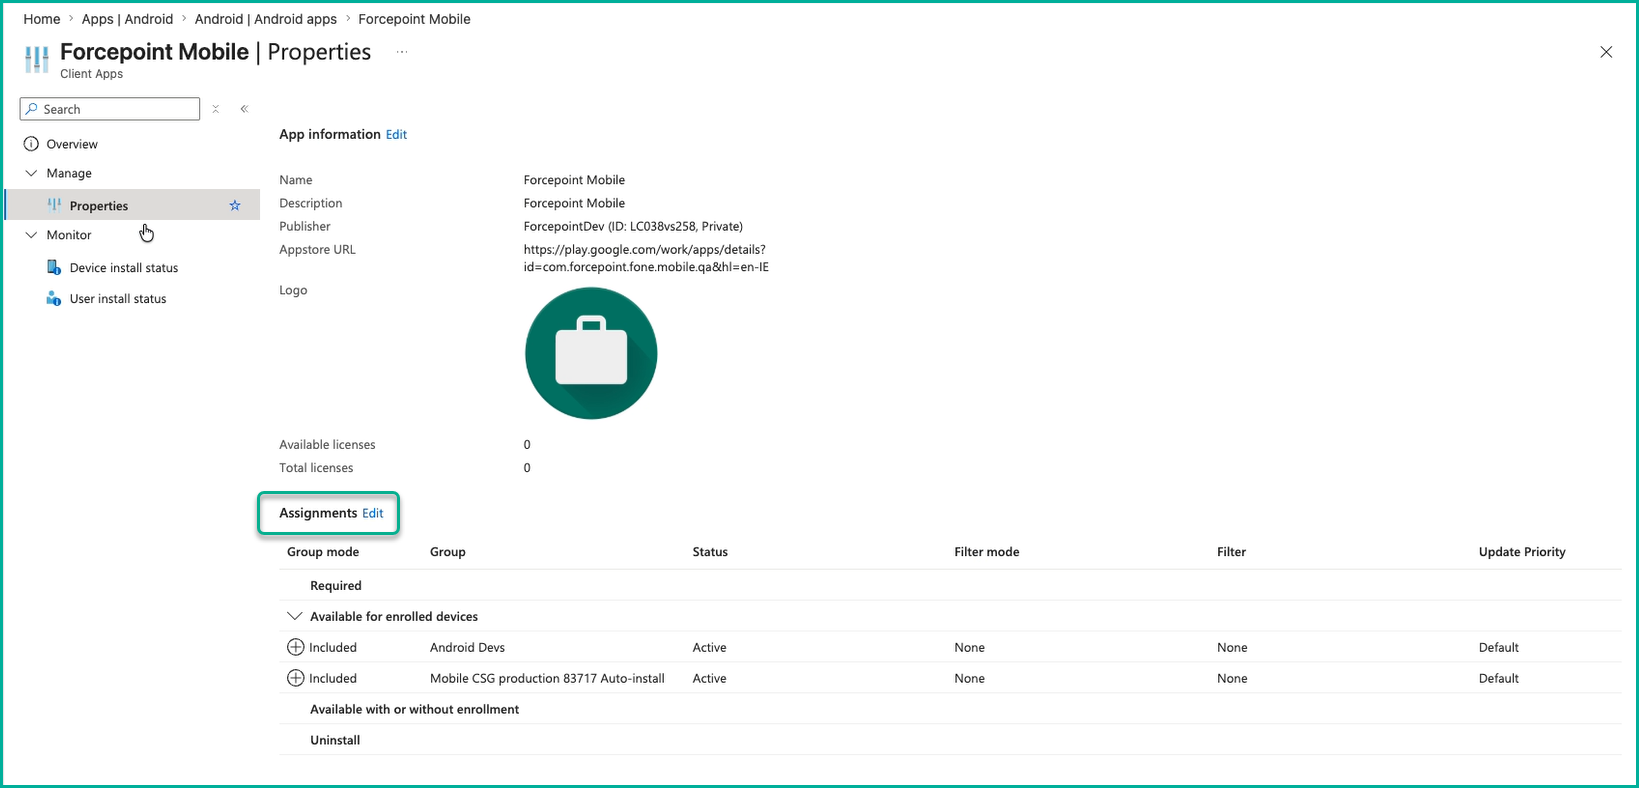
In the Assignments section, click Edit.
-
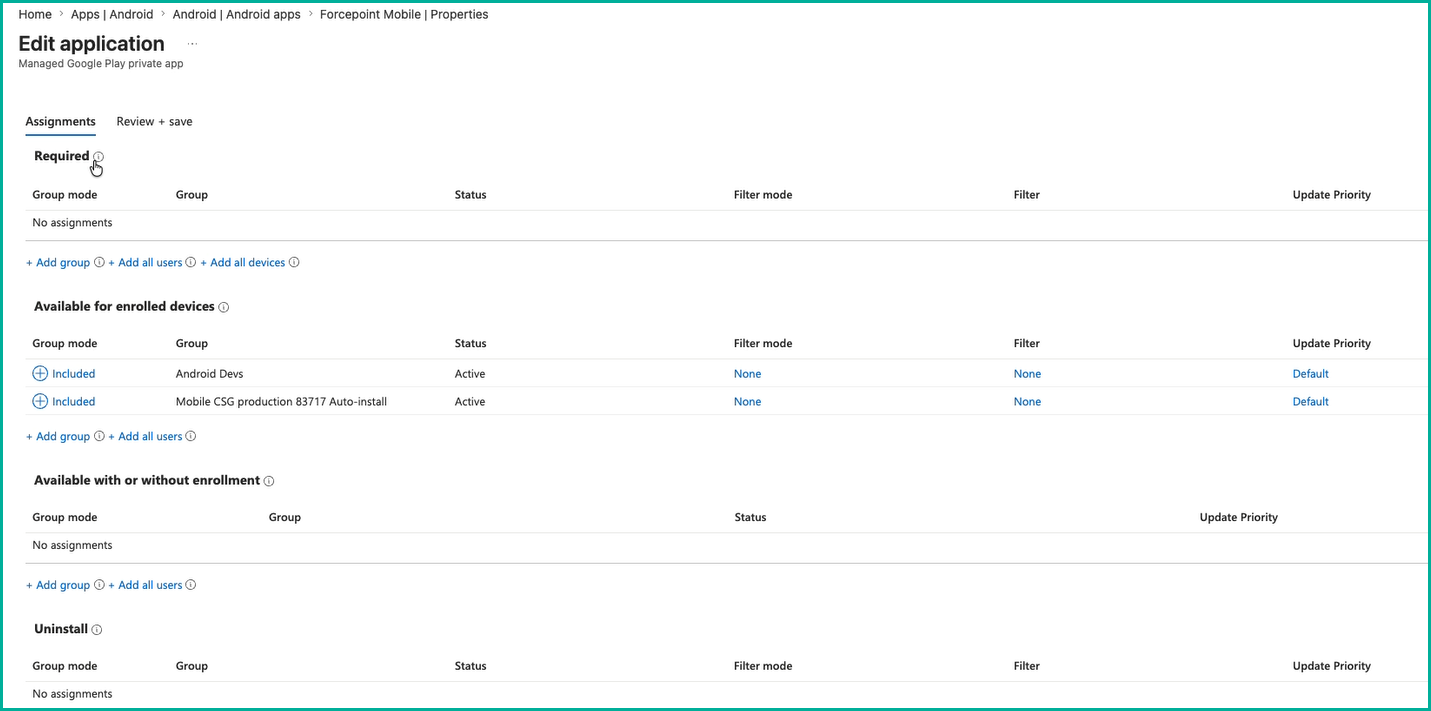
On the Assignment tab, under the Required section, choose groups that will have the solution force installed. This can be a
user group, device group, all users, or all devices. Then click Next.
-
From the Category dropdown, select Store app, then select the Managed Google Play app radio button.
Click Select.
-
Step 2: Configure the App Configuration policy.
-
On the Basics tab, enter the following properties:
Table 1. Key Value Name Enter a name that identifies the profile. Use a descriptive name so you can easily recognize it later. Description Enter a description for the profile (optional). Platform Select Android Enterprise. Profile Type Select Fully Managed, Dedicated, and Corporate-Owned Work Profile Only. Note: The profile type selection shown here is an example based on enrollment type. Select the profile type that corresponds to your device enrollment configuration.Targeted app Select the Forcepoint Mobile application you created in Step 1. 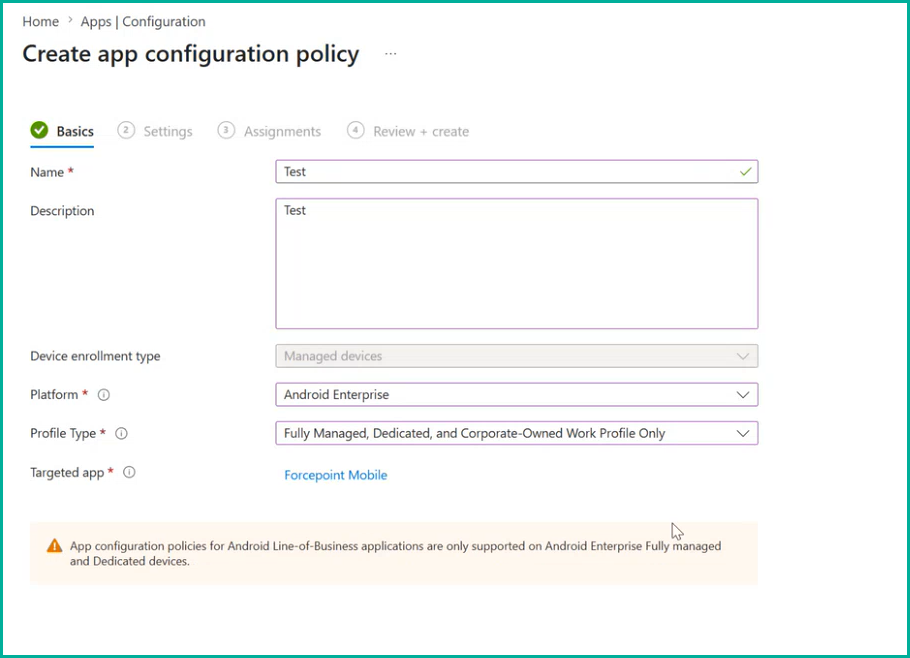
-
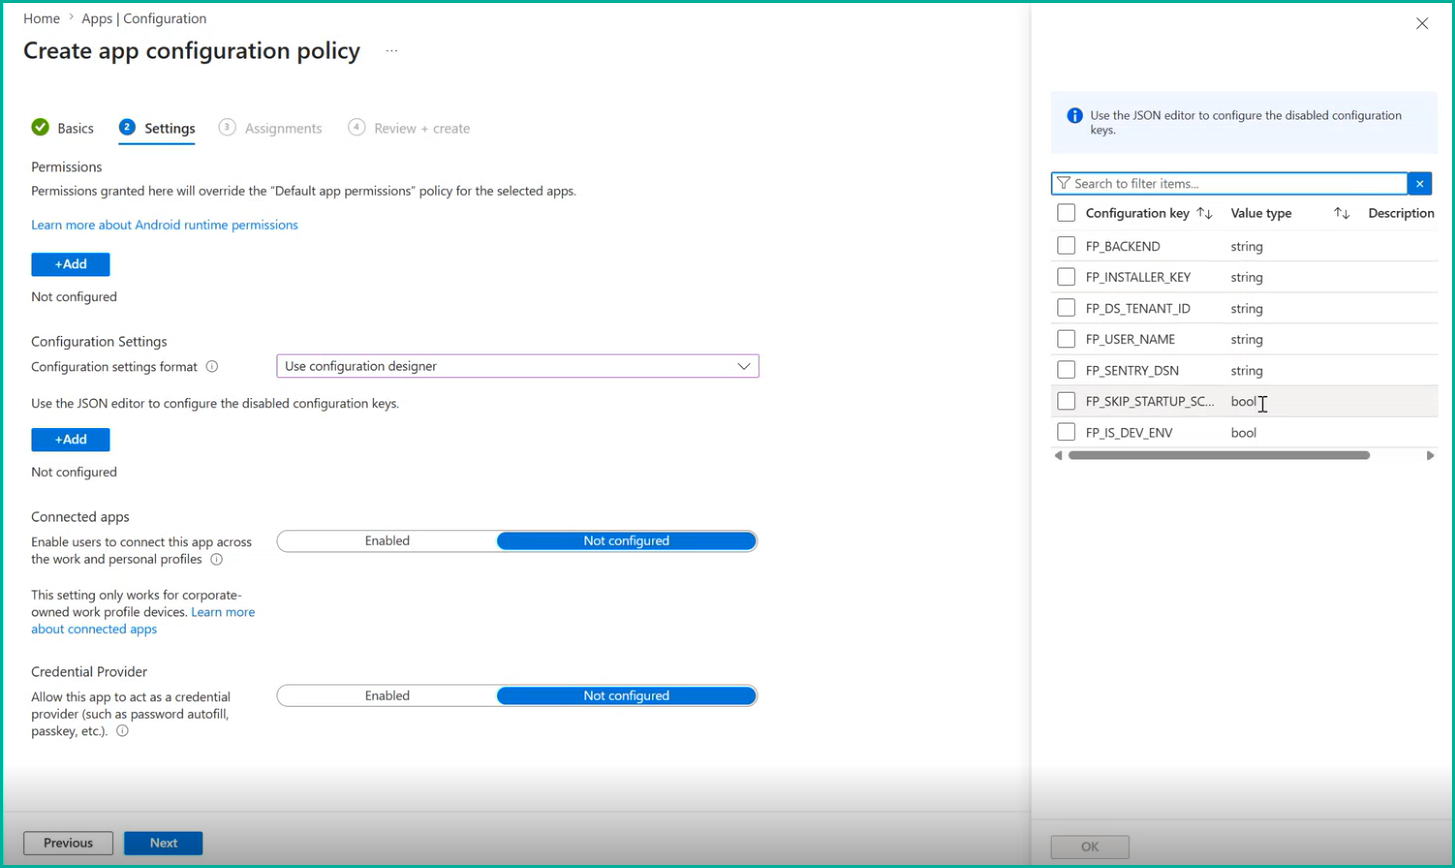
On the Settings tab, select Use configuration designer from the Configuration Settings dropdown. Add
and configure the following settings from the Global Settings page in the Forcepoint Data Security Cloud portal.
Before entering values, navigate to in the Forcepoint Data Security Cloud portal and copy these values:
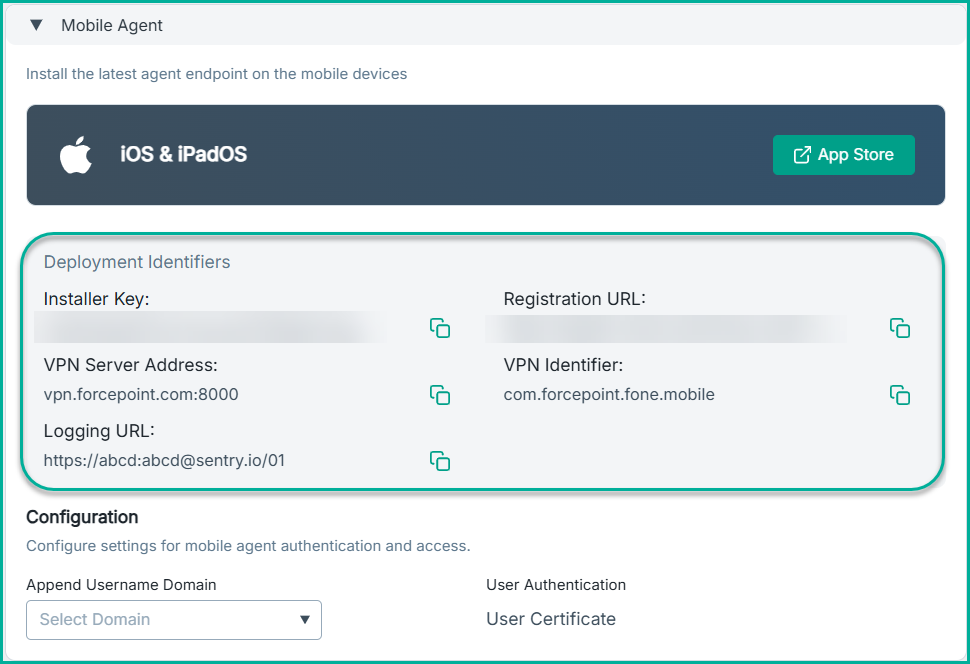
Table 2. Configuration key Value FP_BACKEND Enter the Registration URL. FP_INSTALLER_KEY Enter the Installer Key. FP_DS_TENANT_ID In the portal, select . Enter the TENANT ID. FP_USER_NAME Enter the {{UserPrincipalName}}. FP_SENTRY_DSN Enter the Logging URL. FP_SKIP_STARTUP_SCREEN - Select true to enable auto-start, allowing the application to launch automatically.Note: For Android devices, the user needs to accept the VPN permission before the app can start the VPN service.
- Select false to display the End-User License Agreement (EULA) screen. Users must read and accept the EULA before proceeding to use the application.
For more details about these fields, see the Global Settings page.
- Select true to enable auto-start, allowing the application to launch automatically.
-
On the Basics tab, enter the following properties: