GitHub: Configuring GitHub as a SSO application in Forcepoint Data Security Cloud | SSE
This topic explains the process of setting up GitHub as a custom app in Forcepoint Data Security Cloud | SSE and configuring it for Single Sign-On (SSO).
Steps
-
Configure managed app for GitHub in the Forcepoint Data Security Cloud | SSE portal.
-
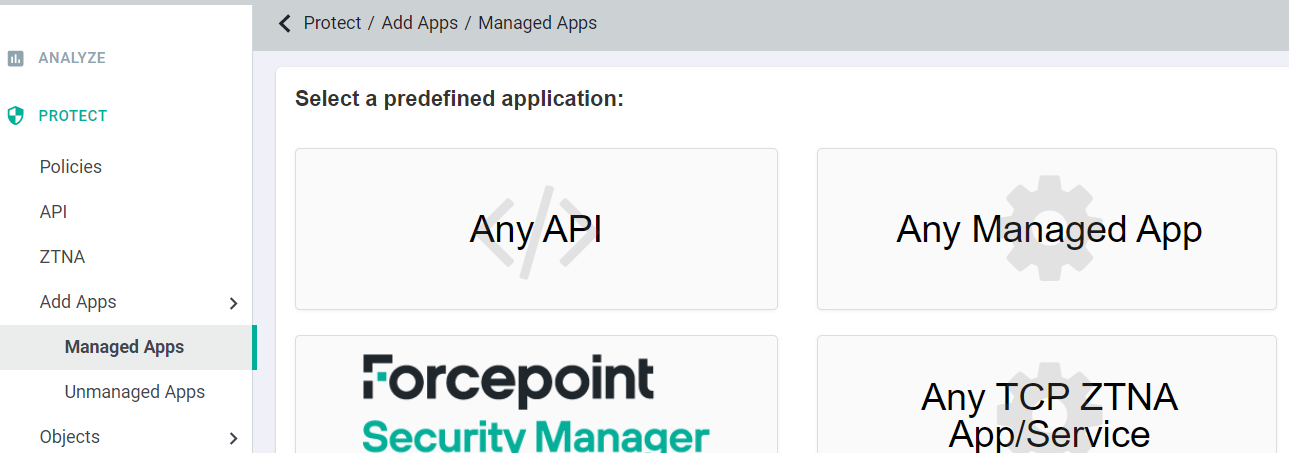
On the Managed Apps screen, select Any Managed App tile.
-
In the Custom Application Configuration page that appears, enter the details as below and Click OK.
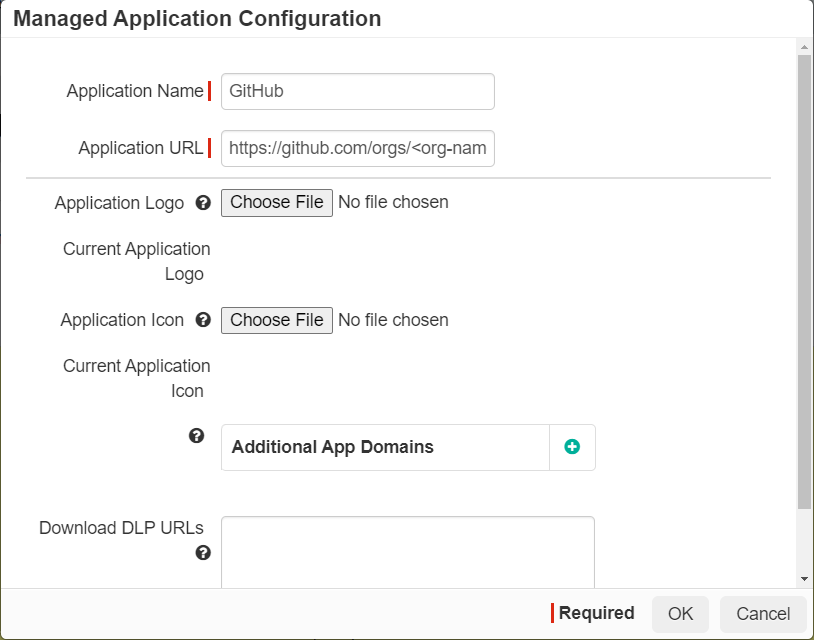
- Application Name: GitHub
- Application URL: https://github.com/orgs/<org-name>
- Application Logo: Upload an Application Logo for GitHub
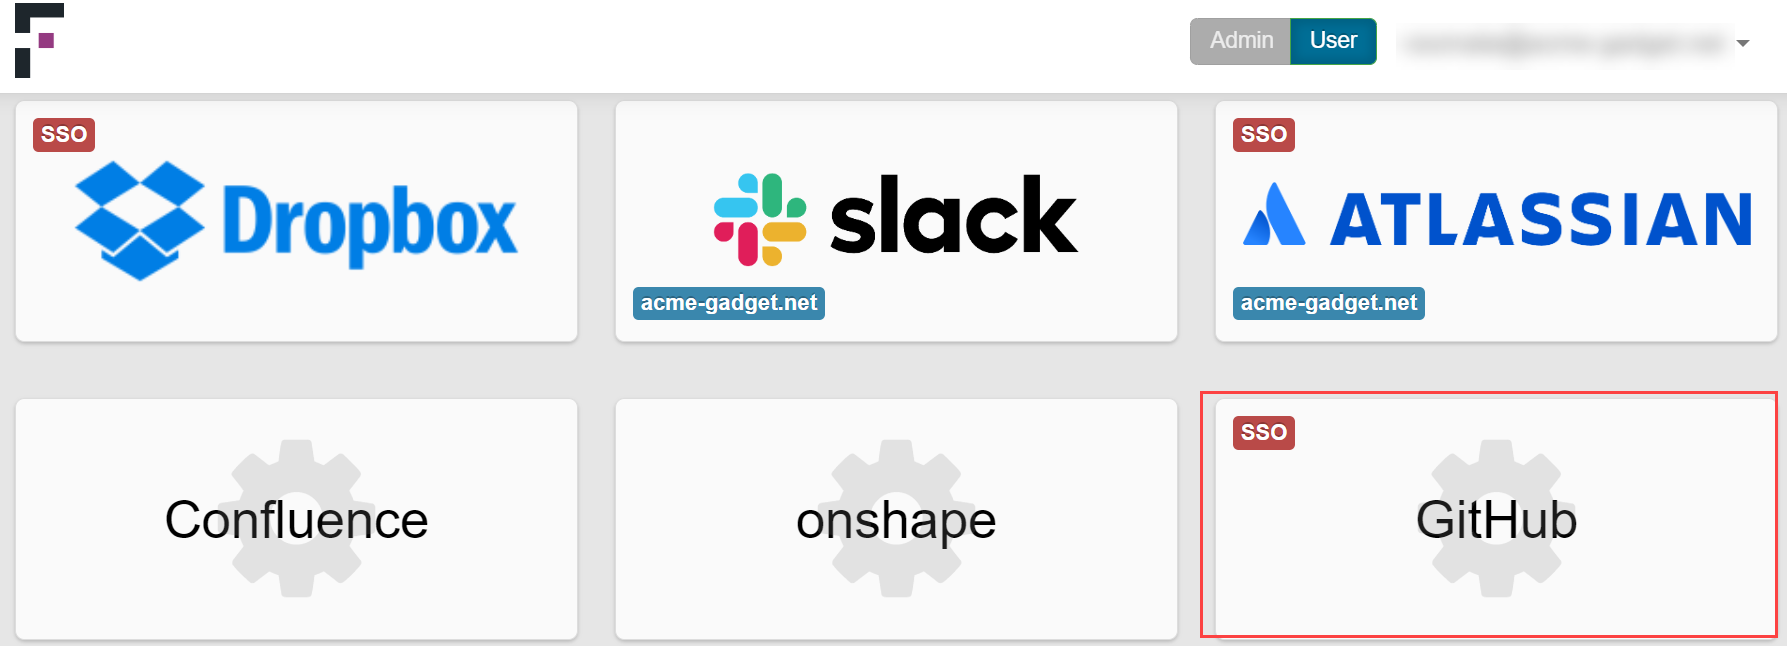
Application Logo is displayed as App Tile in the Forcepoint Data Security Cloud | SSE User Portal.
Example Logo below:

- Application Icon: Upload an Application Icon for GitHub
The application Icon is displayed on the page in Forcepoint Data Security Cloud | SSE Admin Portal.
Example Icon below:

-
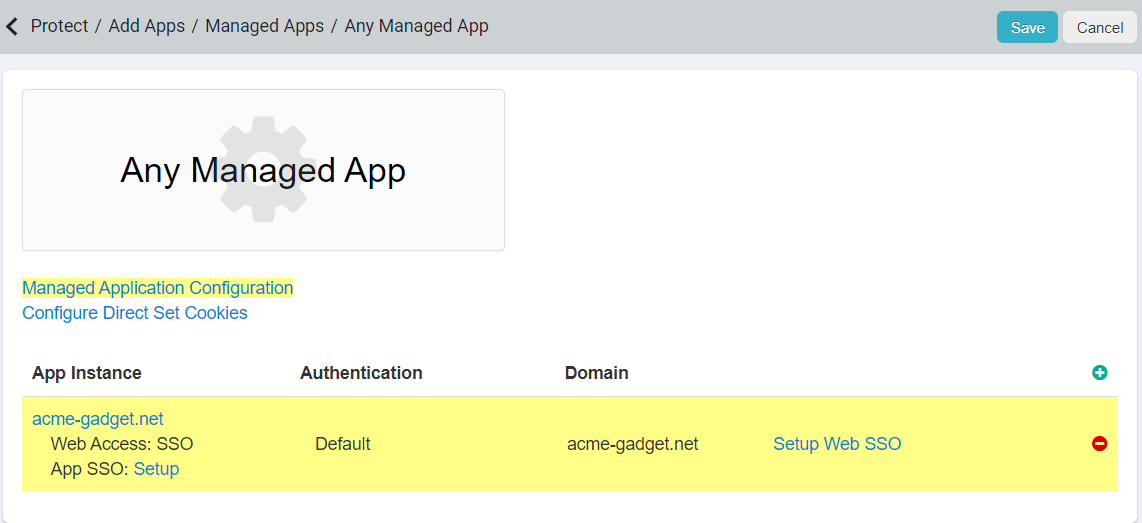
Click on the Domain under App Instance, and on the page that appears, select the enable checkbox for SAML SSO and click
OK.

-
Click the Save button on the Any Managed App page to complete the initial app setup.
-
On the Managed Apps screen, select Any Managed App tile.
-
Obtain Forcepoint Data Security Cloud | SSE SSO Config to enter into GitHub:
-
Once the GitHub App is saved in Forcepoint Data Security Cloud | SSE, click on the Setup Web SSO link.
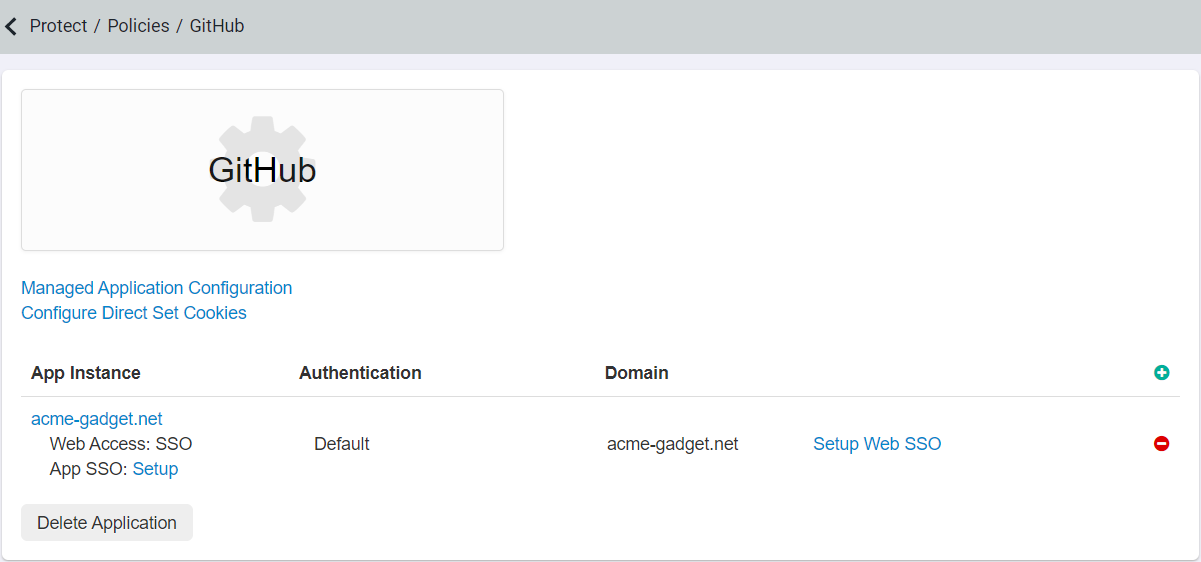
Single Sign On Setup page opens.
-
Click on the Download Certificate link and save the certificate downloaded to disk.
OR
Copy the following values:
- Issuer ID
- Login URL
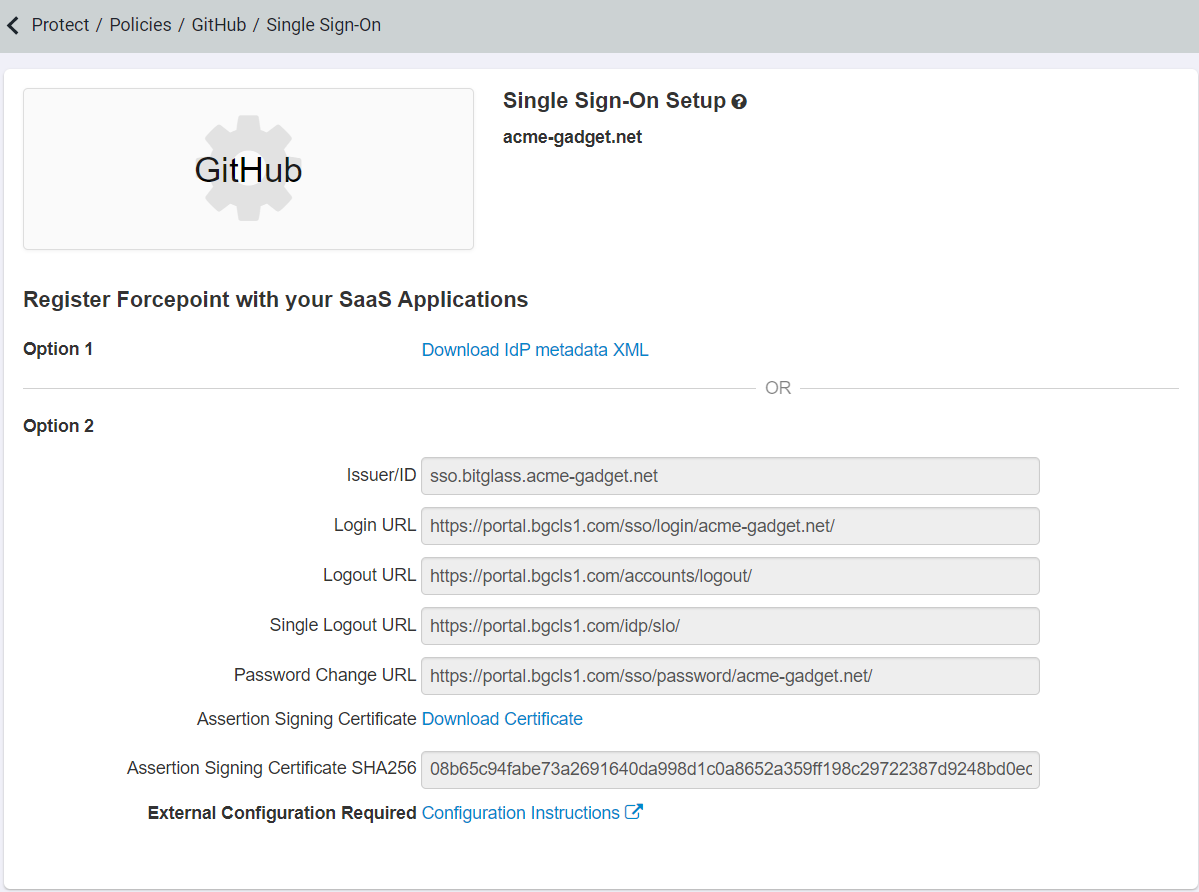
The Certificate information will need to be added to GitHub.
-
Once the GitHub App is saved in Forcepoint Data Security Cloud | SSE, click on the Setup Web SSO link.
-
Configure SSO Settings in GitHub:
-
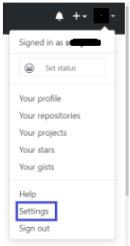
On another browser window, go to GitHub.com, log in with the credentials of the GitHub Admin account,
and select Settings under the Admin profile.
-
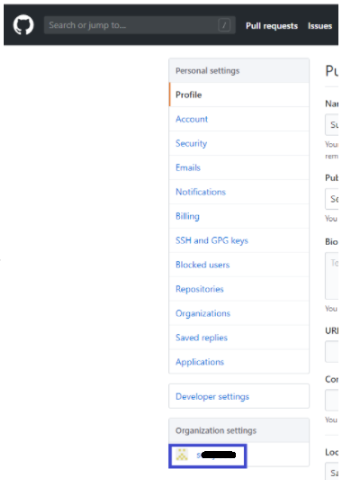
On the settings screen, click on your organization name under Organization settings in the left menu.
-
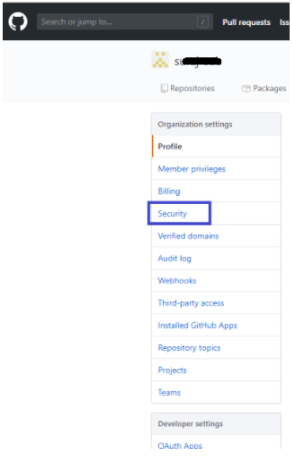
Select Security under the organization settings menu.
-
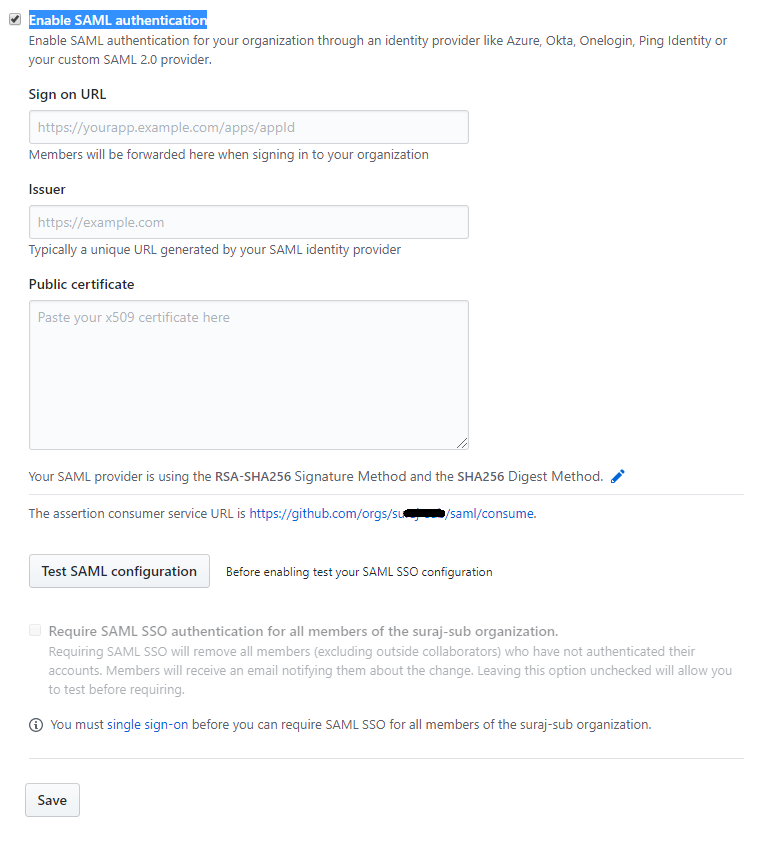
Select the Enable SAML authentication checkbox on the security screen, and a form for entering SAML settings should appear.
-
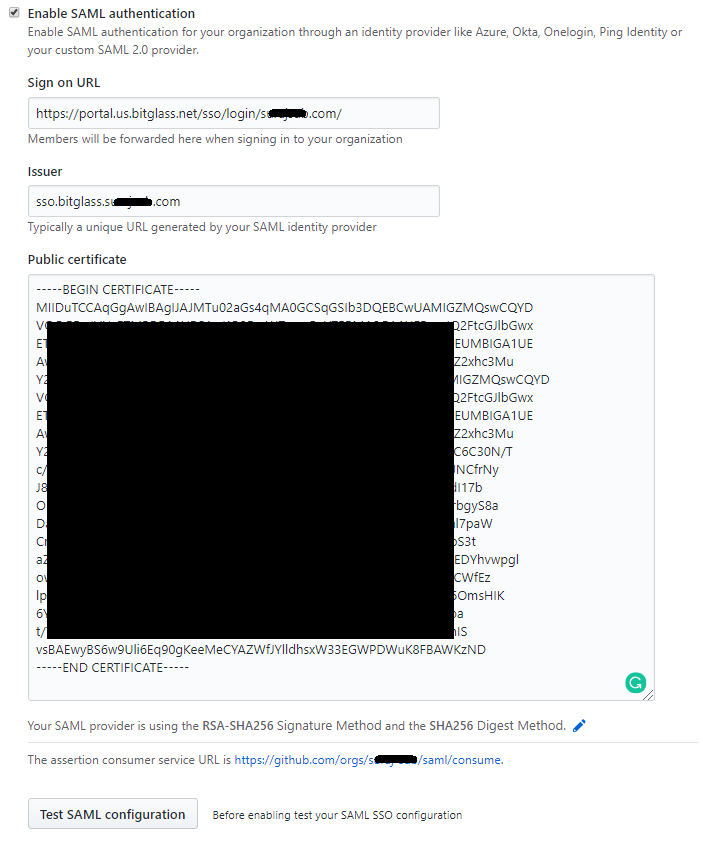
Enter the Issuer/ID and Login URL from the Forcepoint Data Security Cloud | SSE SSO Setup page to the GitHub SSO
settings page in the Issuer and Sign-on URL fields, respectively.
-
On another browser window, go to GitHub.com, log in with the credentials of the GitHub Admin account,
and select Settings under the Admin profile.
-
Enter App SSO: Setup details in Forcepoint Data Security Cloud | SSE portal:
-
Go back to the browser tab for Forcepoint Data Security Cloud | SSE portal and click on the App SSO: Setup link.
-
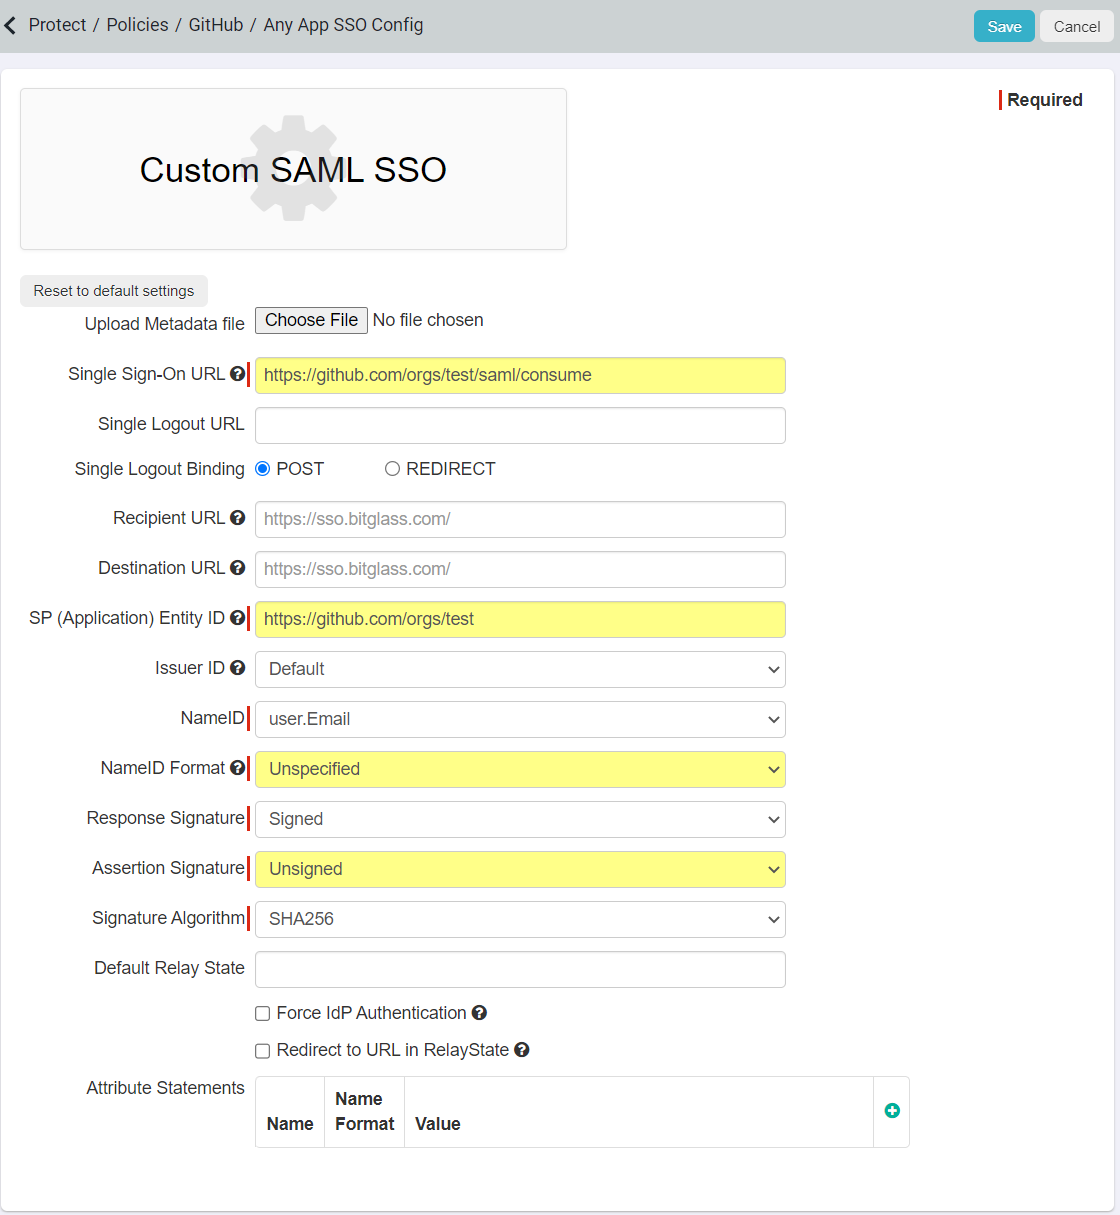
On the Any App SSO Config Page:
- Paste the ACS URL copied from GitHub into the Single Sign-On URL.
- Enter the SP Entity ID as your GitHub organization URL, that is, https://github.com/orgs/<org-name>
- Set the NameID Format as Unspecified and Assertion Signature as Unsigned.
- Click Save to record the config.
-
Go back to the browser tab for Forcepoint Data Security Cloud | SSE portal and click on the App SSO: Setup link.
-
Test the SAML configuration on GitHub:
-
Click on the Test SAML configuration, and a successful authenticated message is shown.

-
Click on the Test SAML configuration, and a successful authenticated message is shown.
-
Open an incognito window, log in to Forcepoint Data Security Cloud | SSE as a test user, and click on the GitHub app. You may be shown a GitHub signup page if there is
no account already set up for the test user in GitHub.
-
Require SAML SSO Authentication for all users on GitHub:
-
Once signed in, navigate to the Organization settings Security page and enable the Require SAML SSO authentication for all members of the
<org-name> organization checkbox and click Save.
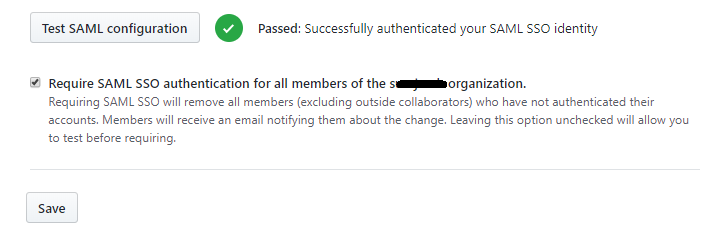
On clicking save, you will be provided with a list of recovery codes that should be downloaded, printed, and saved in a secure location.
-
Once signed in, navigate to the Organization settings Security page and enable the Require SAML SSO authentication for all members of the
<org-name> organization checkbox and click Save.