GitHub: Configuring API access
The setup process will require the admin to create an OAuth app inside of GitHub's admin console. Once created the admin will need to copy the Client ID and Client Secret to configure inside of Forcepoint Data Security Cloud | SSE for authorization.
Steps
-
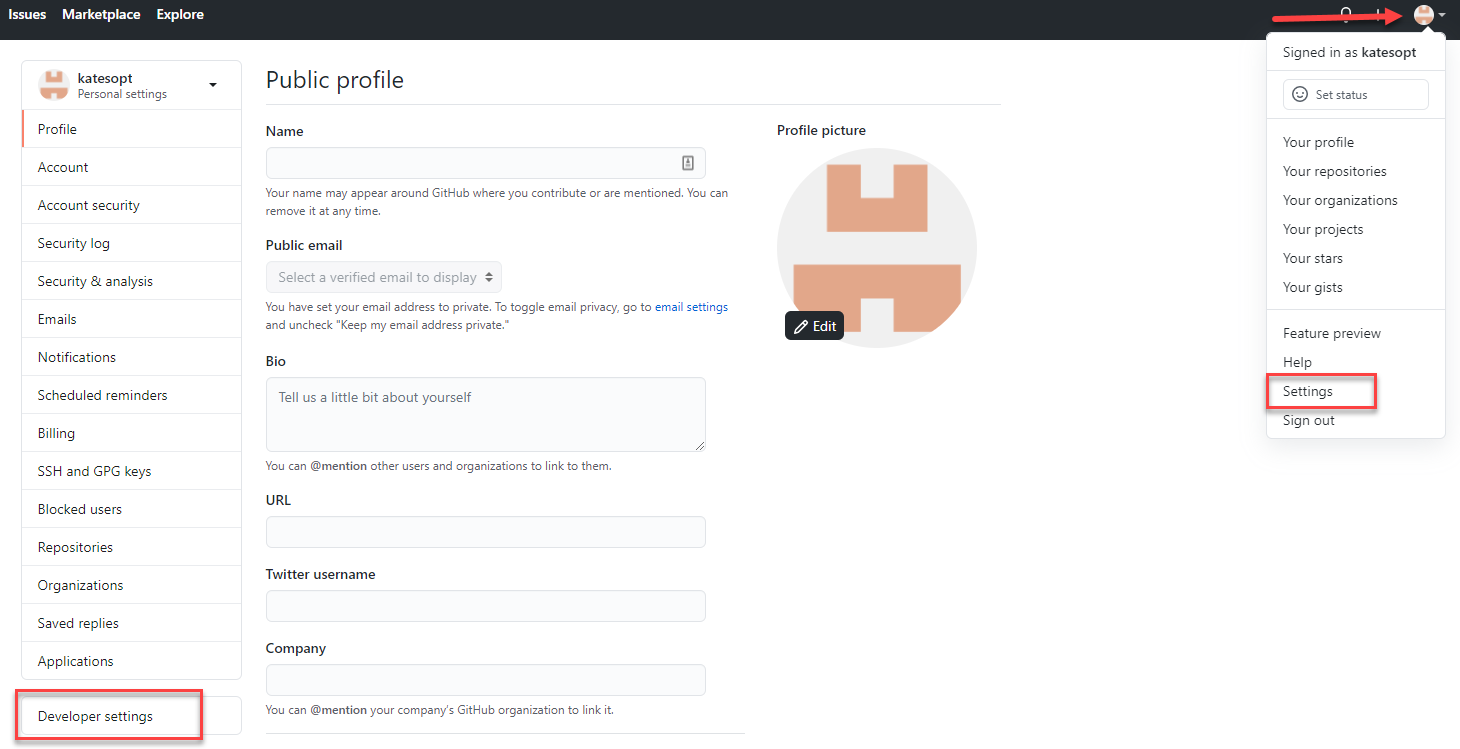
Start by logging into your GitHub instance as an admin. Click on your profile icon in the top right and select Settings. In the left column of your profile
settings page, click on Developer Settings at the bottom.
-
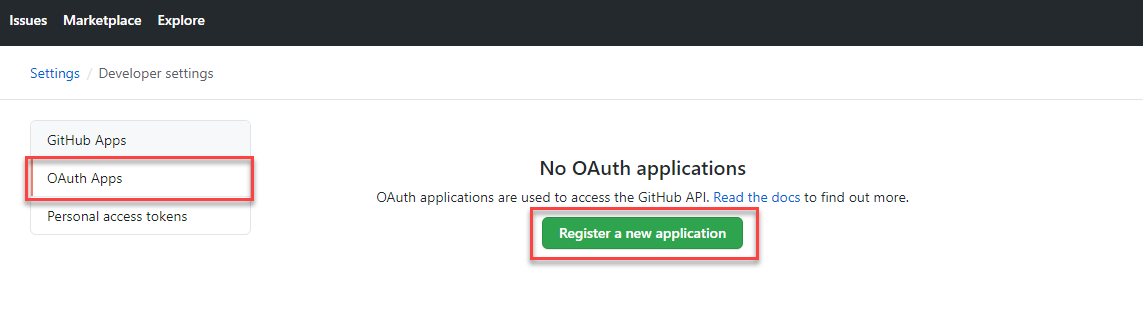
On the Developer Settings page, select OAuth Apps from the left column and then in the middle of the page, select Register a
new application.
Then fill out the form page as required and click Register application at the bottom when done.
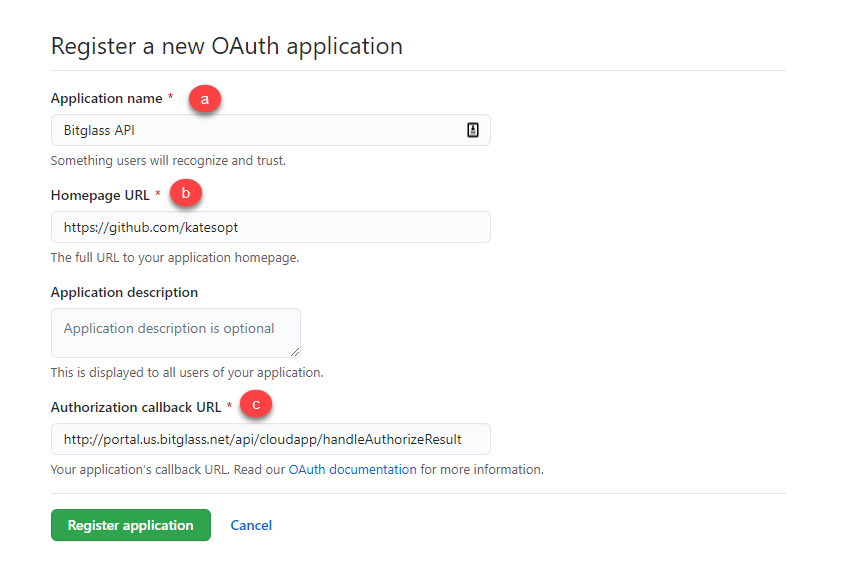
- Application name: Can be whatever you want (something recognizable)
- Homepage URL: Your GitHub instance Homepage URL that you want to be scanned
- Authorization Callback URL:
http://portal.bitglass.com/api/cloudapp/handleAuthorizeResult
-
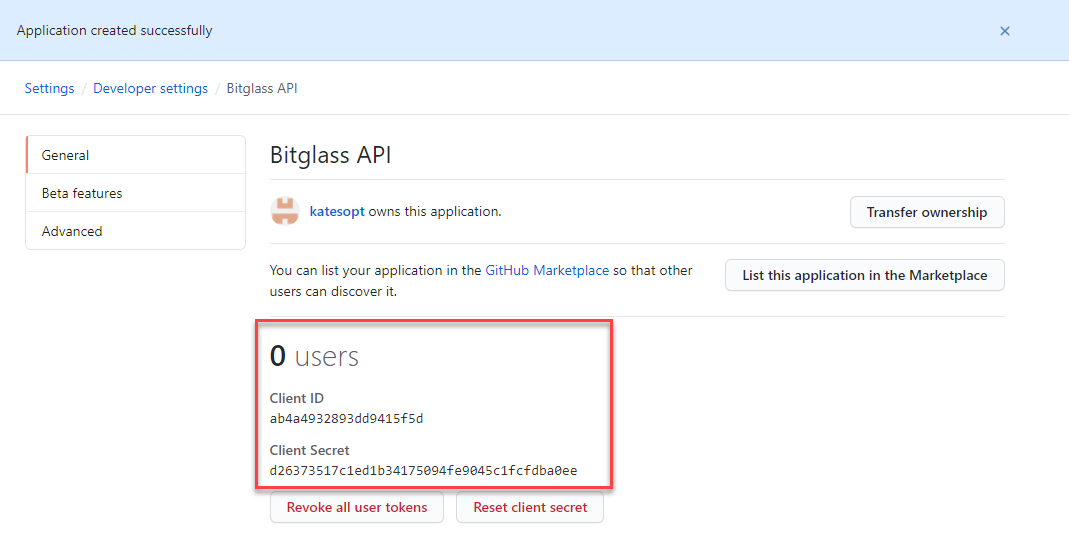
After clicking Register application, the app will be created and you will be redirected to a new page with the application information. Keep this page open
as you will need the Client ID and Client Secret for later.
-
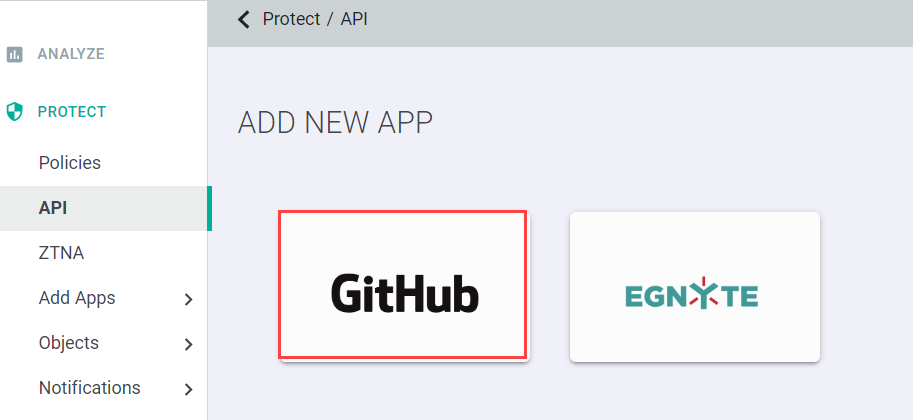
Open a new browser tab or window and login to the Forcepoint Data Security Cloud | SSE
portal as your admin account. Navigate to and add a new App. Click on the GitHub app option to configure.
-
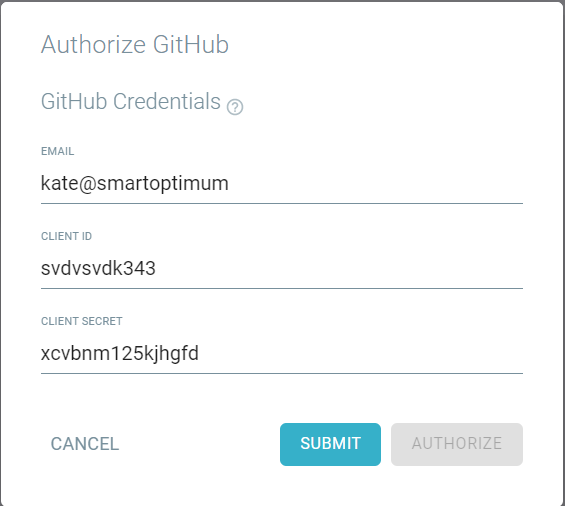
When you click on GitHub to add it, a new window will pop up prompting you to enter your GitHub account email that you used above to create the OAuth app as
well as the Client ID and Client Secret. Copy that info over from your GitHub instance. Click Submit when configured.
-
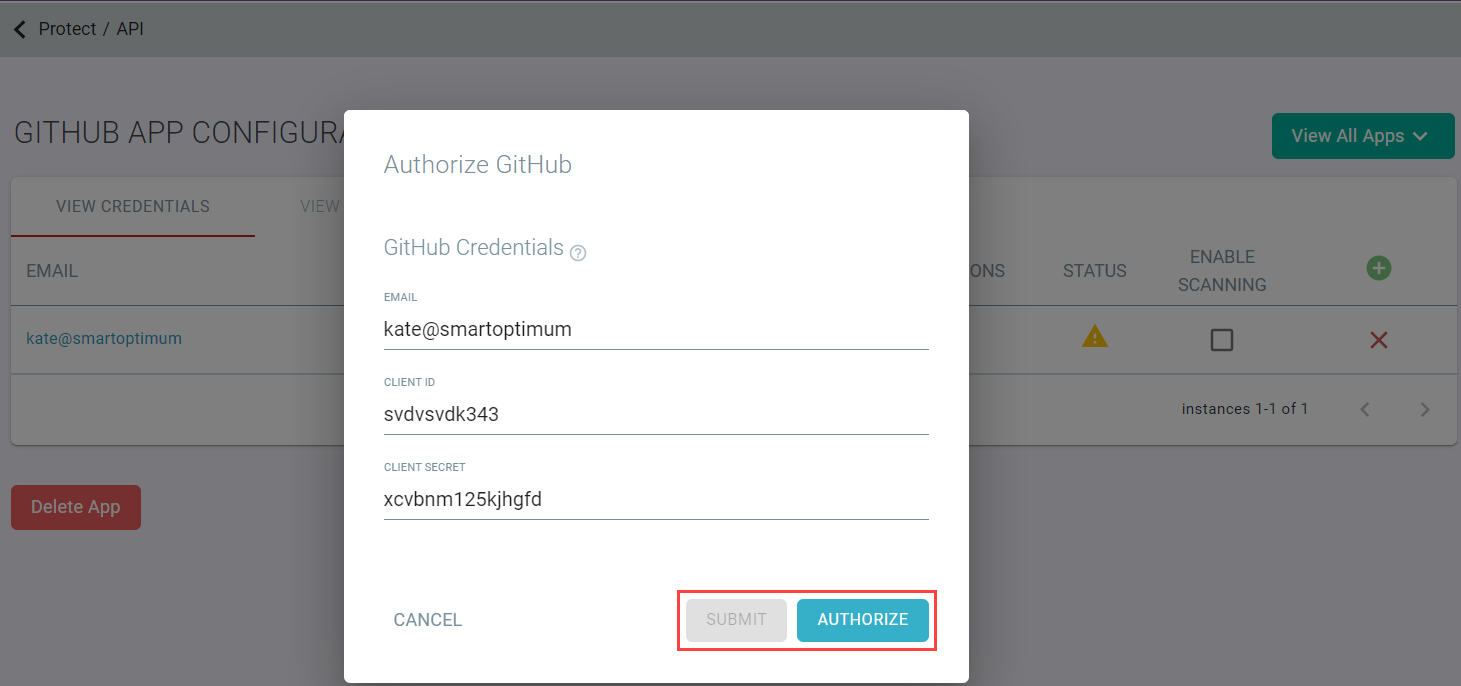
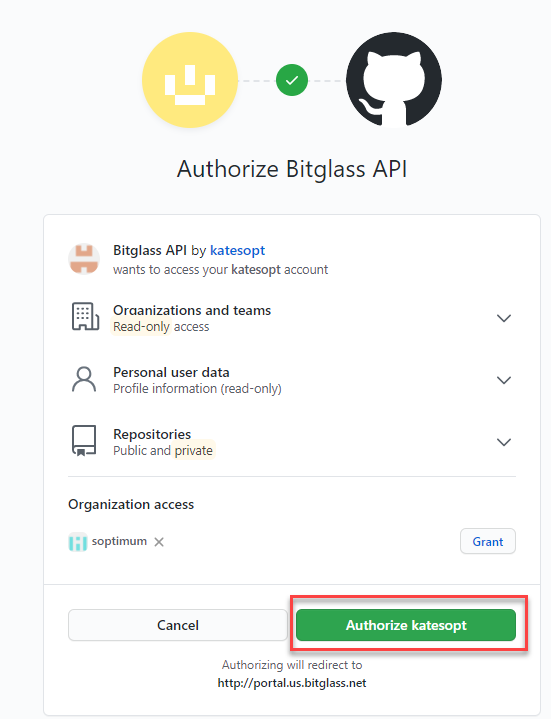
Once you click Submit, you will see the application connection is added in the background of the Forcepoint Data Security Cloud | SSE window. The Authorize GitHub
window will still be displayed with the option to Authorize now selectable. Click Authorize and it will redirect you to a GitHub page
to authorize the API connection.
-
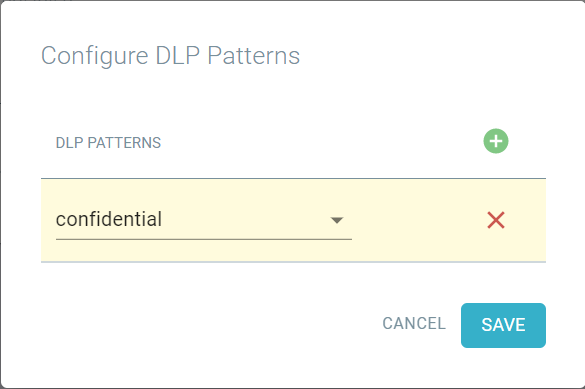
Once authorized, you can now add Data Patterns to scan for. Click on the Add Patterns green plus icon under the Data
Patterns column. A new window will pop up where you can add the Data Patterns. You can add as many as needed depending on what you want to
scan for.