Configuring Slack SSO in Forcepoint Data Security Cloud | SSE
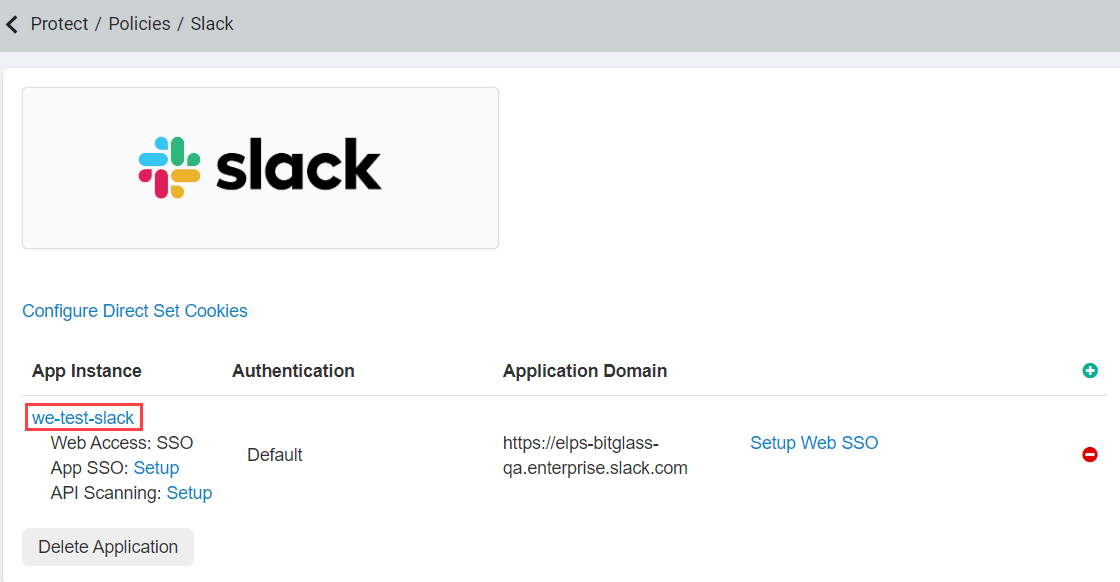
Setting up SSO for Slack starts with enabling Web SSO for the Slack application in Forcepoint Data Security Cloud | SSE. As always start on the page and select Slack from your applications (or click the green plus icon to add the application if you haven't already).
Steps
-
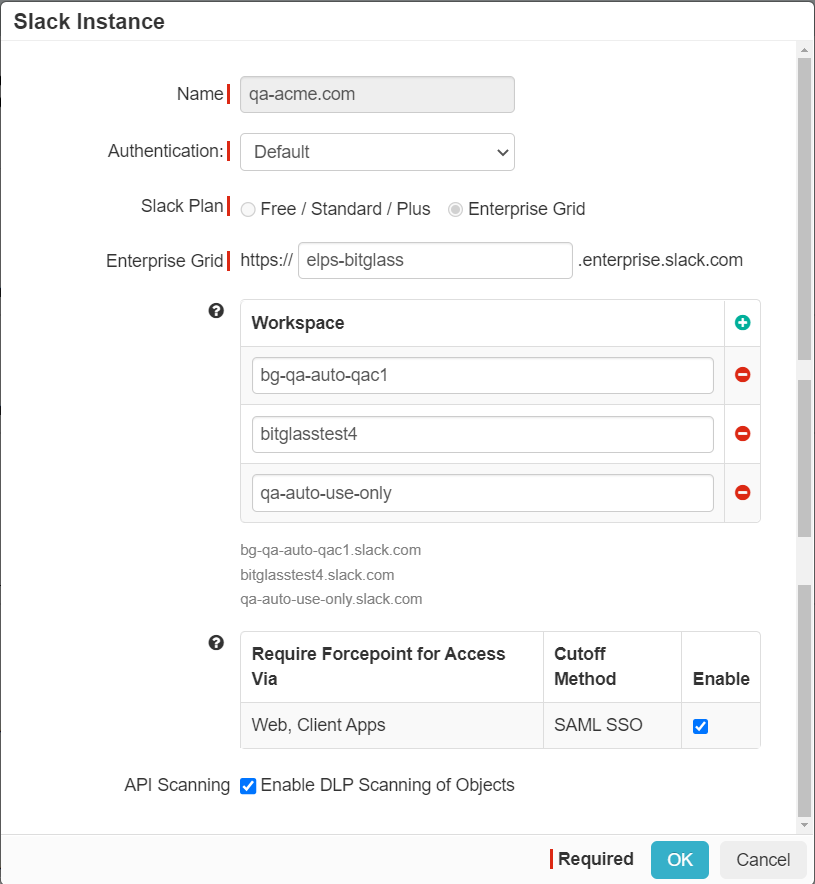
On the Slack settings page, select your App Instance to open the Slack Instance dialog. In the dialog scroll to the bottom and select the
checkbox Enable to enable SAML SSO. Click Ok at the bottom and then click Save in the top right corner of the
settings page to save your changes.
-
The App SSO settings in Forcepoint Data Security Cloud | SSE
will already be configured for you, however you will be able to make adjustments if your setup is customized (for example, sending a different NameID for authentication or sending
different or other attributes during the SAML Request).

-
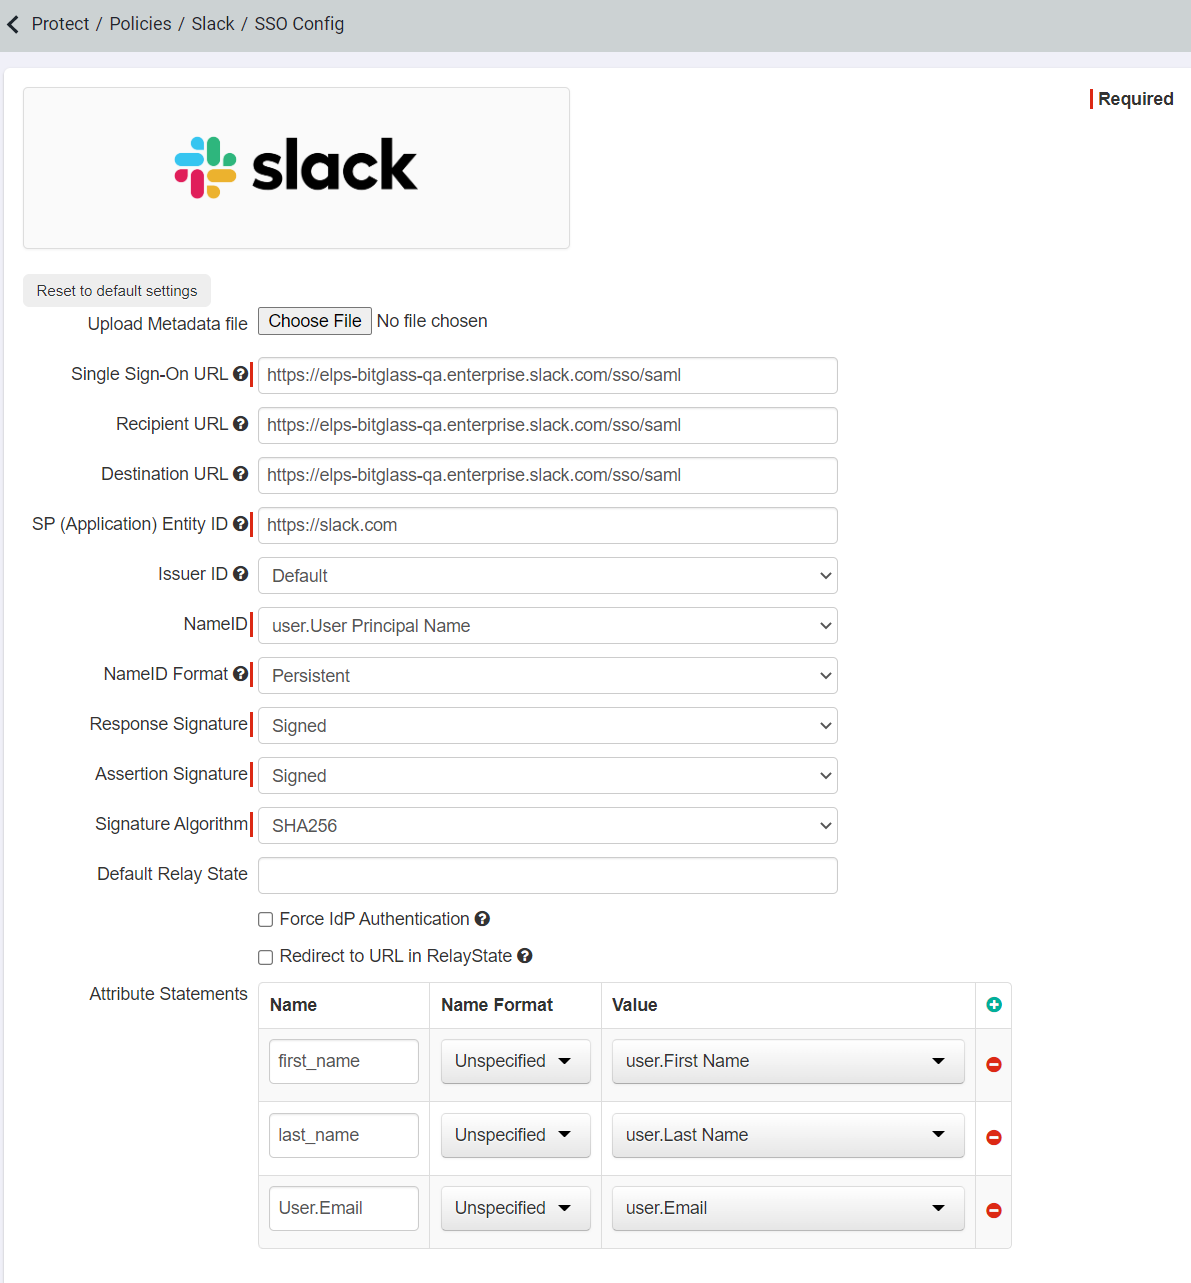
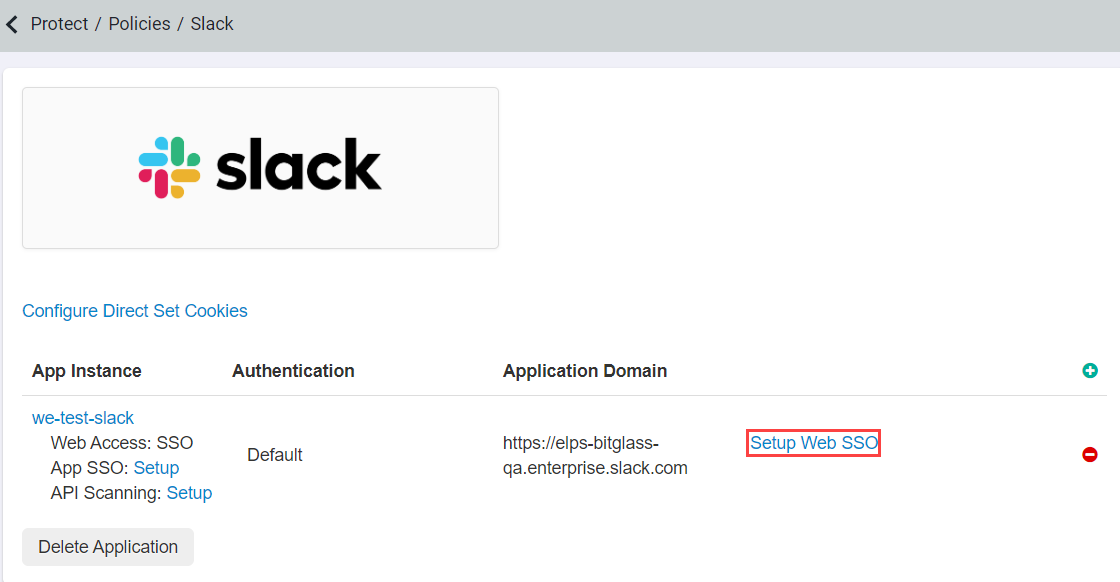
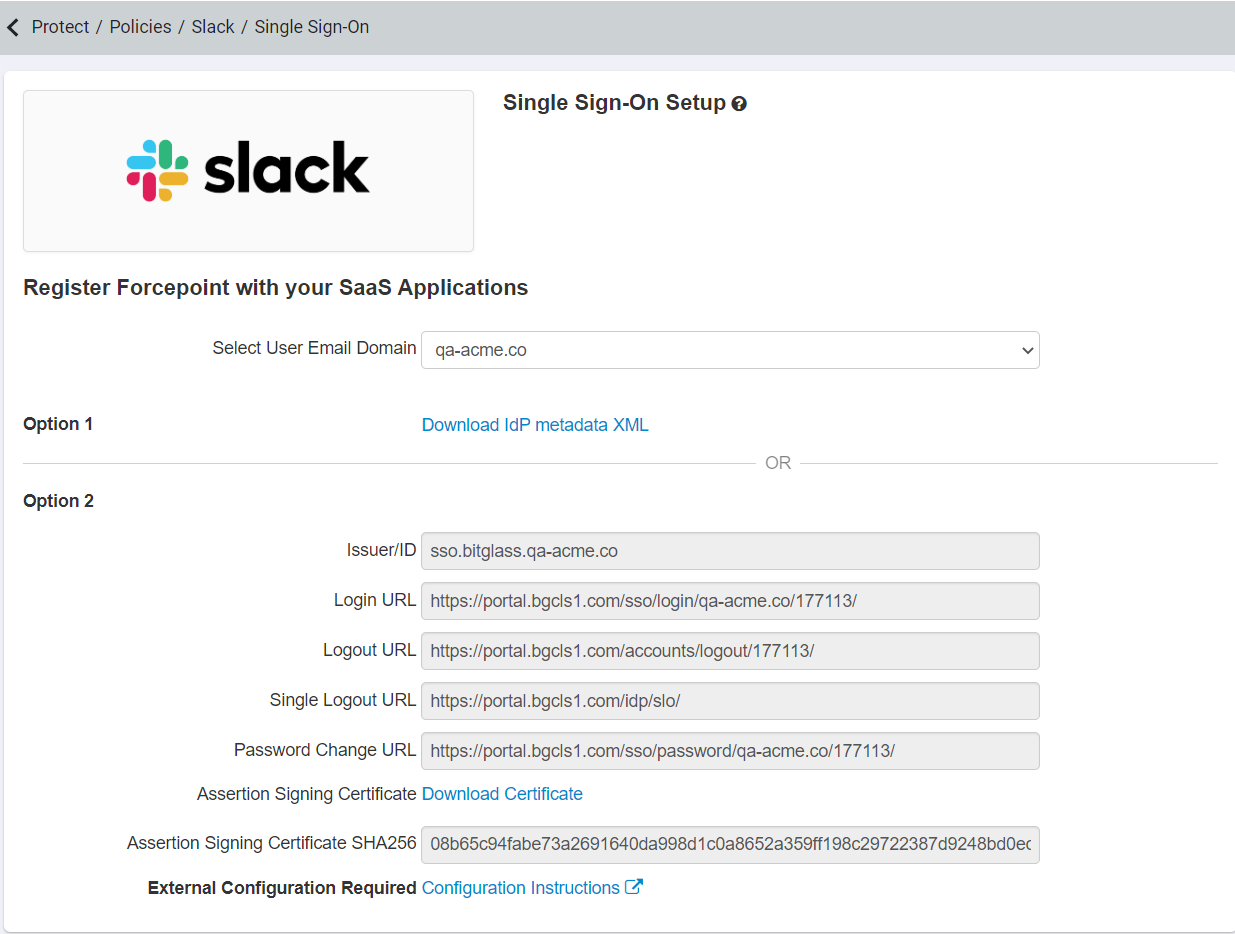
Back on the Slack settings page select Setup Web SSO and then on the top drop-down select your particular domain you are setting Slack up for. You will now
see the SSO setting information you will need to input into Slack. Keep this page open since you will need this information for the next steps.
-
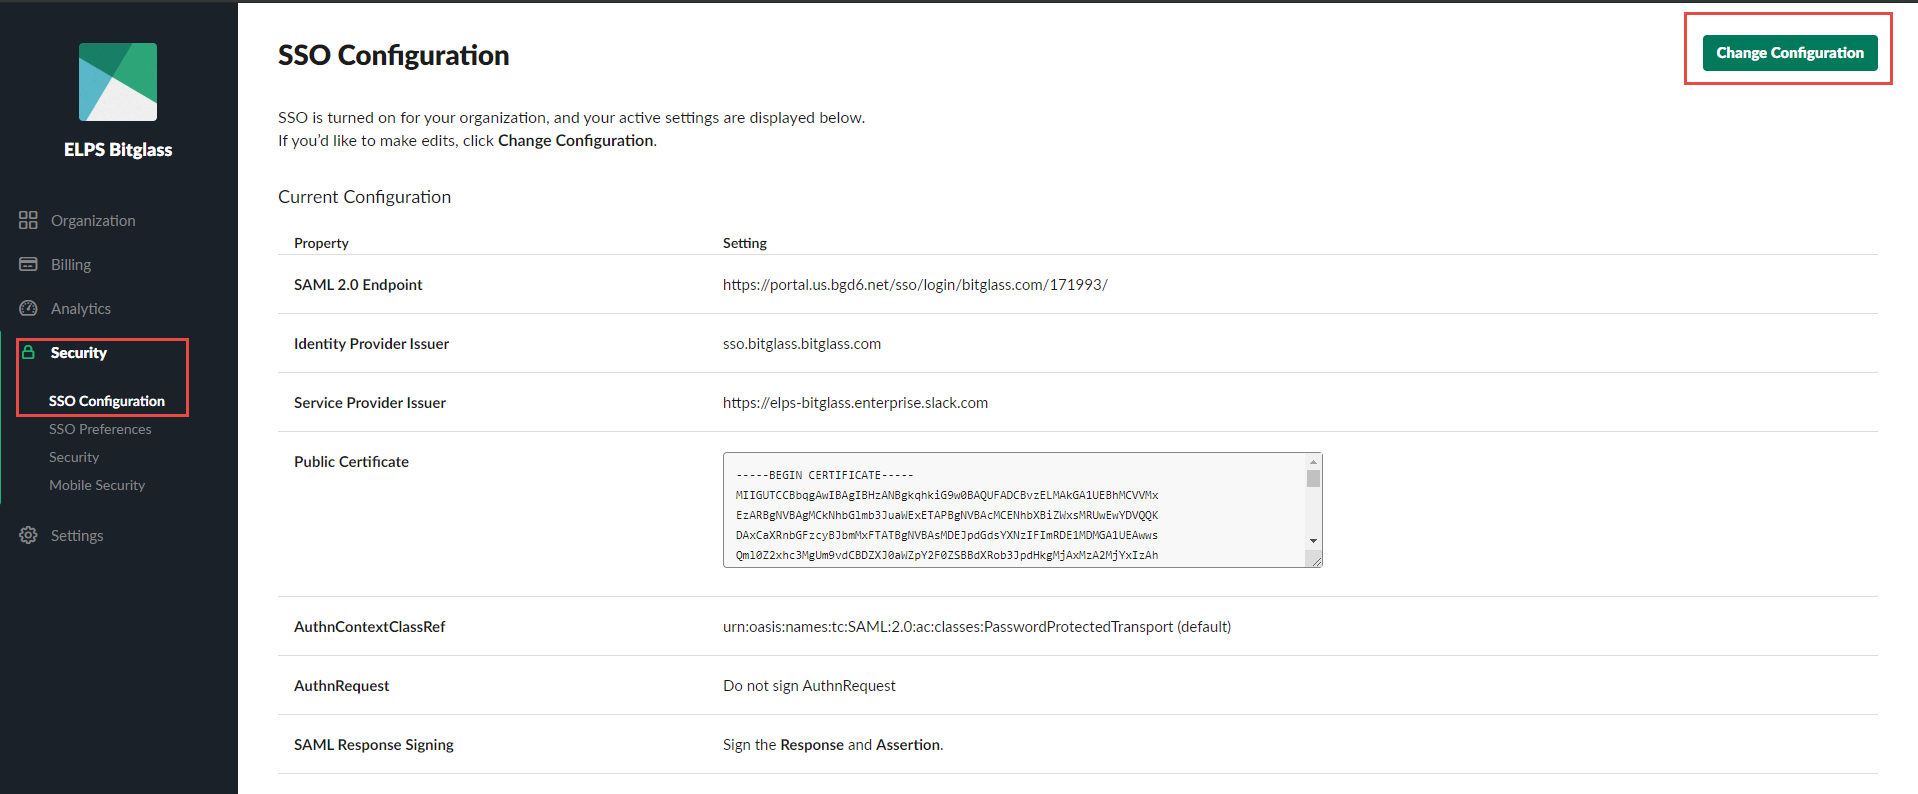
Open up a new window and login to your Slack administrator console. Once logged in click Manage Organization in the top right corner. On the
Manage Organization click Security in the left column tab and you will notice that SSO Configuration is the
first option and already selected. On the right in the main Window select Change Configuration from the top right.

-
In the Change SSO Configuration page, copy over the information from the Forcepoint Data Security Cloud | SSE
Web SSO Setup page we opened up in Step 3.

- For the Assertion Signing Certificate you will need to download the certificate from Forcepoint Data Security Cloud | SSE, open the certificate and then copy/paste the contents into the Public (X.509) Certificate field.
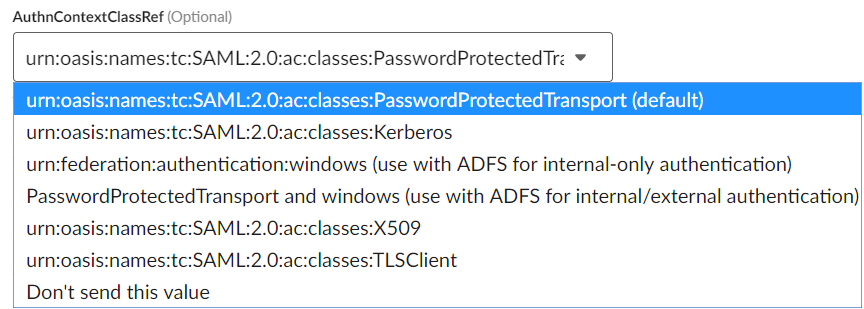
- For the AuthnContextClassRef leave as the top default option.
- Check off Sign the Response and Sign the Assertion. Once you are done click Test Configuration and you
will be redirected to enter your SSO authentication credentials to validate the setup.
