ServiceNow: Deploying Forcepoint Data Security Cloud | SSE as a SAML IdP
Instructions to setup the ServiceNow app in the Forcepoint Data Security Cloud | SSE portal.
Before you begin
Steps
-
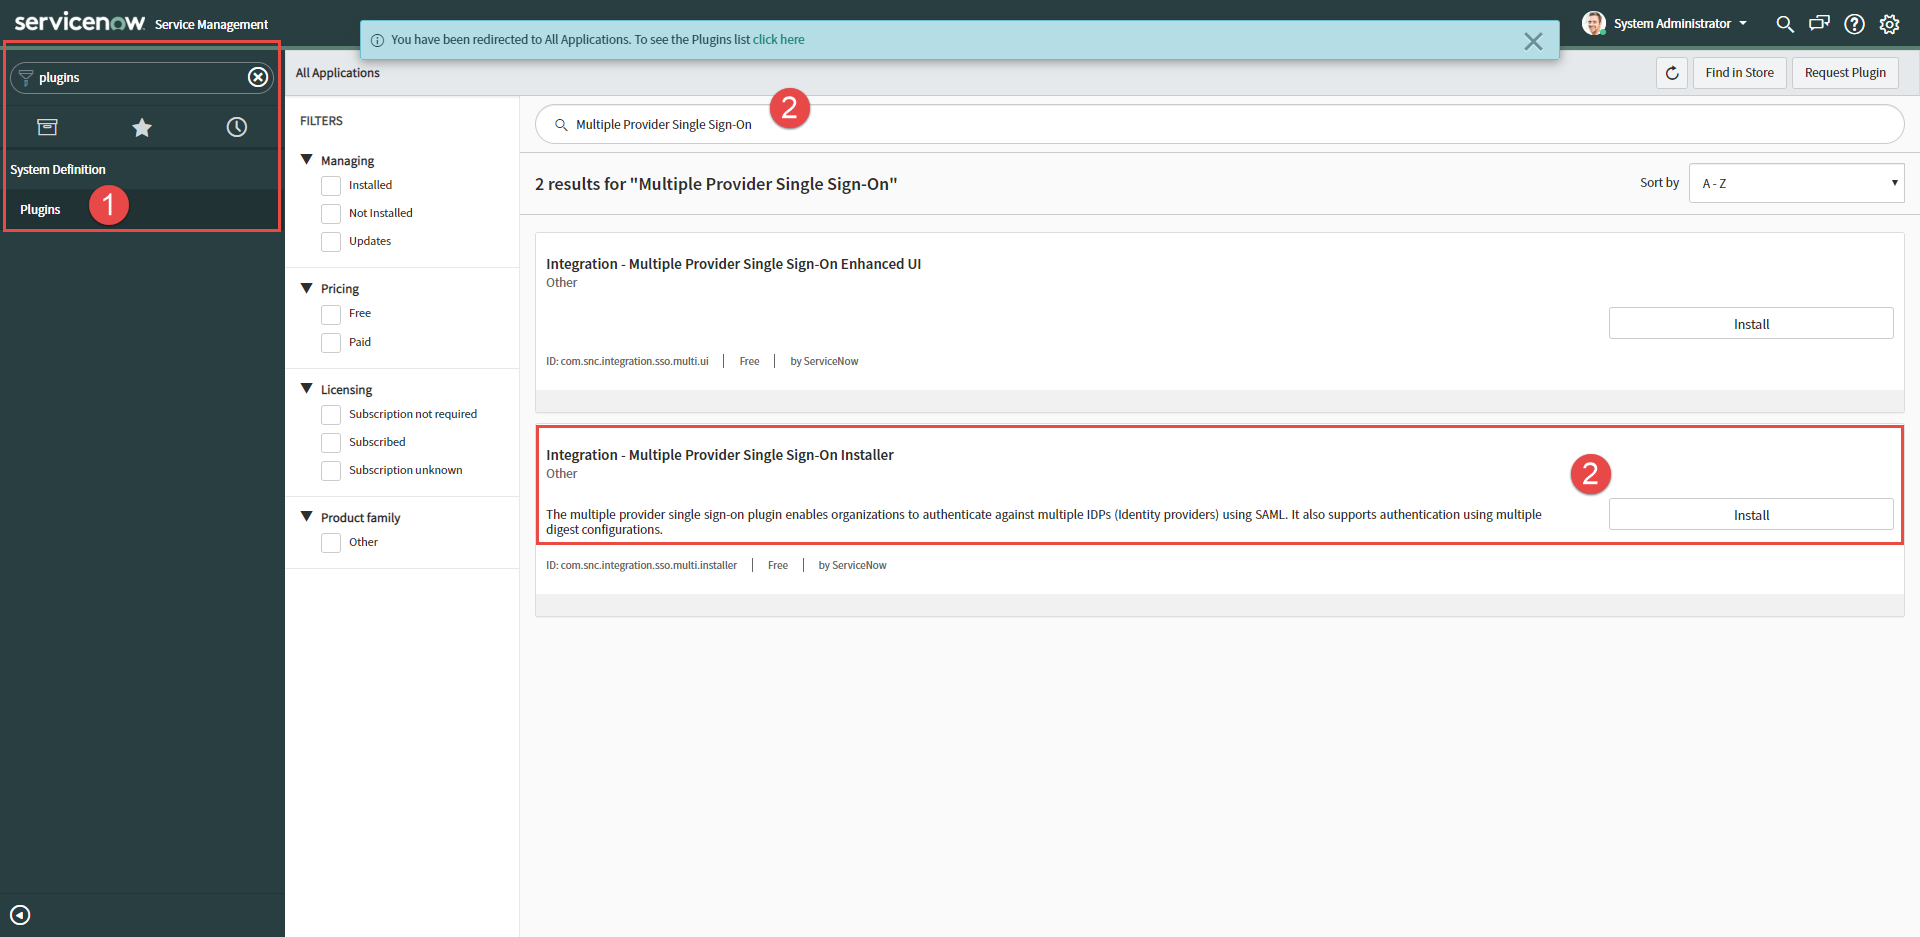
In the main screen, you can now search for Multiple Provider Single Sign-On. Install the 2nd option titled Integration - Multiple Provider Single
Sign-On Installer (without the Enhanced UI).
-
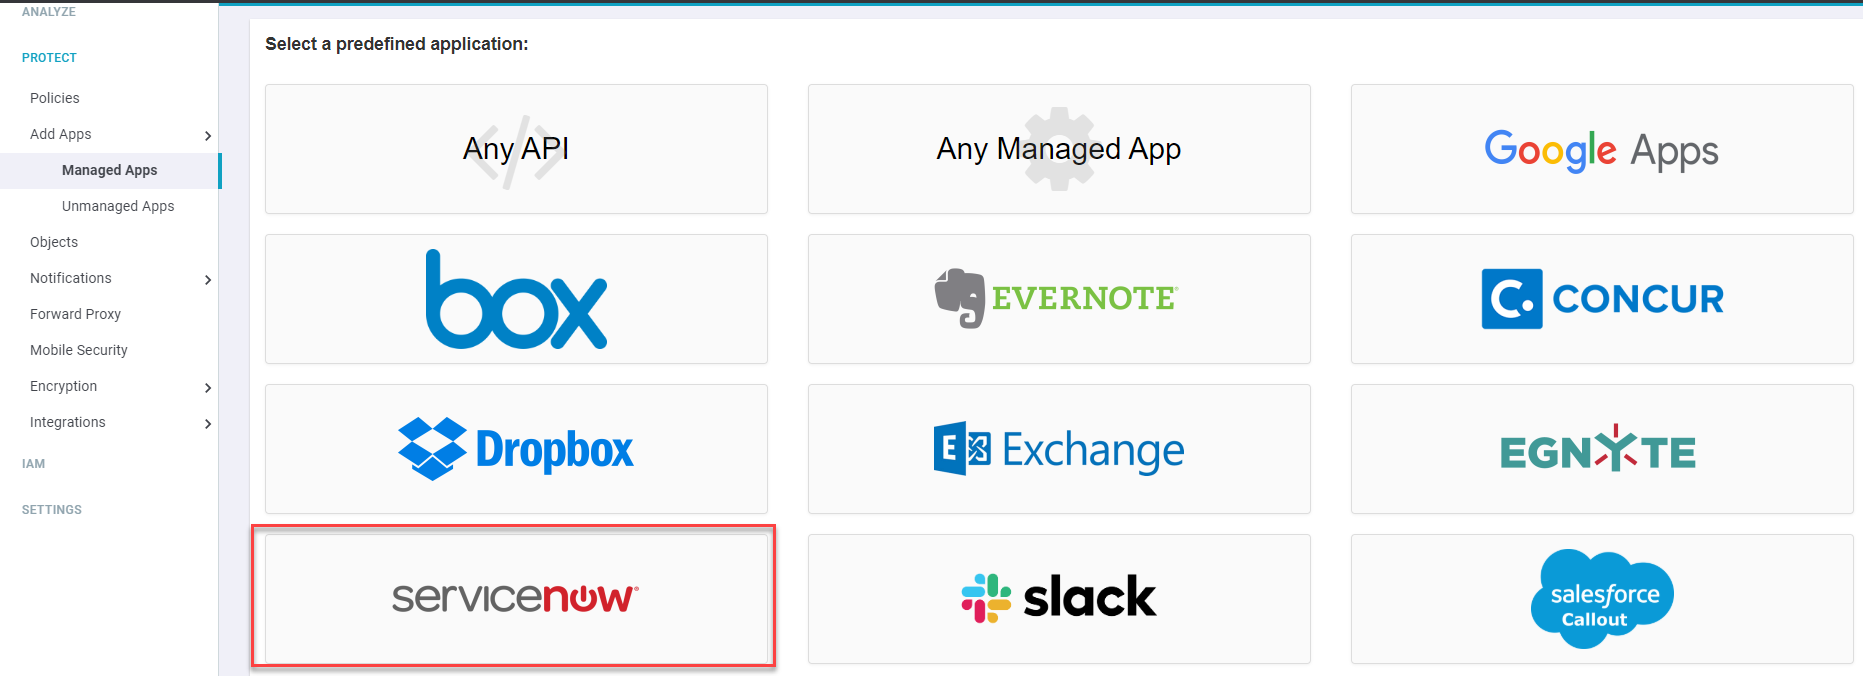
Now we can switch over to the Forcepoint Data Security Cloud | SSE admin portal and
start by adding ServiceNow. Under , select ServiceNow as the application you wish to add.
-
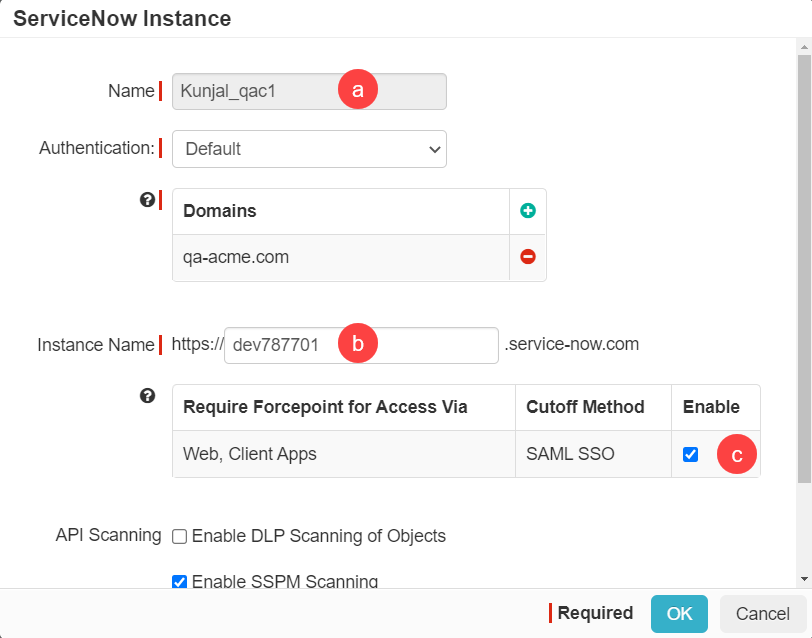
In the instance dialog, fill out the info as follows:
-
Enable SAML SSO so we can start to configure the SSO settings. Leave the SAML NameID set to Email as you will be using emails
for authentication. Click Ok and then click Save on the application settings page:
-
Enable SAML SSO so we can start to configure the SSO settings. Leave the SAML NameID set to Email as you will be using emails
for authentication. Click Ok and then click Save on the application settings page:
-
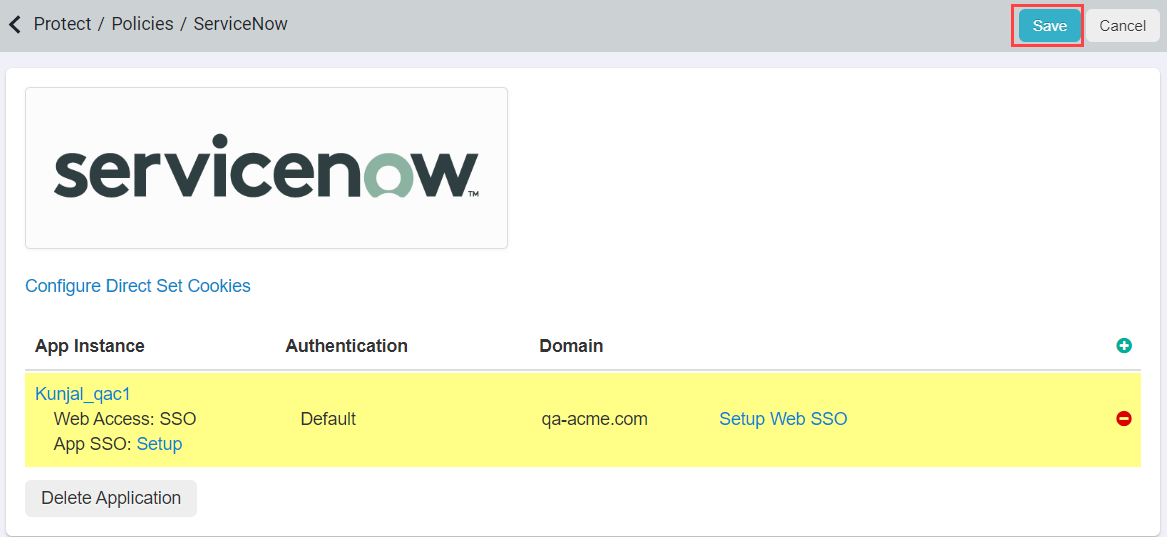
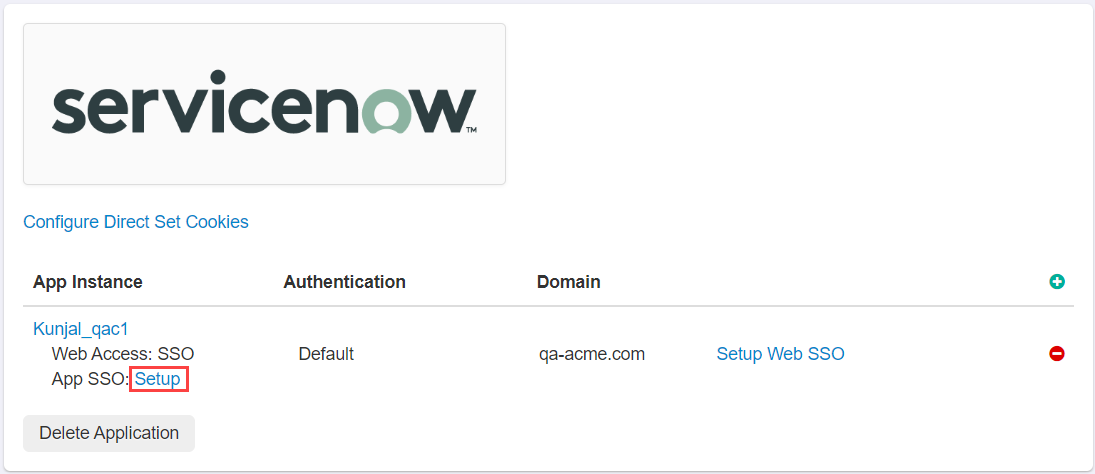
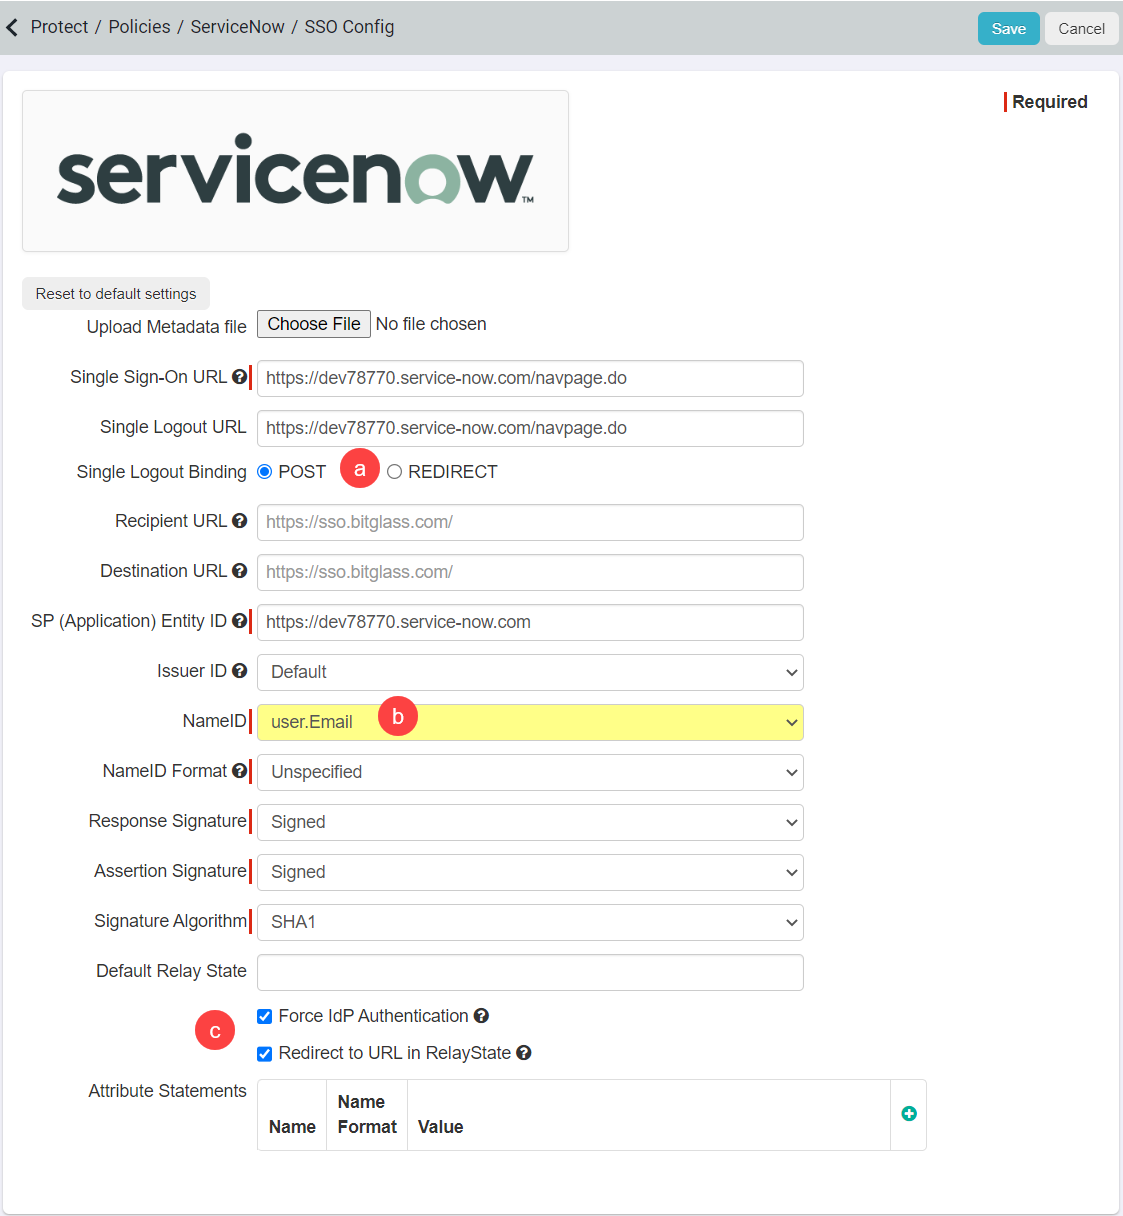
Select App SSO: Setup to configure the SSO settings inside of Forcepoint Data Security Cloud | SSE. You will see that the majority of the SSO information
is filled out for you. You will need to make some minor setting changes:
-
Once you are done click Save.
-
Once you are done click Save.
-
Go back to the page and set ServiceNow to Direct App Access under the Action Column before proceeding to the next steps. Direct Access
is required in order to successfully authenticate the SSO setup inside of ServiceNow, applications will not be able to authenticate the setup if you are sending them through the
reverse proxy. Once you are done with the full setup, you can then adjust your policy as needed.

-
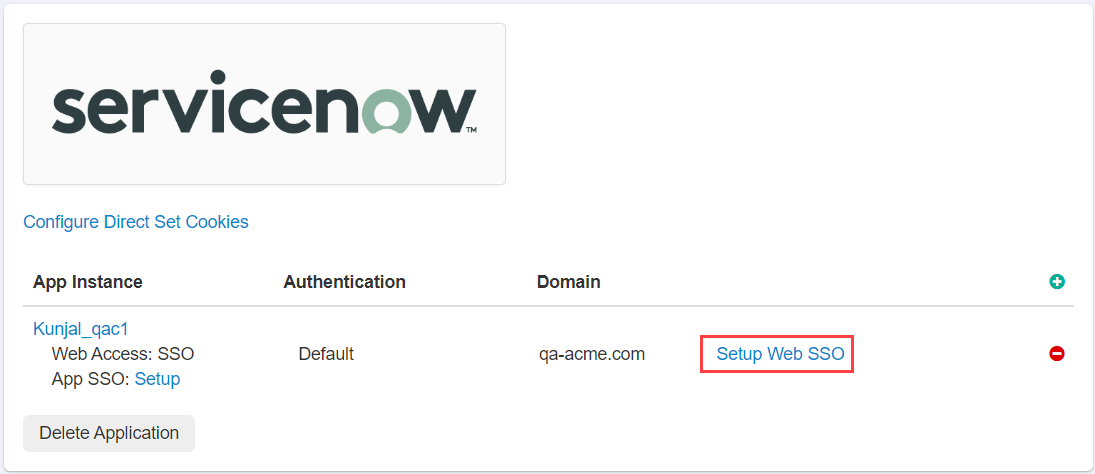
Now we can navigate back to the ServiceNow setting page and select Setup Web SSO to find the SSO settings we will need to input into ServiceNow.
-
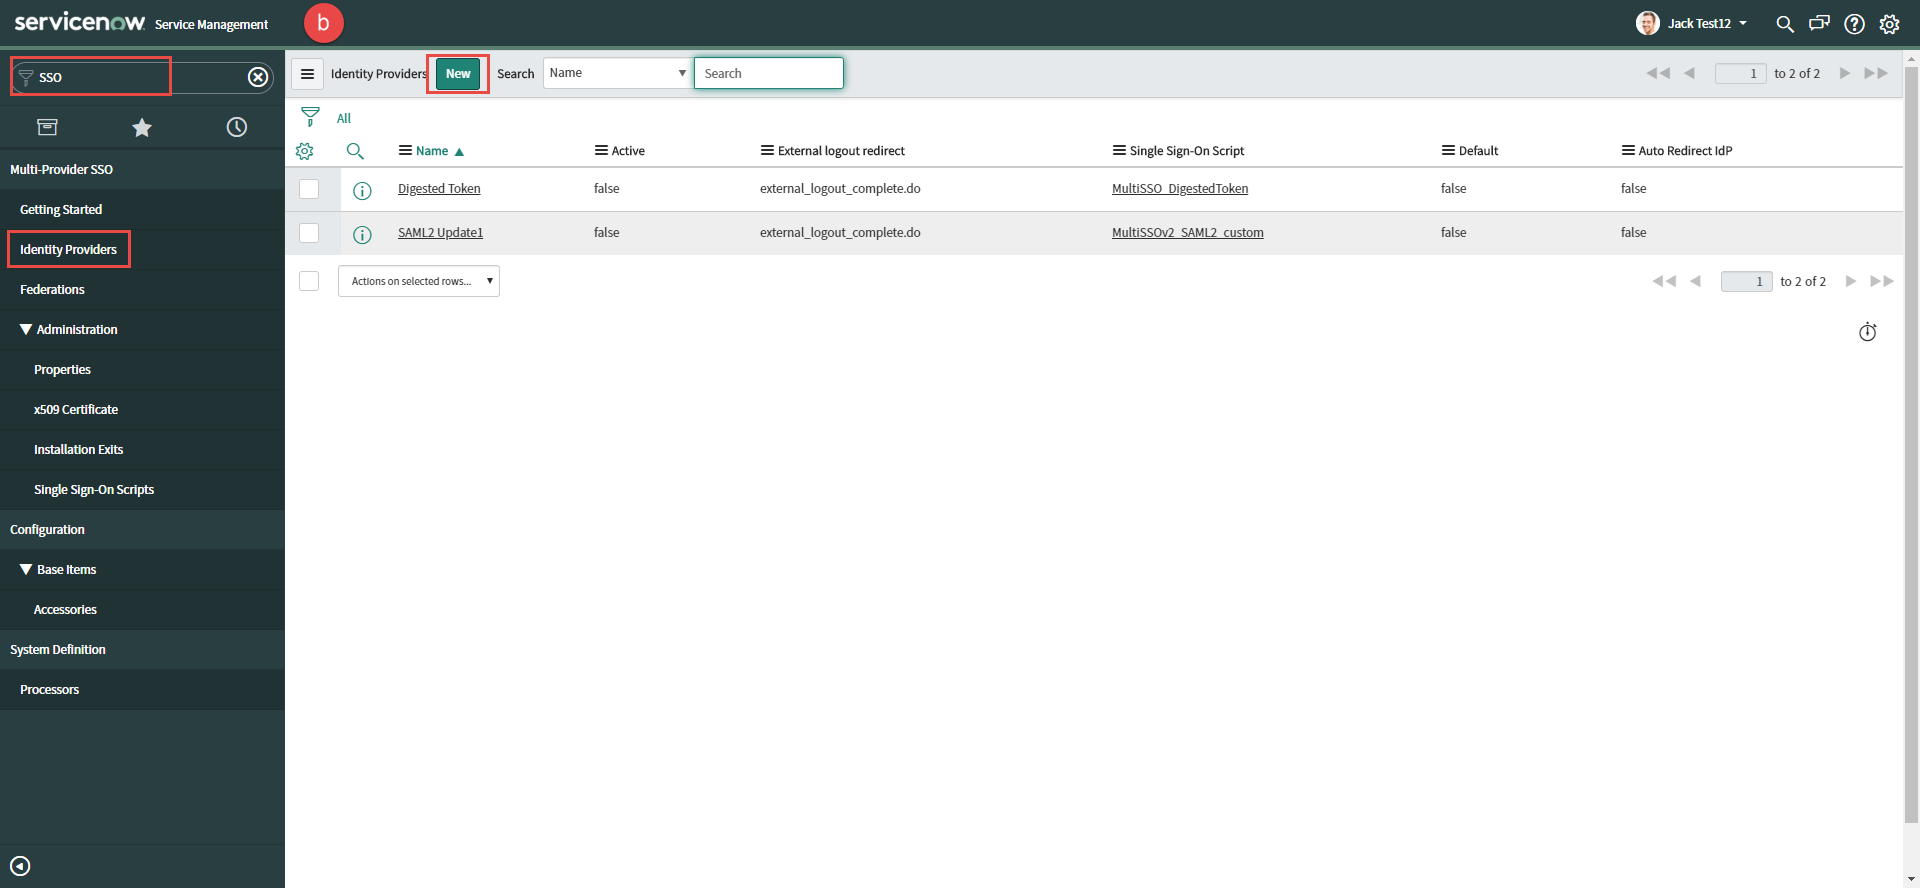
In another browser window go back to your ServiceNow admin portal and search for SSO in the left column and then select Identity
Providers and click New in the top bar to create a new IdP setup.

-
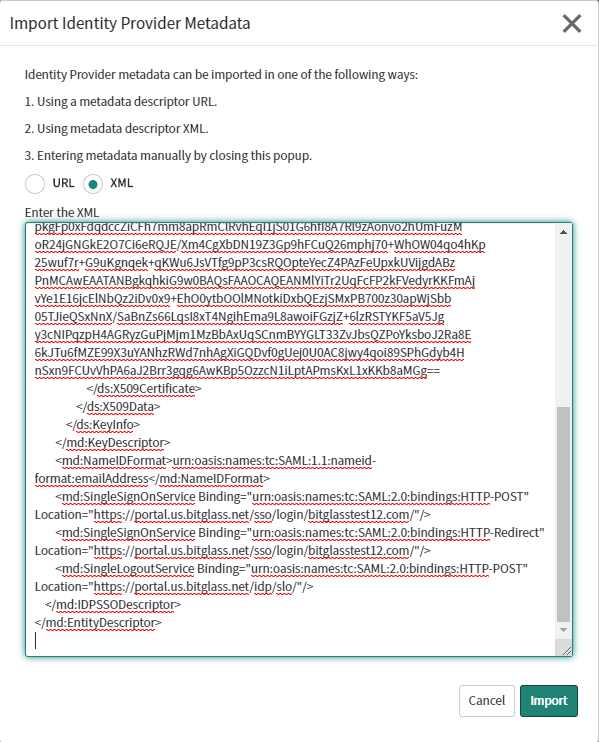
In the Import Identity Provider Metadata dialog select XML and then open up the metadata XML file we downloaded above in step a
inside of a text editor and copy the contents and paste it here. Click Import when you're done.
-
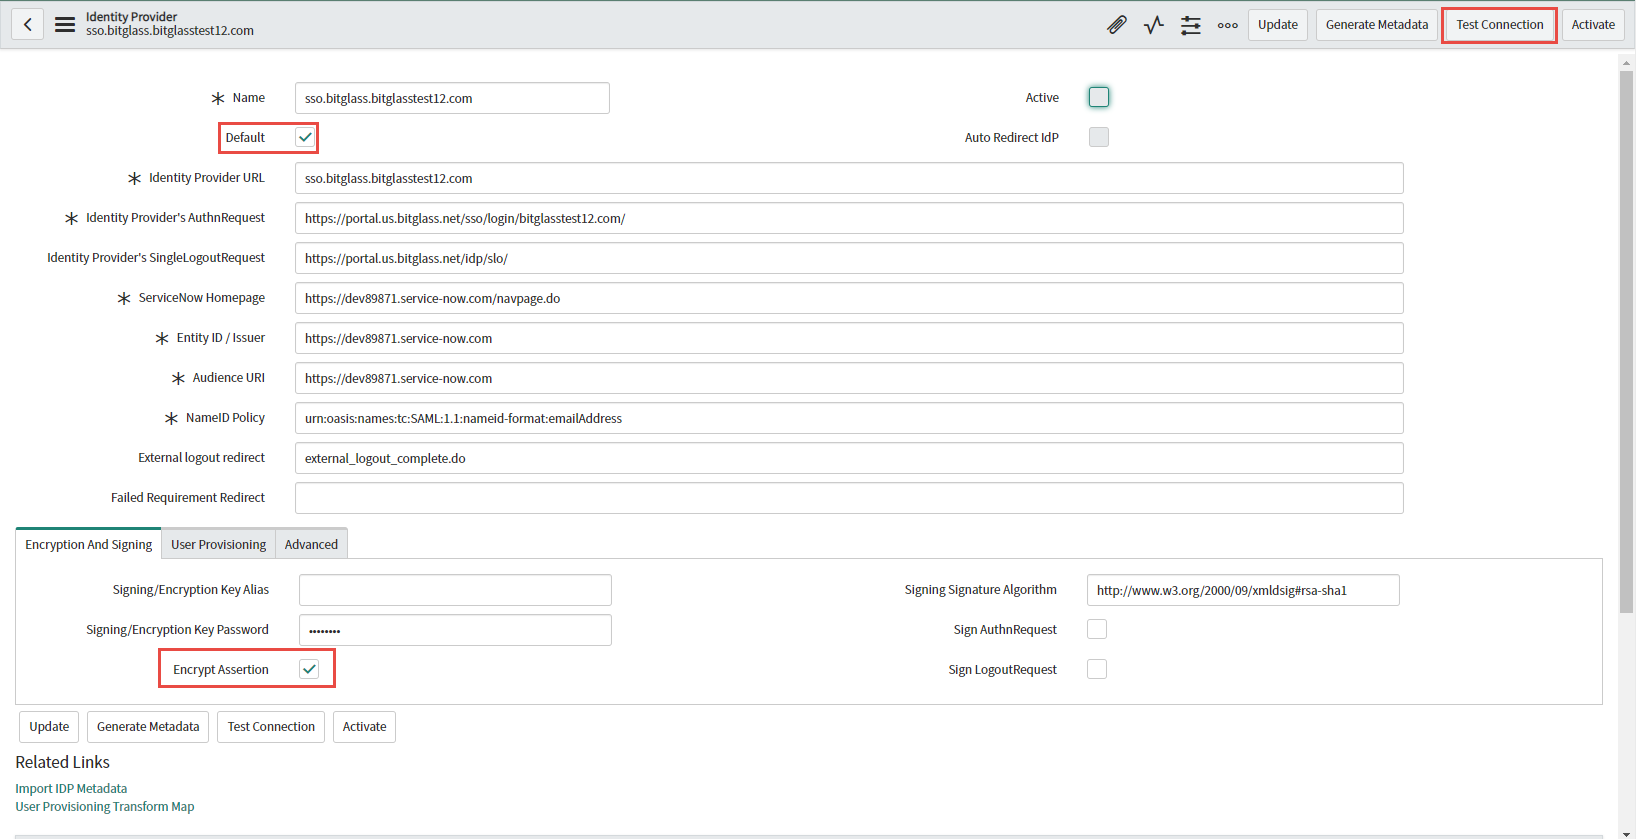
On the Identity Provider page you will see the SSO information configured for you. The only changes you will need to make is select the
Default checkbox at the top and then check the box for Encrypt Assertion at the bottom under the Encryption and
Signing tab. All other settings can remain default. Click Test Connection in the top right corner.
-
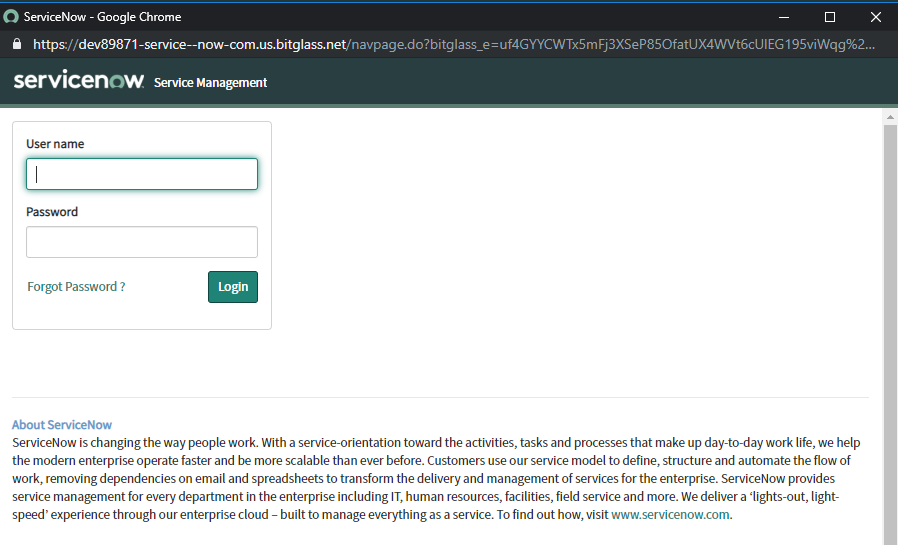
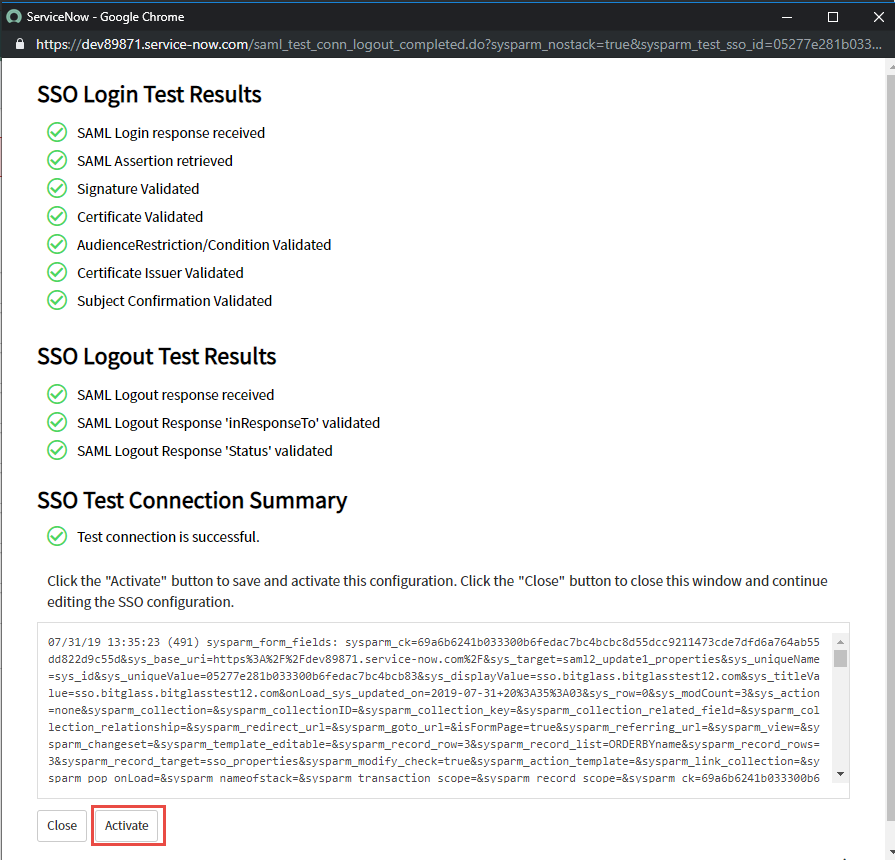
When you click Test Connection you will be prompted to login with your ServiceNow admin account. Do so and then you should see the test results page
summary. Click Activate at the bottom of this page.
-
In another browser window go back to your ServiceNow admin portal and search for SSO in the left column and then select Identity
Providers and click New in the top bar to create a new IdP setup.
-
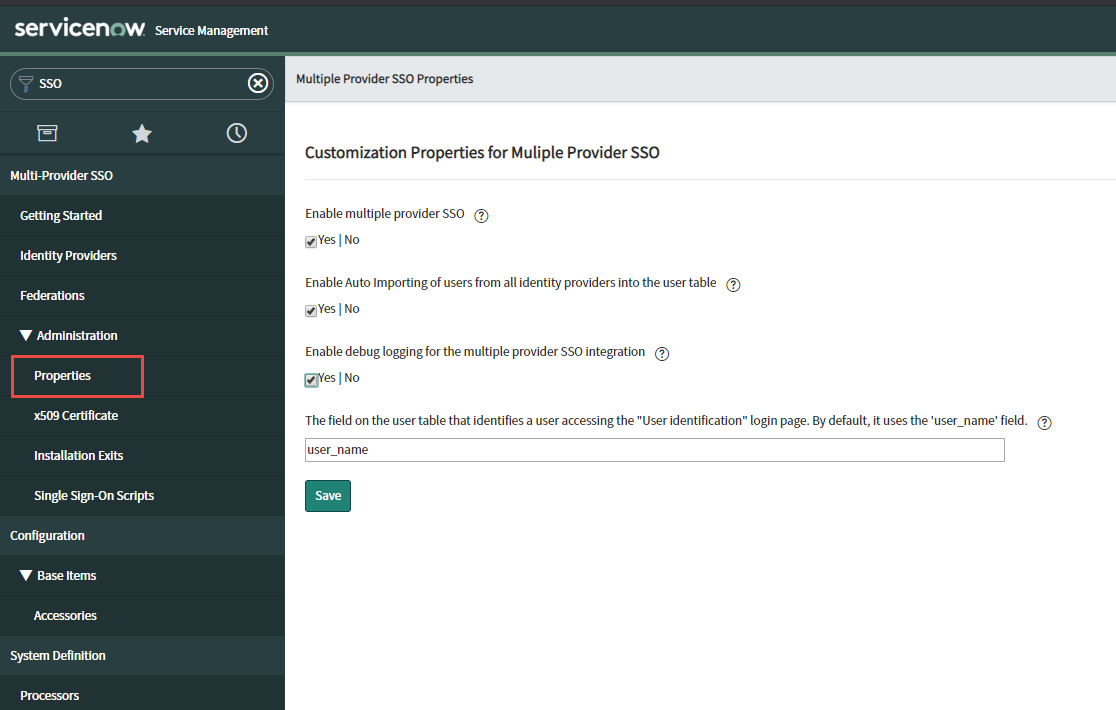
With your SSO settings now Active, go to in the left column and check Yes for each available option presented. ClickSave when you are done.
-
You have now completed your setup. You can navigate back to your Forcepoint Data Security Cloud | SSE admin portal page and setup or test your policies.
Refer to the Configuring proxy policy actions to learn more about available policy actions you can configure.
As a test example, you can set your policy back to Secure App Access and try to login to ServiceNow and see that it redirects you to Forcepoint Data Security Cloud | SSE (or your IdP) for authentication and then routes you through the proxy (notice the rewritten URL in the second screenshot).

