ServiceNow: Enabling SSPM scanning
This guide page will walk you through setting up and enabling SSPM scanning for ServiceNow to scan for security misconfigurations.
Before you begin
Steps
-
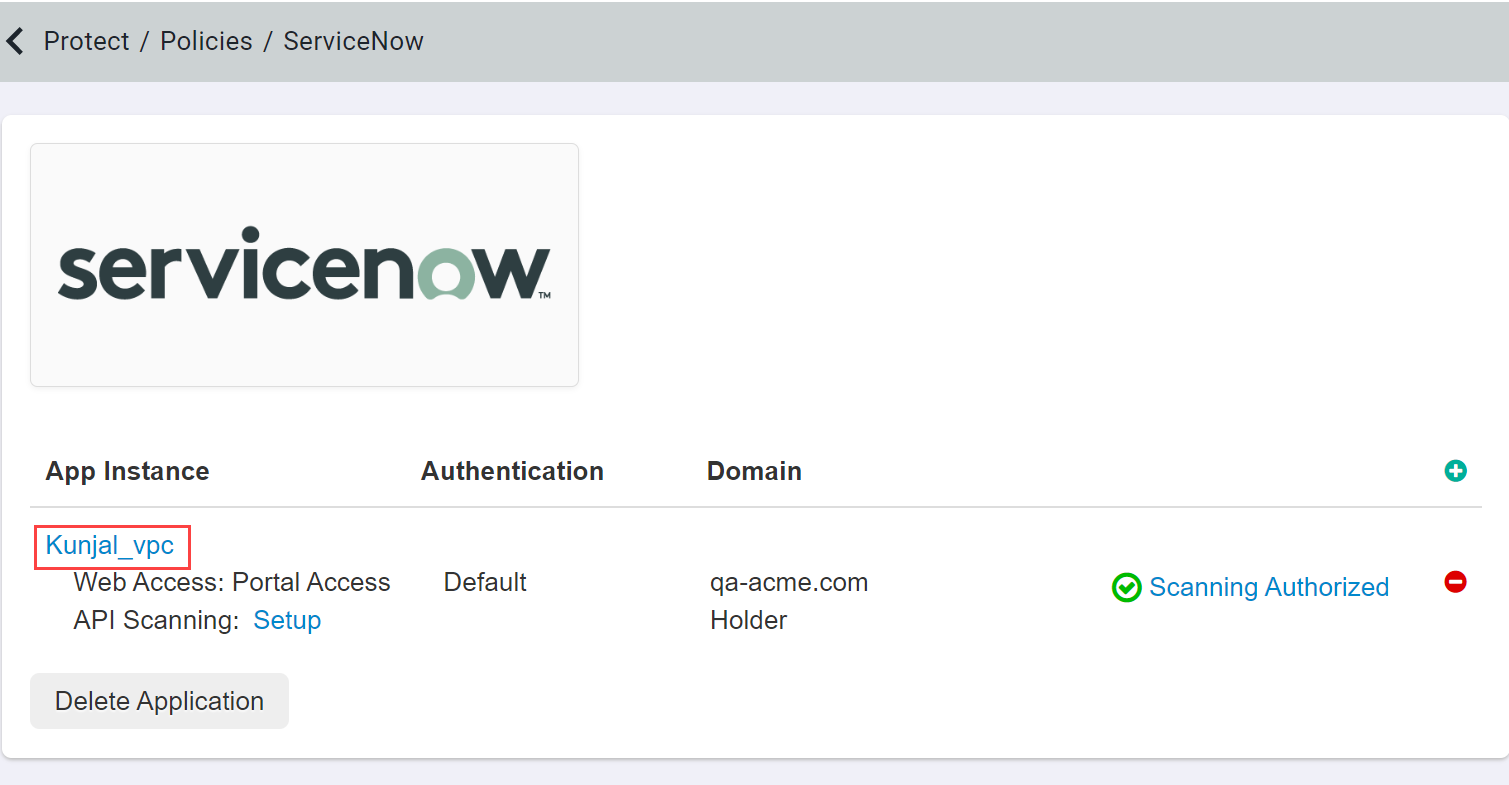
In the Forcepoint Data Security Cloud | SSE admin portal, navigate to and scroll down to select the ServiceNow app to view the application settings page.

-
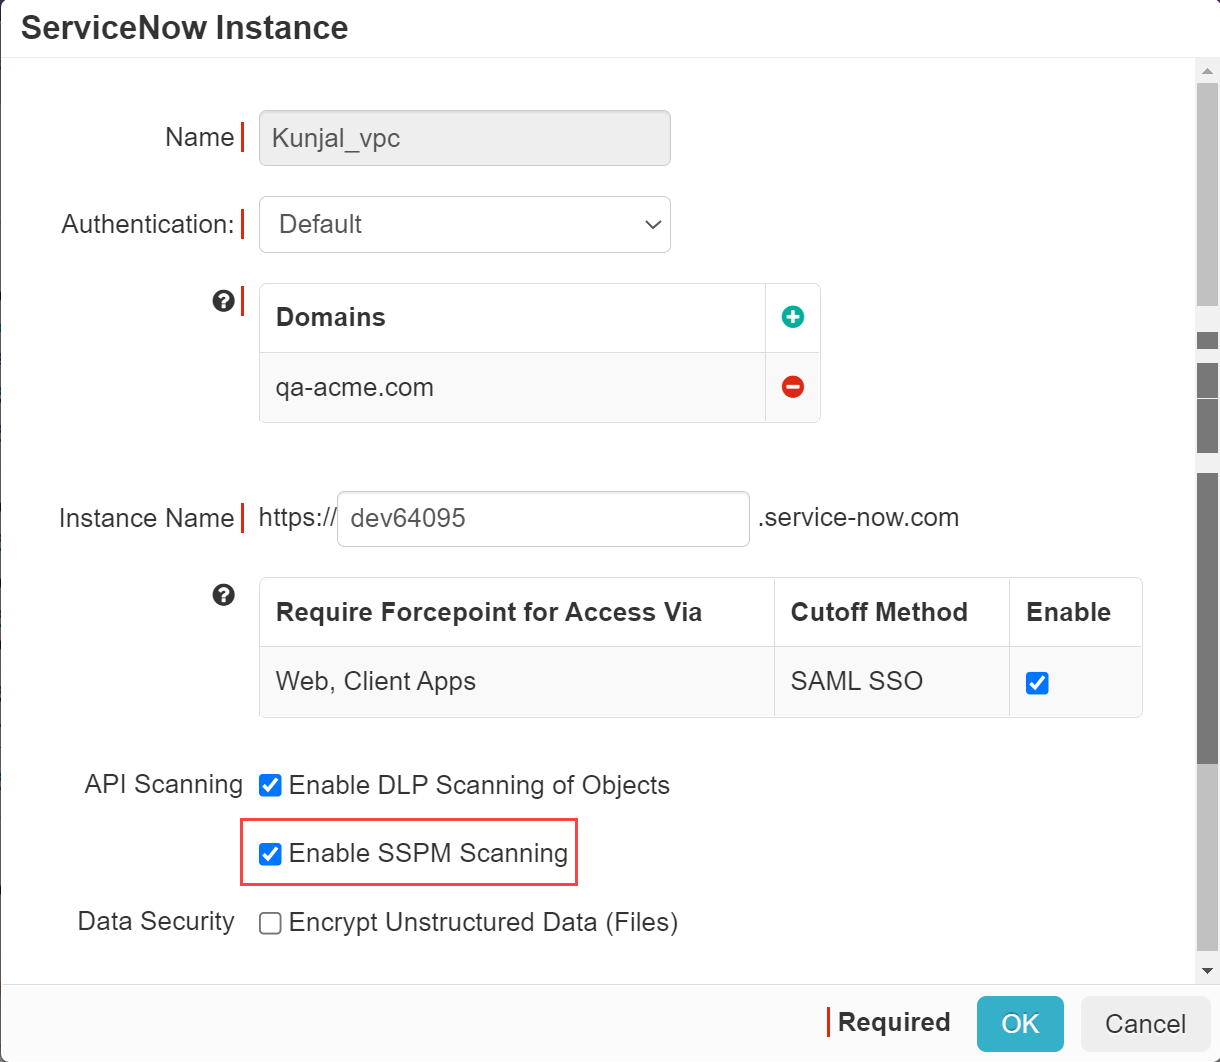
On the app settings page, select the app instance you setup API scanning with that you want to enable SSPM for. In the app instance dialog window that pops up check the box to
Enable SSPM Scanning. Click Ok and then save and you're all set.
-
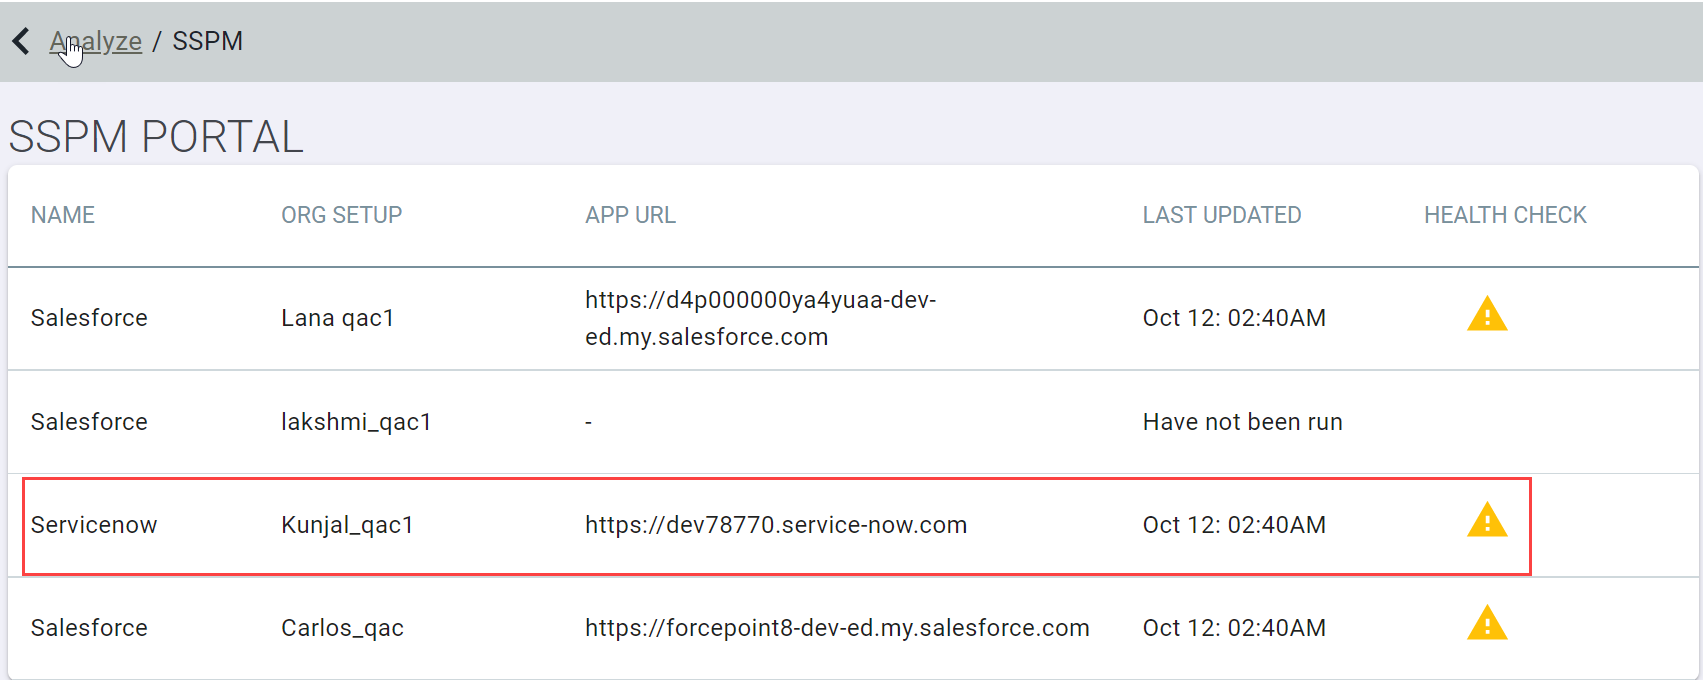
Scanning should start after saving and then a report will be generated once ready. You can review the report on the page, you'll see your app with the org (instance) name next to it in case you have multiple apps and instances configured. Click on it to view the report.
-
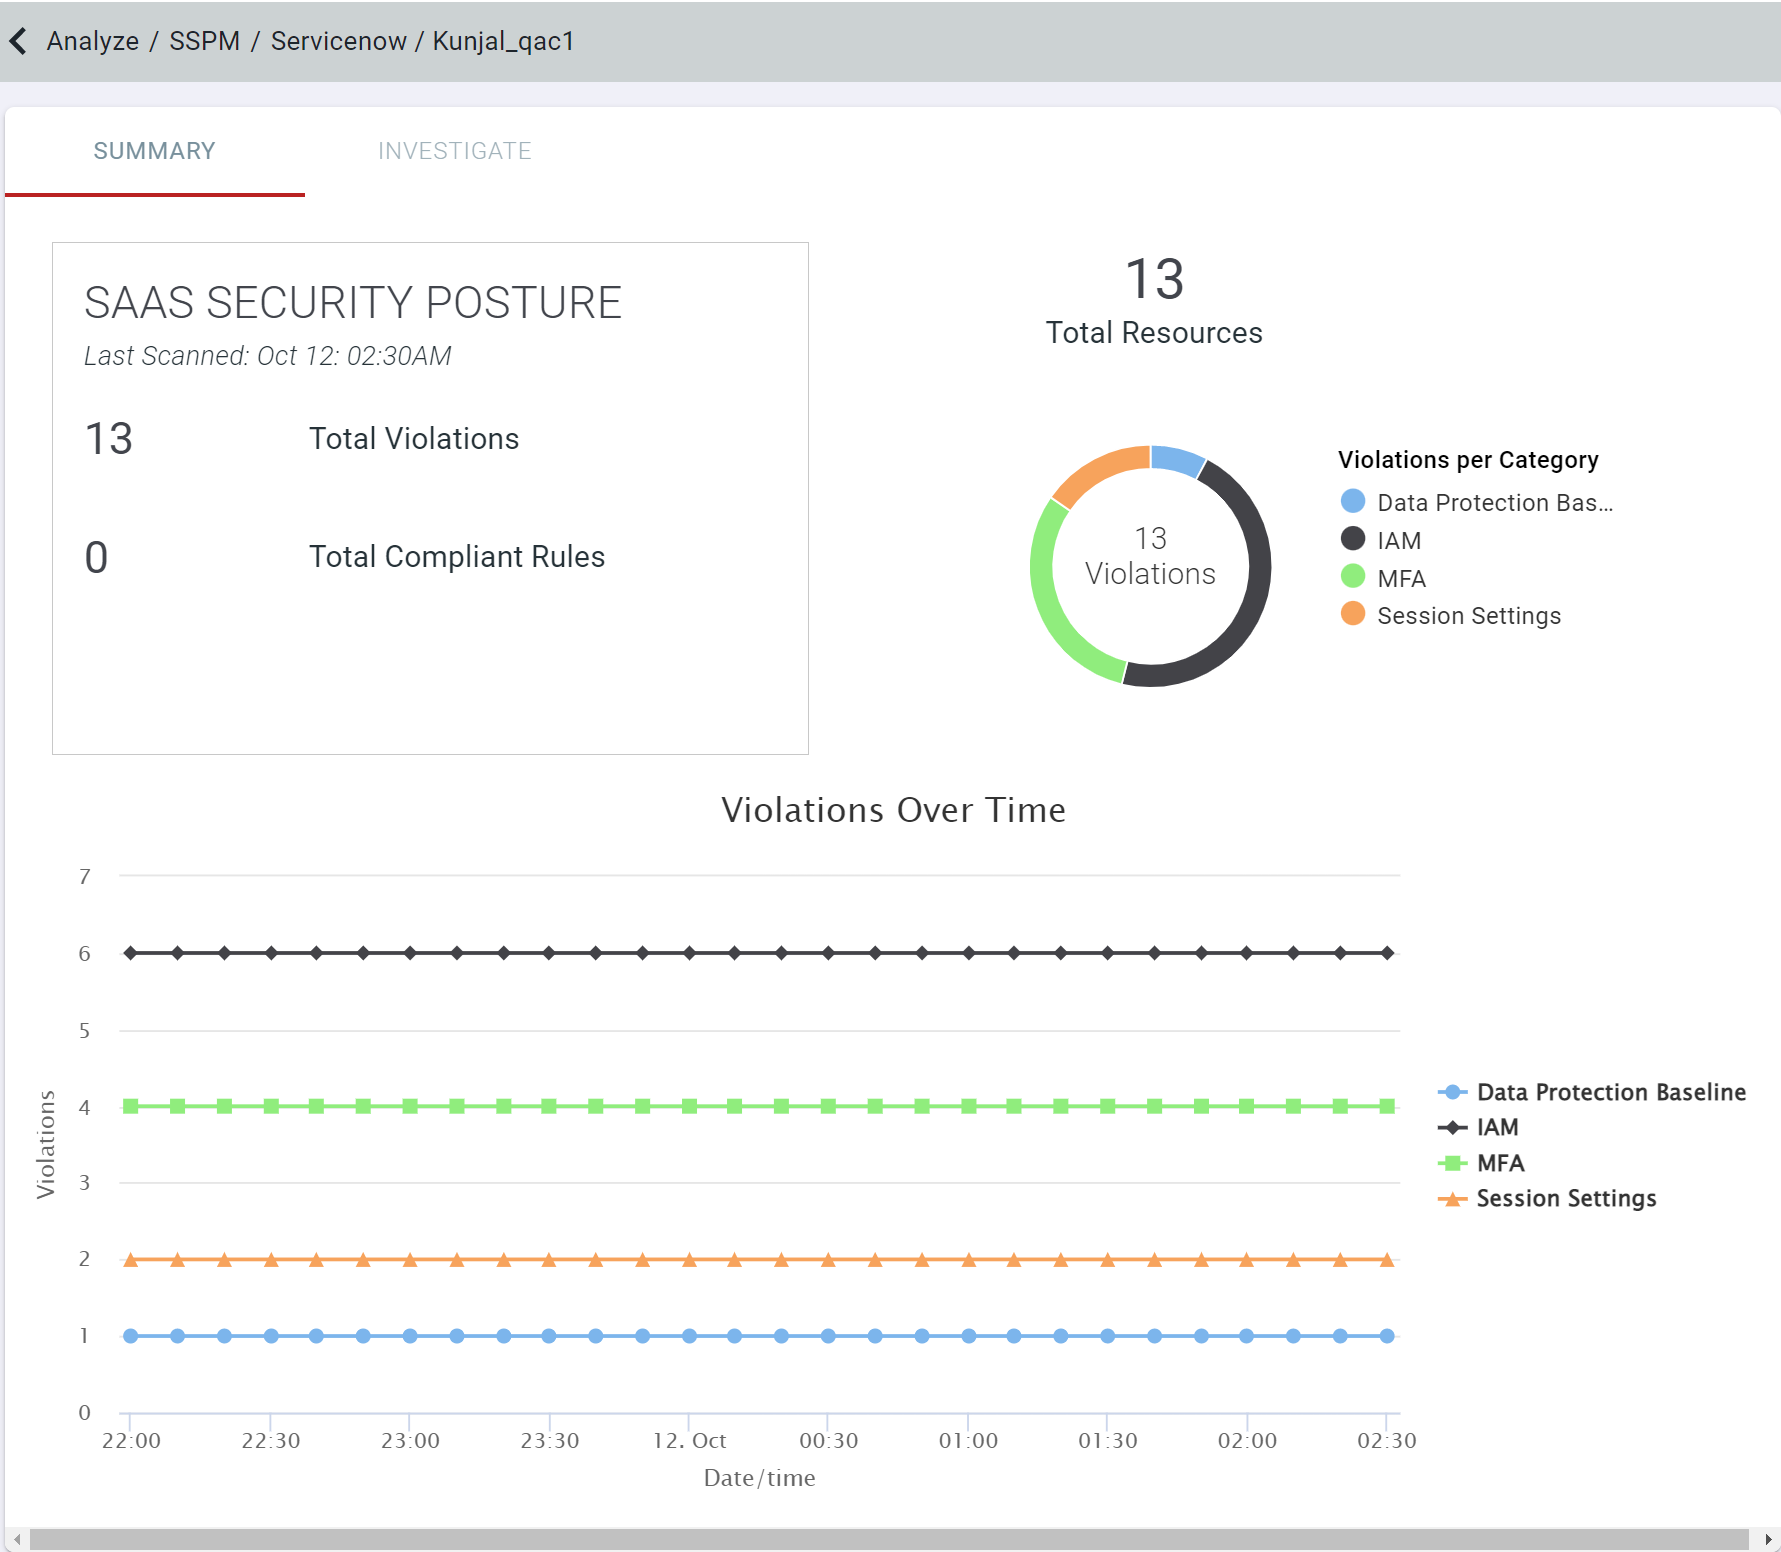
The Summary tab will give you an overview of the number of violations you currently have within ServiceNow as well as your changes over time on the bottom
graphs.
-
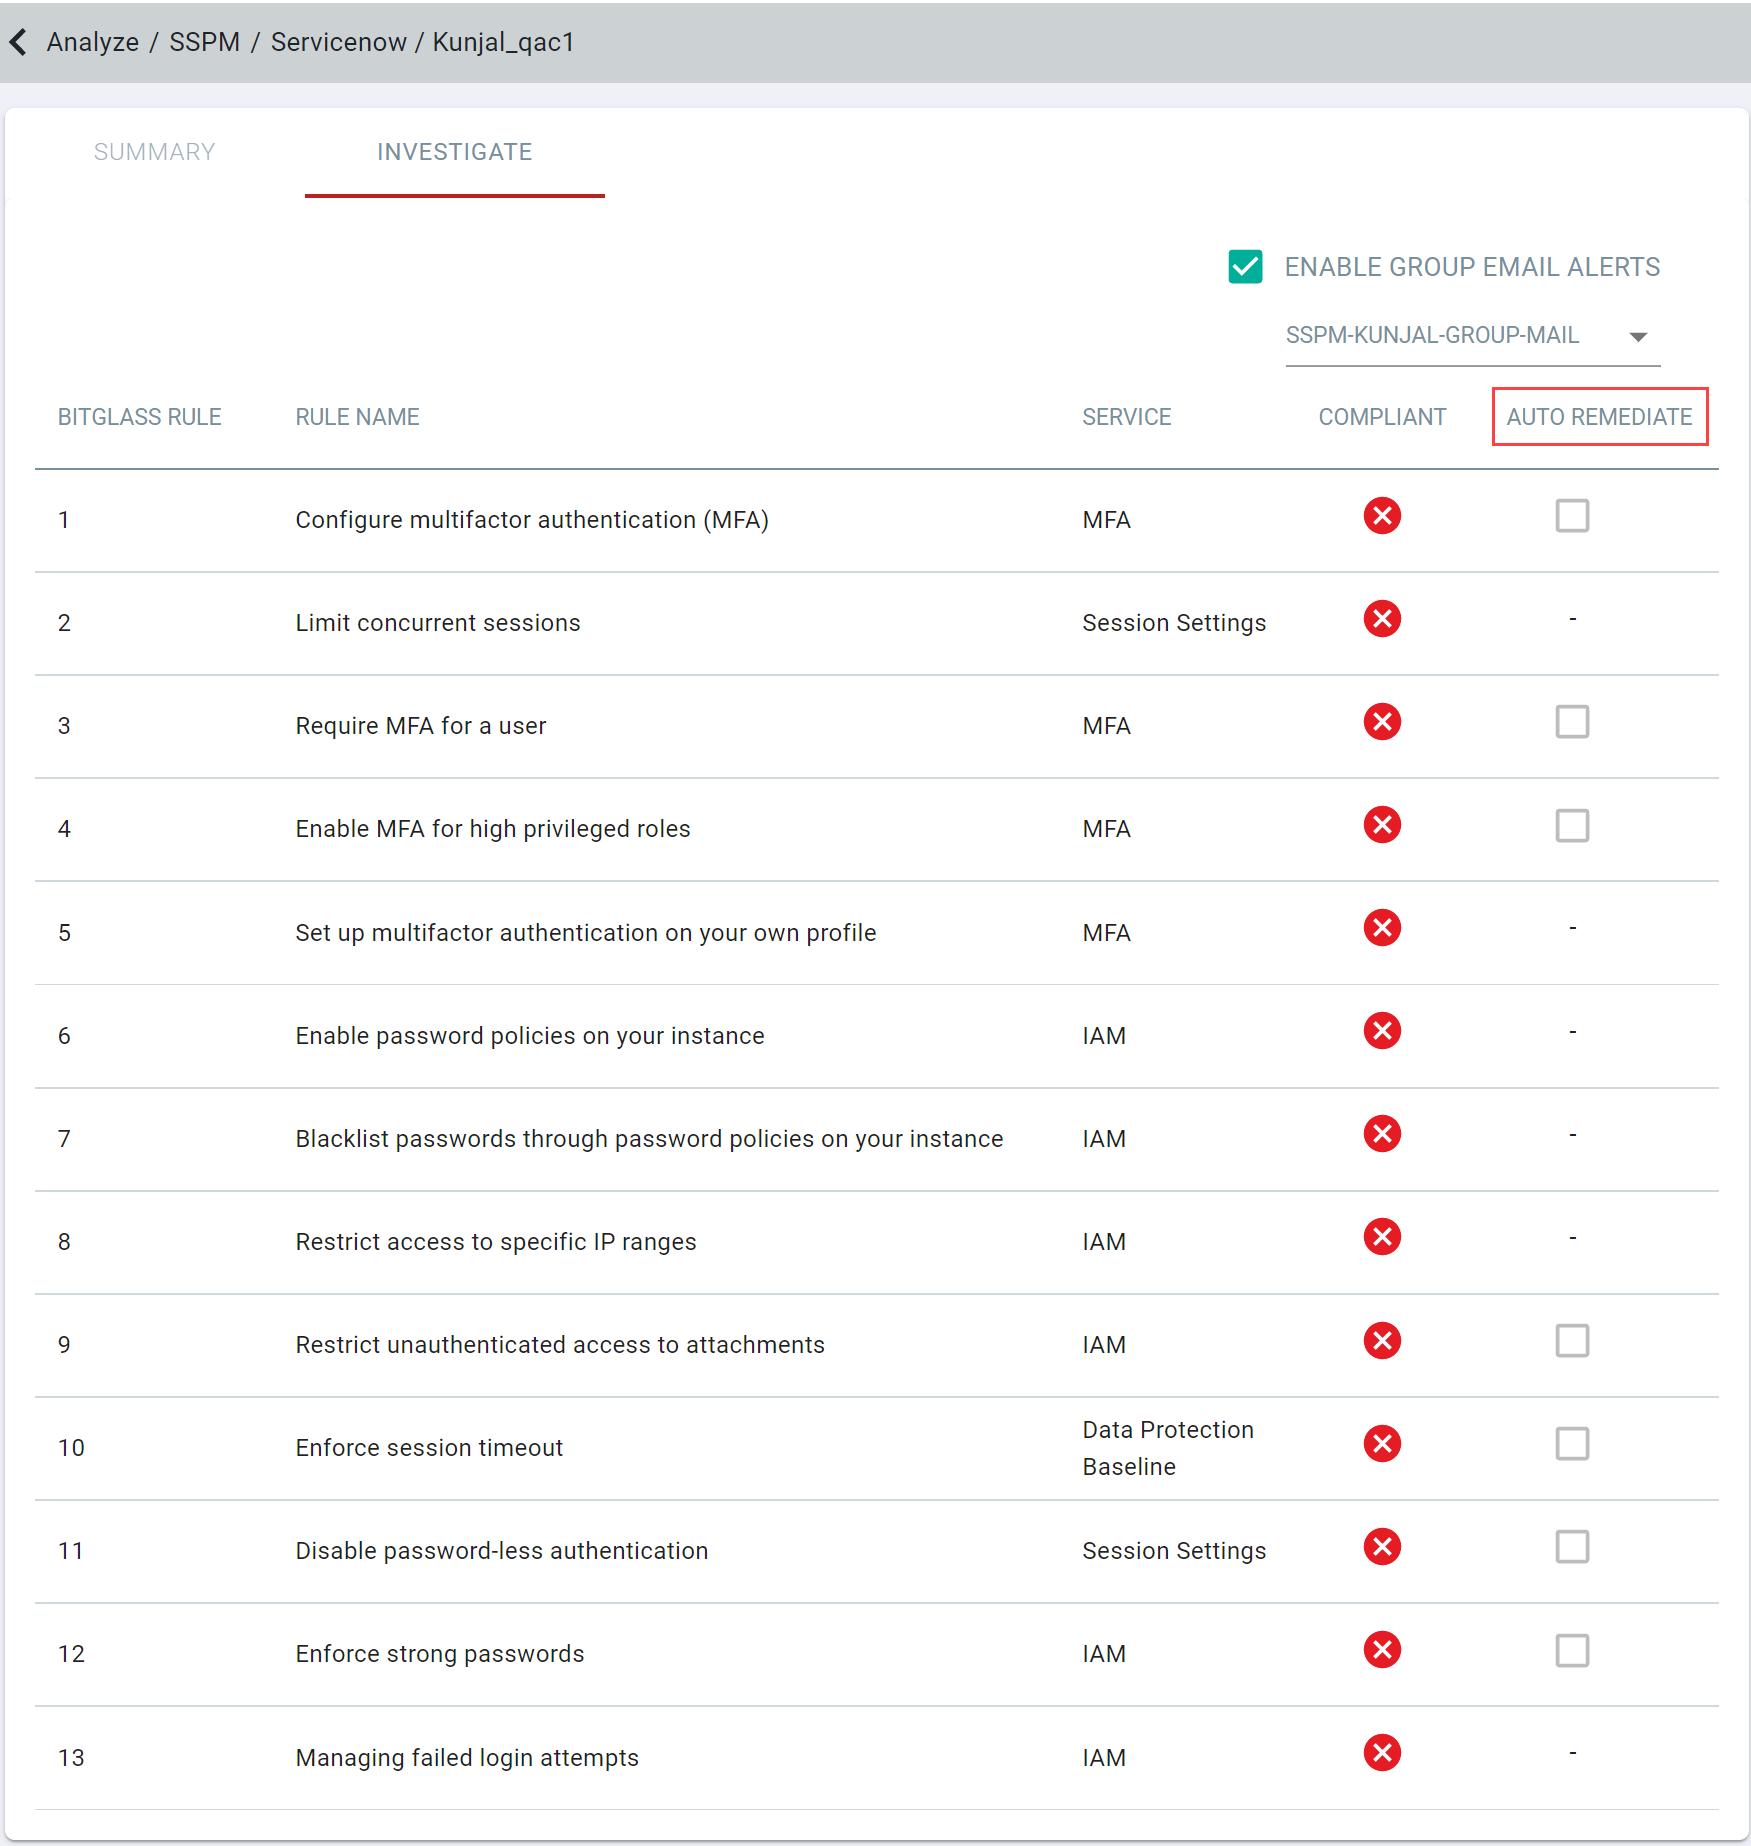
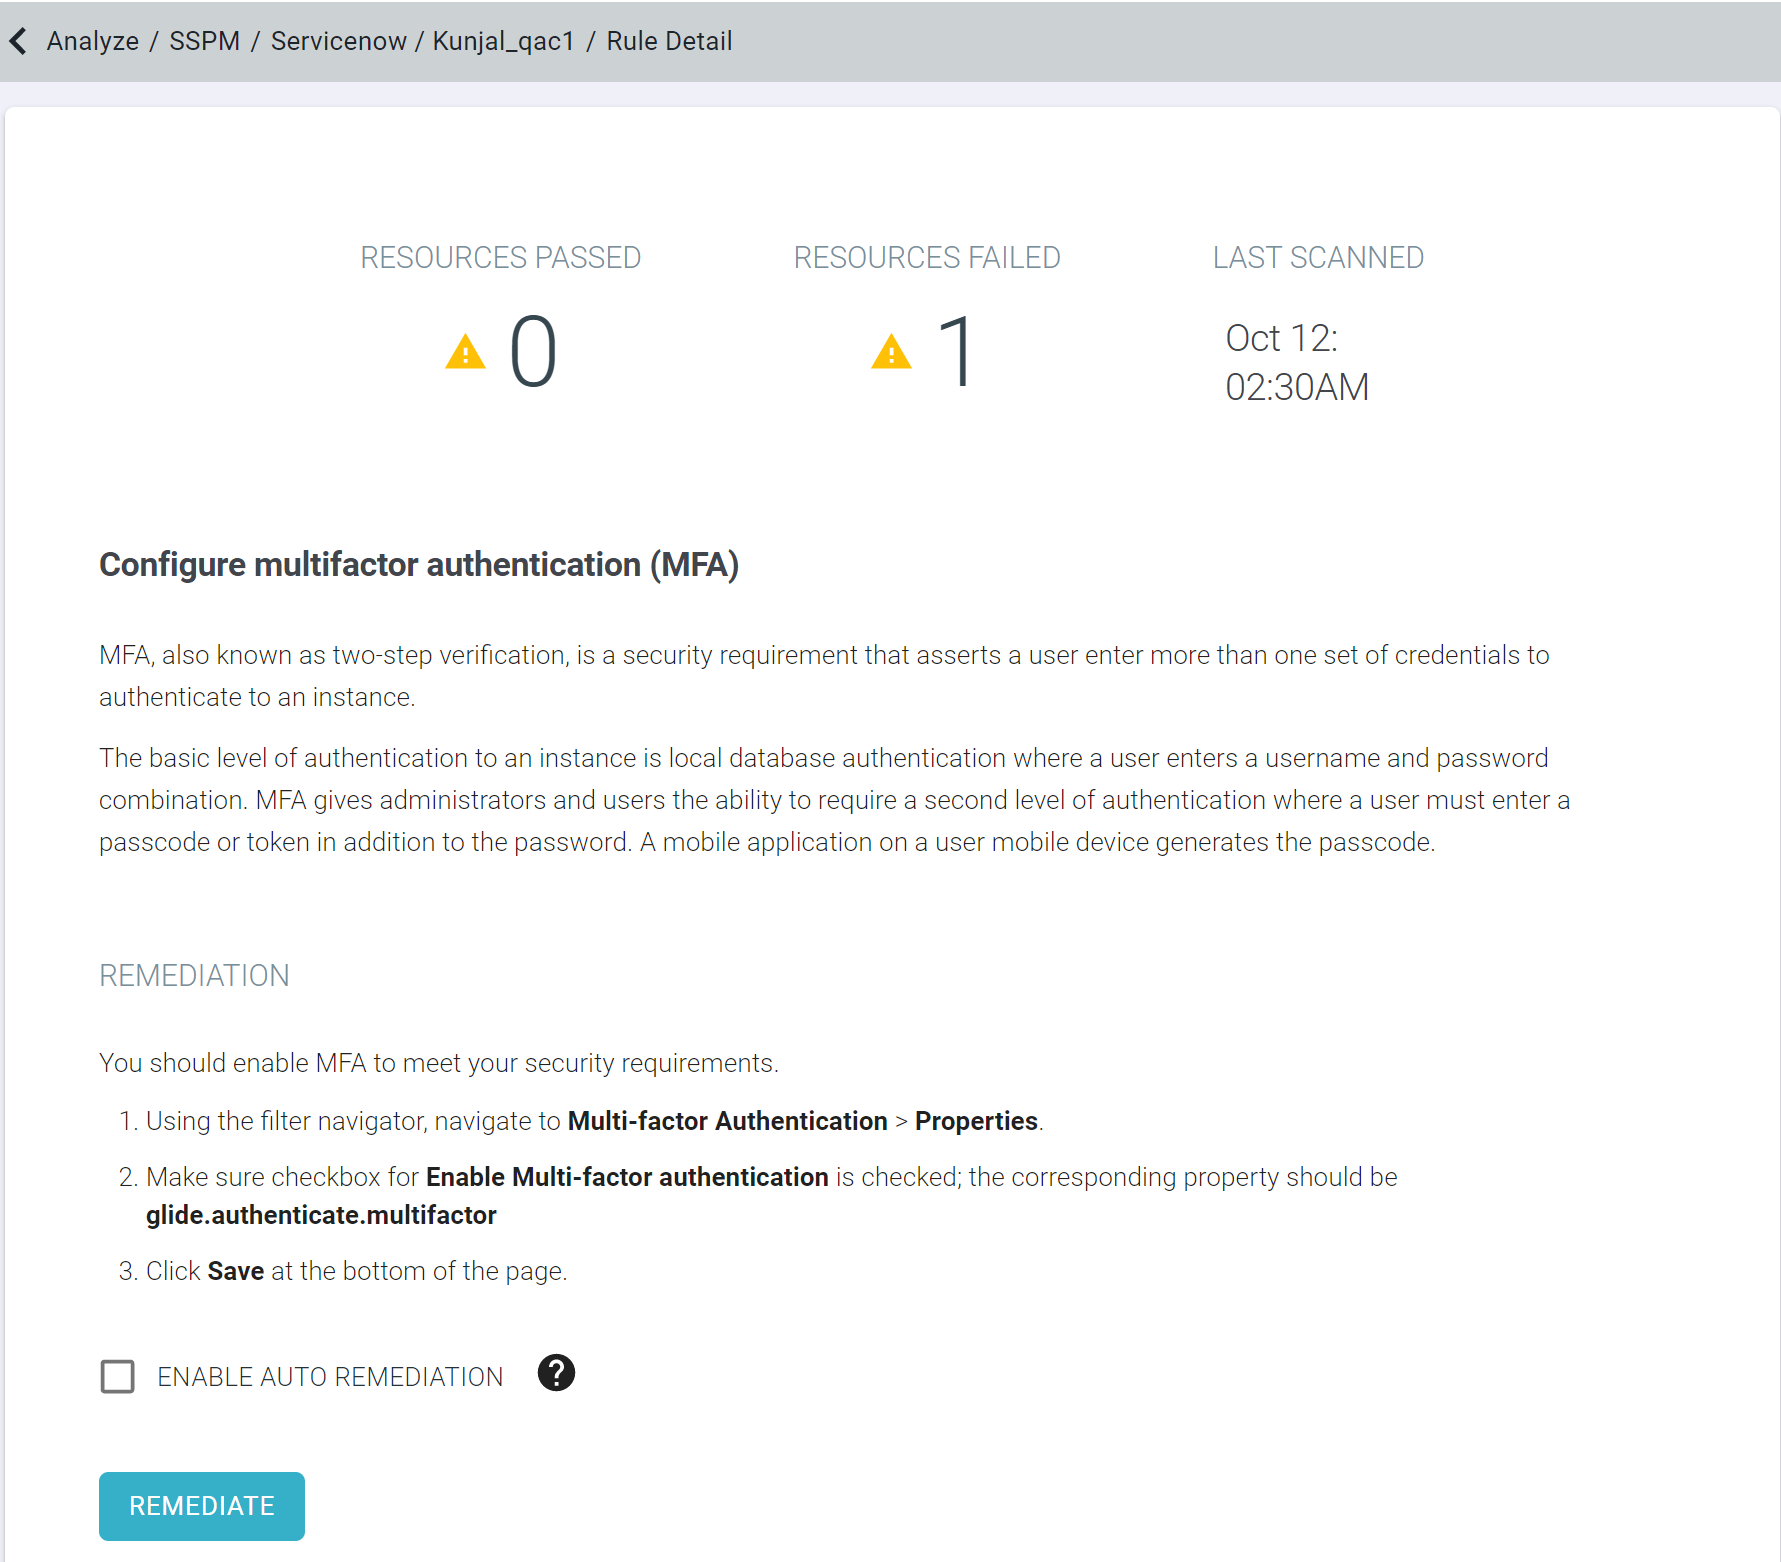
The Investigate tab will give you a break down of each of the rules and configurations and whether you are in compliance or not. You can click the
Auto Remediate checkbox (for applicable rules) to have Forcepoint Data Security Cloud | SSE automatically make changes to the setting if it is ever
discovered to not be in compliance. Otherwise you can click into any rule to read more information about the security configuration and how to manually remediate it (Forcepoint Data Security Cloud | SSE will provide you exact steps for making the
change).