Configuring primary and secondary IKE gateways

You need to configure primary and secondary IKE gateways to the Forcepoint ONE SSE cloud.

Steps

  1. Configure Primary Cloud FQDN and Secondary Cloud FQDN under Objects > Addresses.

    You can obtain the primary and secondary Cloud FQDN from Forcepoint ONE SSE by navigating to the Analyze > Tunnels > Setup Info dialogs of the primary and secondary IPsec tunnels.

  2. Navigate to Network > Network Profiles > IKE Gateways > Add.
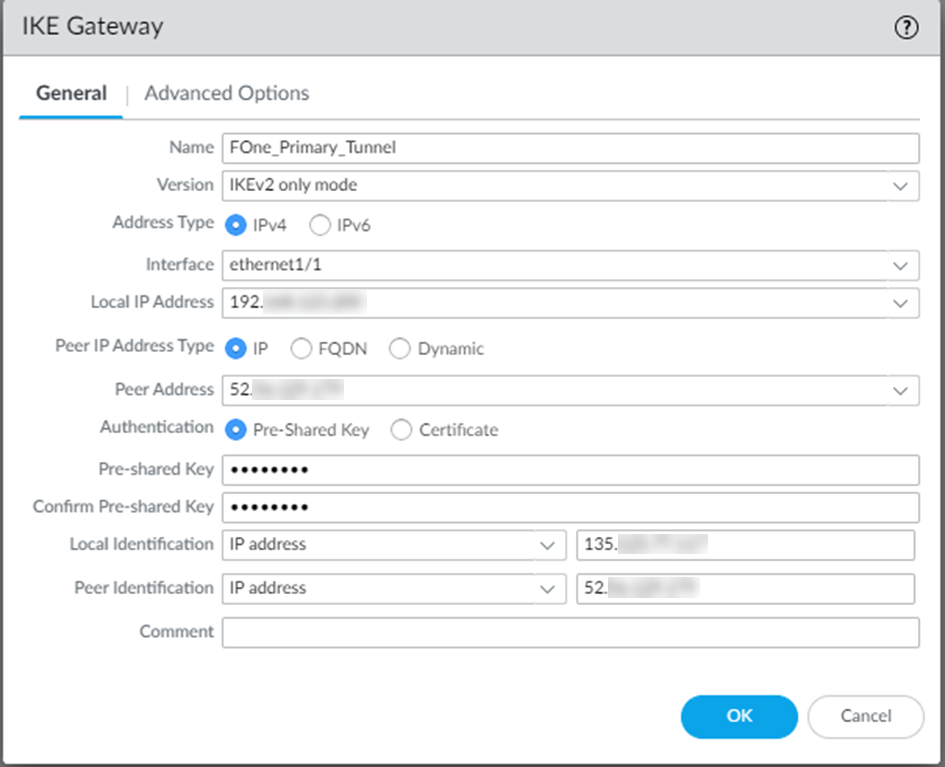
  3. On the IKE Gateway page, on the General tab, enter the following details:
    1. Enter an appropriate gateway Name.
    2. Select the IKEv2 only mode option from the Version drop-down as Forcepoint ONE SSE supports only IKEv2.
    3. Select the IPv4 option as Address type as Forcepoint ONE SSE supports only IPv4.
    4. Select the internet facing interface from the Interface drop-down.

      In this example, ethernet1/1 is the internet facing interface and ethernet1/2 is the internal client facing interface.

    5. Enter the Local IP Address for the local interface that is the endpoint of the tunnel.
      This field is optional.
    6. Select Peer IP Address Type to IP or FQDN option button based on what is configured on the Forcepoint ONE SSE.

      In the following example, Peer IP Address Type is set to IP for establishing the tunnel.


      In the following example, Peer IP Address Type is set to FQDN for establishing the tunnel.


    7. Enter either IP address or FQDN of the primary datacenter in Peer Address based on what you have selected as Peer IP Address Type.

      Copy the Cloud FQDN of primary datacenter from Forcepoint ONE SSE by navigating to the Analyze > Tunnels > Setup Info dialog of the primary IPsec tunnel and paste it in Peer Address.

      Note: To know the public IP address of the primary datacenter, you need to nslookup using the Cloud FQDN.
    8. Select the Authentication type as Pre-shared Key.
    9. Enter the Pre-shared Key configured on the Forcepoint ONE SSE.

      You can obtain the Pre-shared Key from Forcepoint ONE SSE by navigating to the Analyze > Tunnels > Setup Info dialog of primary or secondary IPsec tunnel.

      Note: The Pre-shared Key is same for the primary and secondary IPsec tunnel.
    10. Select either IP address or FQDN from the Local Identification drop-down based on the Site IKE Identity Type configured on the Forcepoint ONE SSE and then enter Site IKE ID.

      You can obtain the Site IKE ID from Forcepoint ONE SSE by navigating to the Analyze > Tunnels > Setup Info dialog of the primary or secondary IPsec tunnel.

      Note: The Site IKE ID is same for the primary and secondary IPsec tunnel.
    11. Select either IP address or FQDN from the Peer Identification drop-down based on the Cloud IKE Identity Type configured on the Forcepoint ONE SSE and then enter the Cloud IKE ID of the primary IPsec tunnel.

      You can obtain the Cloud IKE ID from Forcepoint ONE SSE by navigating to the Analyze > Tunnels > Setup Info dialog of the primary IPsec tunnel.

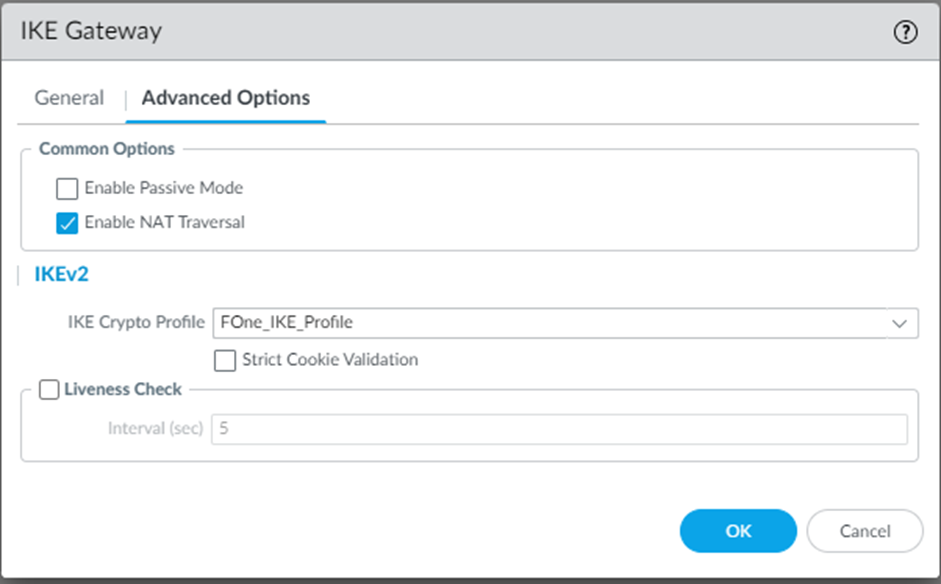
  4. On the Advanced Options tab, enter the following:
    1. Select the Enable NAT traversal checkbox.


    2. From the IKE Crypto Profile drop-down, select the IKE crypto profile you created.
    3. To create the primary IKE gateway with entered details, click OK.
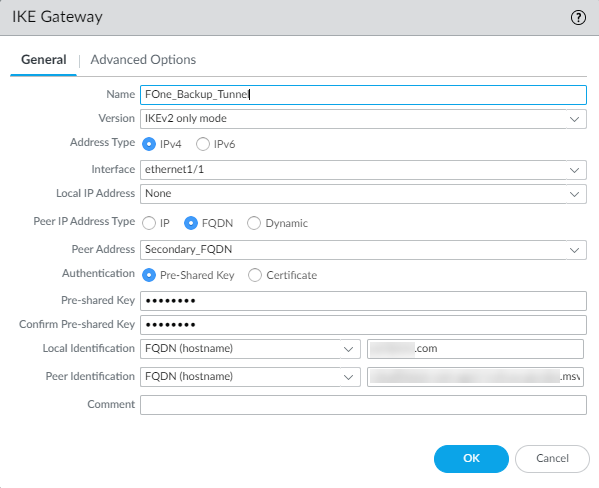
  5. Repeat the same steps (from step 2 through step 4) for the secondary IKE gateway. While creating secondary IKE gateway, consider the following:
    1. Enter either IP address or FQDN of the secondary datacenter in Peer Address based on what you have selected as Peer IP Address Type.

      Copy the Cloud FQDN of secondary datacenter from Forcepoint ONE SSE by navigating to the Analyze > Tunnels > Setup Info dialog of the secondary IPsec tunnel and paste it in Peer Address.

      Note: To know the public IP address of the secondary datacenter, you need to nslookup using the Cloud FQDN.

      In the following example, Peer IP Address Type is set to IP for establishing the tunnel.


      In the following example, Peer IP Address Type is set to FQDN for establishing the tunnel.


    2. Select either IP address or FQDN from the Peer Identification drop-down based on the Cloud IKE Identity Type configured on the Forcepoint ONE SSE and then enter the Cloud IKE ID of secondary IPsec tunnel.

      You can obtain the Cloud IKE ID from Forcepoint ONE SSE by navigating to the Analyze > Tunnels > Setup Info dialog of the secondary IPsec tunnel.

    3. To create the secondary IKE gateway with entered details, click OK.


Result

You have primary and secondary IKE gateways. In this example, FOne_Primary_Tunnel represents primary IKE gateway and FOne_Backup_Tunnel represents secondary IKE gateway.