Deploying Forcepoint Mobile for iOS and iPadOS using Microsoft Intune
Microsoft Intune is a cloud-based endpoint management solution. It manages user access to organizational resources and simplifies app and device management across many devices, including mobile devices, desktop computers, and virtual endpoints. You can deploy the Forcepoint Mobile solution using Microsoft Intune.
Note: Before you try the steps below, ensure you are connected to the internet.
Steps
- Log in to the Microsoft Intune admin center.
- Navigate to Apps > iOS/iPadOS > +Add.
-
From the App type drop-down box, select iOS store app.
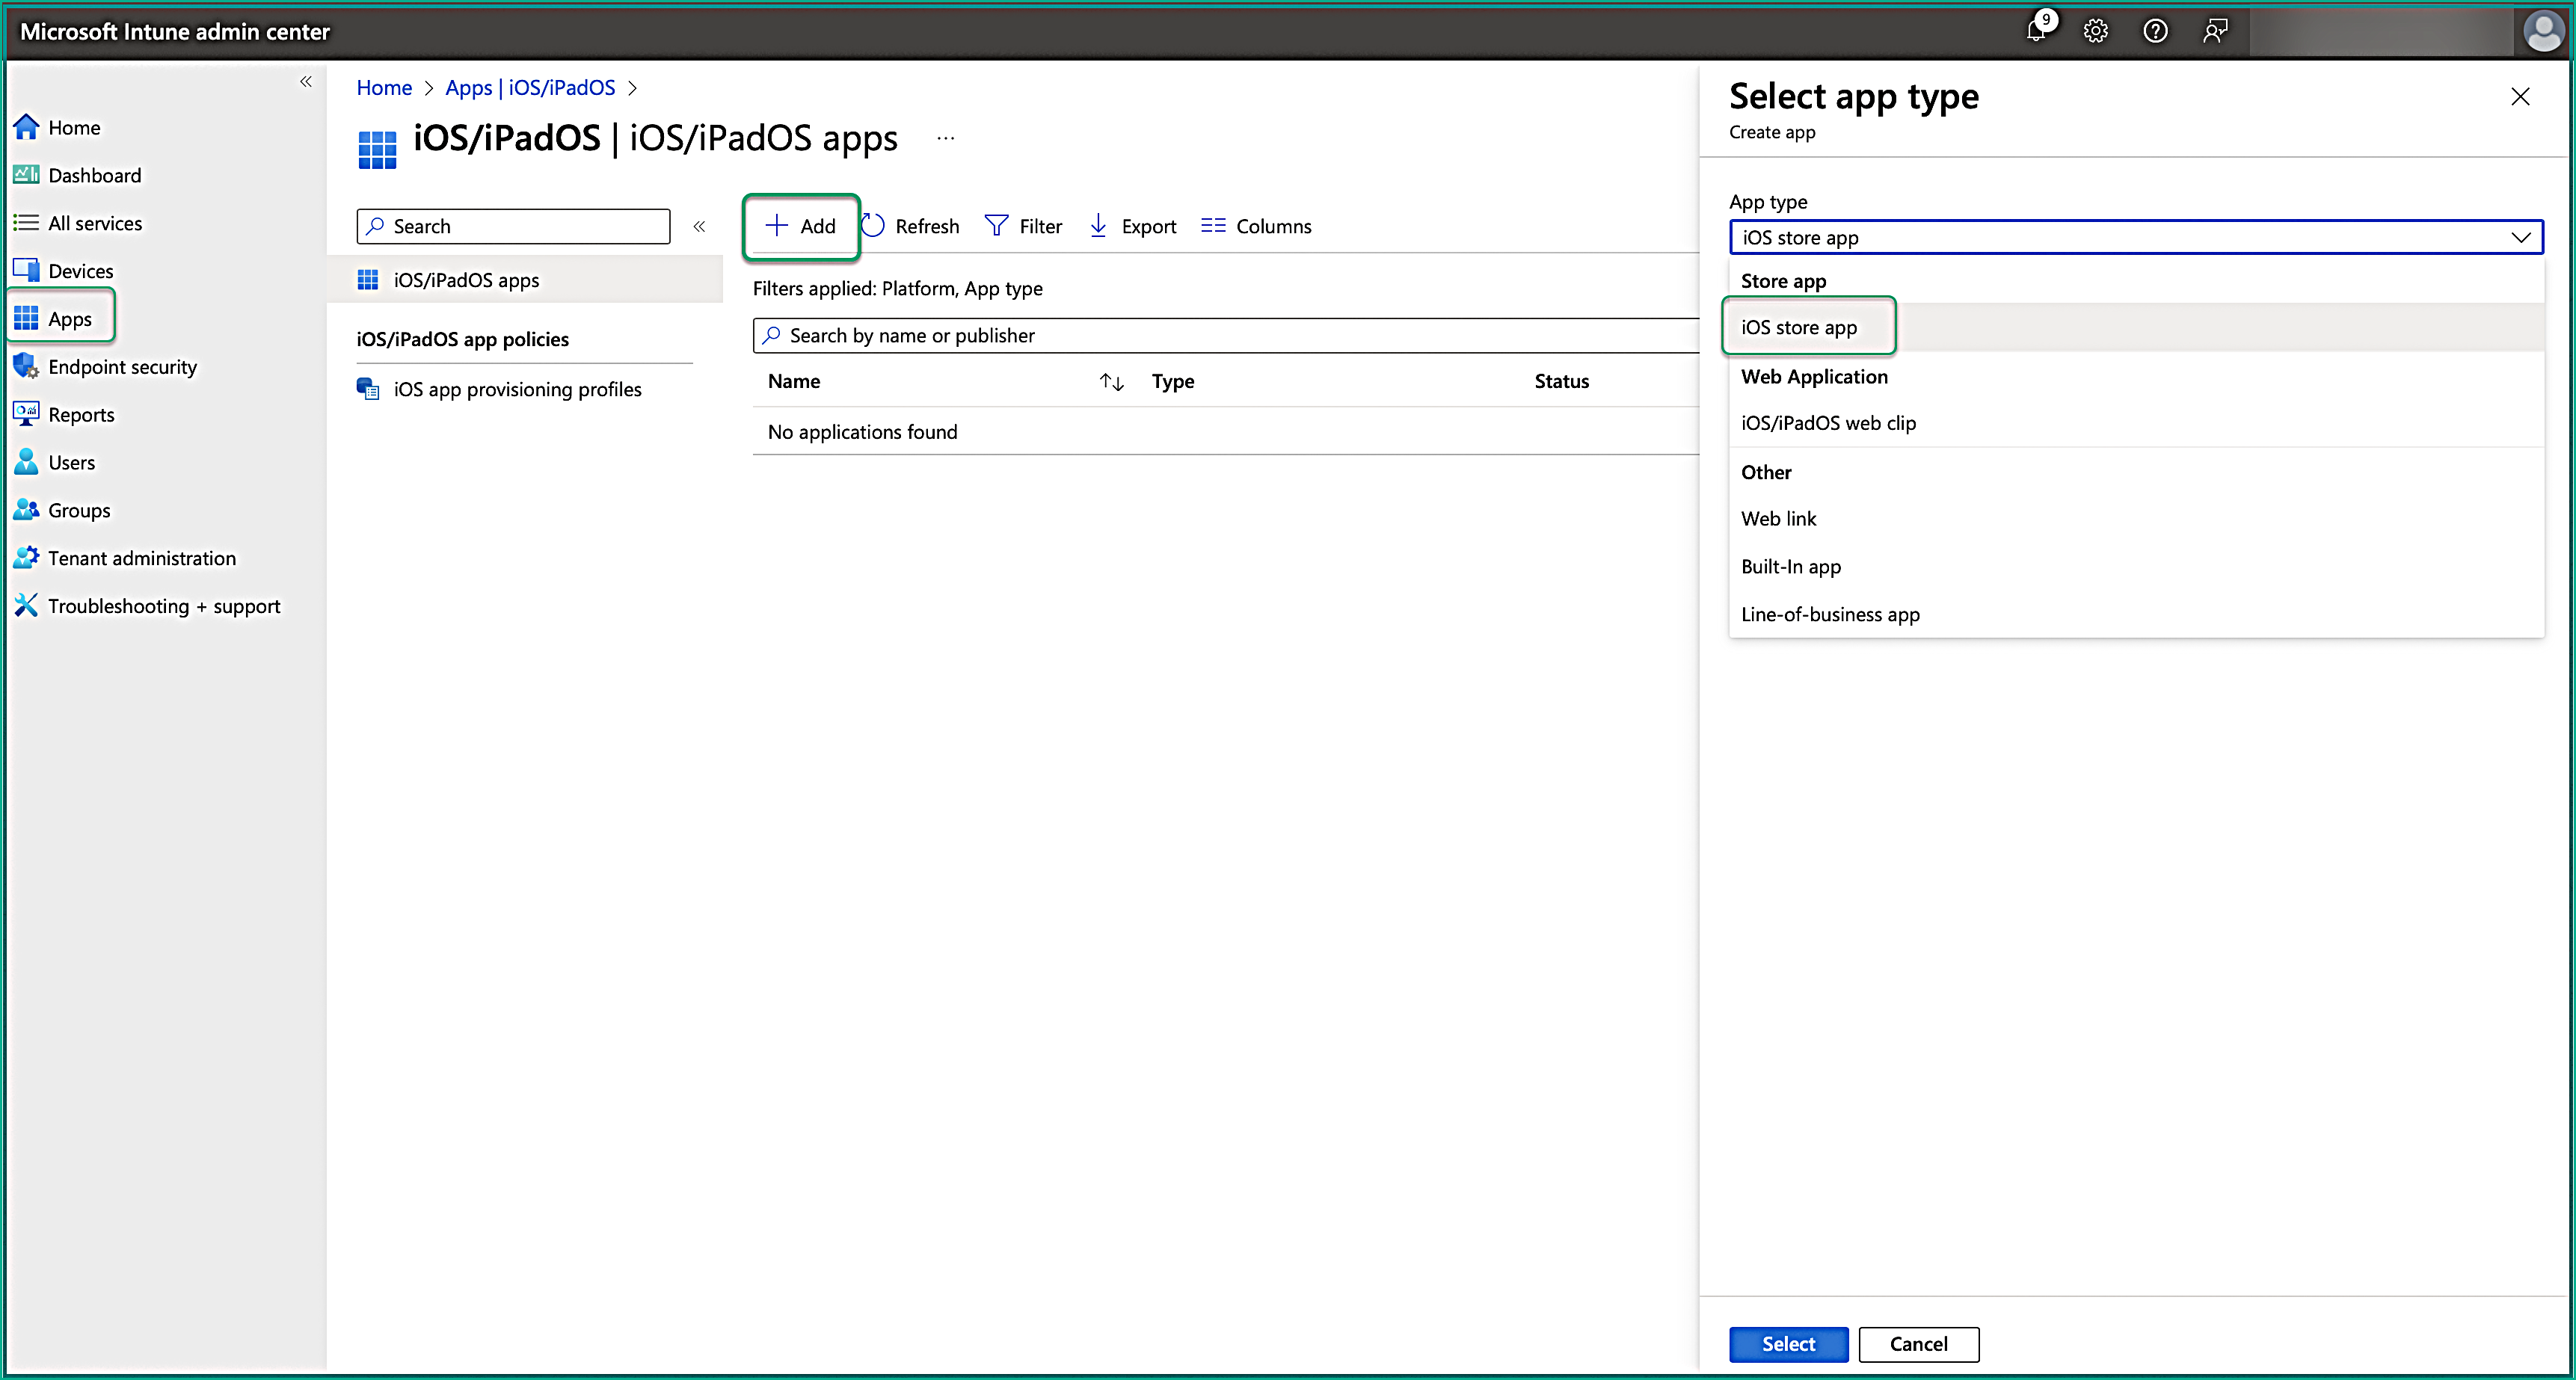
Click Select.
-
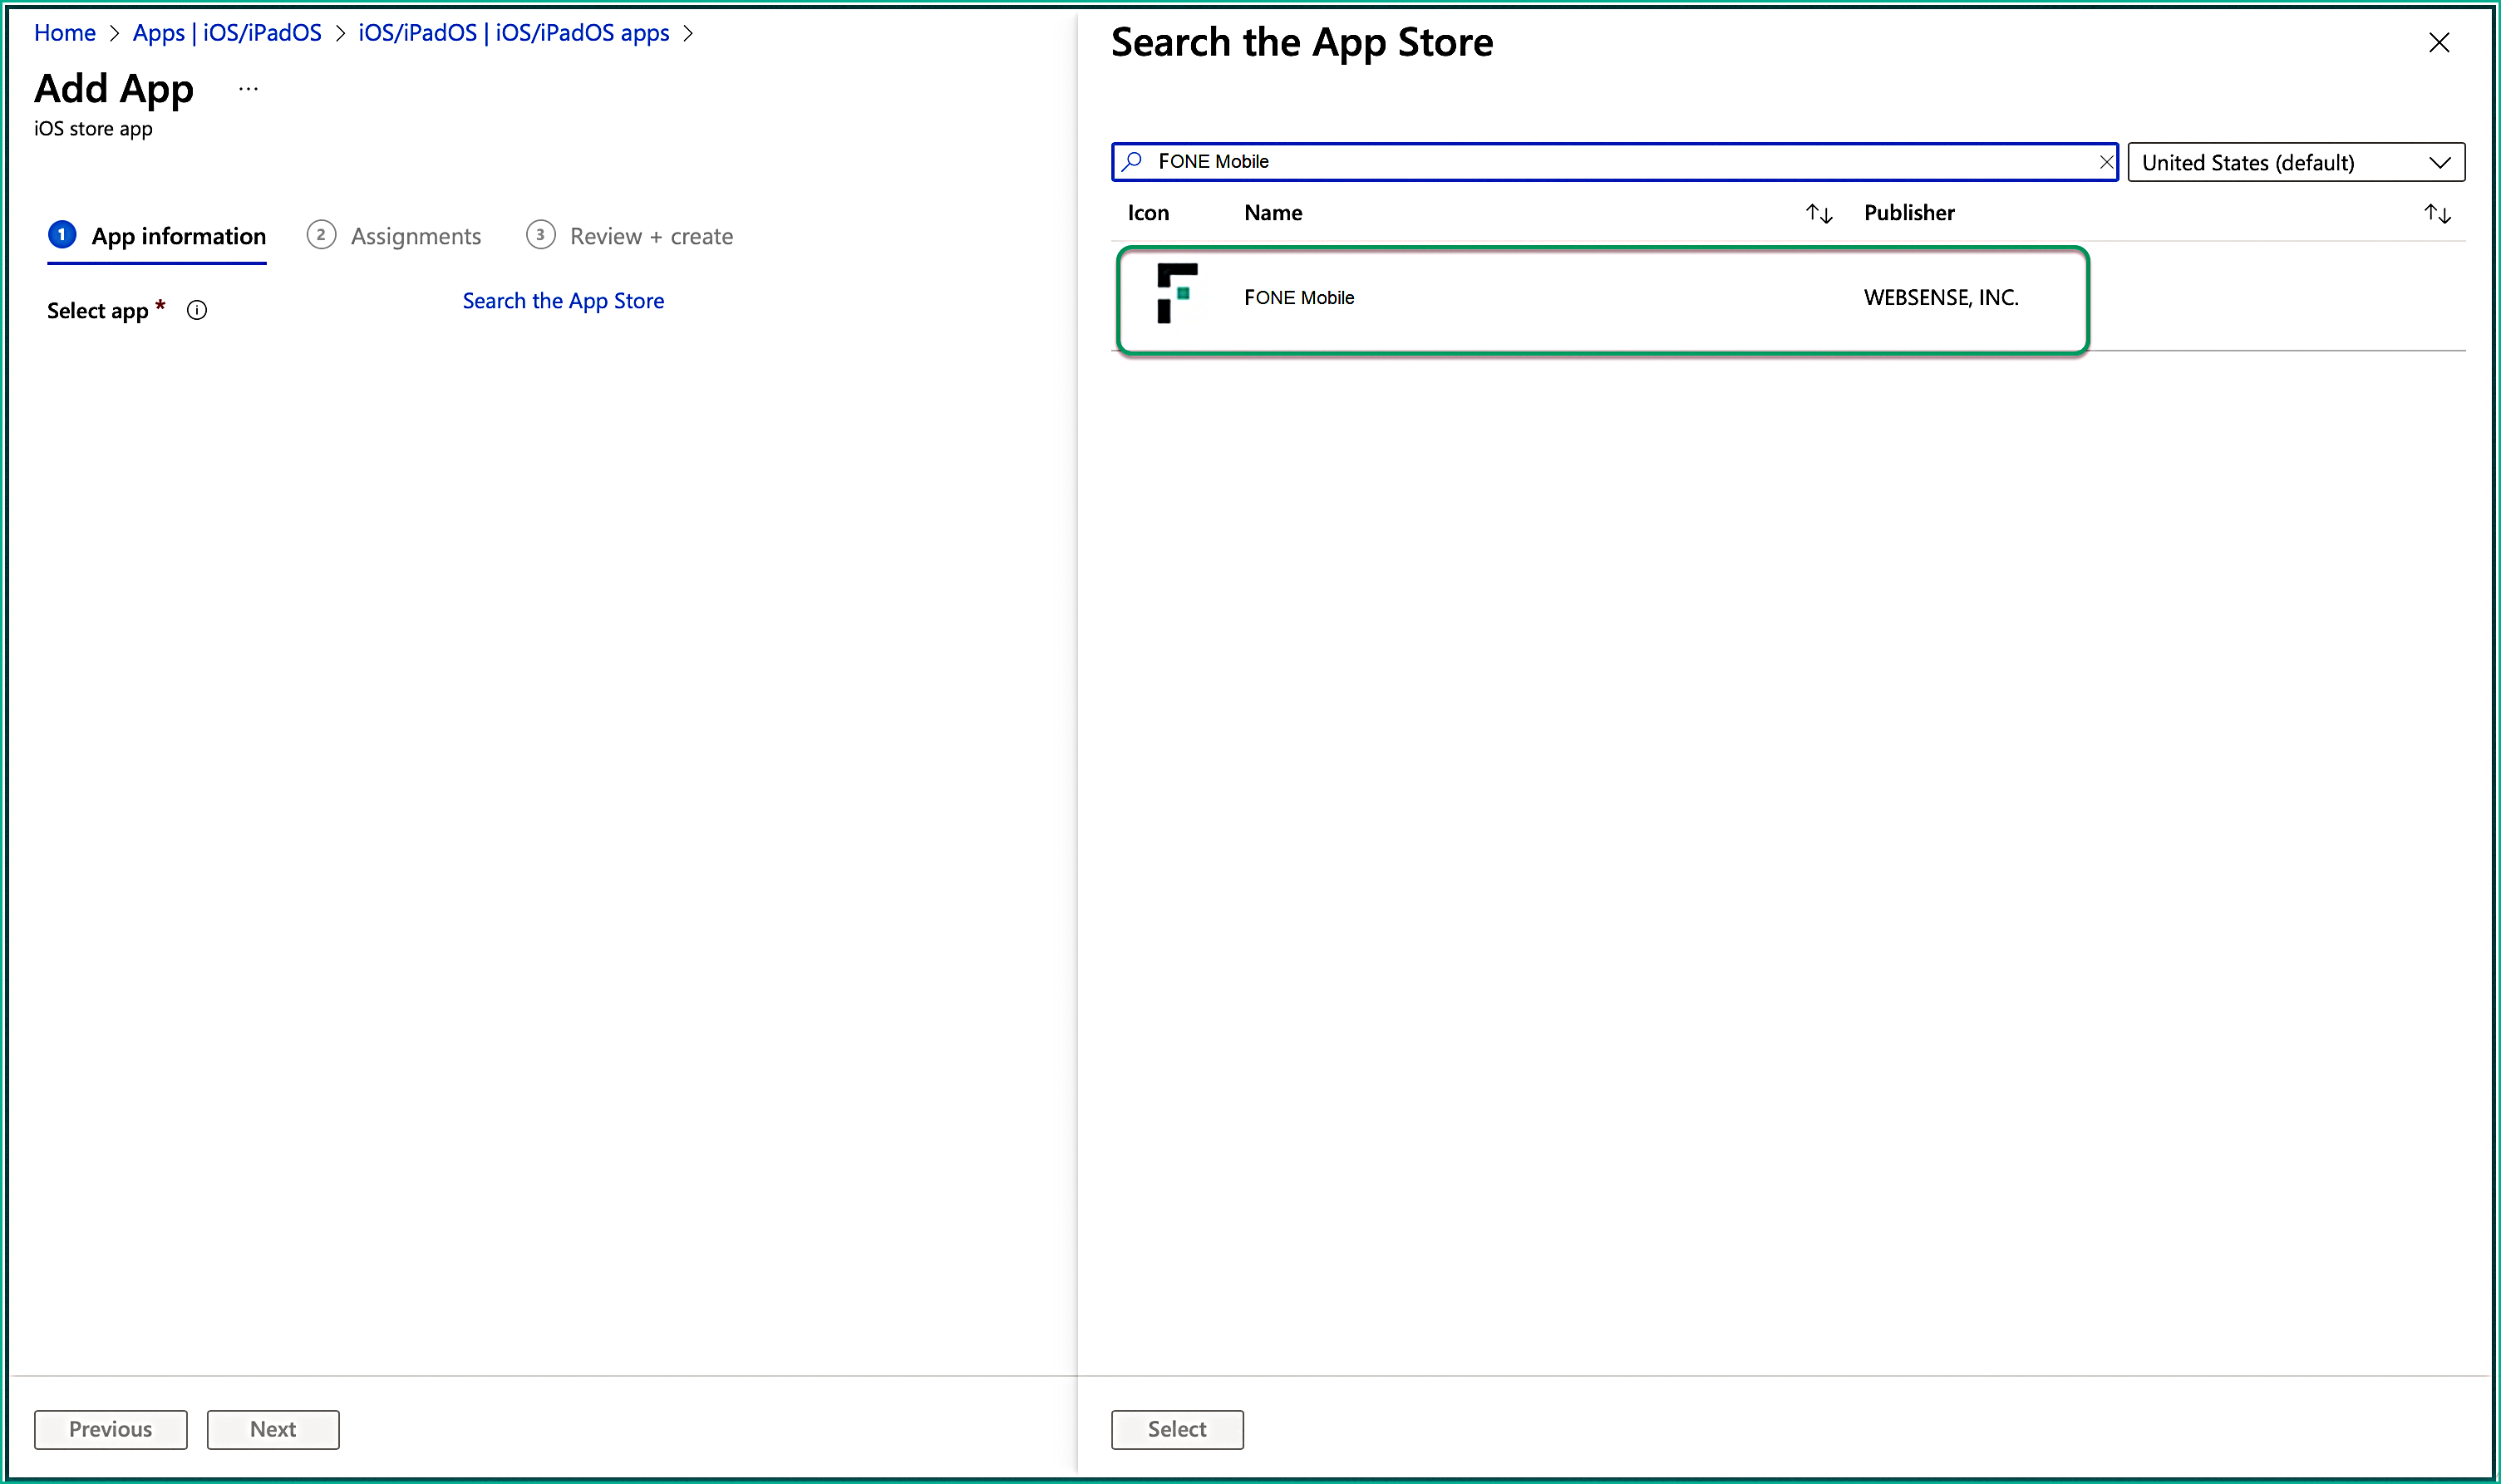
On the Add App page, click Search the App Store and search with Forcepoint to find the Forcepoint
Mobile solution. Then select it.
-
On the App Information tab, you must populate the app metadata fields such as the name, description, publisher, applicable device type, and minimum
operating system. You are only required to fill out the mandatory fields.
Following is an example of information that you can enter in the mandatory fields:
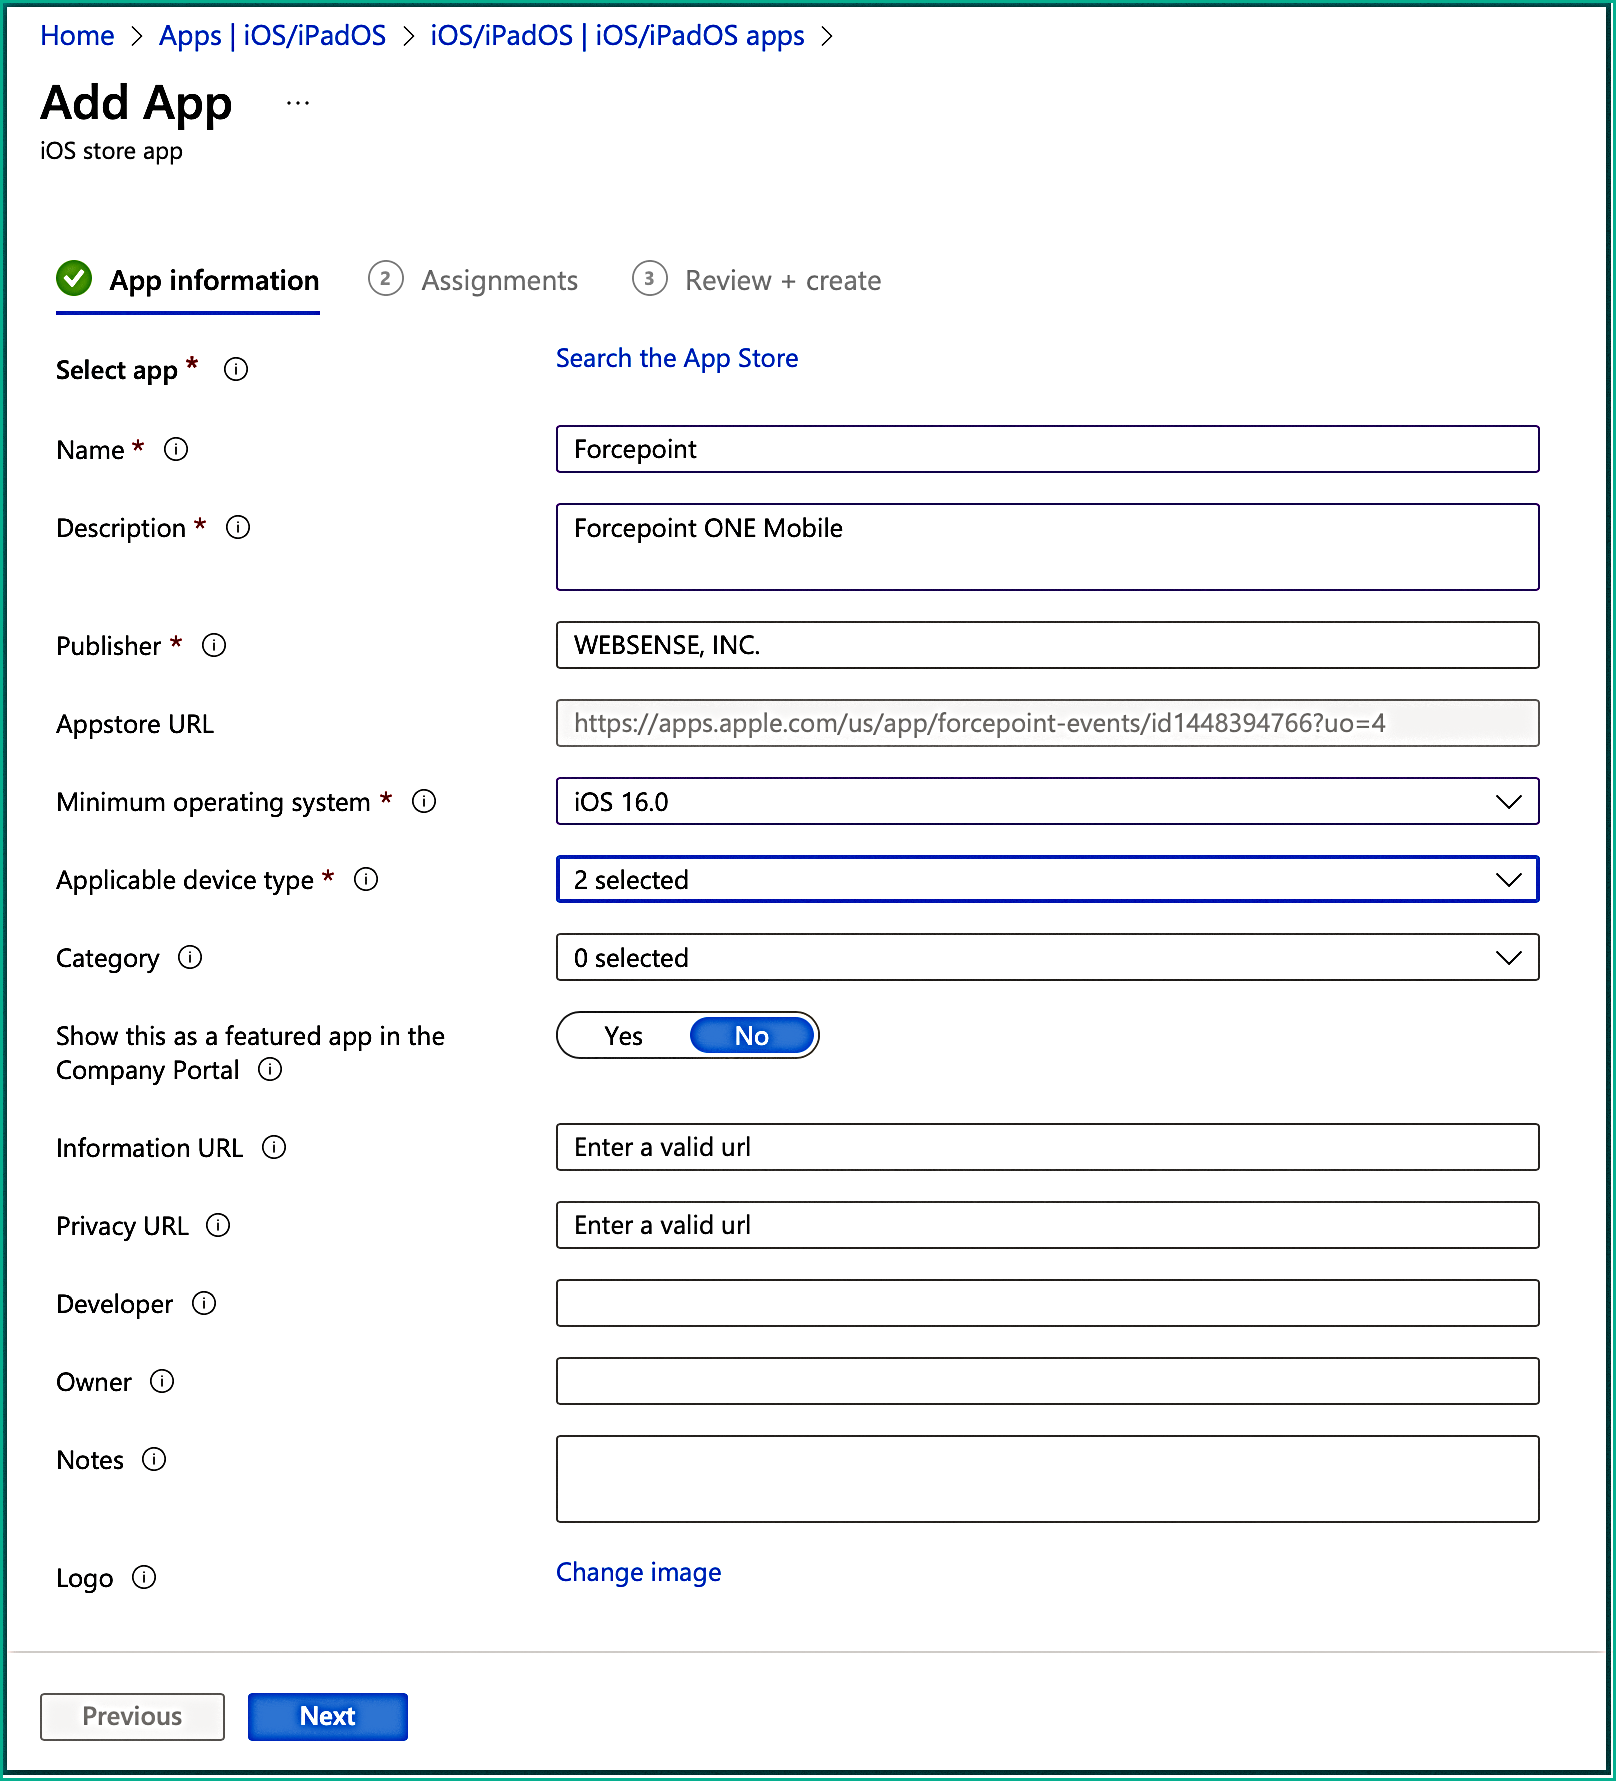
Click Next.
-
On the Assignment tab, under the Required section, choose groups that will have the solution force installed. This can be a user
group, device group, all users, or all devices. Then click Next.

-
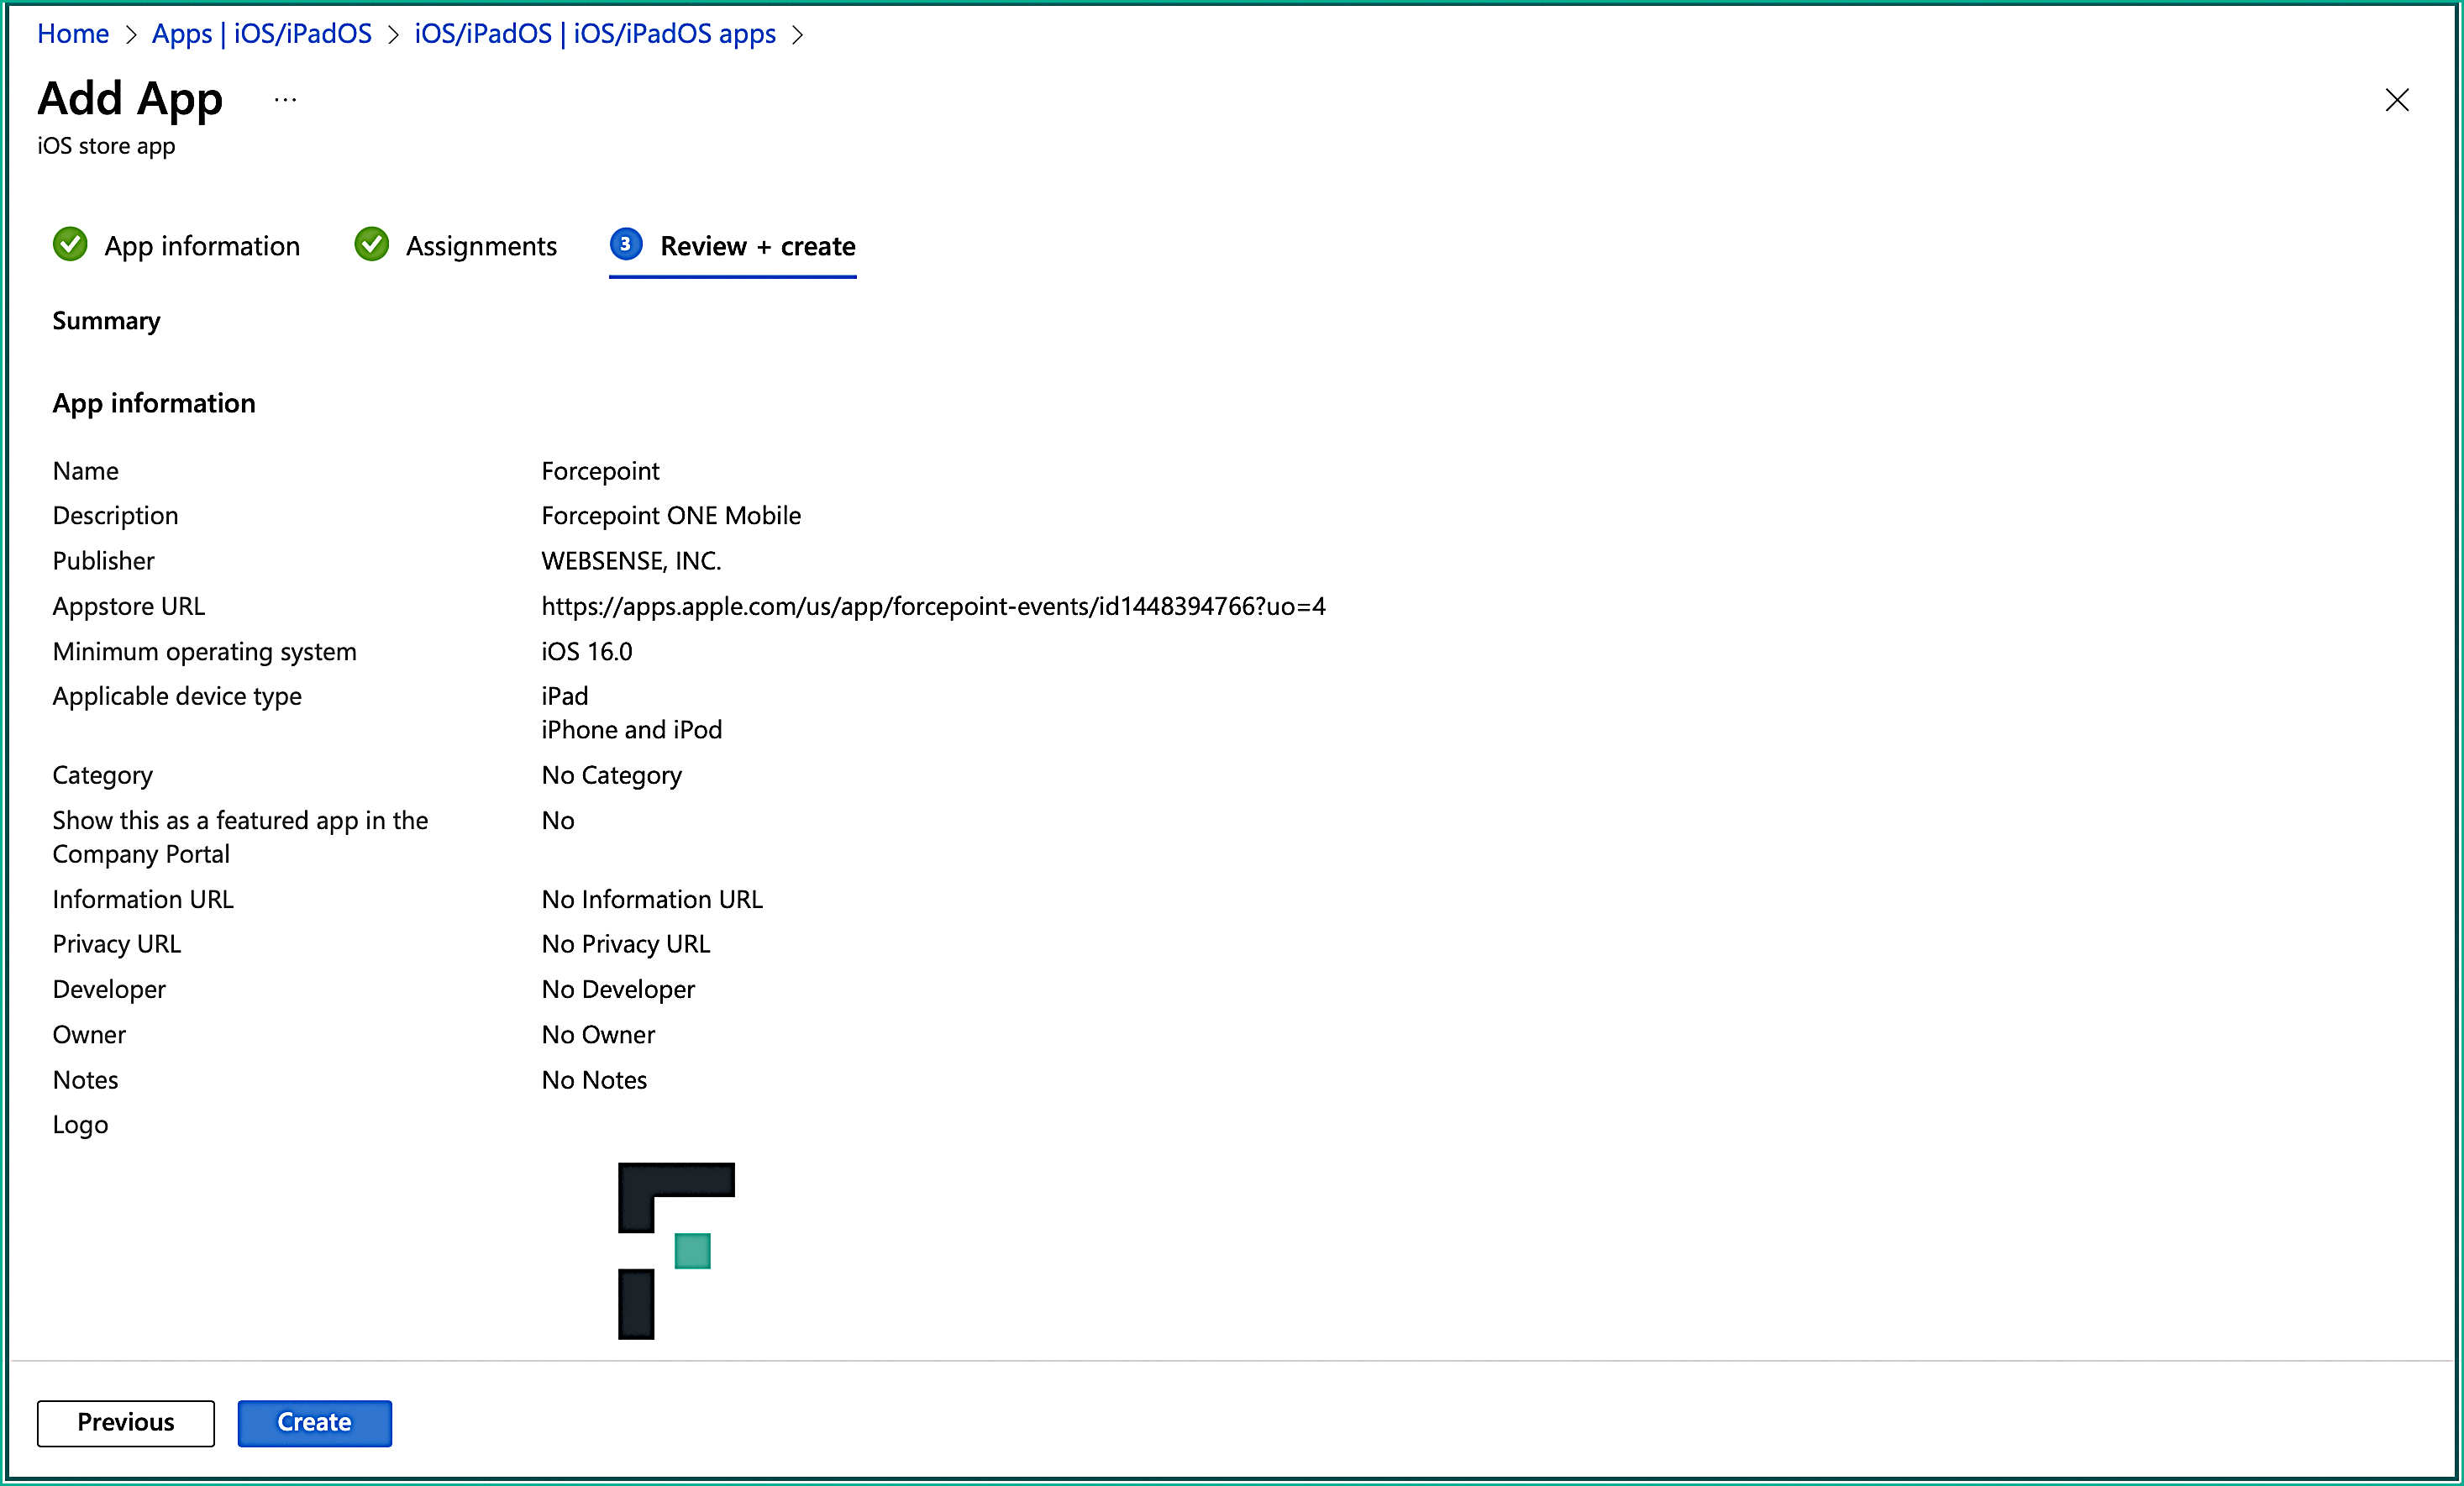
On the Review + create tab, you can confirm the settings you entered. Hitting Create will then upload the solution.
- To configure the trusted certificate, navigate to Devices > Configuration > +Create > New Policy.
-
Enter the following properties:
- Platform: Select iOS/iPadOS.
- Profile type: Select Templates.
- Template name: Select Trusted certificate.
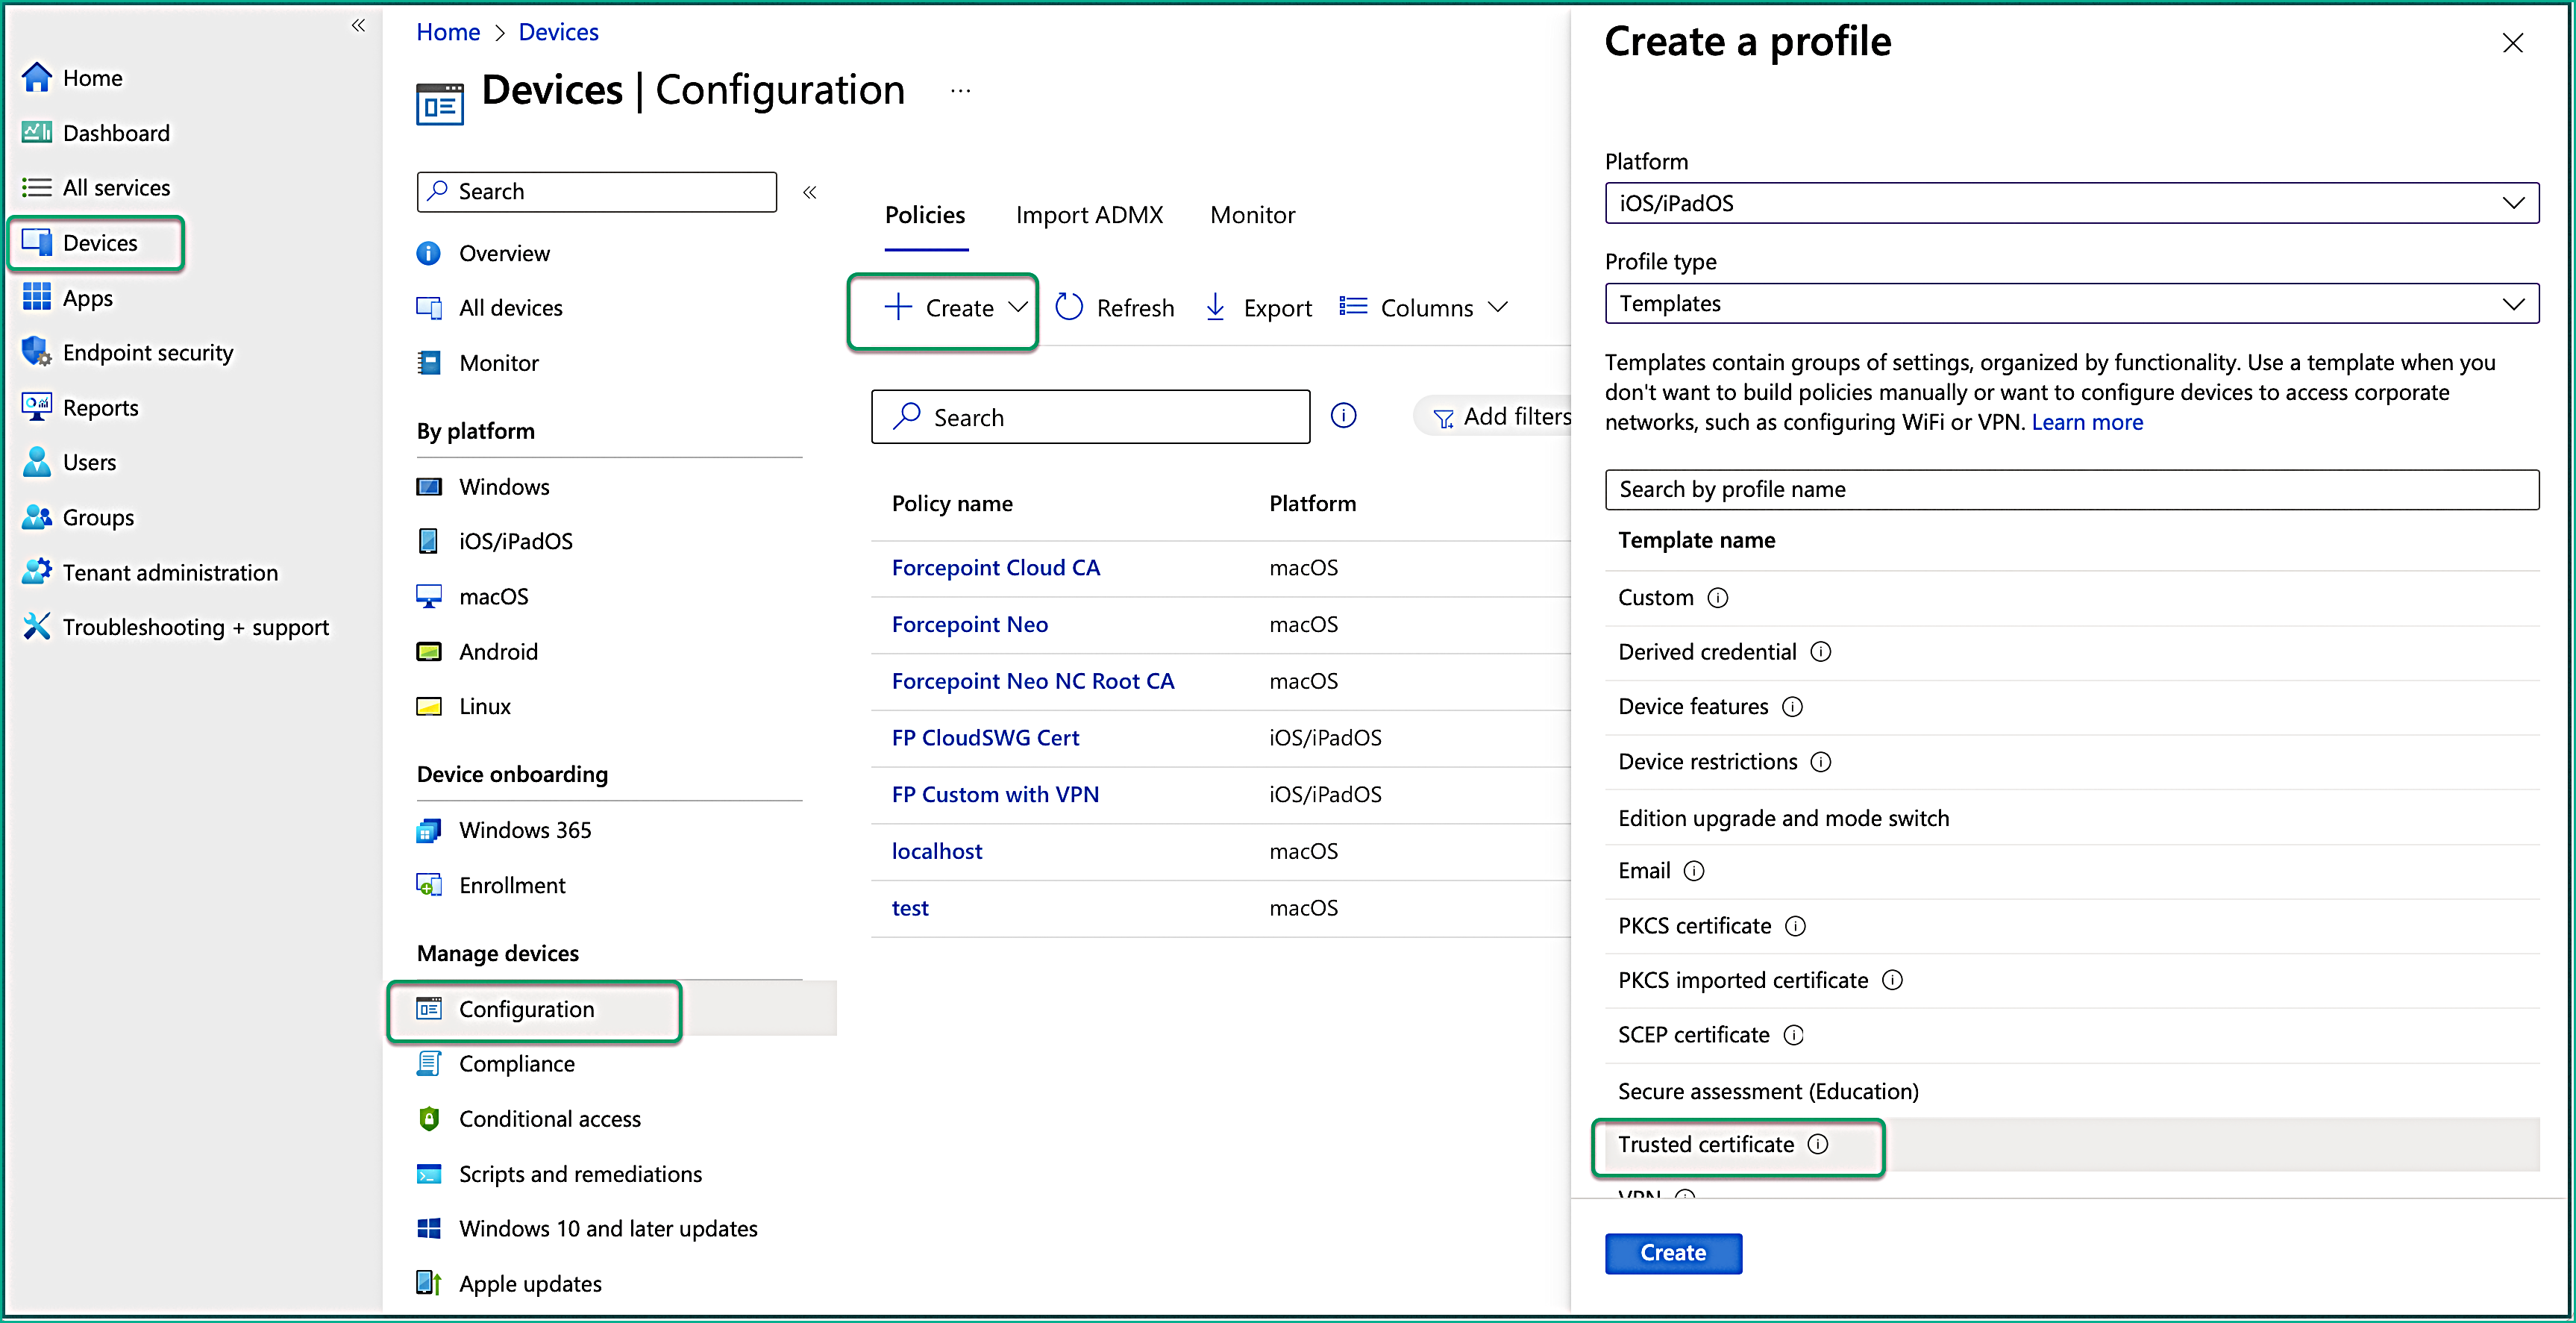
Then click Create.
-
On the Basics tab, enter the following properties:
- Name: Enter a descriptive name for the profile. Name your profiles so you can easily identify them later.
- Description: Enter a description for the profile. This setting is optional.
Then click Next.
-
On the Configuration settings tab, select the folder icon, browse the certificate (.cer file) you exported from your Forcepoint ONE SSE portal under Forward proxy > Settings > Download Forcepoint CA Certificate, and click Upload.
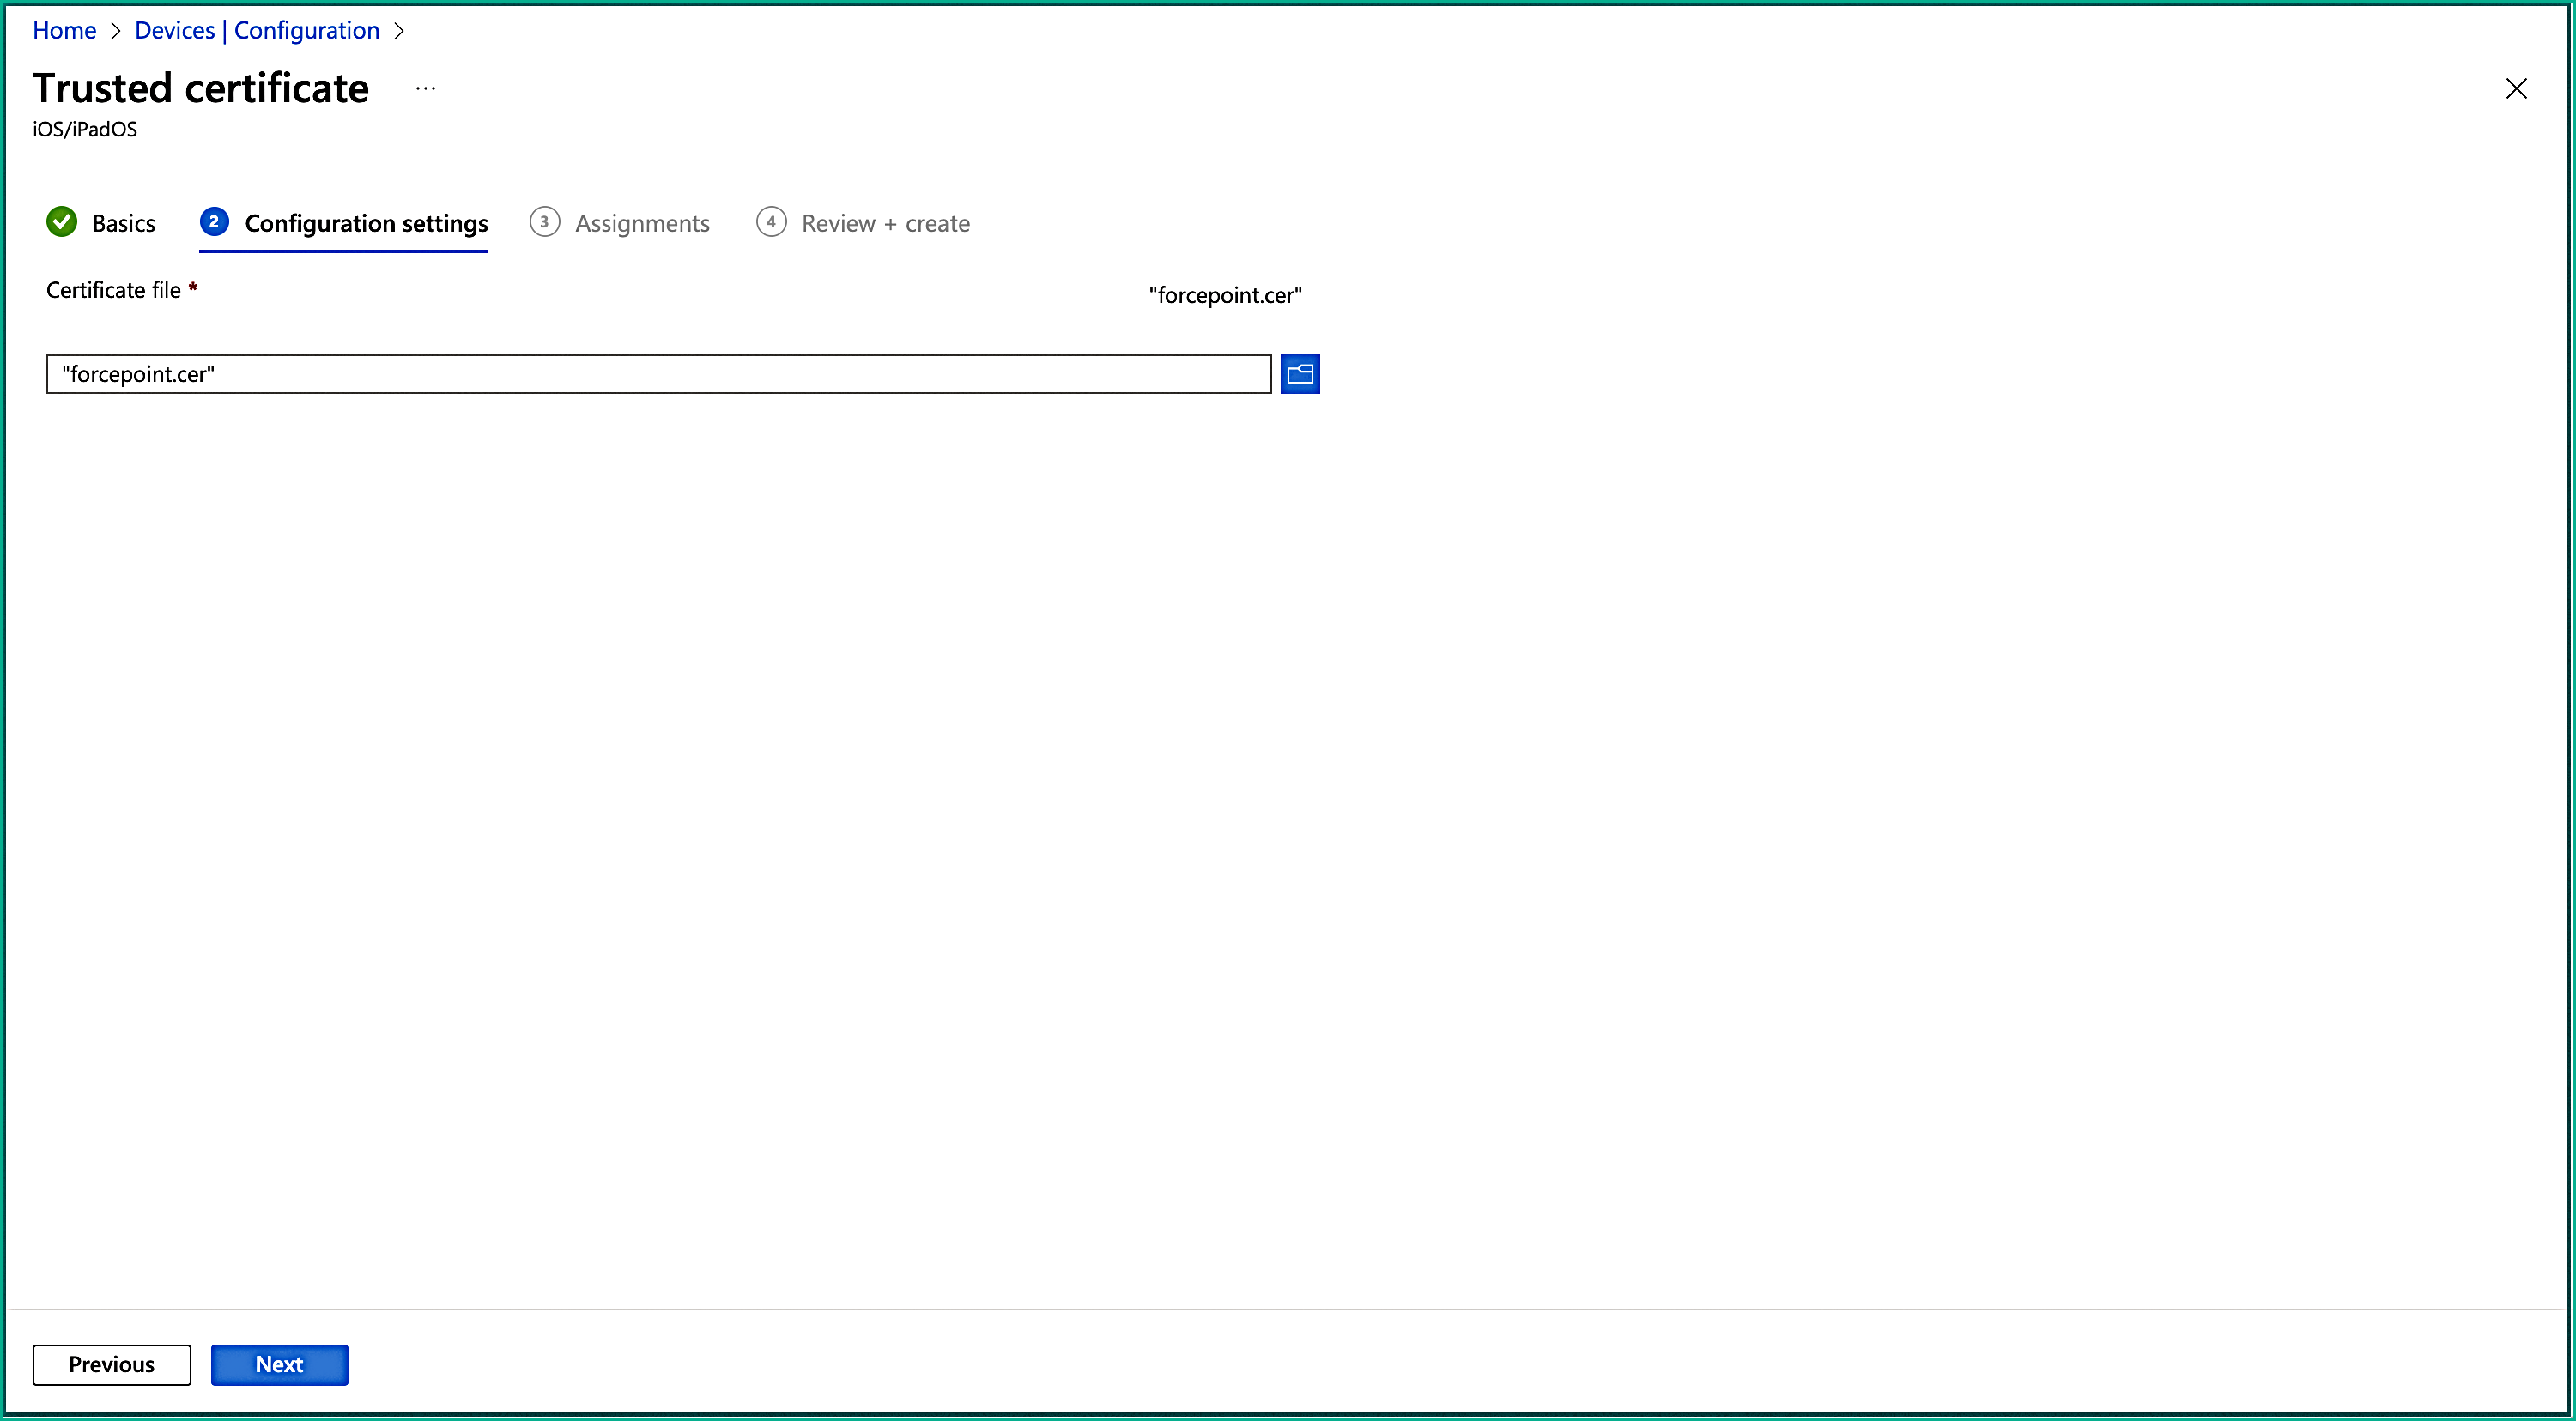
Then click Next.
- On the Assignments tab, under the Included groups section, choose groups that will have the solution force installed. This can be a user group, device group, all users, or all devices. Then click Next.
- On the Review + create tab, you can confirm the settings you have entered. When you select Create, your changes are saved, and the profile is assigned. The policy is also shown in the profiles list.
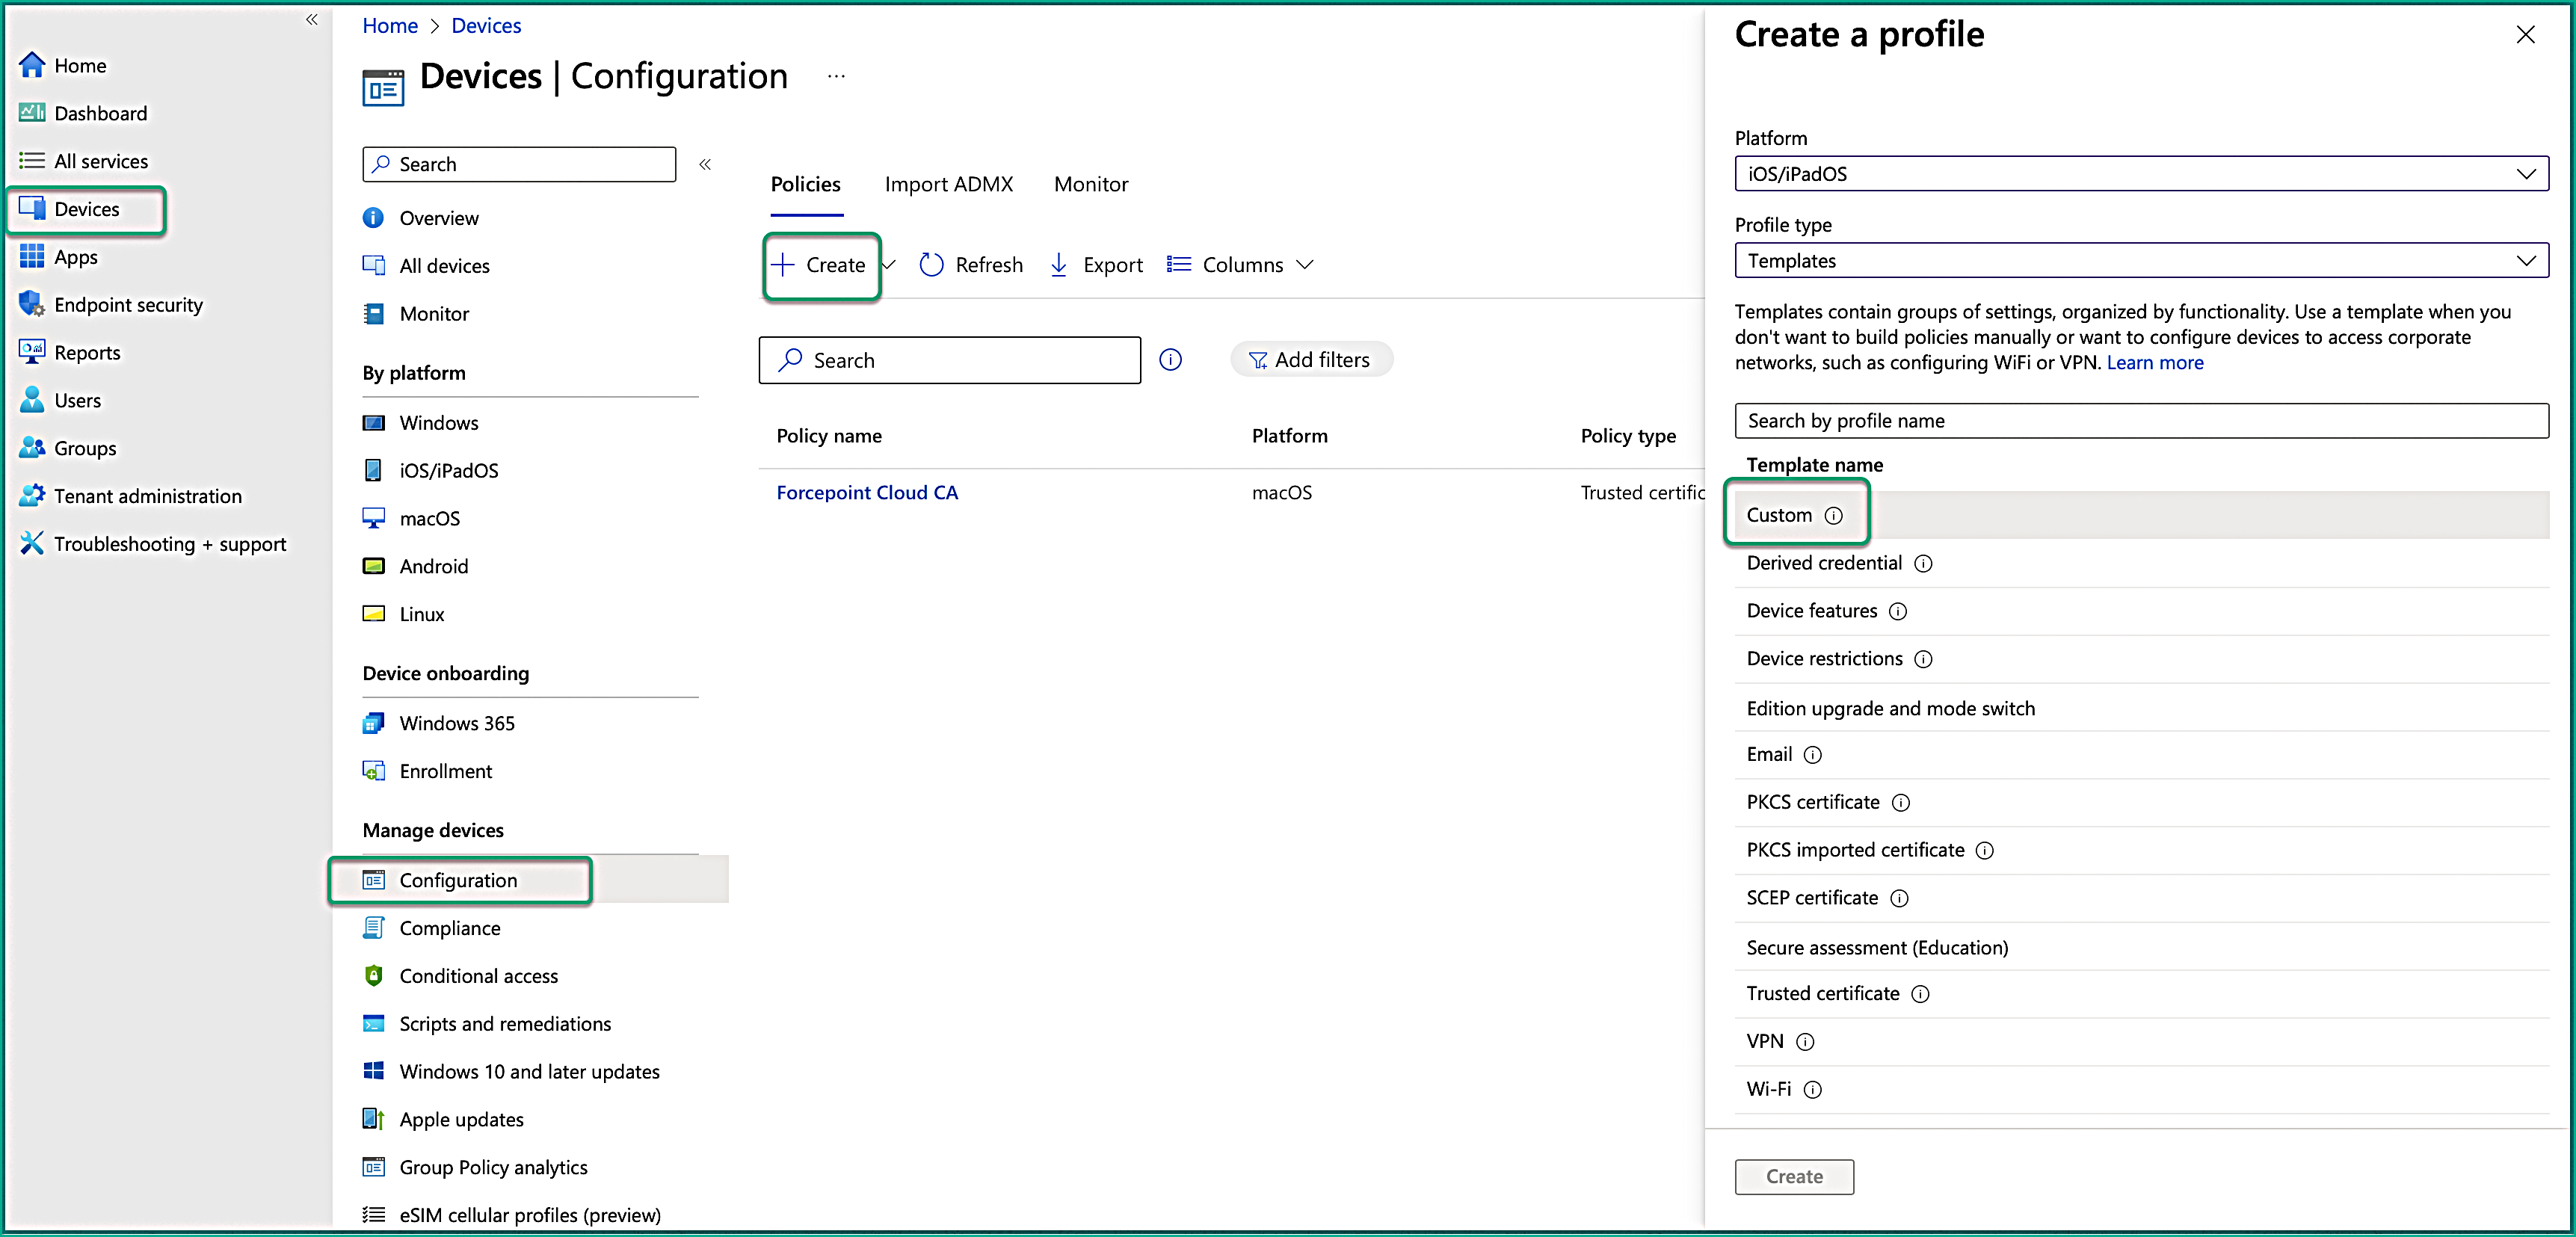
- To configure the custom VPN profile, navigate to Devices > Configuration > +Create > New Policy.
-
Enter the following properties and select Create:
- Platform: Select iOS/iPadOS.
- Profile type: Select Templates.
- Template name: Select Custom.
-
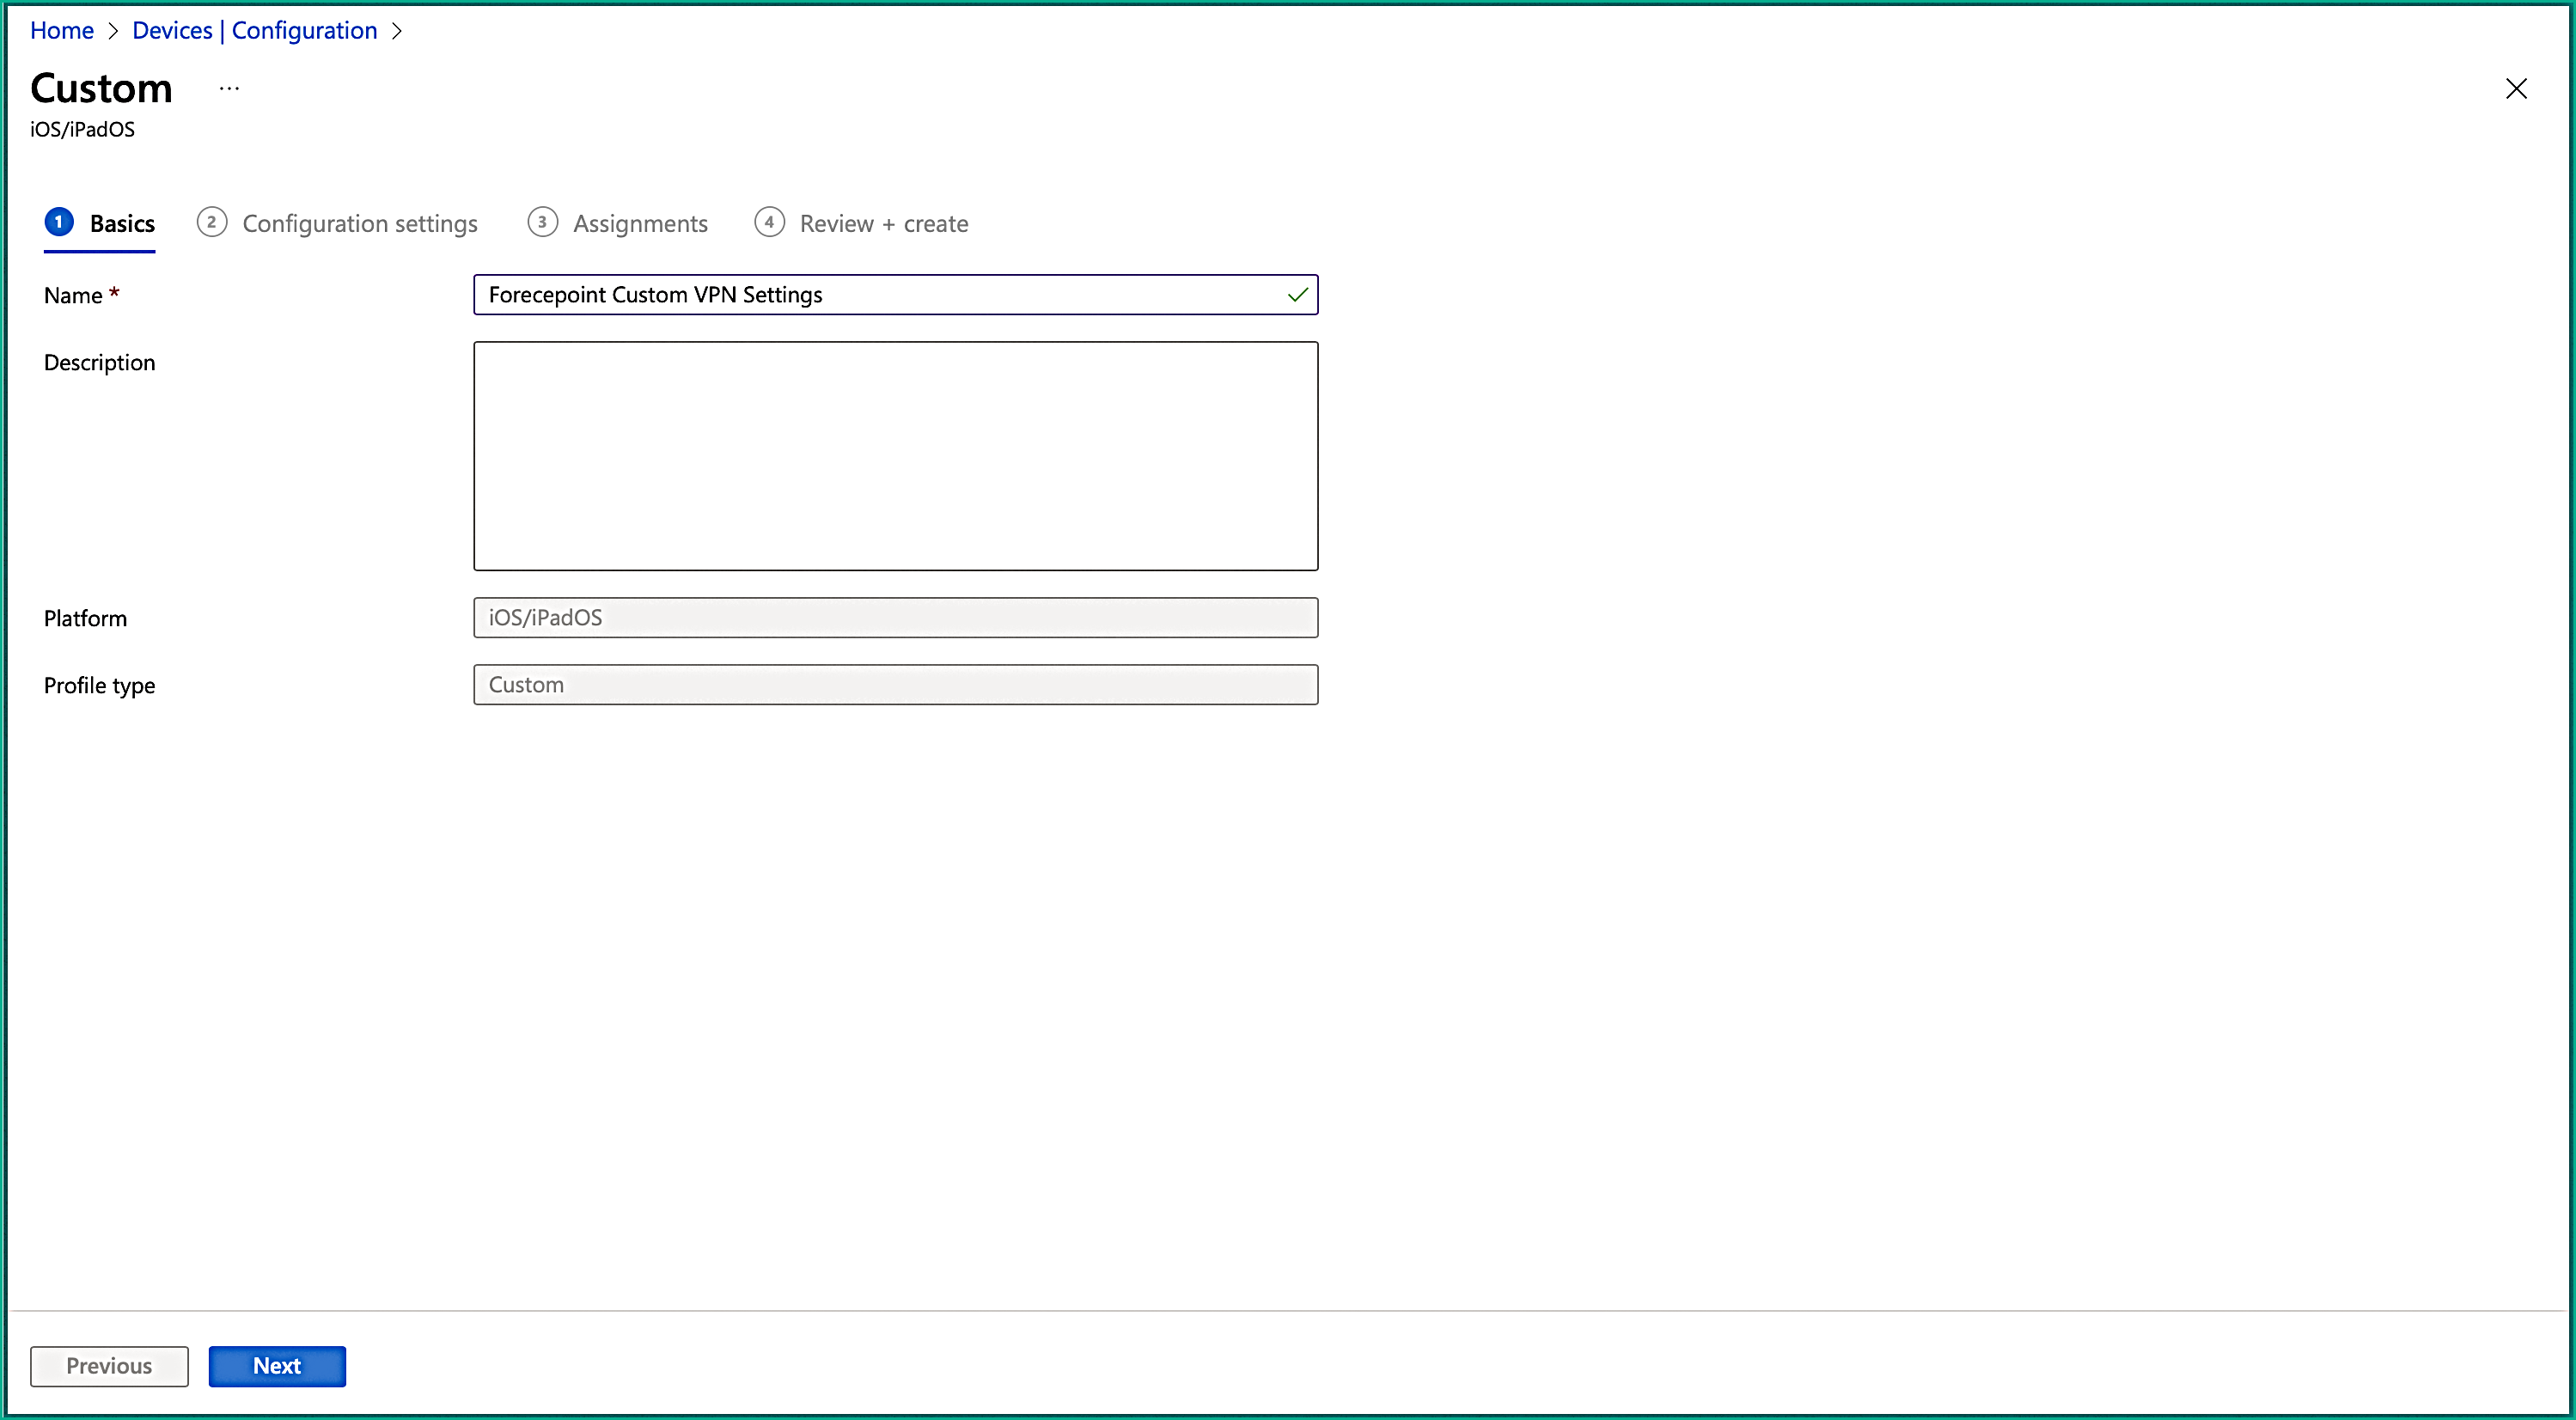
On the Basics tab, enter the following properties:
- Name: Enter a descriptive name for the custom profile. Name your profiles so you can easily identify them later.
- Description: Enter a description for the profile. This setting is optional.
-
On the Configuration settings tab, configure the following settings:
- Custom configuration profile name: Enter a descriptive name for the custom configuration profile.
- Configuration profile file: Select the folder icon, browse the Mobile Config JSON file that you received from Forcepoint, and click Upload.
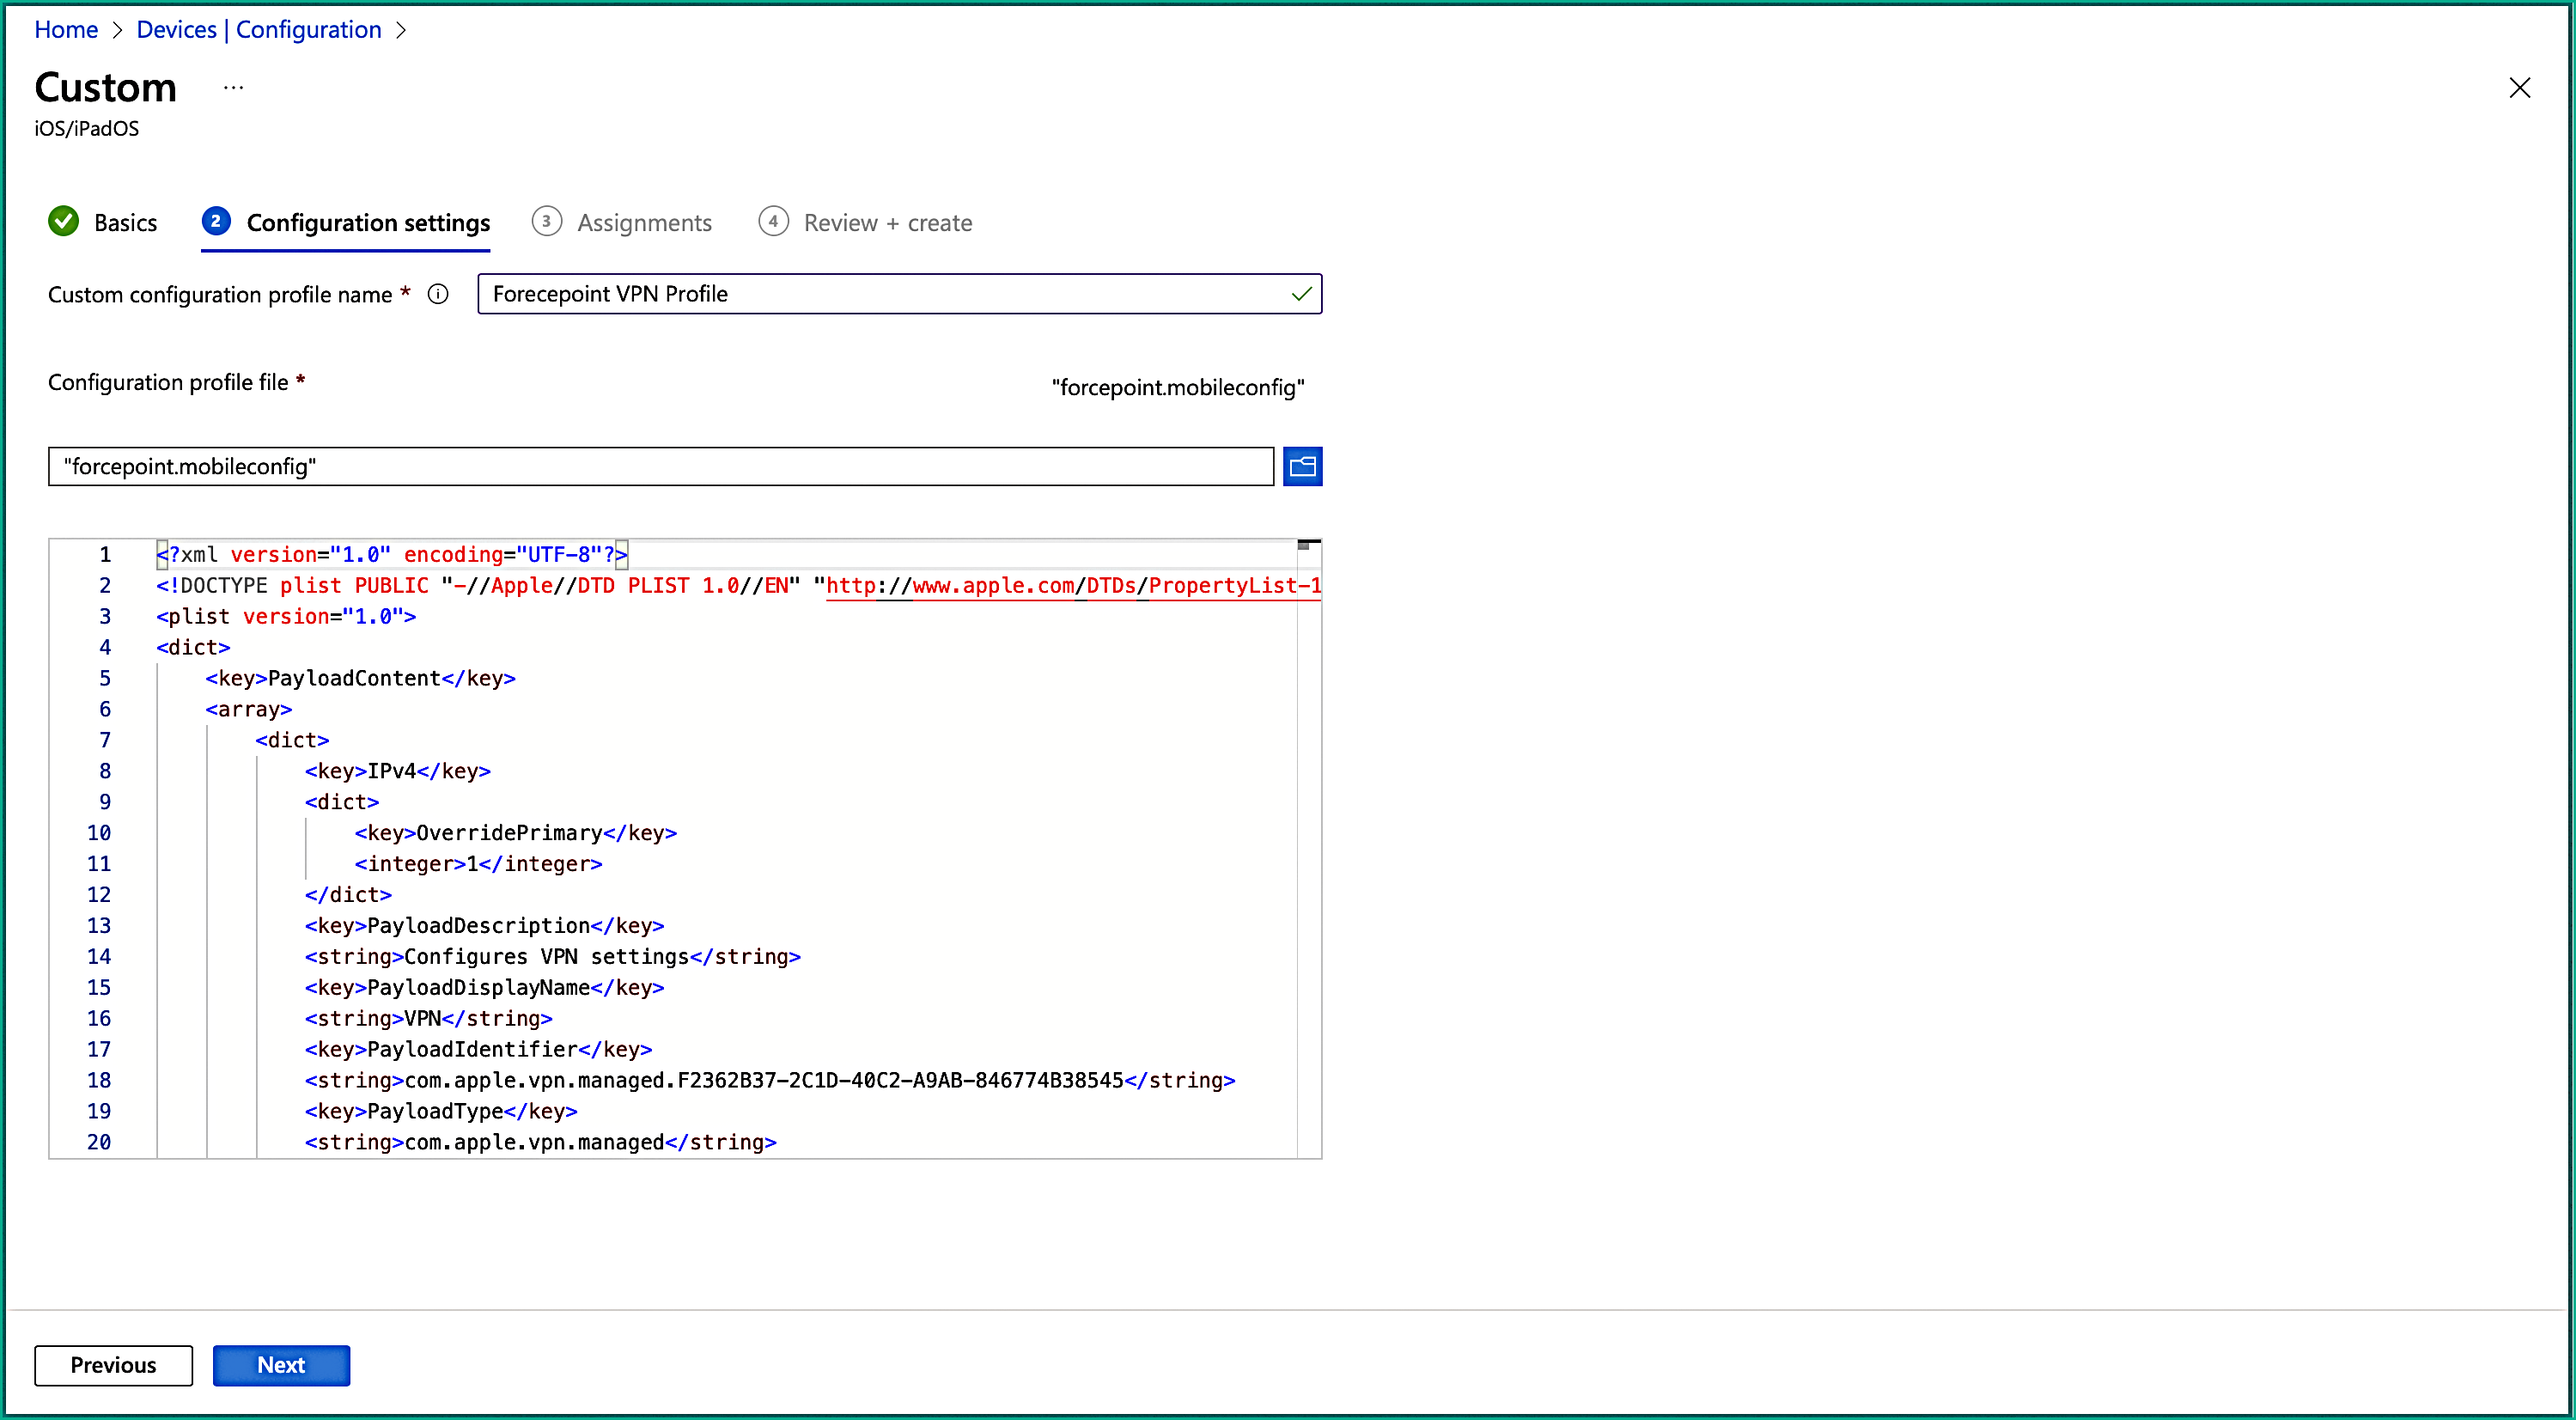
Click Next.
- On the Assignments tab, under the Included groups section, choose groups that will have the solution force installed. This can be a user group, device group, all users, or all devices. Then click Next.
- On the Review + create tab, you can confirm the settings you have entered. When you select Create, your changes are saved, and the profile is assigned. The policy is also shown in the profiles list.
- Upon completing all steps, Microsoft Intune will deploy the solution.