Creating a custom auto-redirect block page in Forcepoint Cloud Security Gateway

If your users do not need to see the block page, create a custom block page to send the web requests to browser isolation automatically.

For more information about block pages, see the Forcepoint Cloud Security Gateway Help on the Forcepoint support website.

Steps

  1. Sign in to Forcepoint Cloud Security Gateway.
  2. Go to Web > Policy Management > Block & Notification Pages.
  3. Click New Page.
  4. On the New custom page screen, enter a Name and Description.
  5. Click Save.
  6. Click HTML Editing, then click Continue on the dialog box.
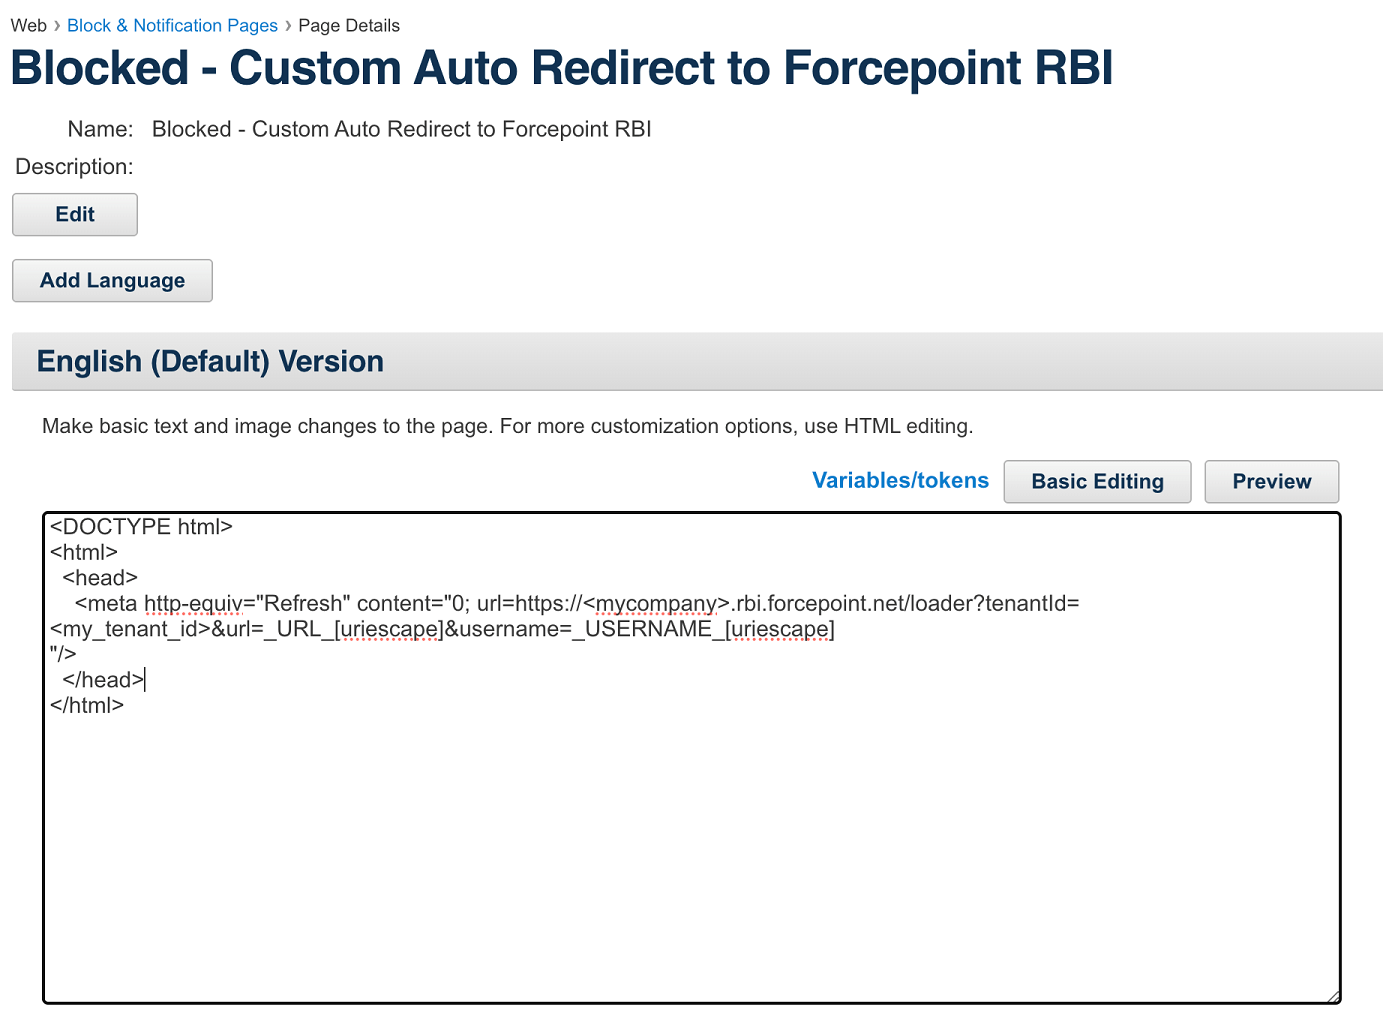
  7. Replace the default HTML code with the following HTML code:
    <DOCTYPE html>
    <html>
      <head>
        <meta http-equiv="Refresh" content="0; url=https://<mycompany>.rbi.forcepoint.net/loader?tenantId=<my_tenant_id>&url=_URL_[uriescape]&username=_USERNAME_[uriescape]
    "/>
      </head>
    </html>
    
  8. Update the company and tenant ID in the URL. The company is shown as <mycompany> and the tenant ID is shown as <my_tenant_id>. This information is found in your fulfillment email.
  9. Click Save.