Creating a new user

Add new users or administrators through the Users page.

Steps

  1. Sign in to Forcepoint ONE Platform.
  2. Select Admin from application waffle.
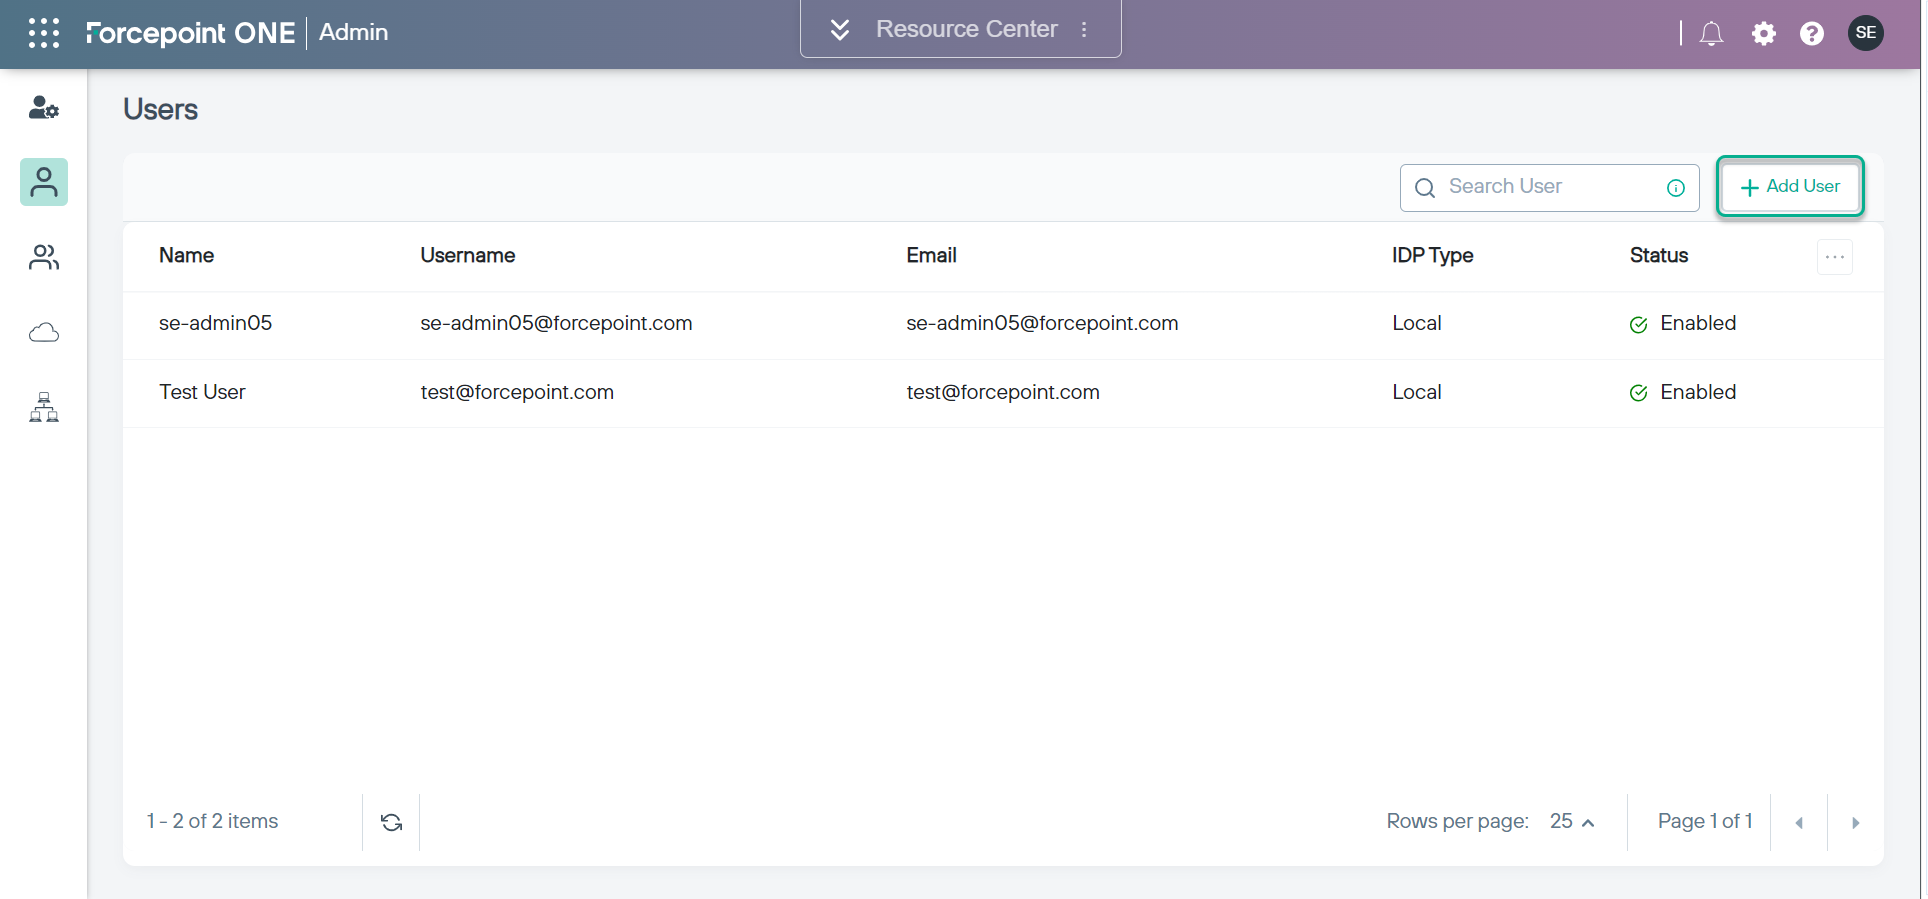
  3. Next, click the User icon from the left navigation. Following screen is displayed:
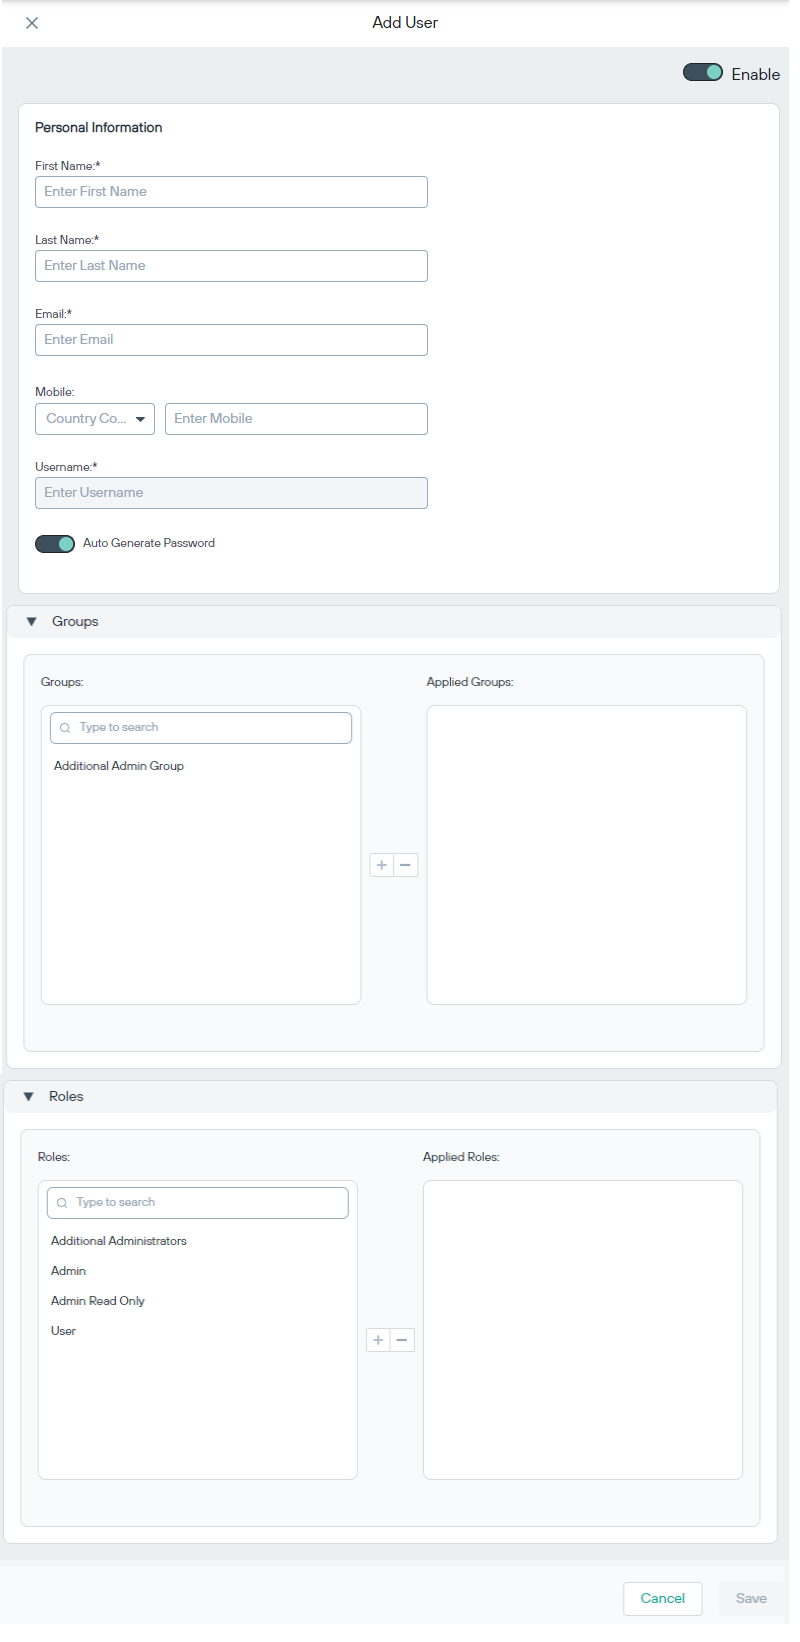
  4. Then click the +Add User button, which will display the following editor:
  5. Enter the user details:
    • First Name and Last Name (required): The name shown for the user within Forcepoint RBI.
    • Email (required): The email address of the user. The user will use this user name to sign in to Forcepoint RBI.
    • Mobile: Select the specific country code and enter the mobile number.
    • Username (required): The user will use this user name to sign in to Forcepoint RBI.
    • Password (required): The password used to sign in to Forcepoint RBI. The password must contain the following:
      • Minimum length of 8 characters
      • Maximum length of 20 characters
      • At least one uppercase letter
      • At least one lowercase letter
      • At least one number (0-9)
      • At least one special character: ! @ # $ % & ? = [ ] < > { }
      Note: Enabling the Auto Generate Password toggle when creating a new local user triggers an automatic mail to the user with a generated password. When this toggle is turned off, the admin is required to manually notify the user.
    • Confirm Password (required): Enter the password a second time to verify that you entered the correct password.
    • Enable User (required): Select this toggle to enable the user. If you do not enable the user, then they cannot sign in using these credentials.
  6. Under Groups, click the group name and then click the plus icon to add them.
  7. Under Roles, click a role, then click the plus icon to add them.
  8. Click Save.