Configure the Forcepoint Okta integration app for SCIM and SAML
Configure the Forcepoint Private Access Okta app to provide user and group provisioning, and single sign-on authentication for your Private Access end users.
Before you begin
Ensure you have administrator access to your organization's Okta account.
Steps
-
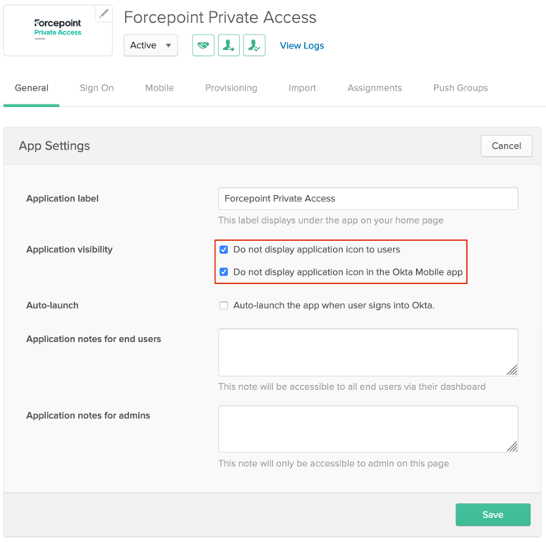
Hide the application from your Okta dashboard using the settings under Application visibility:
- Do not display application icon to users
- Do not display application icon in the Okta Mobile App
-
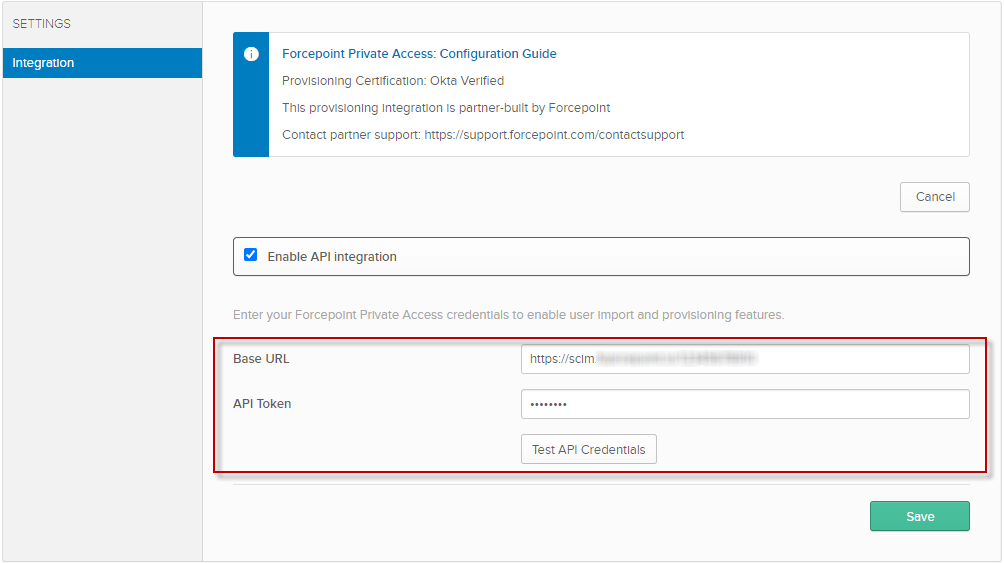
In the Private Access management portal, go to Administration > SCIM Settings. Copy and make a note of the
Base URL for the Forcepoint SCIM service.

-
Paste the values you copied into the following fields:
- Base URL
- API Token
-
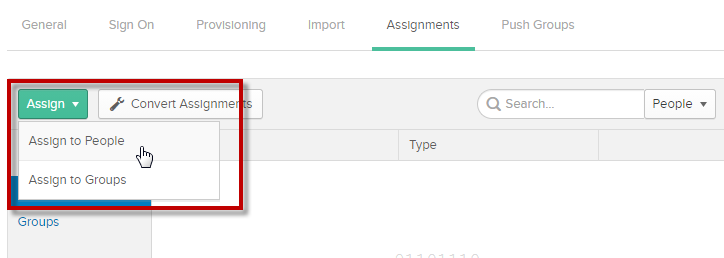
You can assign users to the application individually, or you can assign entire groups to the application. Go to the Assignments tab for your application,
and assign users or groups to the application:
- Click Assign, and select Assign to People or Assign to Groups.
- Search for the users and groups that you want to provision to Private Access, and click Assign for each user and group.
- For any users that you add, verify their user-specific attributes, and click Save and Go Back.
 Note: When you assign a group, all users that are members of that group will be provisioned to Private Access.
 -
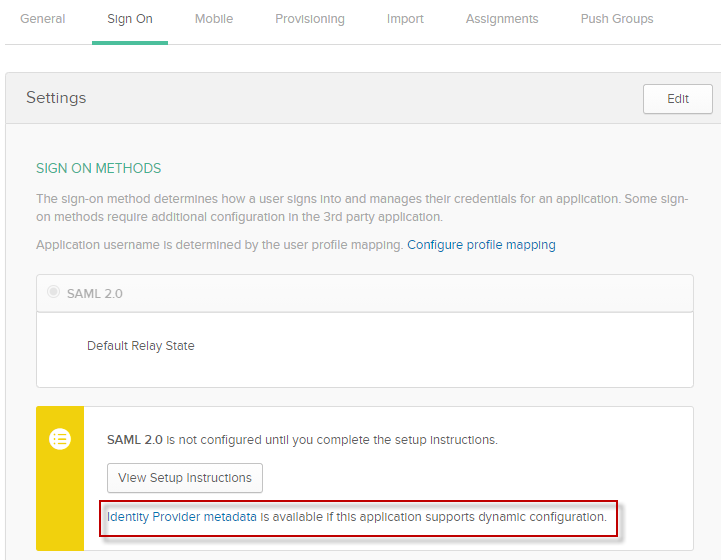
On the Sign On tab for your application, download the Identity provider metadata and save it with a .xml extension.
-
Click New.

-
Copy and make a note of the values in the following fields:
- Service Provider Entity ID
- Service Provider Assertion URL (there may be multiple URLs)
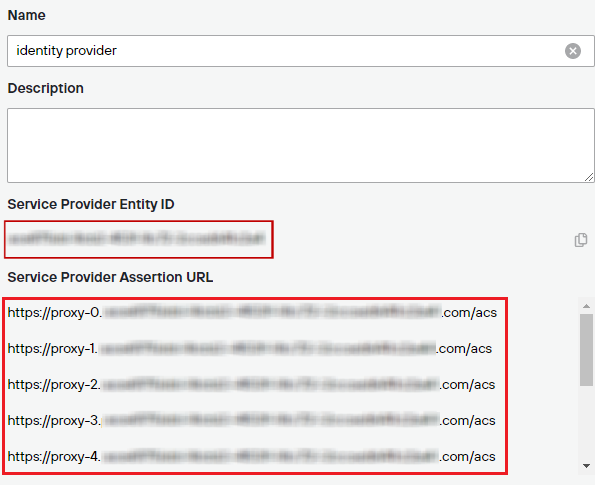
Your entity ID and each ACS endpoint must be configured in your Private Access Okta application to ensure SAML authentication is working properly for each of your configured Private Access Gateways.
-
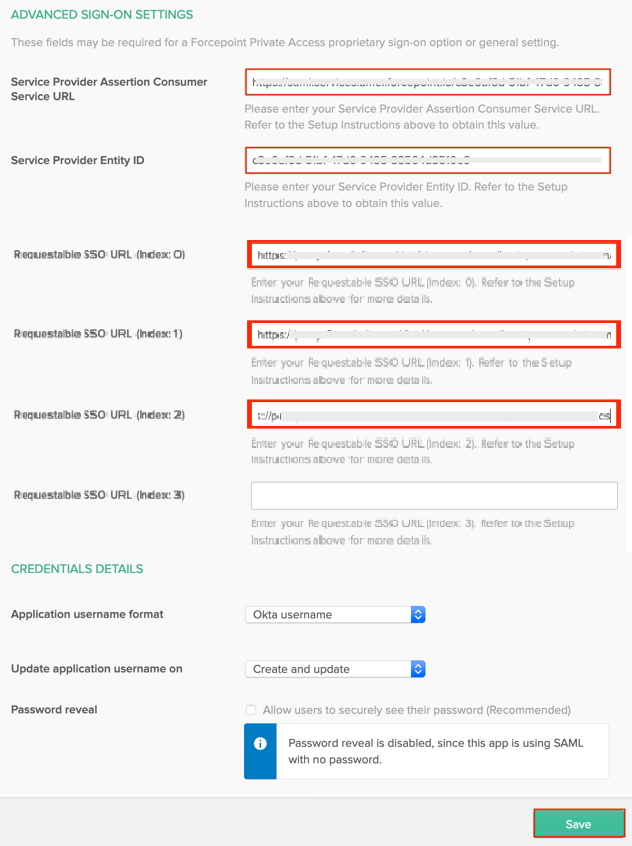
Scroll down to Advanced Sign-on Settings.
- Set the Service Provider Assertion URL to your first Private Access ACS endpoint from step 19. For example:
https://proxy-1.acme.bba.services.amer.forcepoint.io/acs- Set the Service Provider Entity ID to the value you copied from Private Access in step 19.
-
Set each available requestable SSO URL:
- In the Index 0 field, enter your second Private Access ACS endpoint.
- In the Index 1 field, enter your third Private Access ACS endpoint.
- Repeat until you have entered all of your available ACS endpoints to your Okta application.
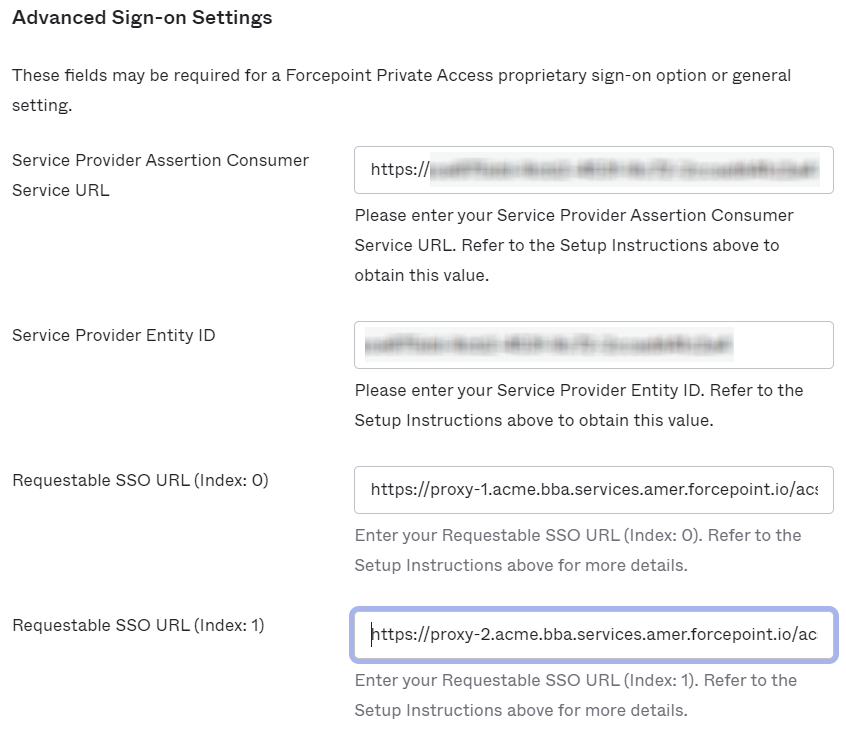 Tip: Each URL is identical except for the sequence number. Copy the first URL and change the sequence number as appropriate.Note: Remember that Index 0 will correspond to https://proxy-1.acme.bba.services.amer.forcepoint.io/acs, and Index 1 will correspond to https://proxy-2.acme.bba.services.amer.forcepoint.io/acs.
If you have any issues with your Forcepoint/Okta integration, contact Forcepoint Customer Hub.
Note: If a user is deactivated in your Okta account, the user will be deleted from the Private Access user directory.