Create the synchronization schedule

To create a synchronization schedule in the Directory Synchronization Client:

Steps

  1. In the Configuration window, click Summary, then click Schedule.
  2. In the Run at field, enter the time you want the process to run.
  3. Specify how often you want to run the process (in months, weeks, days, or hours).
  4. Select whether to run the process on any day within your chosen schedule, or on specific days.
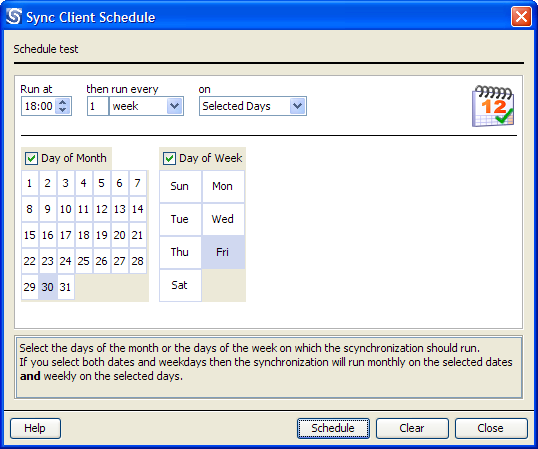
  5. If you are running the process on specific days, do one of the following:
    • Mark Day of Month, then click the dates on which to run the process.
    • Mark Day of Week, then click the days on which to run the process.
    • Mark both boxes and then click the dates and days you want. For example, you can run the process each Friday, and on the 30th of each month.
  6. Click Schedule. The calendar icon changes from gray to color to show that the synchronization is scheduled.
    Note: If the Directory Synchronization Client is running at the same time as the scheduled task, the synchronization will fail.