Setting time periods
Forcepoint Web Security Cloud allows you to restrict web surfing by time of day for either a whole policy or for defined website categories, users, and groups. This gives administrators the greatest possible flexibility to enable a customized acceptable use policy.
To access the current policies in your account and to create new policies, click Web in the portal’s main menu bar, then click Time periods.
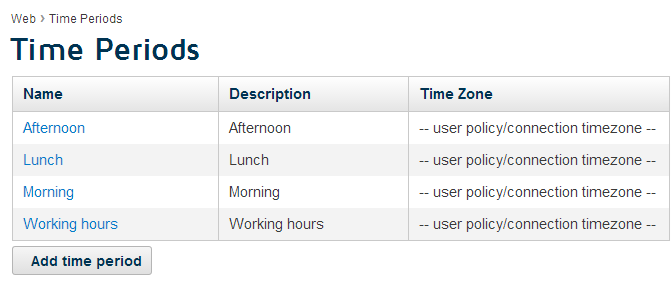
Each account has 4 default time periods: Afternoon, Lunch, Morning, and Working hours. You can view or edit existing time periods, and also create new ones to suit your company’s requirements. For example, click the Working hours period.
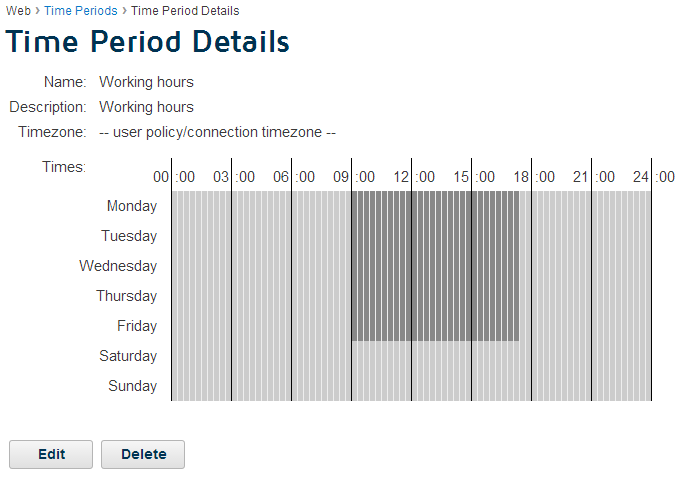
The dark area defines the actual time period. Each division is a 15 minute period; notice that when you roll your mouse over the area, the actual time is displayed below the time chart. If the time period has been allocated to one or more policies, the policy names are listed in the Used in field.
You can click Edit to set a different time period, with either a single click or by clicking and dragging to cover a wider area on the time chart. You can also tie the time period to a specific time zone.
Once you have set up your time periods, you can apply them to policies. To do this, navigate to the relevant policy and on the General tab, select options and configure exceptions with the Internet Availability controls. Here you can define granular access rules for groups and individual users.