Configuring SharePoint Online connector in Dashboard
Steps
-
Navigate to .
-
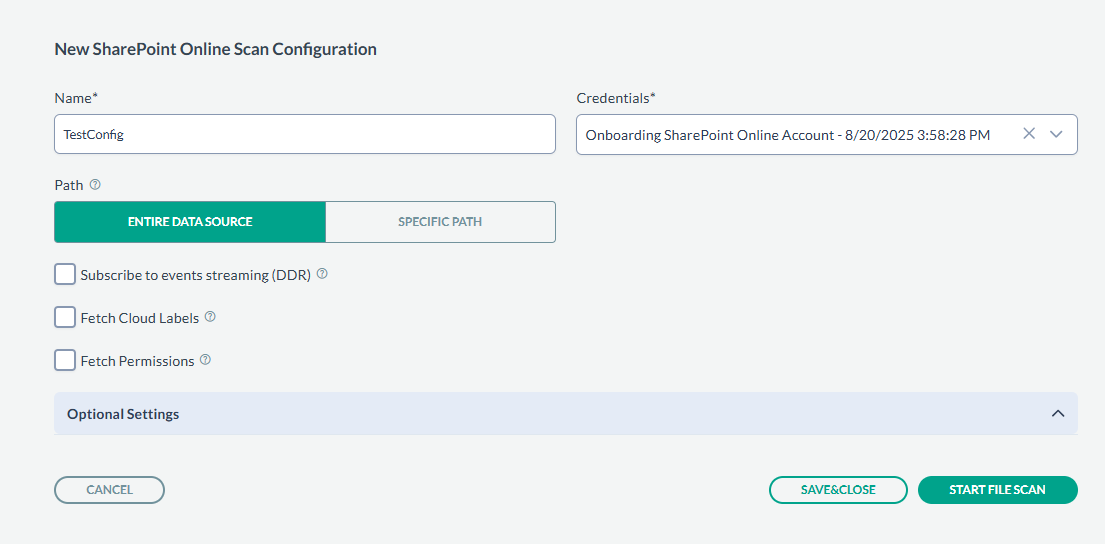
On the tab Scan configurations, click New Configuration, next enter the Name, and
Credentials created in above steps. In the Path field, select the Folder icon to select a particular sites to scan, or leave the
path as empty to scan all sites.
For the fields:
- Subscribe to events streaming (DDR): If selected, then the system will automatically handle the subscription to SharePoint Onlineʼs real-time events.
- Fetch Cloud Labels: If selected, then sensitivity (AIP) and custom labels will be fetched for each file discovered in the scan. This data will be available in Cloud Labels field in Enterprise search. However, enabling this option slows down the scan.
- Fetch Permissions: If selected, then permissions will be fetched for each file discovered in the scan. This data will be available in:
- Anyone With Link and External Shared Link fields in Enterprise search (if a file is shared correspondingly).
- Permissions tab of the sidebar in Enterprise search.
- Risk field (it is calculated based on the permissions and the classification of the file).
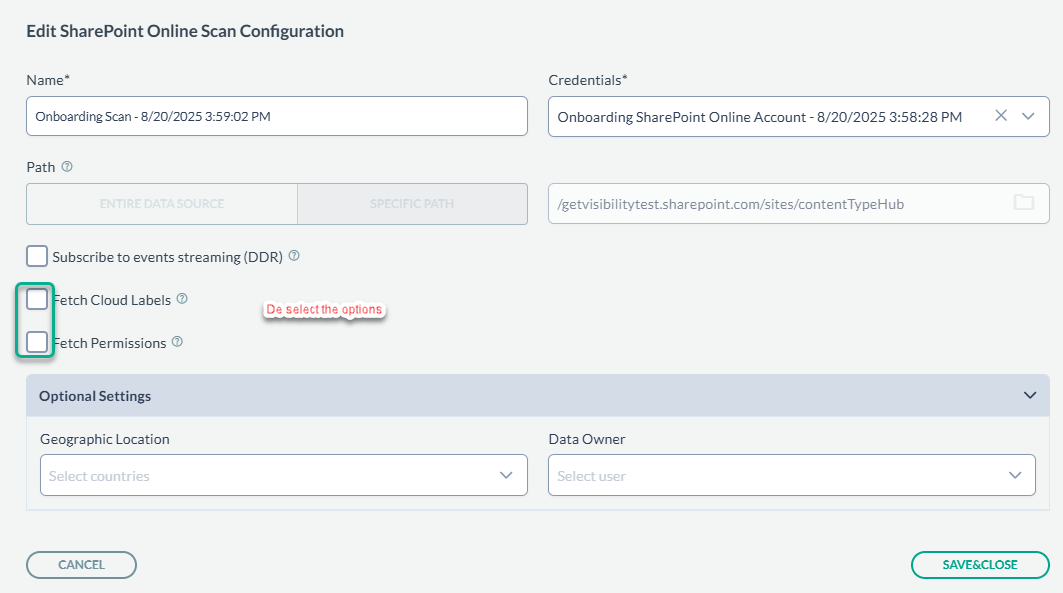
 Note: Earlier versions of the product Fetch Cloud Labels and Fetch Permissions options were enabled by default and hidden under Optional Settings. If scans take longer to run you need to check these settings and edit the scan configuration and disable these options if necessary.
 -
Next, click SAVE & CLOSE to just save the configuration or you can start the scan by clicking START FILE SCAN.
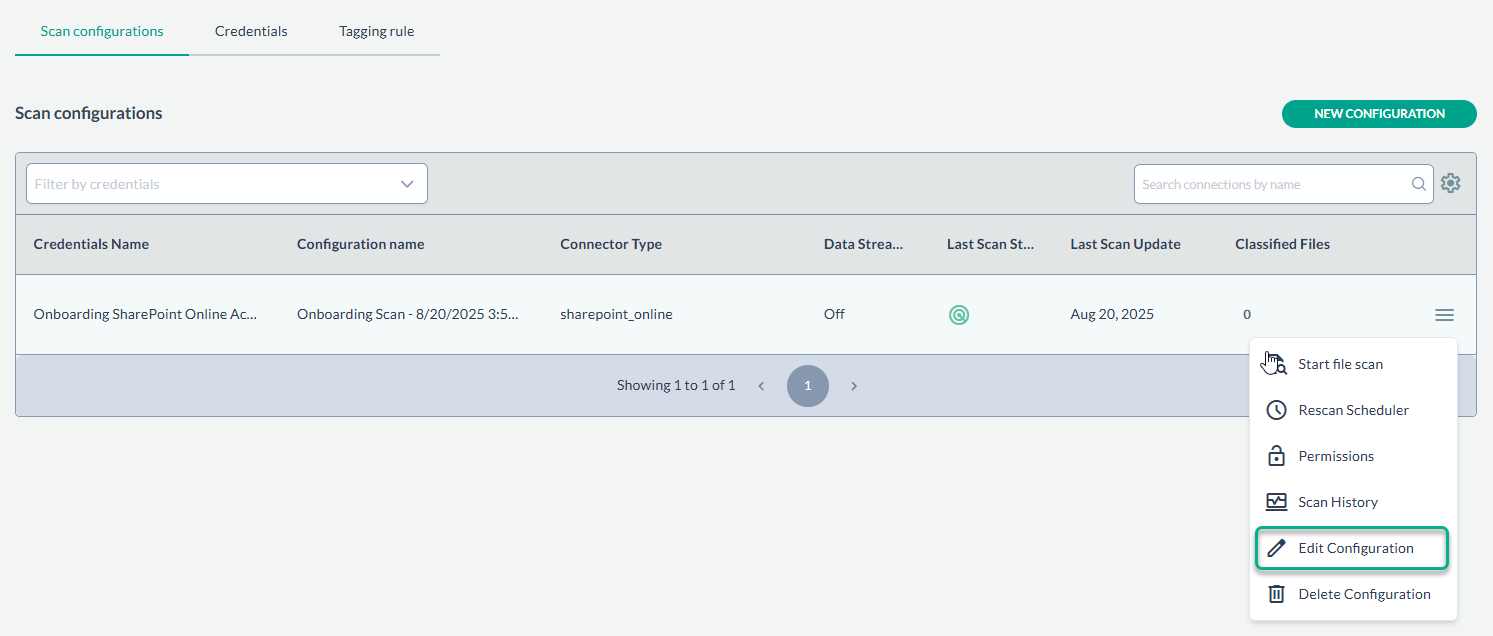
You can also edit the scan configuration created above later using Edit Configuration. For example, if you observe that you scans are running slow, you can go to the edit view and disable the options Fetch Cloud Labels and Fetch Permissions. An example is shown below:
-
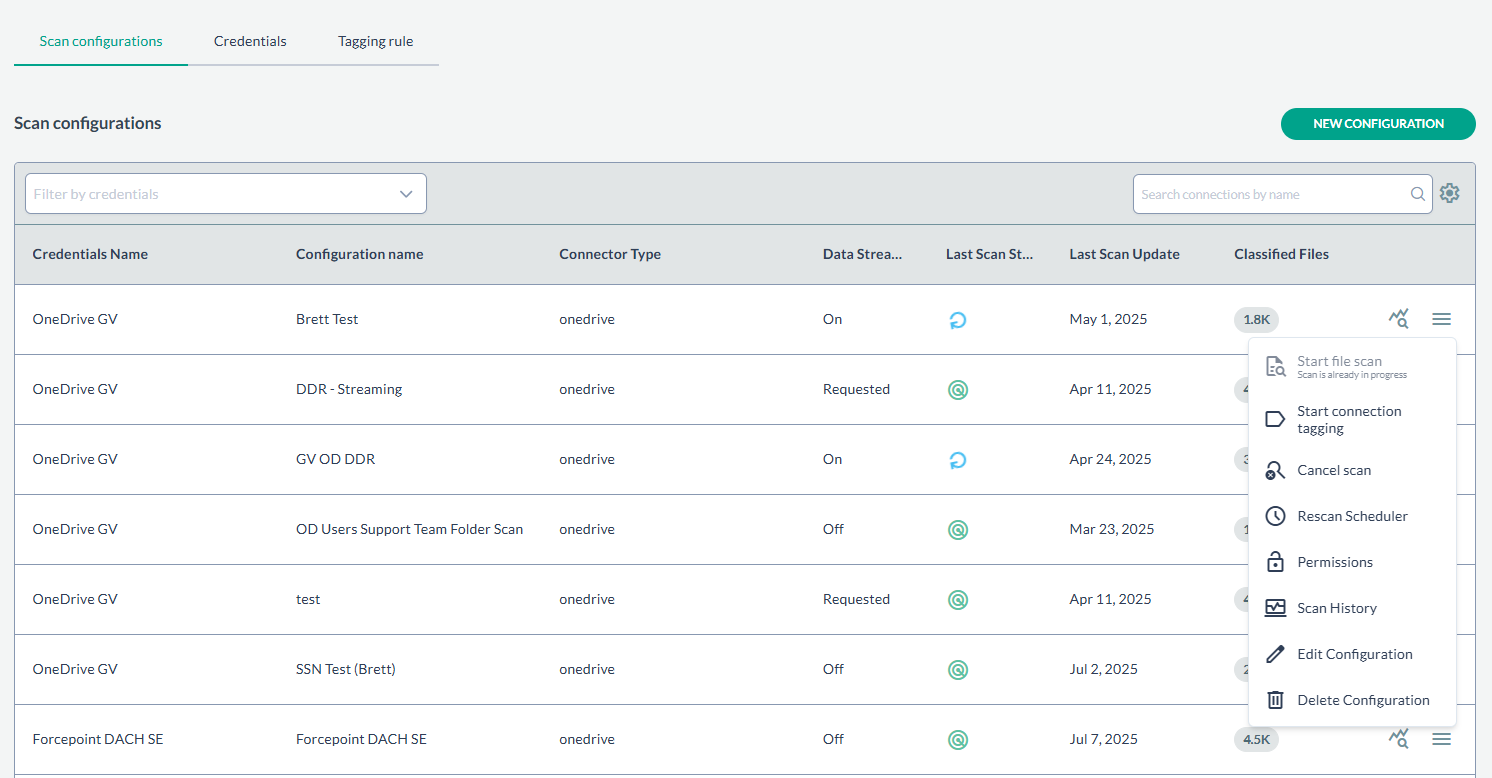
If you have created scan configurations previously, they will be listed under the Scan configurations tab. To run one of the previously created
configurations, click on the icon on the right and select START FILE SCAN to begin scanning.