Microsoft Entra ID: Configuring Forcepoint Data Security Cloud as a SAML Service Provider
You can set up Microsoft Entra ID as an IdP within Forcepoint Data Security Cloud. This setup will work to configure SAML SSO proxy authentication with any apps outside of Microsoft apps.
Attention: Azure Active Directory (AD) is renamed as Microsoft Entra ID.
- Open a new browser window/tab and login to Azure admin portal.
- Navigate to .
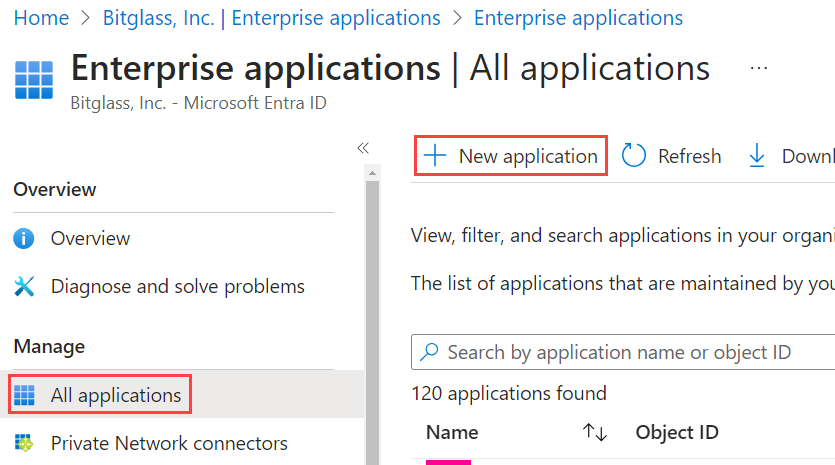
- On the Enterprise Applications page, select All applications and then click New application.
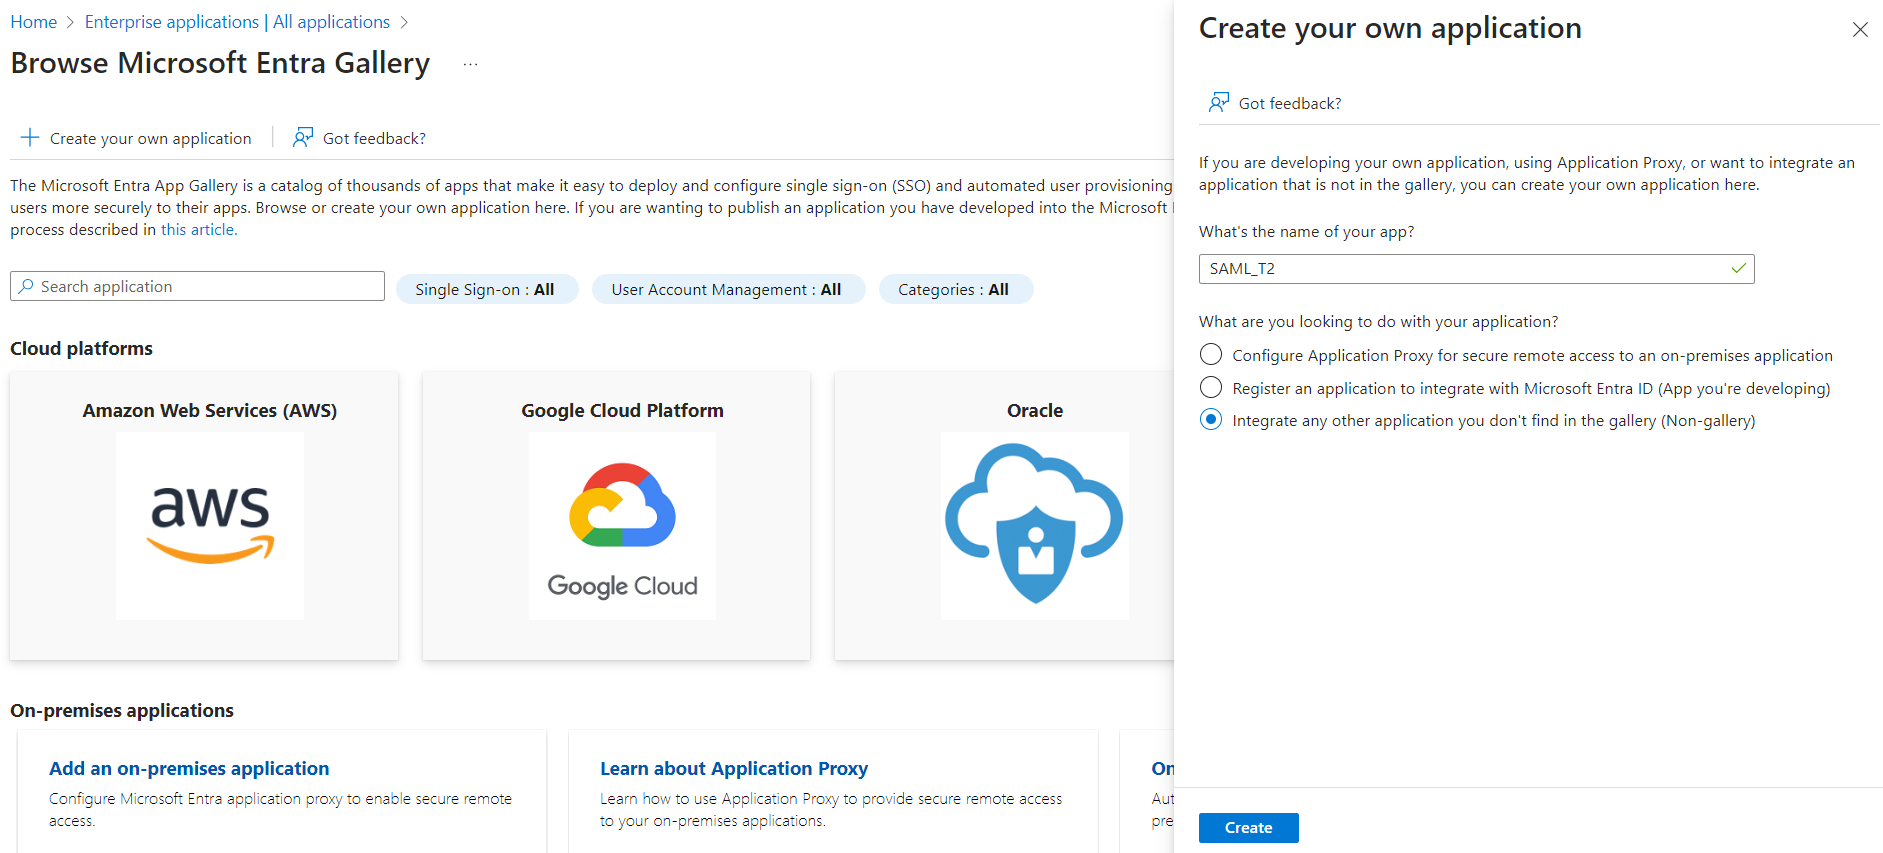
- On the Browse Microsoft Entra Gallery page, click Create your own application.
- On the Create your own application dialog that appears on the right:
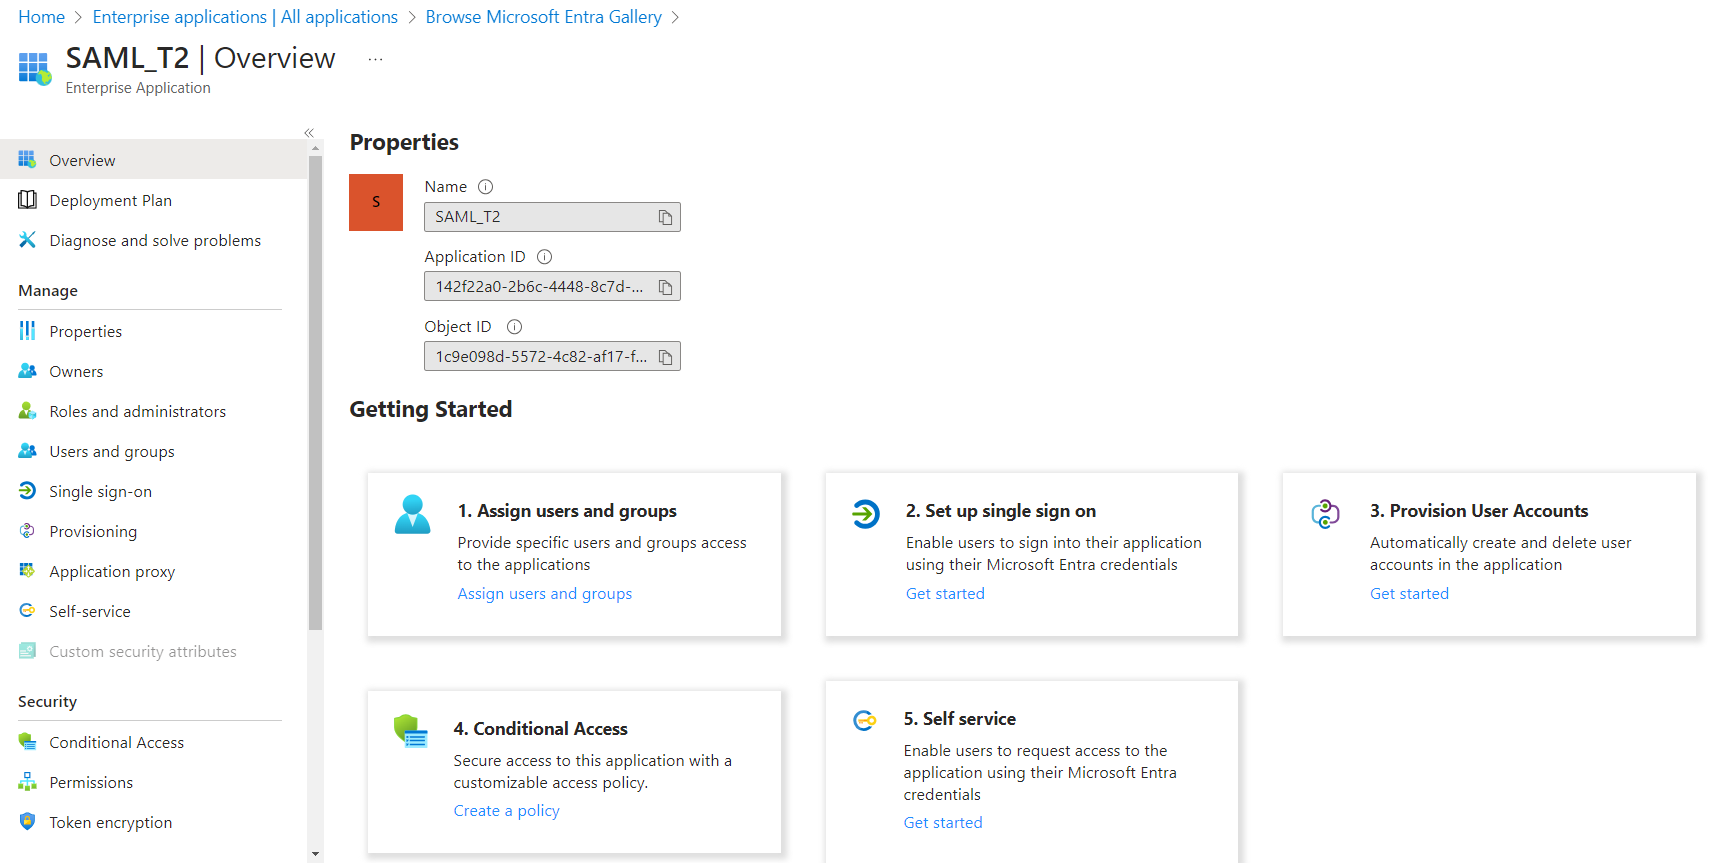
Wait for the application to get created.
- On the newly created app page, select Assign users and groups and assign the users/groups that will be accessing apps and authenticating through Forcepoint Data Security Cloud.
Note: Forcepoint Data Security Cloud UI supports UTF-8 characters. However, the SAML assertion only supports low-ASCII characters as attribute values. If an attribute value contains characters that are not low-ASCII, then SAML sign-in failures occur. - Once you have assigned your users/groups, select Set up single sign on and then click SAML.
- On the Set up Single Sign-On with SAML page:
- Back on the Forcepoint Data Security Cloud browser window/tab, select the specific SAML profile from the list which you want to edit. This opens the editor.
- If you have selected IDP Metadata File from the IdP Metadata drop-down, then follow the below steps:
- To download SAML identity provider Metadata in XML format, click the Download link adjacent to the Federation Metadata XML field under the SAML Certificate section (of Step 13f).
- Click Browse and select the XML certificate that you just downloaded in Forcepoint Data Security Cloud.

After uploading metadata file, other fields are auto-populated.
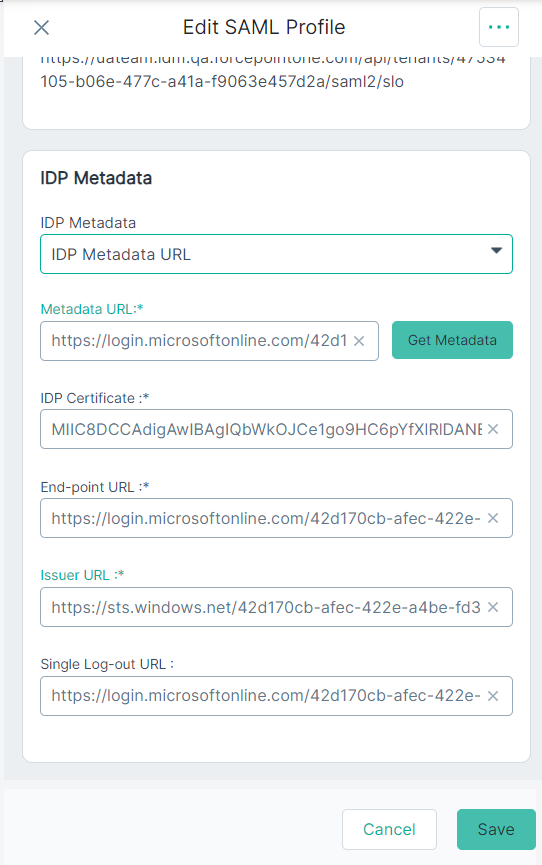
- If you have selected IDP Metadata URL from the IdP Metadata drop-down, then follow the below steps:
- Copy the App Federation Metadata Url from Step 13f and paste the url in the Metadata URL field.
- To pull the metadata based on url, click Get Metadata.
After clicking Get Metadata, other fields are auto-populated.
- If you have selected Manual from the IdP Metadata drop-down, then follow the below steps:
- From the Step 13f, click the Download link adjacent to the Certificate (Base64) field from Azure.
A certificate with base 64 gets downloaded.
- Open the certificate in text editor.
- Copy content between the -----BEGIN CERTIFICATE----- and -----END CERTIFICATE----- sections and paste in the IDP Certificate field in Forcepoint Data Security Cloud.
- Copy over the Login URL from Azure to the End-point URL field in Forcepoint Data Security Cloud.
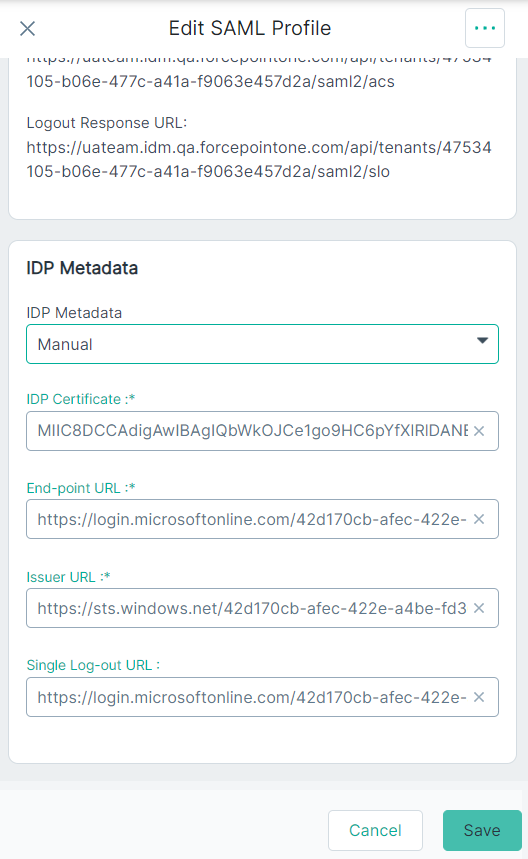
- Copy over the Microsoft Entra Identifier from Azure to the Issuer URL field in Forcepoint Data Security Cloud.
- Copy over the Logout URL in Azure to the Single Log-out URL field in Forcepoint Data Security Cloud.
- From the Step 13f, click the Download link adjacent to the Certificate (Base64) field from Azure.
- Click Save on both pages of setup.
Attention: To login to the Forcepoint Data Security Cloud using SAML SSO, provide access to users to the Forcepoint Data Security Cloud within Azure app permission. If users have no designated permission, they will encounter an error while logging in.
- Now you are set to use Microsoft Entra ID as the IdP to login to Forcepoint Data Security Cloud.
- Now you can enforce users from the specific username domain to get authenticated by the selected Microsoft Entra ID IdP. To configure username domain, refer to Adding a new username domain.