Configuring policy with security token service
Using the Security Token Service (STS) method provides greater security in that you can completely control Forcepoint Data Security Cloud | SSE access to your AWS S3 tenant.
Steps
-
When adding the AWS tenant in Forcepoint Data Security Cloud | SSE, select
Security Token Service. You will be provided with a Bitglass Account ID and an External ID and instructed
to create an Amazon IAM role with that information:

-
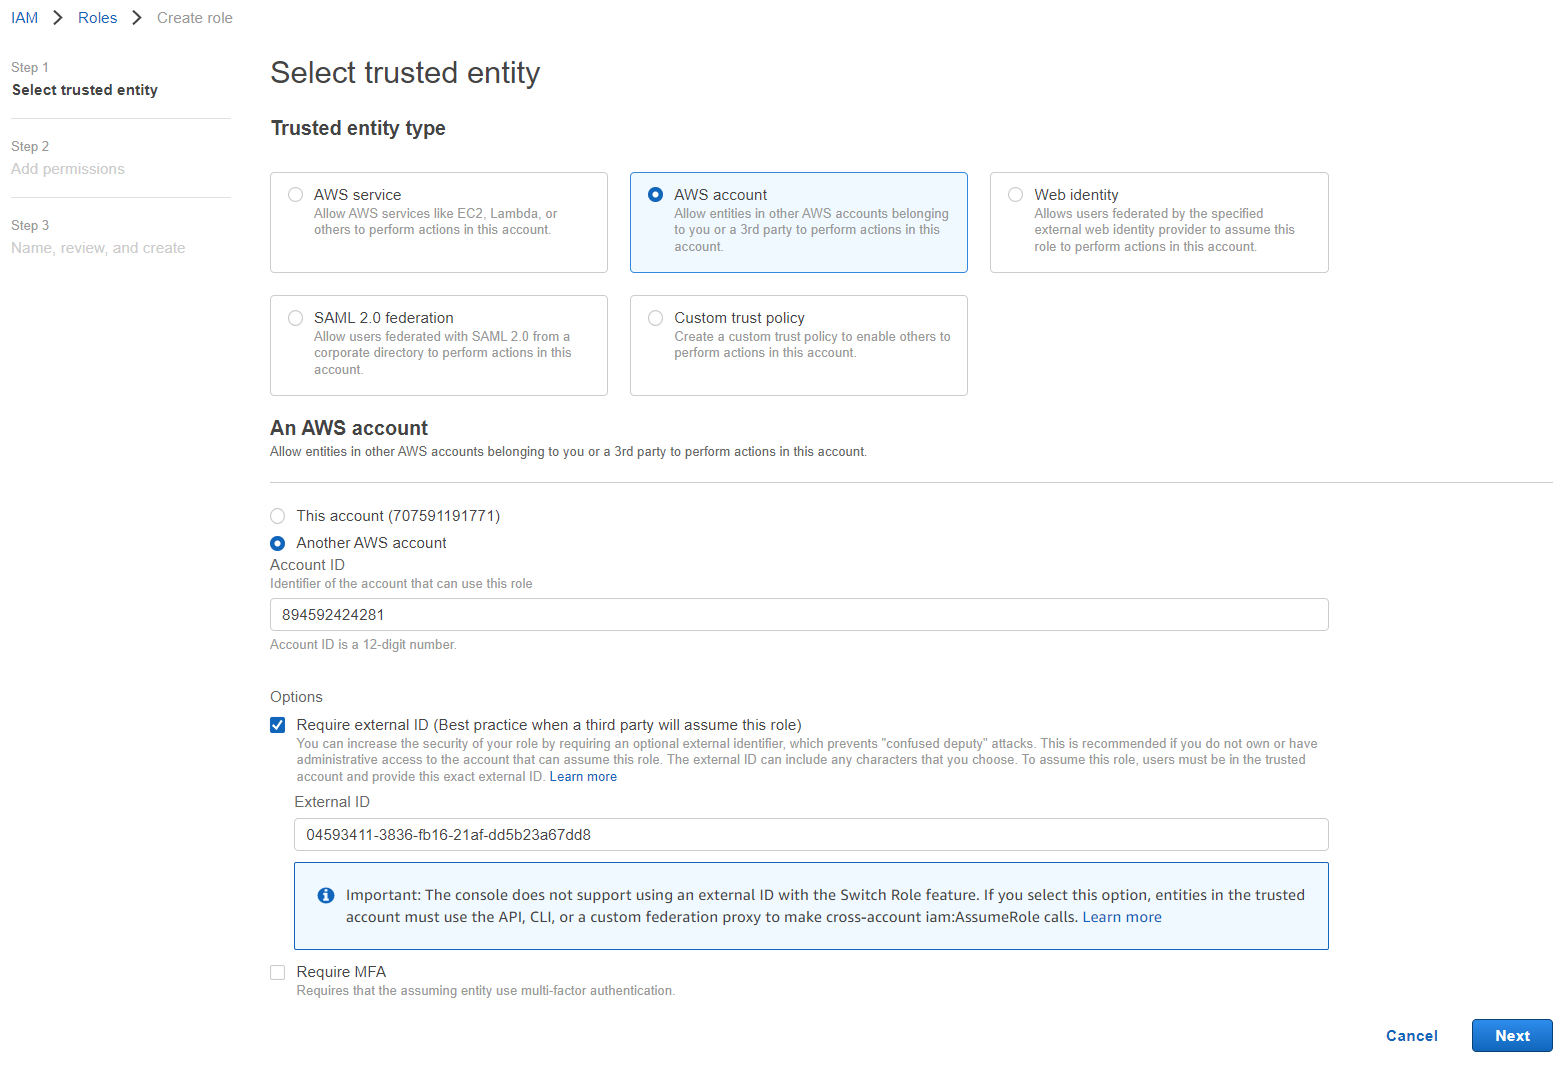
Select AWS Account, and then select the Another AWS account to enter the Account ID from the Forcepoint Data Security Cloud | SSE portal. Check the box for Require external
ID and then copy over the External ID from the Forcepoint Data Security Cloud | SSE portal and then click Next to
open the Add permissions page.
-
On the Add Permissions page, locate the policy that you created at the beginning of this guide page and select it. Then click Nextat
the bottom to open Name, review, and create page.

-
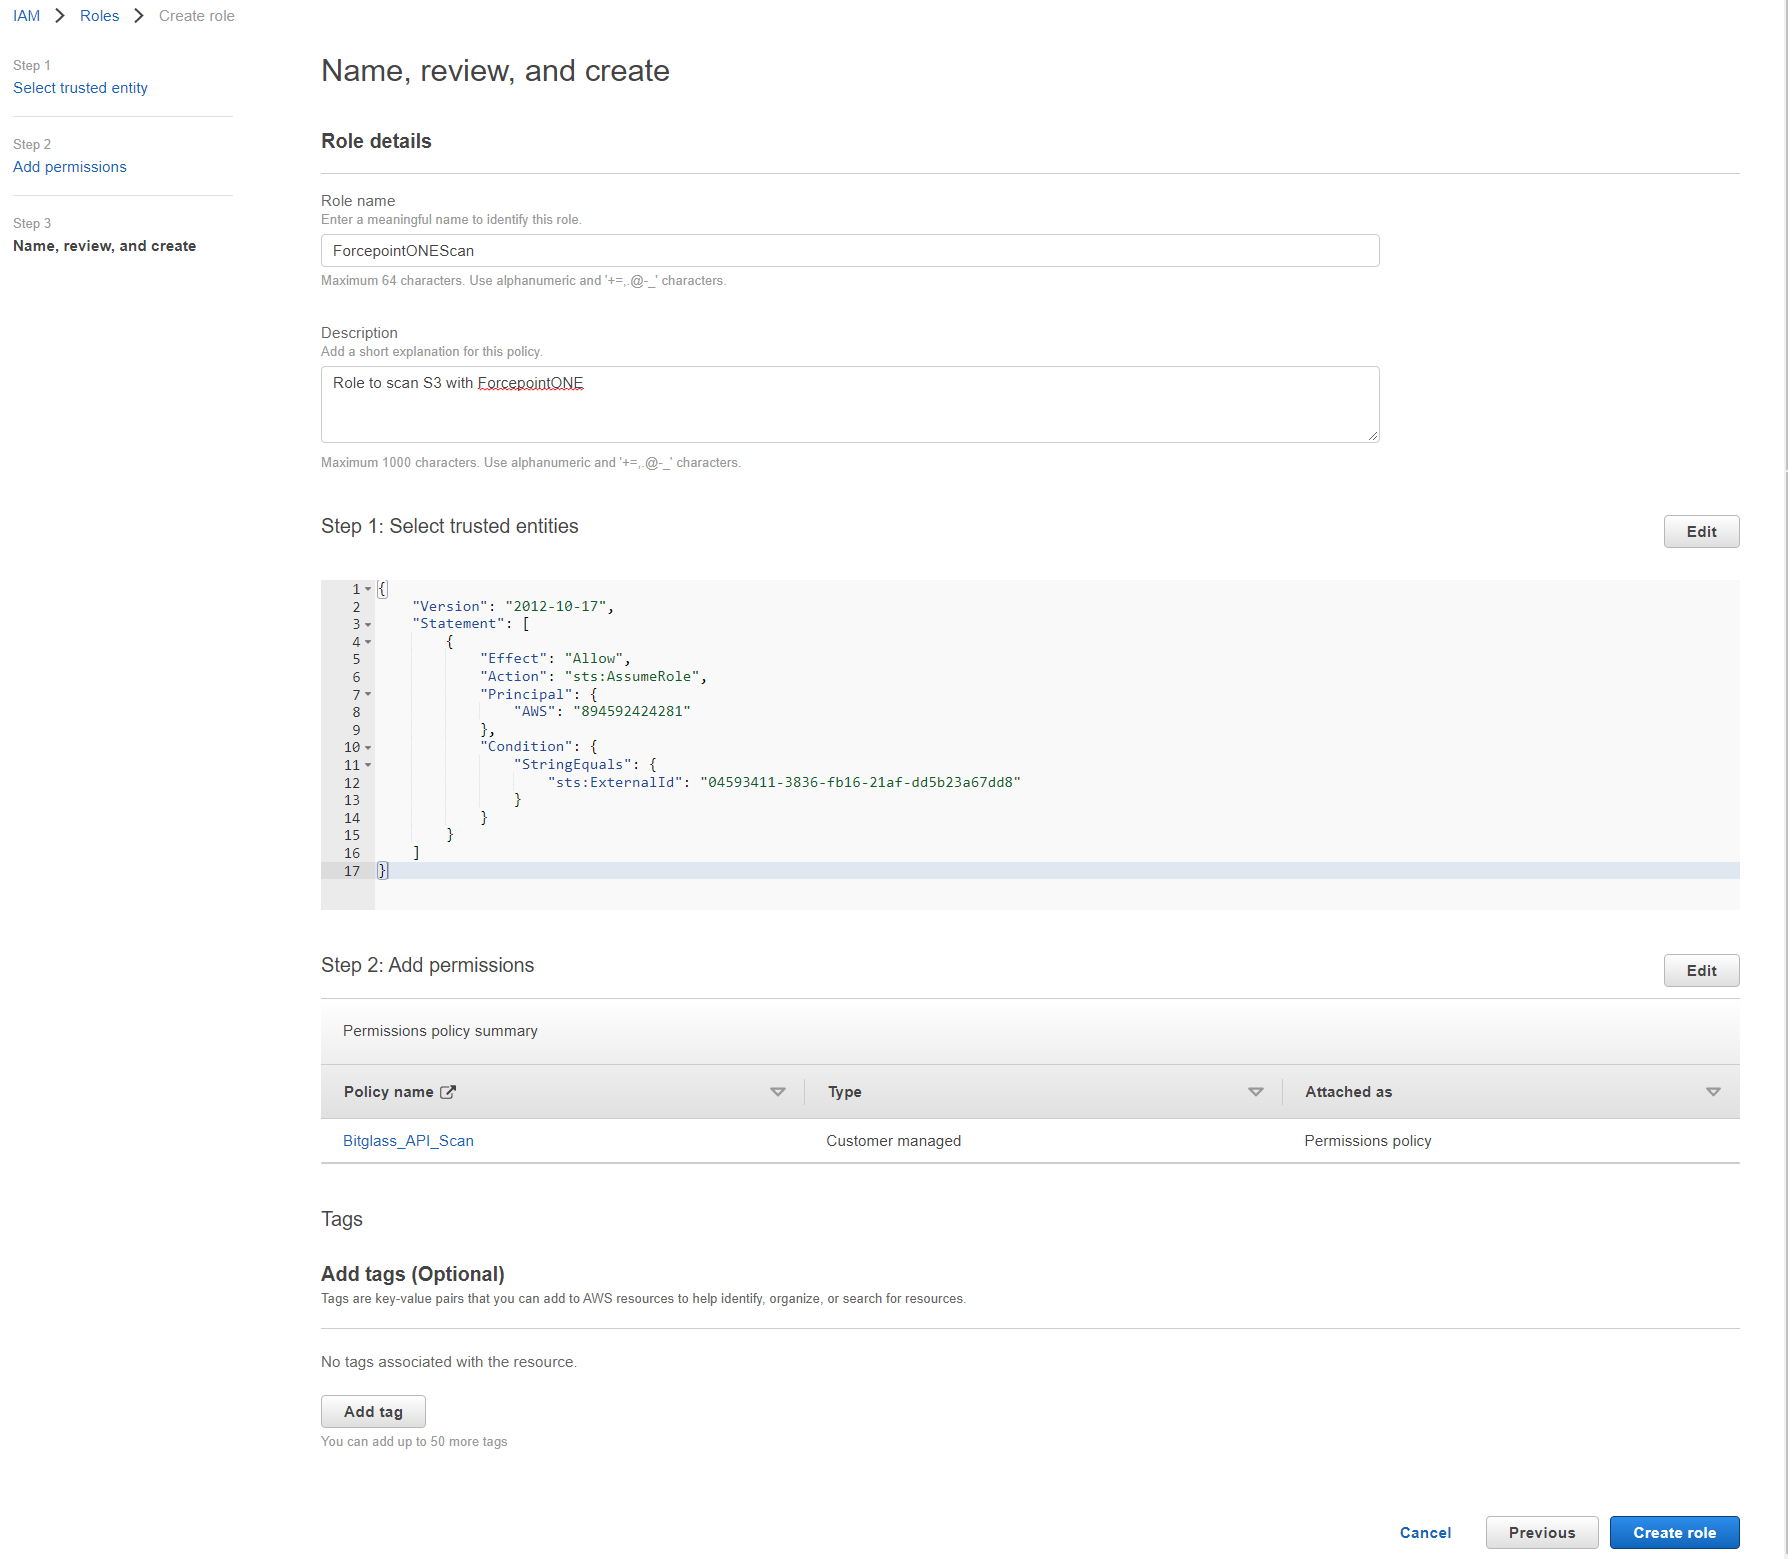
On the Name, review, and create page, give a name to the Role, a description, add tags if any and then click Create Role.
-
Once created, you can locate the role you just created and copy the Role ARN. Back on the Add AWS Tenant dialog, provide a name for the tenant (same name as
the Role ARN you created) and paste the copied Role ARN information and then clickContinue. If correct, the entry should be saved and will display the
additional options for selecting which Buckets to scan and the DLP patterns to match on:

