Google Workspace: Deploying Forcepoint Data Security Cloud | SSE as a SAML IdP
This page will guide you through configuring Forcepoint Data Security Cloud | SSE as a SAML Identity provider for Google Workspace single sign-on (SSO) authentication. This will ensure visibility and access control of Google Workspace via Forcepoint Data Security Cloud | SSE CASB.
Before you begin
Steps
-
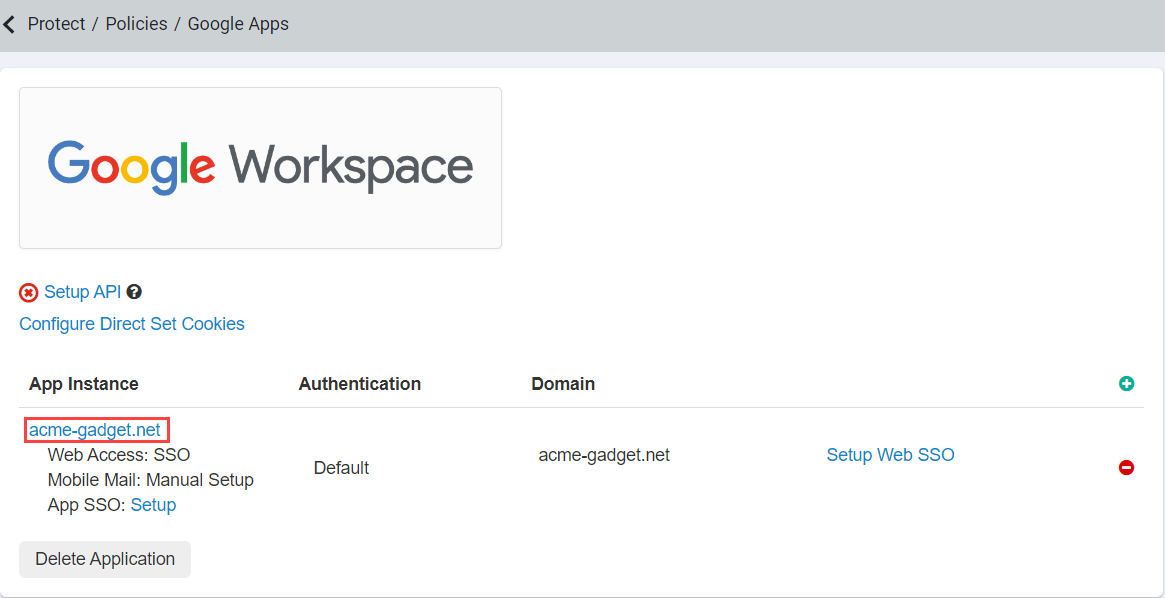
Start by logging into the Forcepoint Data Security Cloud | SSE admin portal and
navigate to Protect > Policies and click on Google Workspace to get to the Google Workspace settings page.

-
On the settings page you will first need to select the App instance to enable SAML SSO for Web, Client Apps.
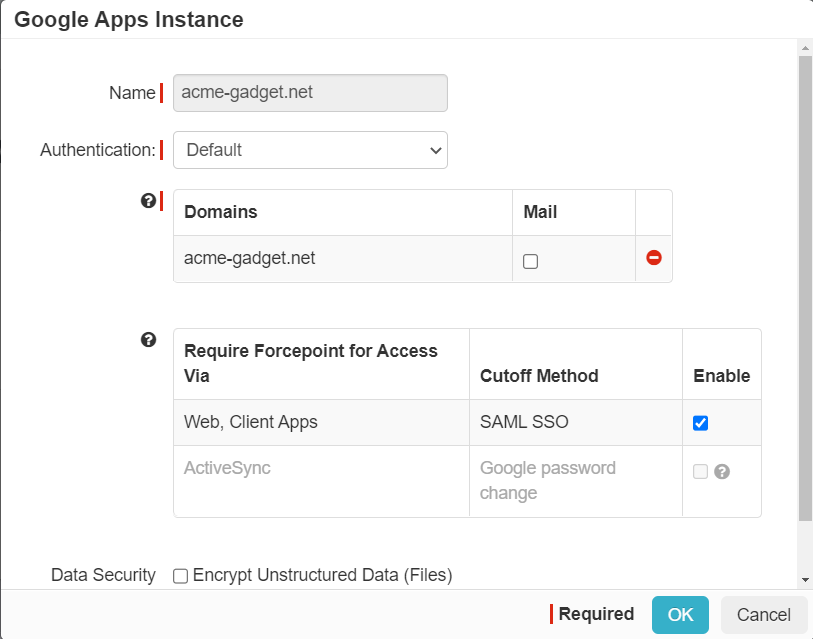
Note: The Google Workspace tile will be hidden from User Portal when the SAML SSO is disabled in the Google Apps Instance dialog. -
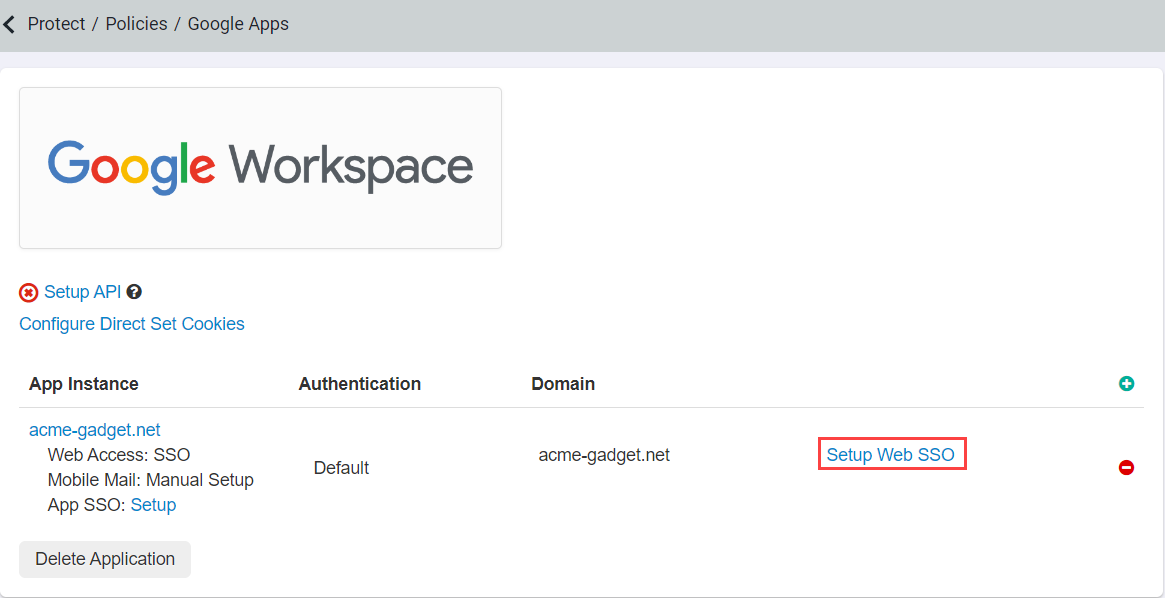
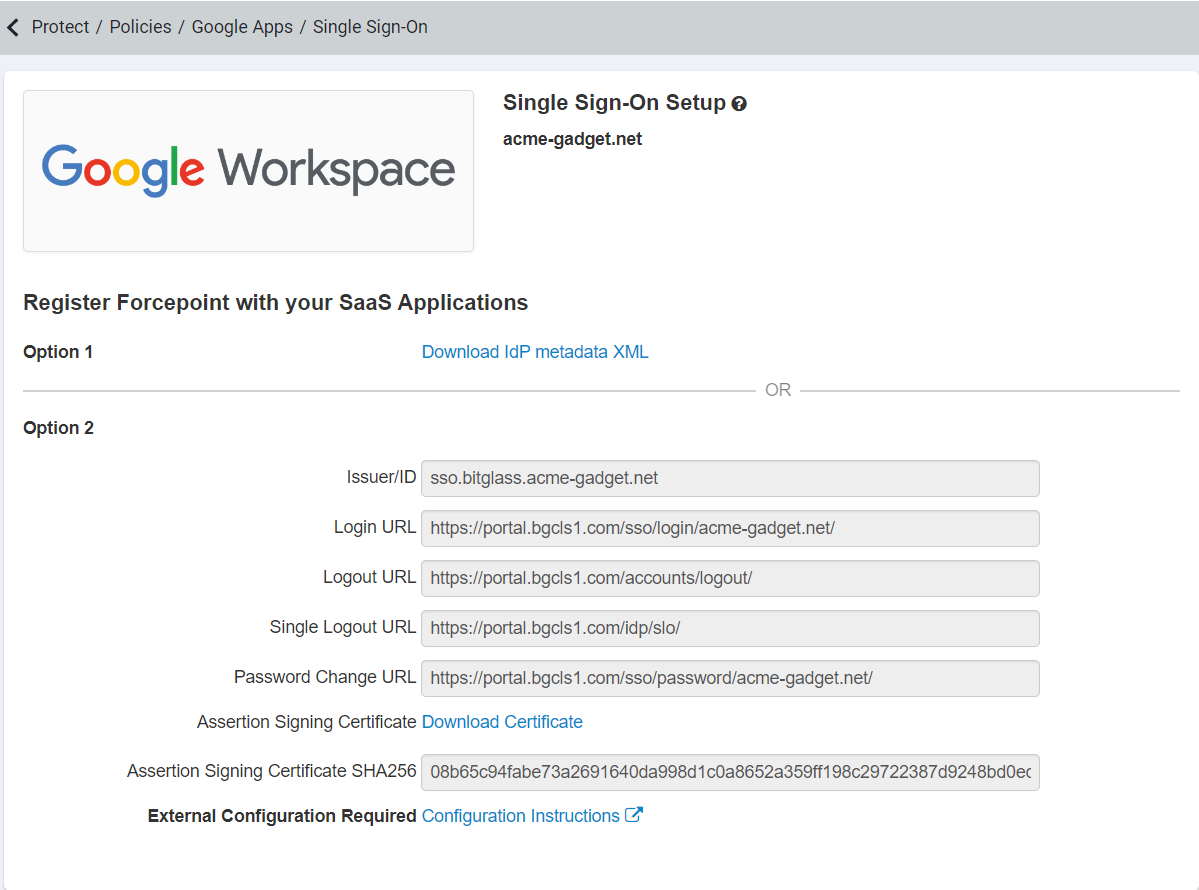
Back on the Google App settings page, select Setup Web SSO and keep this page open as you will need the information from this
page.
-
Open a new browser window or tab:
- Open any Google App and then navigate to Google apps > Admin to open Google Admin portal.
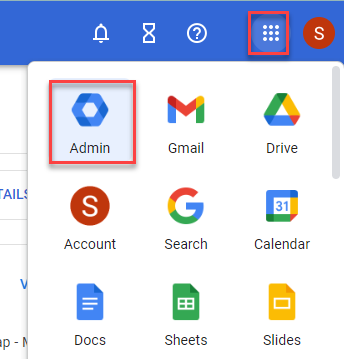
OR
- Login directly to https://admin.google.com.
- Open any Google App and then navigate to Google apps > Admin to open Google Admin portal.
-
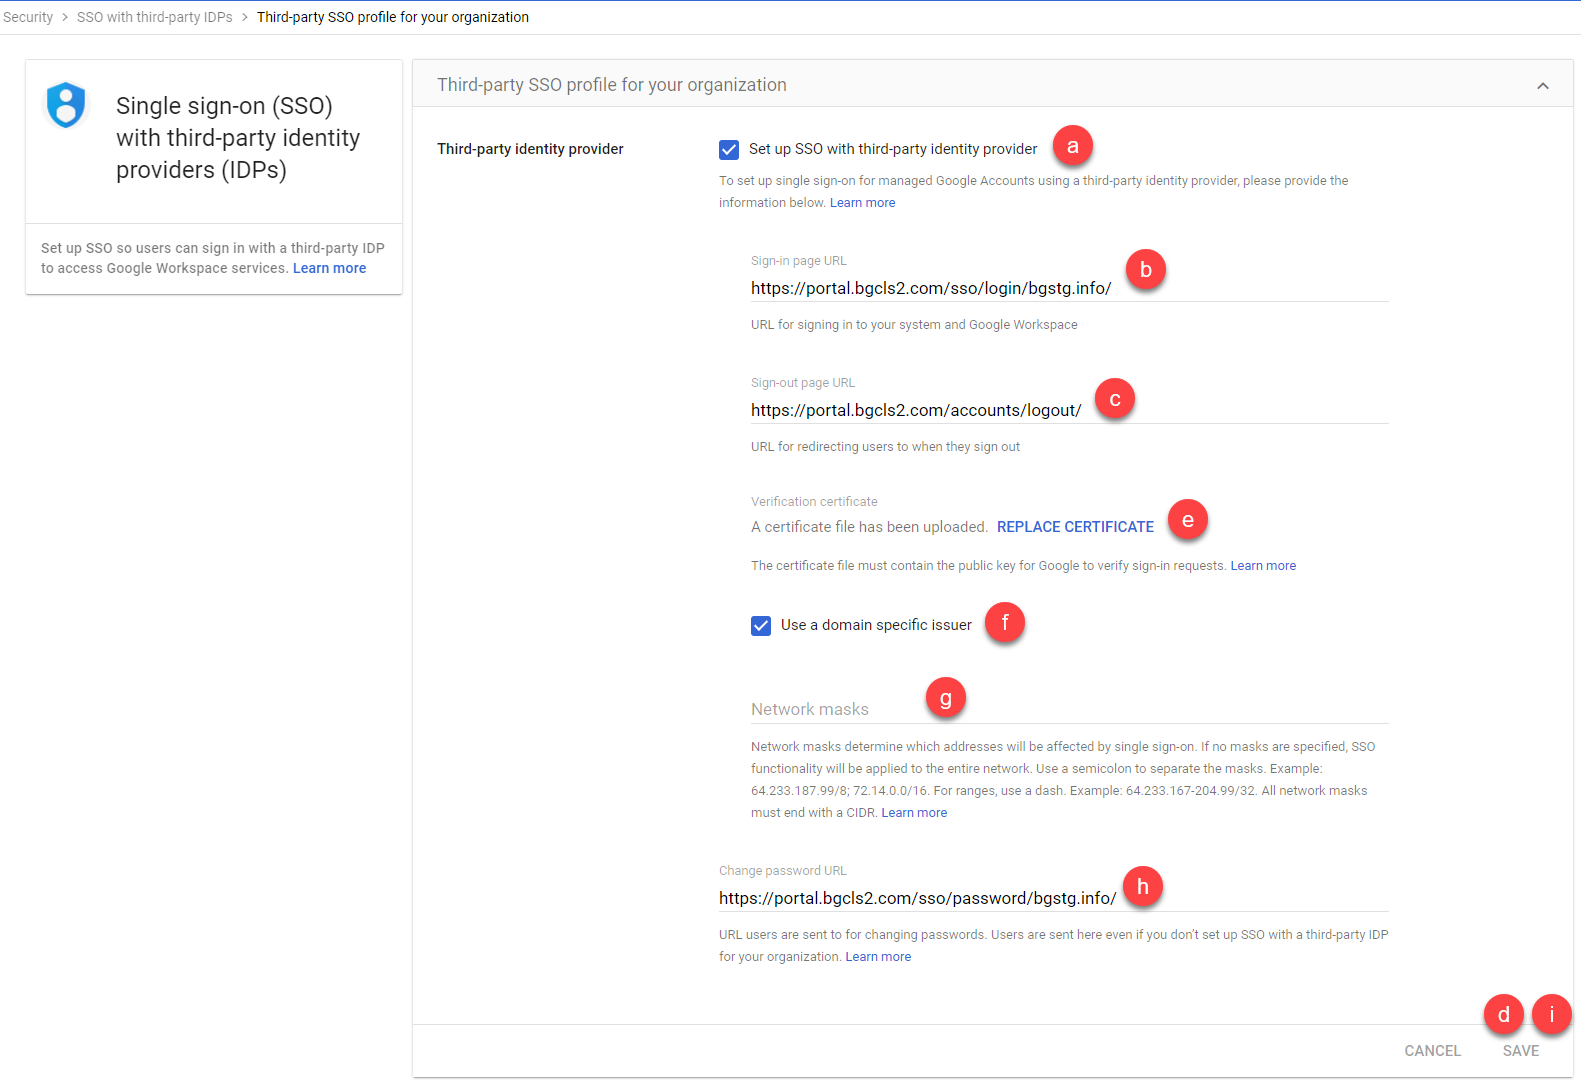
On the left navigation pane, navigate to Security > Authentication > SSO with third party IdP page and then click on Third-party SSO profile for your Organization section to edit the fields.

- Follow the below steps:
- Check the Setup SSO with third party identity provider checkbox. Now we will be copying the options from the page we opened in step 3 above over to Google.
- Copy the Login URL from the Forcepoint Data Security Cloud | SSE admin portal and paste it into the Sign-in page URL field.
-
Copy the Login URL from the Forcepoint Data Security Cloud | SSE admin portal and paste it into the
Sign-in page URL field.
Note: In some scenarios, you may want users to be logged out of both Forcepoint Data Security Cloud | SSE and an external IdP when clicking the logout link in the application. To accomplish this, use
https://portal.bitglass.com/accounts/logout/as the Logout URL instead of the default ofhttps://portal.bitglass.com/portal/ - Make sure you click Save before moving on to the next step to upload the certificate.
-
Click the Replace certificate link.
- Login to:
https://portal.bitglass.comand then click the following download cert link to download a token signing certificate. - Select the downloaded certificate in the open Upload certificate file chooser.
- Login to:
- Check the Use a domain specific issuer checkbox.
- Clear the Network masks field since the Forcepoint Data Security Cloud | SSE cloud service will now be the identity provider for SSO.
- Copy the Password Change URL from the Forcepoint Data Security Cloud | SSE admin portal (from start of instructions) and paste it into the Change password URL field.
-
Click Save.
-
If you are configuring SSO for specific Organizational Units (OUs) or Groups, then follow the below steps in Forcepoint Data Security Cloud | SSE:
- Navigate to Protect > Policies and click on Google Workspace to get to the Google Workspace settings page.
-
On the settings page, click App SSO: Setup link to update the details.
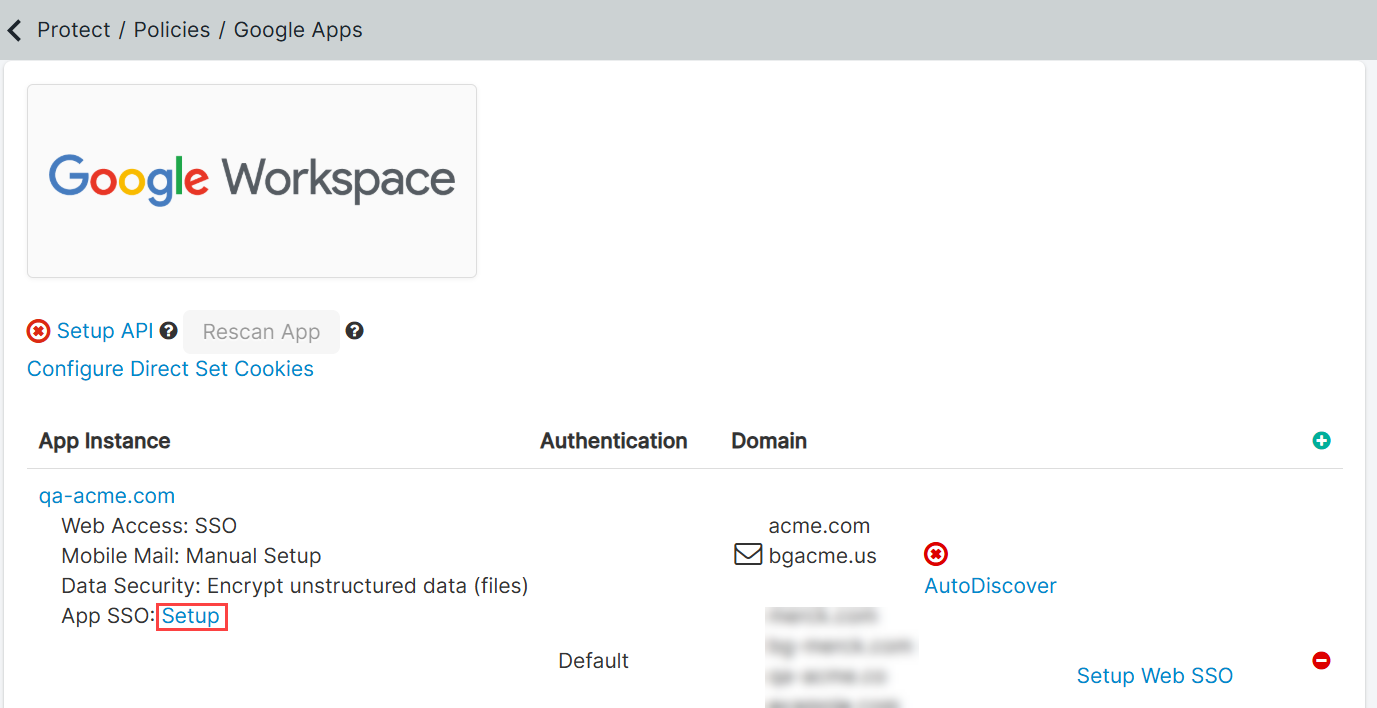
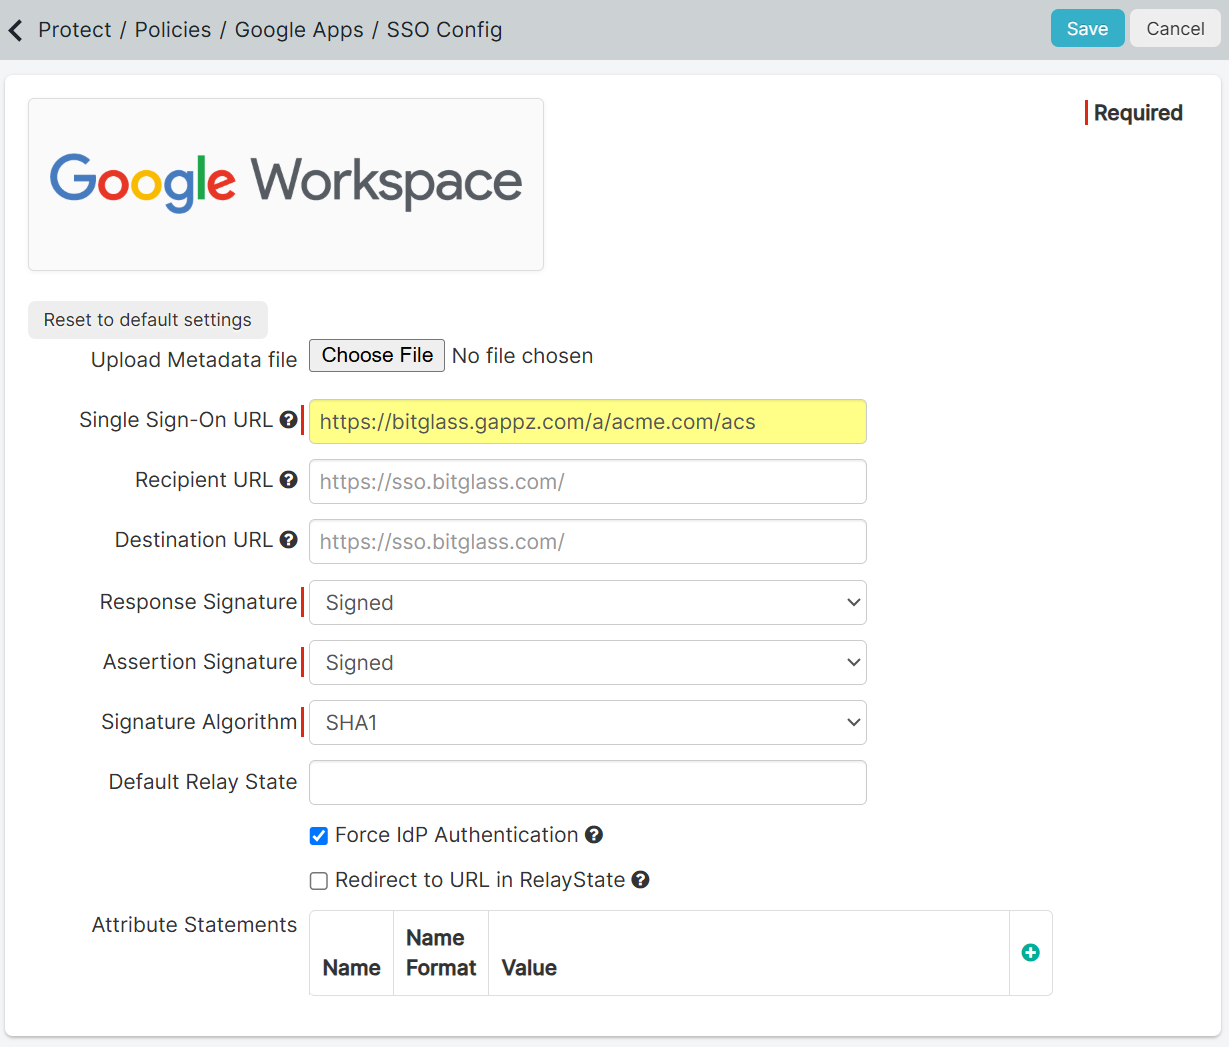
The SSO Config page opens.
-
In the Single Sign-On URL field, replace the existing domain with bitglass.gappz.com while keeping the rest of the URL
unchanged..
For example, Replace the https://www.google.com/a/acme.com/acs URL with the https://bitglass.gappz.com/a/acme.com/acs URL.
- Enable Force IdP Authentication.
- Click Save.