Salesforce: Configuring SSPM scan in Forcepoint Data Security Cloud | SSE
Admins can also have Forcepoint Data Security Cloud | SSE scan Salesforce for SSPM (SaaS Security Posture Management) to audit Salesforce security configurations. This setup does not require any additional changes or alterations to the Salesforce setup above.
Steps
-
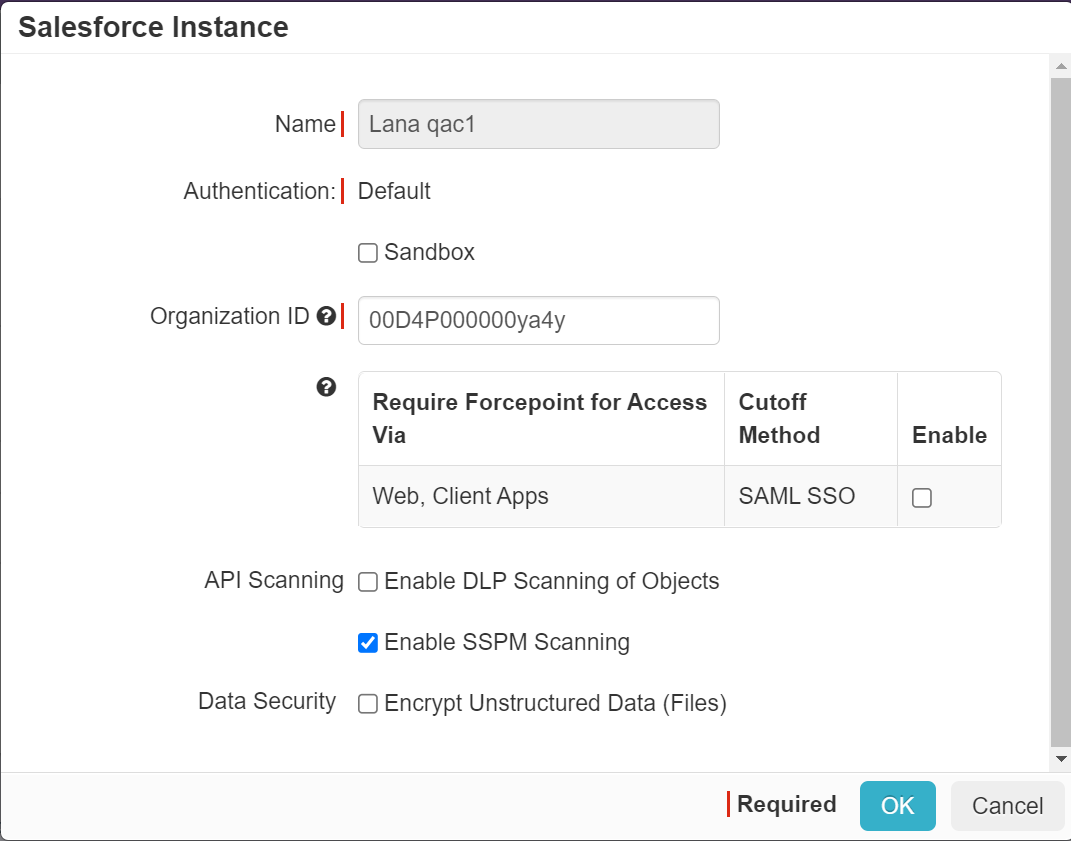
Login to the Forcepoint Data Security Cloud | SSE portal and navigate to and select the Salesforce application to get to the settings page and then click on the app instance that you wish to enable API scanning for.
In the app instance dialog enable API scanning by checking Enable DLP Scanning of Objects and then clickOk. Back on the Salesforce
Settings page click Save in the top right corner.
-
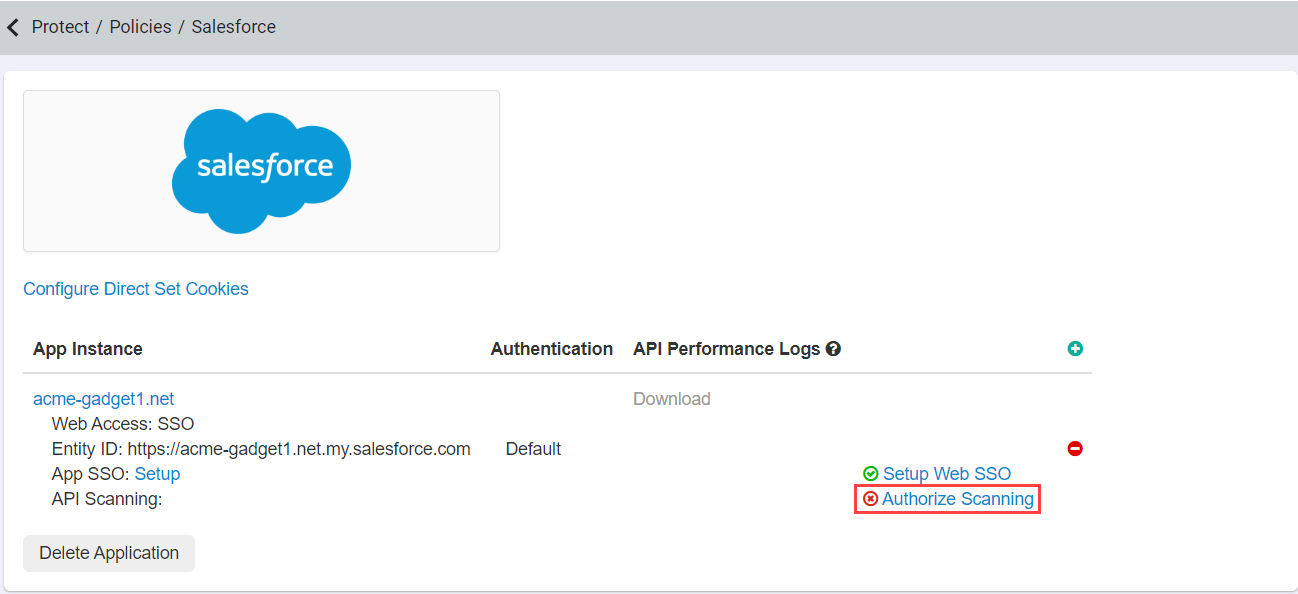
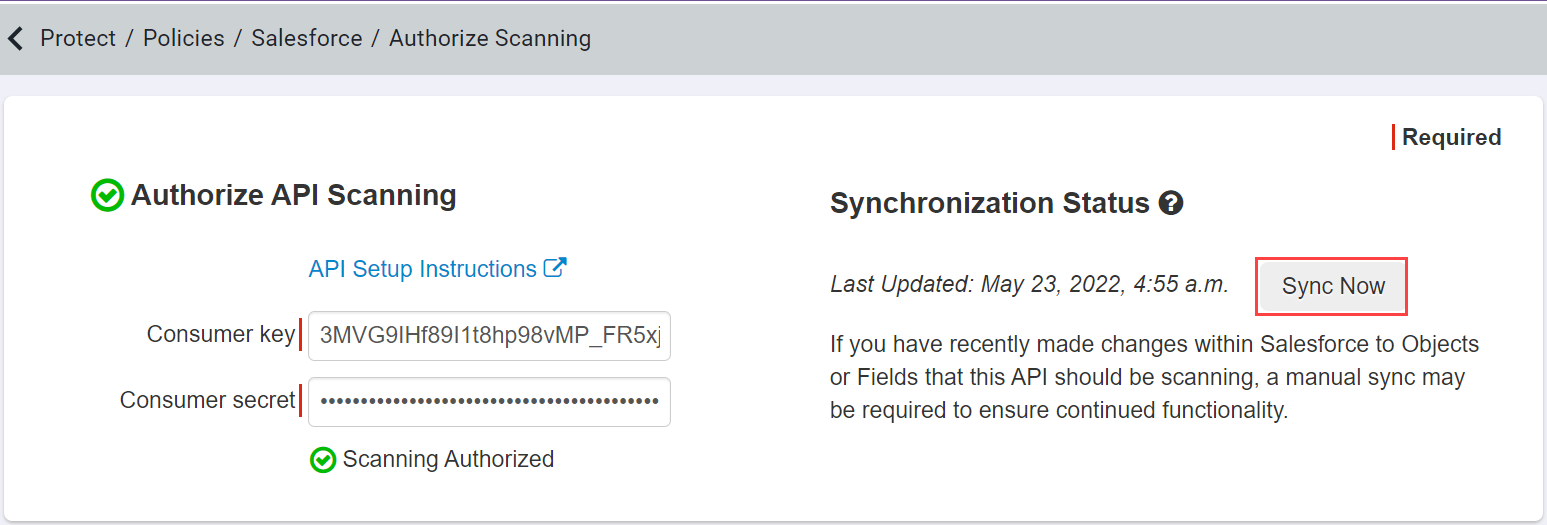
After you save, under the app instance, select the option called Scanning Authorized. On the new setup page copy and paste over the Consumer key and secret
from step 5 in the Salesforce Connected App Setup steps above and then click Save. Once you have saved click Authorize Scanning
underneath and you will be taken to a Salesforce page to authorize the API access.
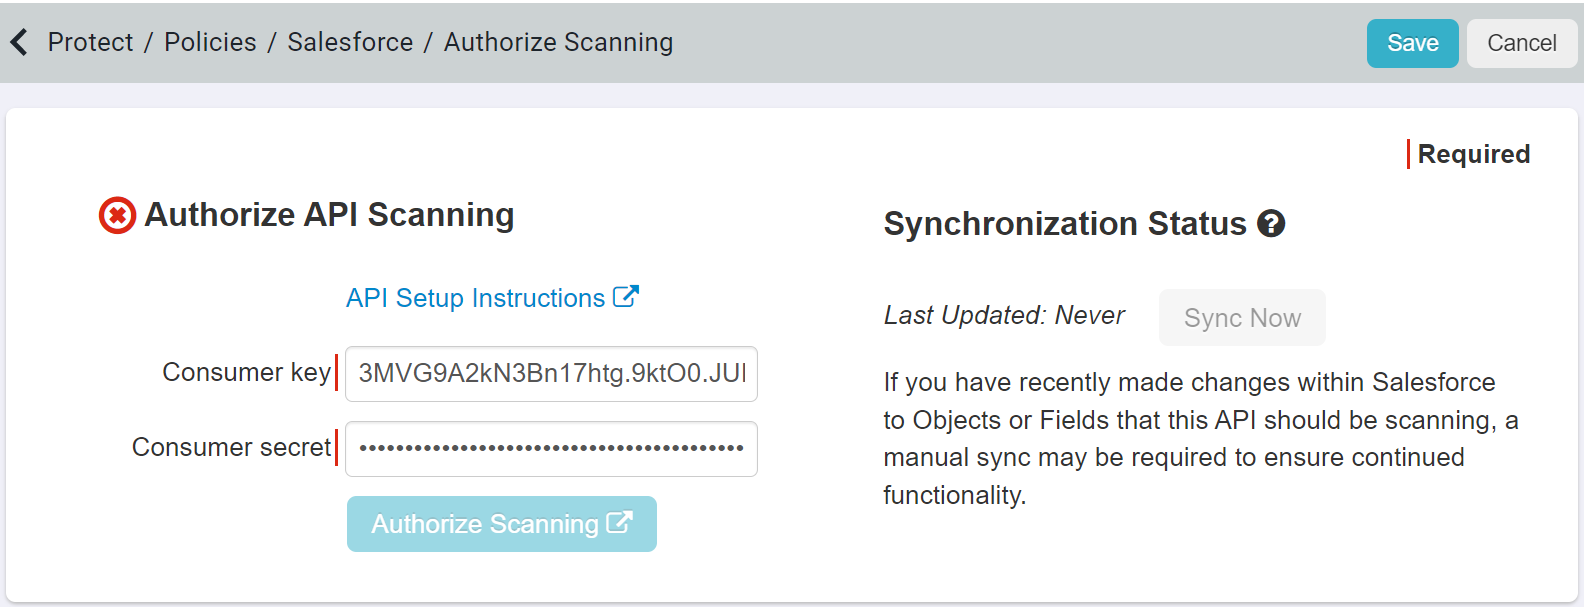
Note:The Authorize API Access link must be visited by a Salesforce admin who must authenticate with admin credentials to generated an associated OAuth token.

Once authenticated, you should see a green check mark beside Scanning Authorized.

-
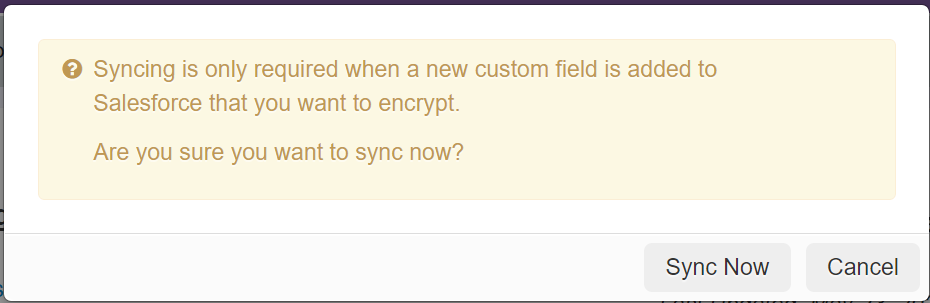
Click the Scanning Authorized and then click Sync Now under the Synchronization Status section.
A pop-up opens asking to confirm the sync. Click Sync Now to continue with the sync.