Configuring Salesforce SSO
With the subdomain configured and the Salesforce app added in Forcepoint Data Security Cloud | SSE, you can start configuring the SSO information.
Steps
-
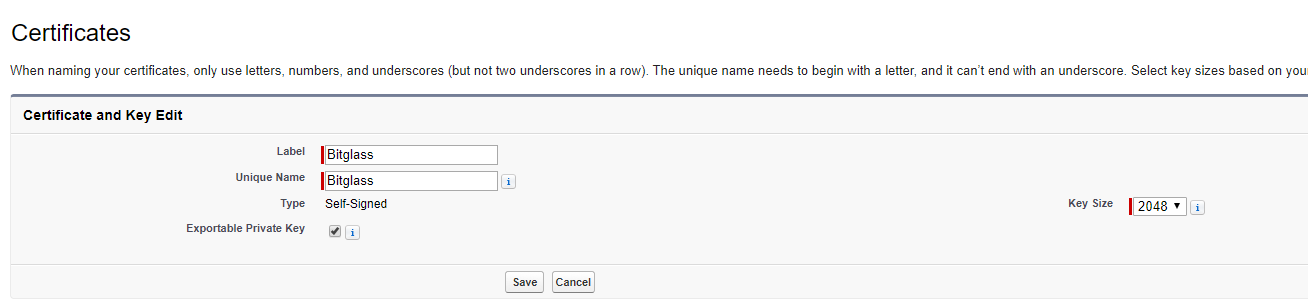
While still in the Salesforce admin portal, on the left nav expand Security Controls and select Certificate and Key Management. In
the new page click Create Self-Signed Certificate.


-
For the Label you can give it any name you want, that will be your identifier when configuring your subdomain setup. We typically just label it as
Forcepoint Data Security Cloud | SSE. The Unique Name field will be filled out with whatever was entered into the
Label field. Leave everything else as default and Save at the bottom.
-
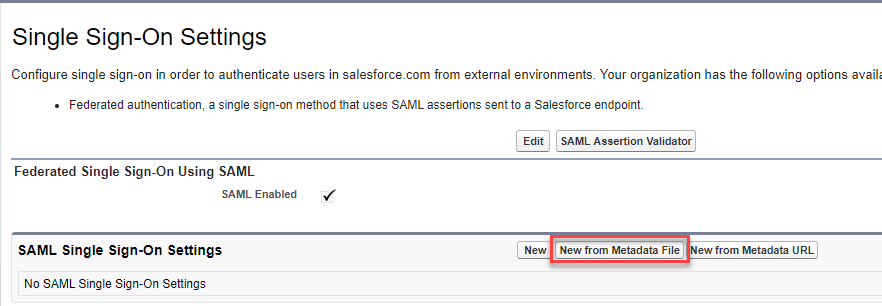
On the left navigation under the expanded Security Controls section click on Single Sign-on Settings. First we will need to enable
SAML. Click Edit at the top and then on the next page click the check box for SAML Enabled and Save.


-
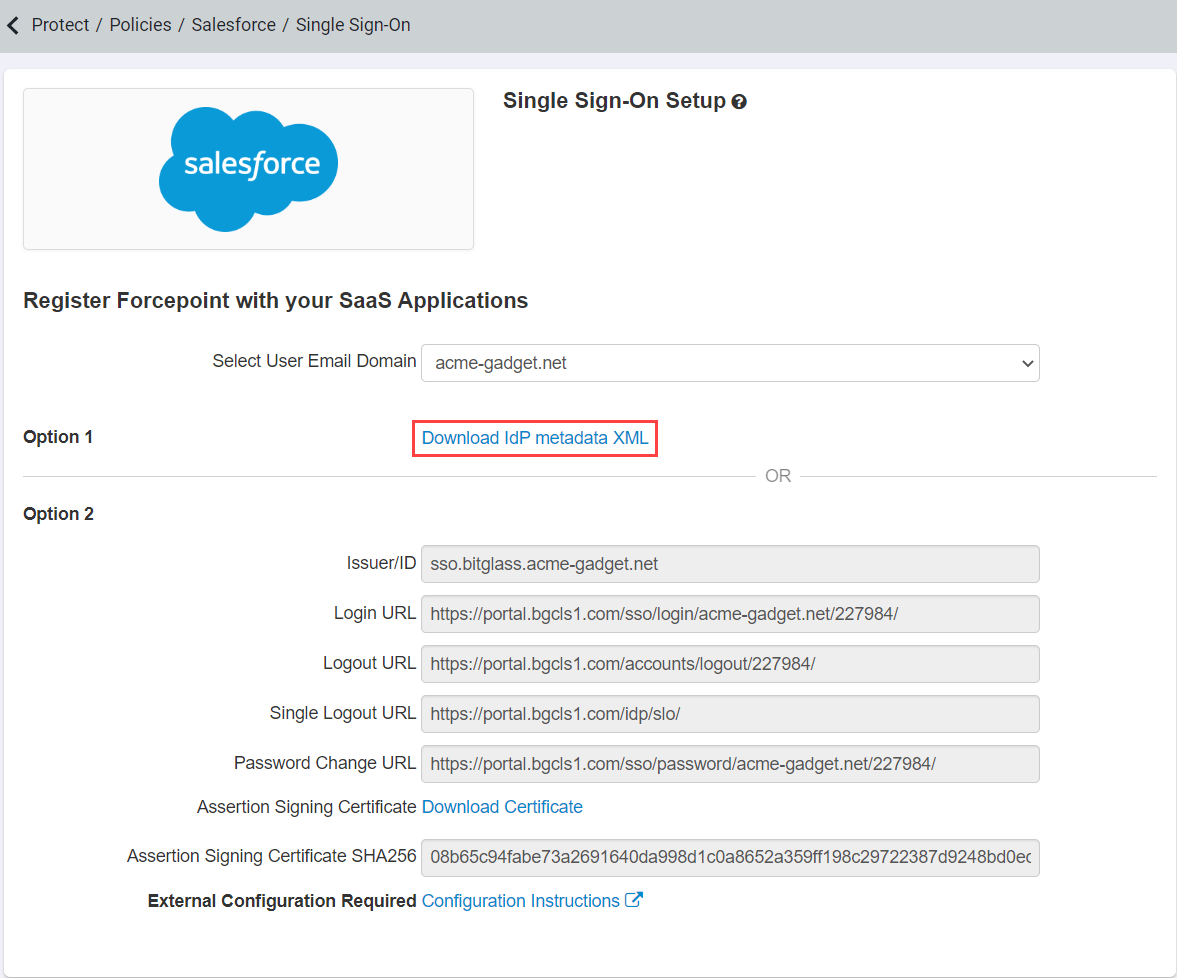
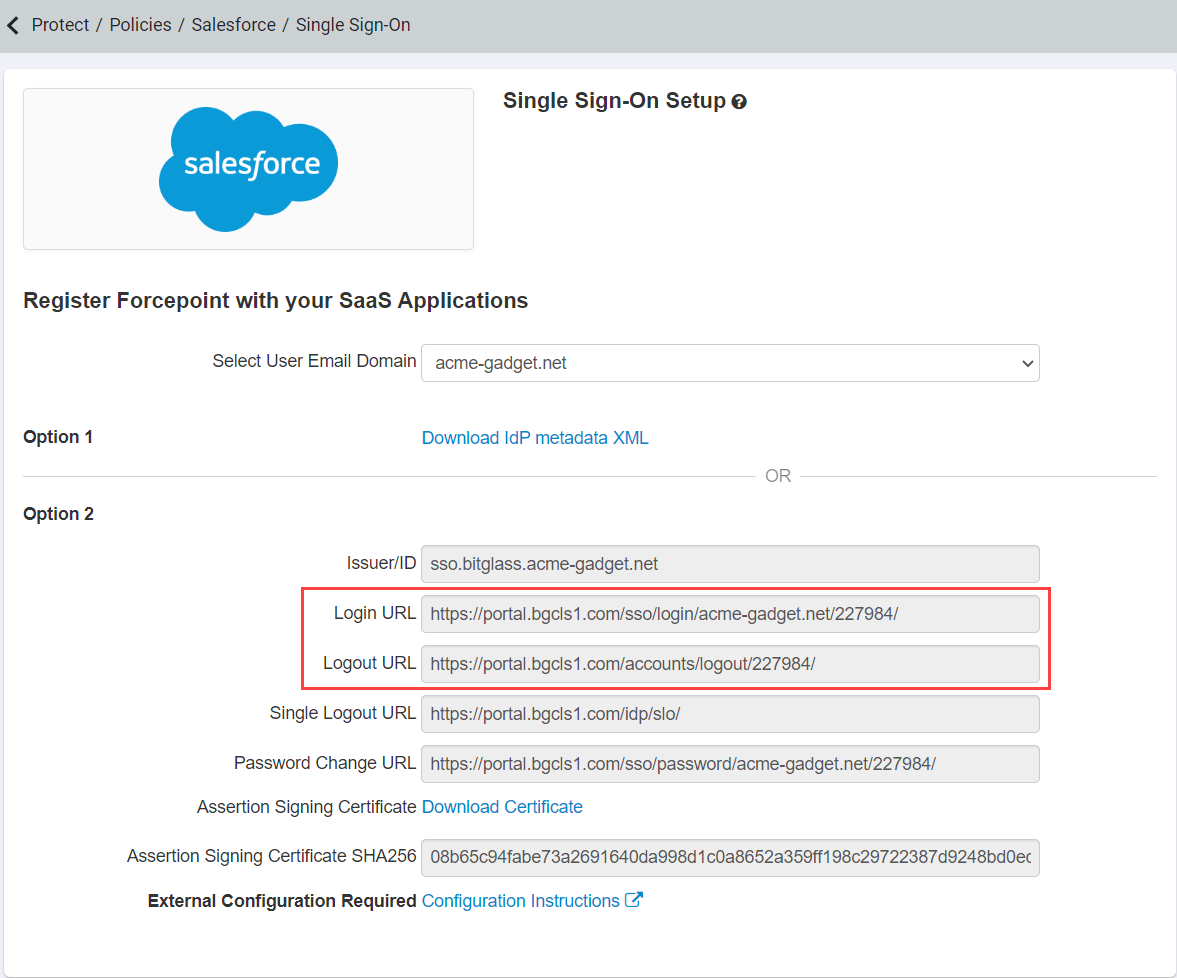
Now to setup the SAML SSO Settings it's best to navigate back to the Forcepoint Data Security Cloud | SSE Web SSO info page we opened in Step 4 in the first
preparation section. You can either download the metadata XML file to create the SSO settings in Salesforce or you can manually copy them over. Using the metadata is easiest. Skip
to step 5 if you wish to copy over manually.
-
Click to download both the IdP metadata XML and remember where you save it.
-
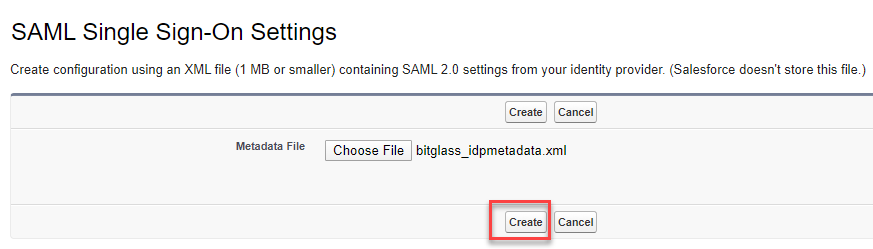
Navigate back to the Salesforce window and click New from Metadata Fileand select the metadata file we just downloaded. Click
Create when you have selected the XML file.
-
You will be taken to the SSO setting page with information filled out already and the certificate already uploaded. You will need to copy over 1 field from the Forcepoint Data Security Cloud | SSE SSO setting page (The Login URL). It's also probably best to update the Name and API
Name fields to just Forcepoint Data Security Cloud | SSE for easier identification.

-
Copy over the Login URL and Logout URL from the Forcepoint Data Security Cloud | SSE
SSO page to this Salesforce page and then click Save.

-
Click to download both the IdP metadata XML and remember where you save it.
-
If you wanted to copy over the configuration manually follow the below steps:


- Enter Forcepoint Data Security Cloud | SSE SSE into the Name field. Once you click out of the field it will fill in the API Name field with the same name.
- Copy the Issuer ID from the Bitglass SSO page to the Issuer field in Salesforce.
- For the Entity ID field enter the URL for your new Salesforce subdomain you created. For this example it would be https://bitglasstraining1-dev-ed.my.salesforce.com since we are using a developer account. Most URLs will have a format of https://yourdomain.com.my.salesforce.com.
- Download the Assertion Signing Certificate from the Bitglass SSO page and upload it in Salesforce in the Identity Provider Certificatefield.
- Leave Request Signing Certificate, Request Signature Method, Assertion Decryption Certificate, SAML Identity Type, and SAML Identity Location fields as is.
- Switch Service Provider Initiated Request Binding to HTTP Redirect
- Copy over the Login and Logout URLs from the Bitglass SSO page and paste them in the Identity Provider Login URL and Custom Logout URL fields. Click Save when you are done.
-
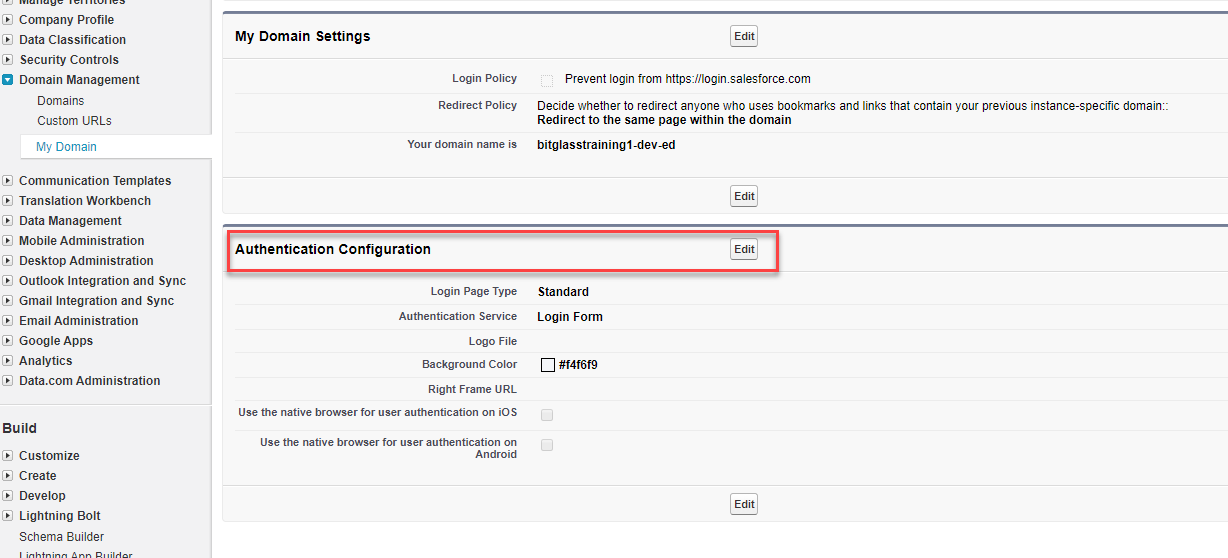
Now in Salesforce navigate to again and Edit the Authentication Configuration.
-
You should now see an additional Authentication Service option titled whatever you gave the name of the SSO setup in step 5 above. This will determine what
happens to the user when they navigate to your Salesforce subdomain URL. If you have both boxes checked, when a user navigates to (for example)
bitglasstraining1-dev-ed.my.salesforce.com they will land on a Salesforce login page and they are given 2 options for logging in. They can either login directly to Salesforce
without SSO meaning they are bypassing Forcepoint Data Security Cloud | SSE or they can click the Forcepoint Data Security Cloud | SSE
button to initiate SAML SSO. Keeping both boxes checked is good for allowing admins to login directly or during demo/trial purposes. If you uncheck the Login
Form option and have the Bitglass option checked, when users navigate to your Salesforce subdomain URL they will be immediately redirected to
your IdP (whether that is handled locally by Forcepoint Data Security Cloud | SSE or a third party IdP you have configured in Forcepoint Data Security Cloud | SSE). Click Save at the bottom when you are done.

-
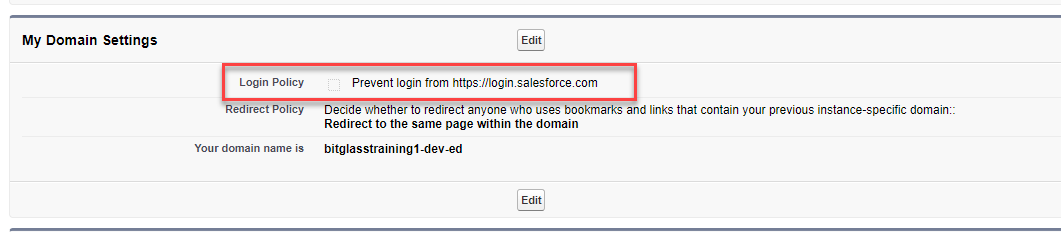
There is one other option you can set under the My Domain Settings section. You can check the box to Prevent login from
https://login.salesforce.com. Checking this box will force users to navigate to your subdomain URL instead of allowing them to login directly from the main
Salesforce login page. This is not required but can be implemented if you are trying to force users to authenticate and be proxied through Forcepoint Data Security Cloud | SSE.
-
You have now finished the setup and can test both the authentication redirect and ensure users are being proxied through Forcepoint Data Security Cloud | SSE.


Note: If you are using a developer account for Salesforce for demo or trial purposes you will need to adjust the App SSO settings inside of Forcepoint Data Security Cloud | SSE. Forcepoint Data Security Cloud | SSE defaults the field configuration for a normal Salesforce instance. You will need to adjust the SSO URL, Recipient URL, Destination URL, and Entity ID to match the URL format of a developer account. In Forcepoint Data Security Cloud | SSE open up the Salesforce application settings page and click onApp SSO: Setup. Change the fields mentioned above to match the proper URL:
