PingFederate: Configuring Forcepoint Data Security Cloud | SSE as a SAML SP
You can add PingFederate to Forcepoint Data Security Cloud | SSE as a third party IdP.
Before you begin
Note: Forcepoint Data Security Cloud | SSE UI supports UTF-8 characters. However, the SAML
assertion only supports low-ASCII characters as attribute values. If an attribute value contains characters that are not low-ASCII, then SAML sign-in failures occur.
Note: The following steps and screenshots were taken with PingFed server version 7.3.0.5, but the steps should be the same in later versions.
Follow the below steps to setup an SP connection assuming your server settings are already setup (for your domain):
Steps
-
Login to the Forcepoint Data Security Cloud | SSE admin portal and add a new External
IdP from the page. Provide an Object Name and select PingFederate from the IdP Type drop-down.
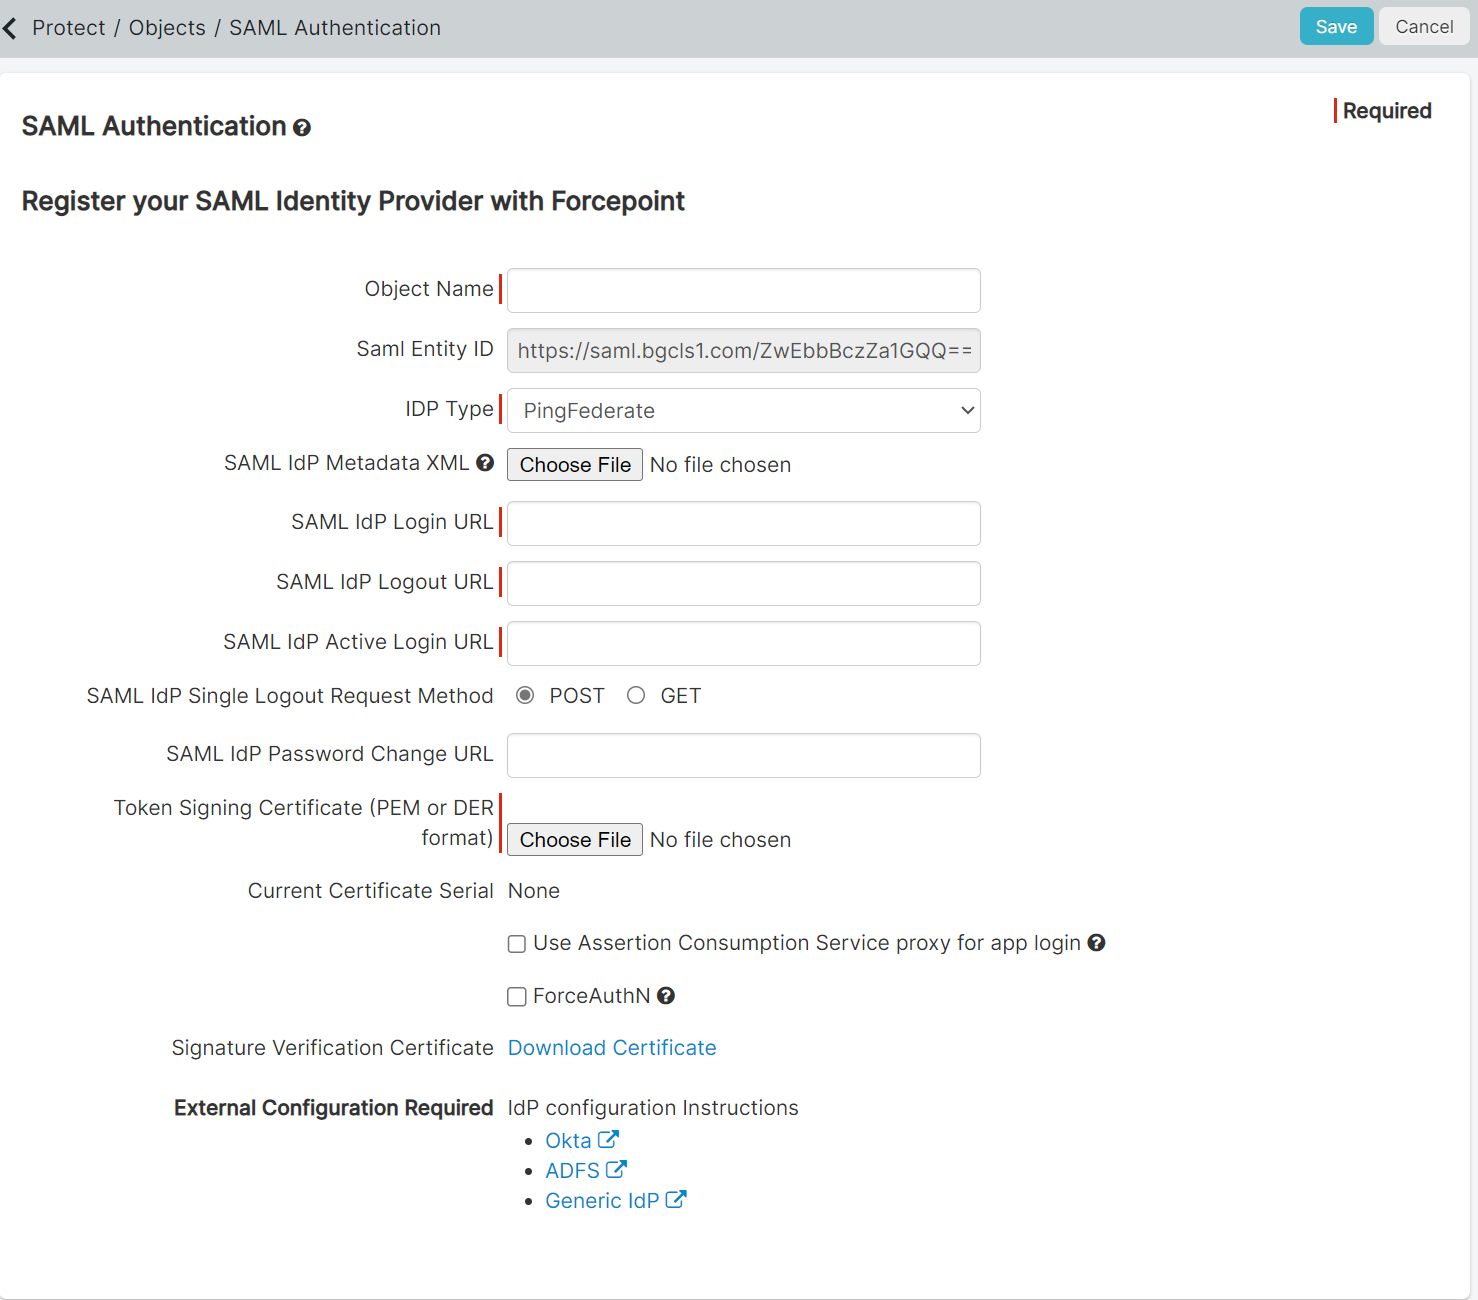
Keep this window open as you will need the SAML Entity ID for the PingFed management portal setup.
-
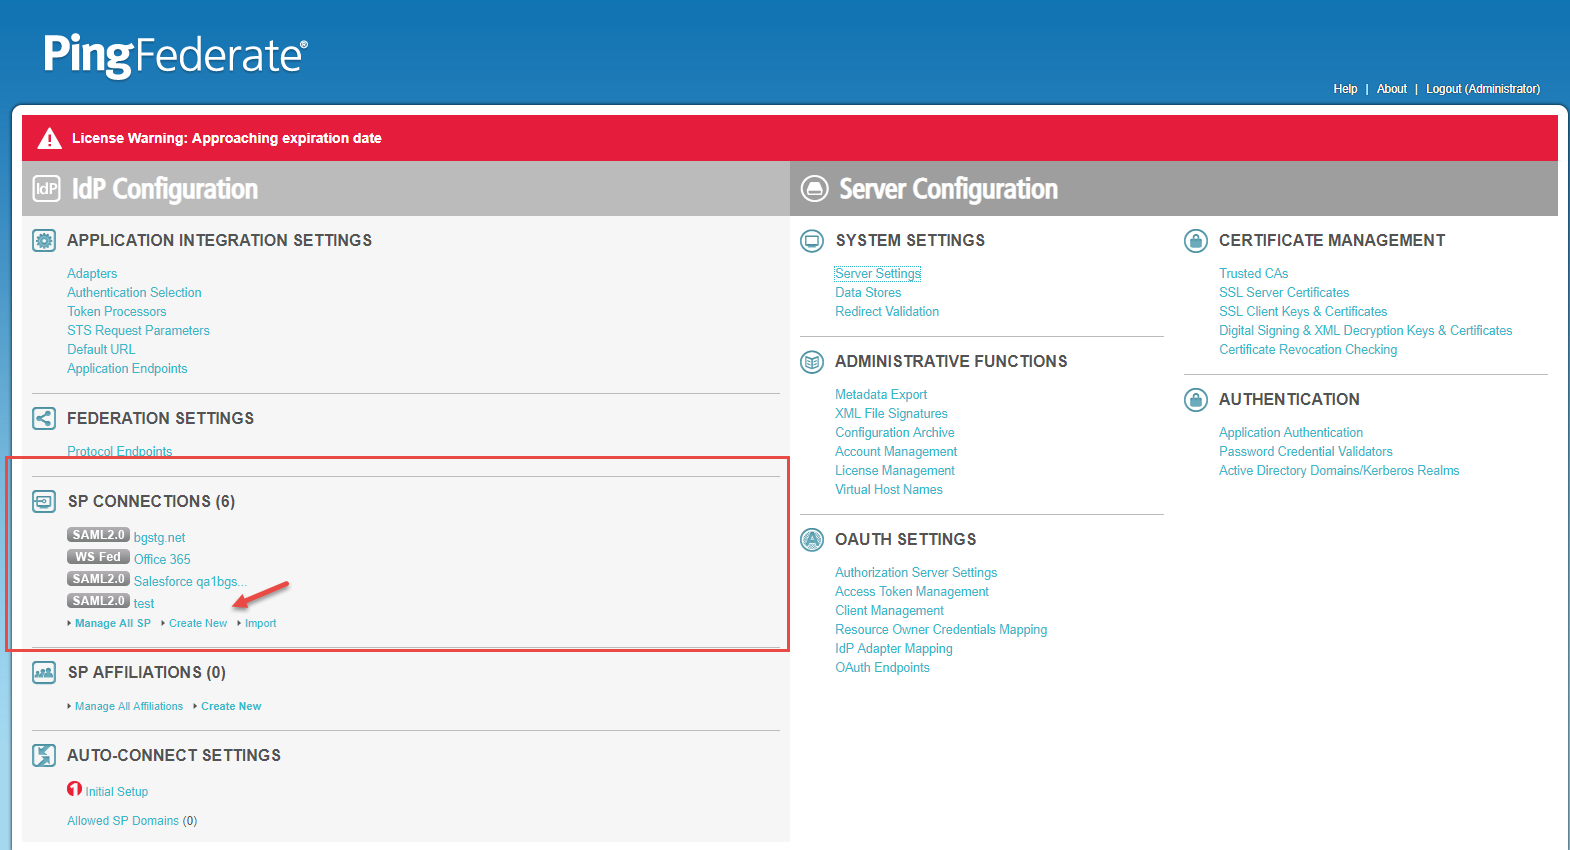
Open a new browser window and login to PingFed. On the main PingFed page, select Create New under the SP Connections section.
-
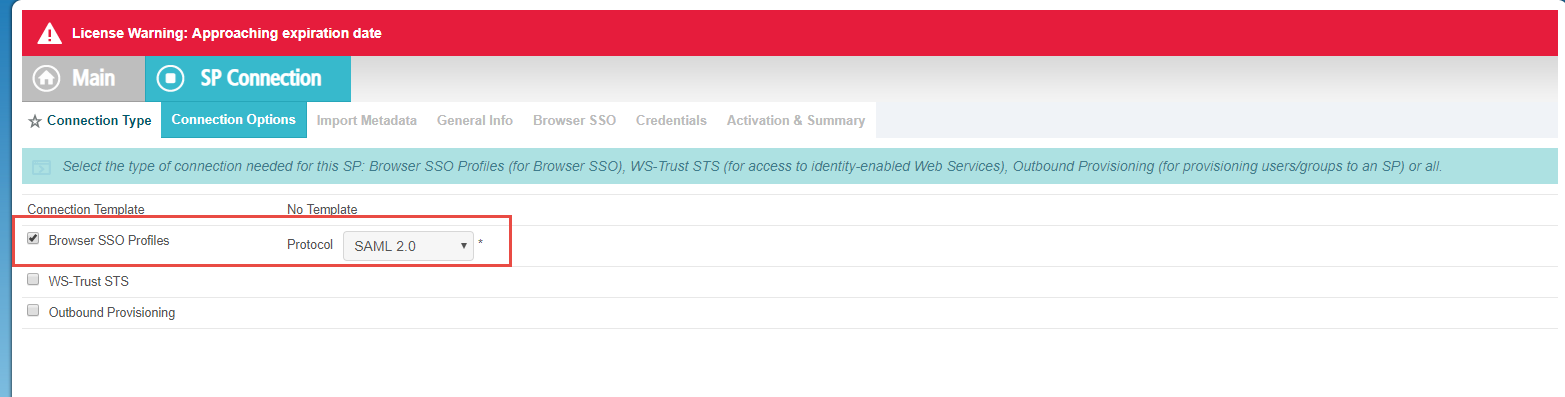
Navigate to page. Select Browser SSO Profile under Connection Template and then select SAML 2.0 from the
Protocol drop-down. Click Next when you're done. On the Connection Type tab, leave the check boxes as default
and click Next again to progress. As you do not have a metadata file, so click Next on the Import Metadata tab as
well.
-
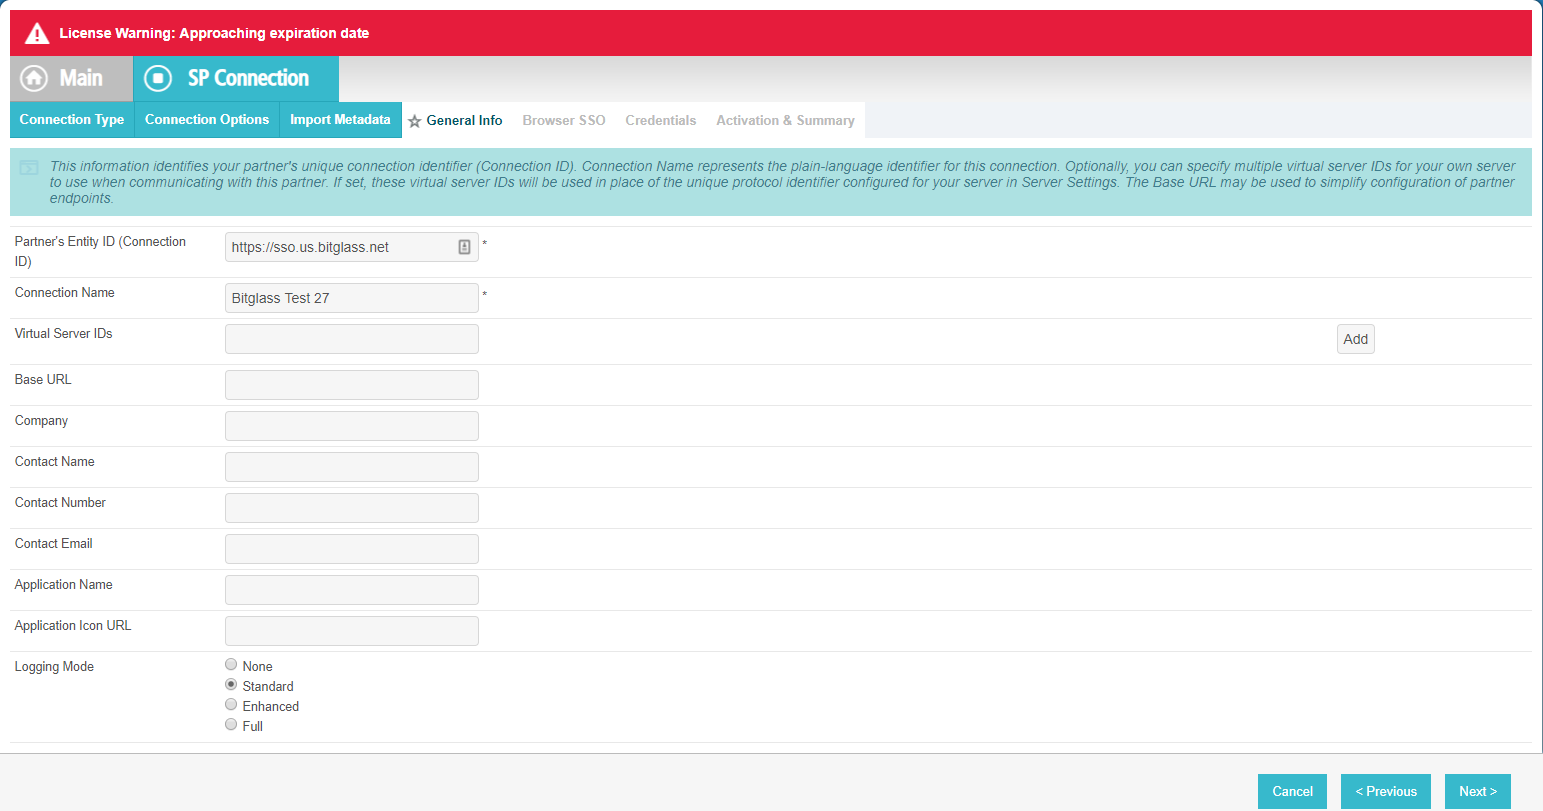
On the General Info tab, copy the Entity ID from the Forcepoint Data Security Cloud | SSE SAML IdP from step 1 and then provide the
Connection Name that is unique to make it identifiable. The rest of the information is not needed, but can be input if you like.
-
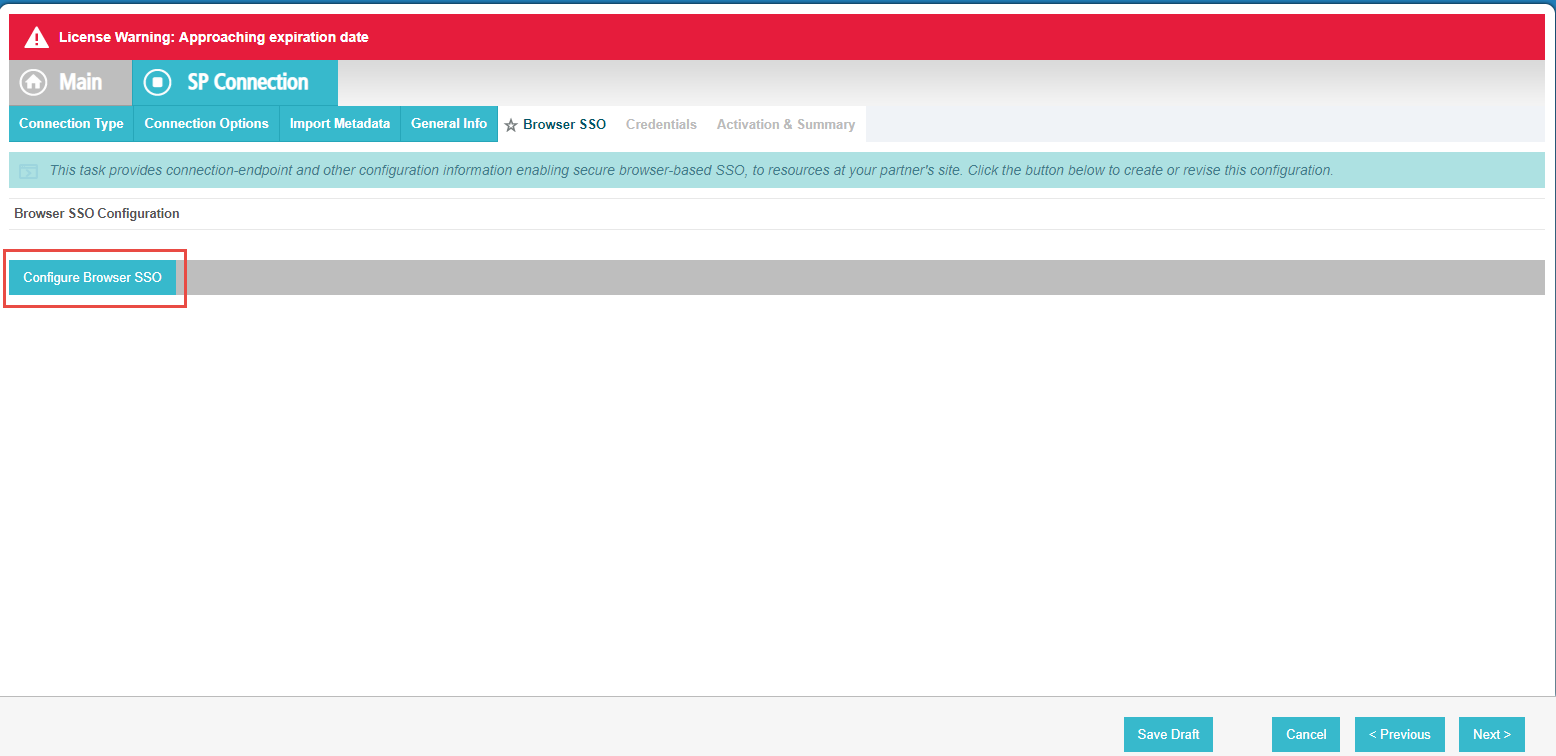
On the Browser SSO tab, click Configure Browser SSO in the middle of the page. Then, you will need to fill out the following info:
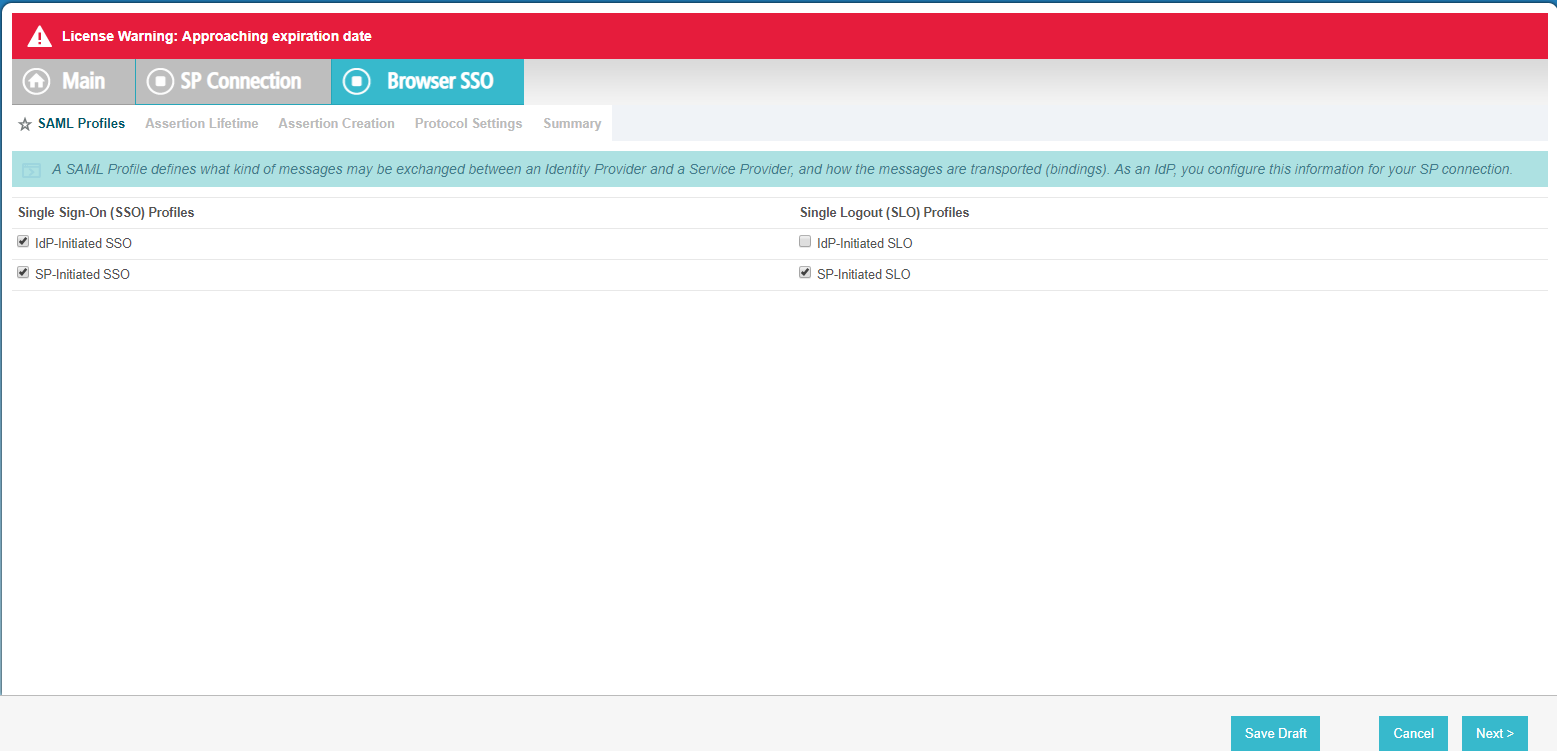

- For SAML Profiles, check all options except for IdP-Initiated SLO
- For Assertion Lifetime, leave as default of 5 minutes for Before and After.
-
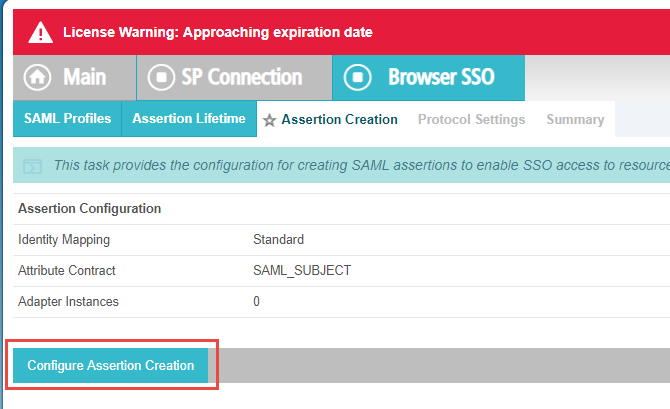
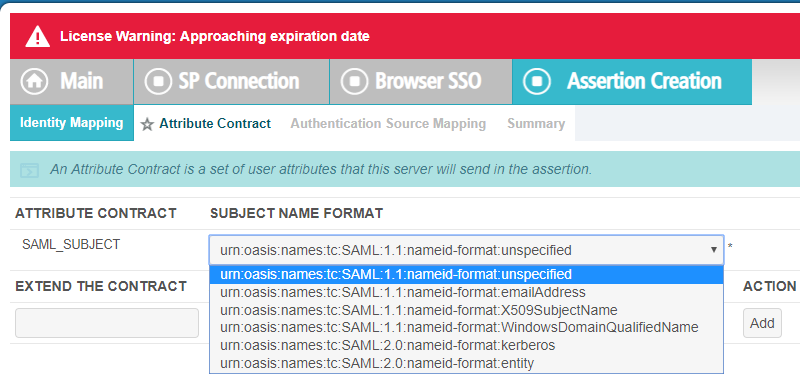
On the Assertion Creation page, click Configure Assertion Creation in the middle of the page and then select the
SAML_Subject as the top default option (SAML 1.1: nameid-format:unspecified).
-
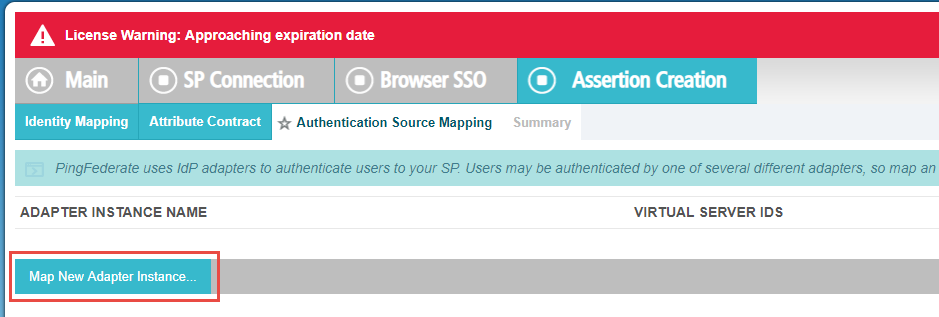
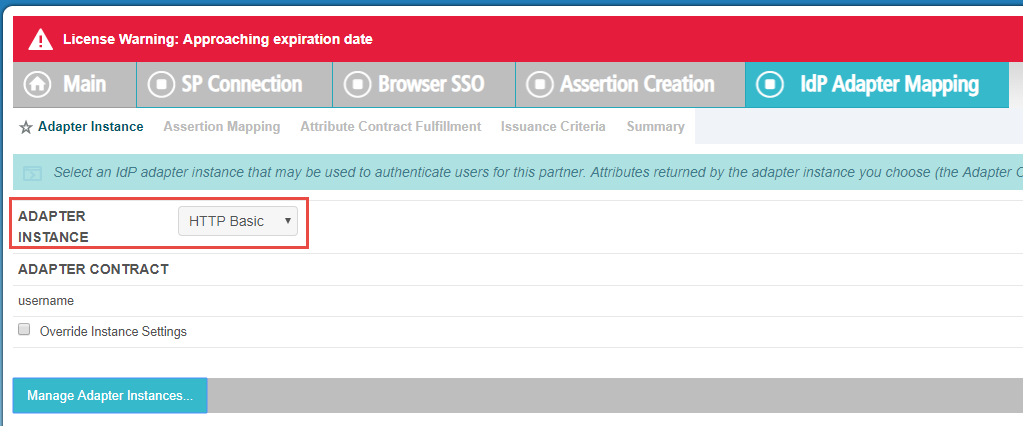
After that is done, you can click on the Map New Adapter Instance on the Authentication Source Mapping tab. Select HTTP
Basic from the Adapter Instance drop-down and then click Save. You do not need to manage your adapter instances
here.
-
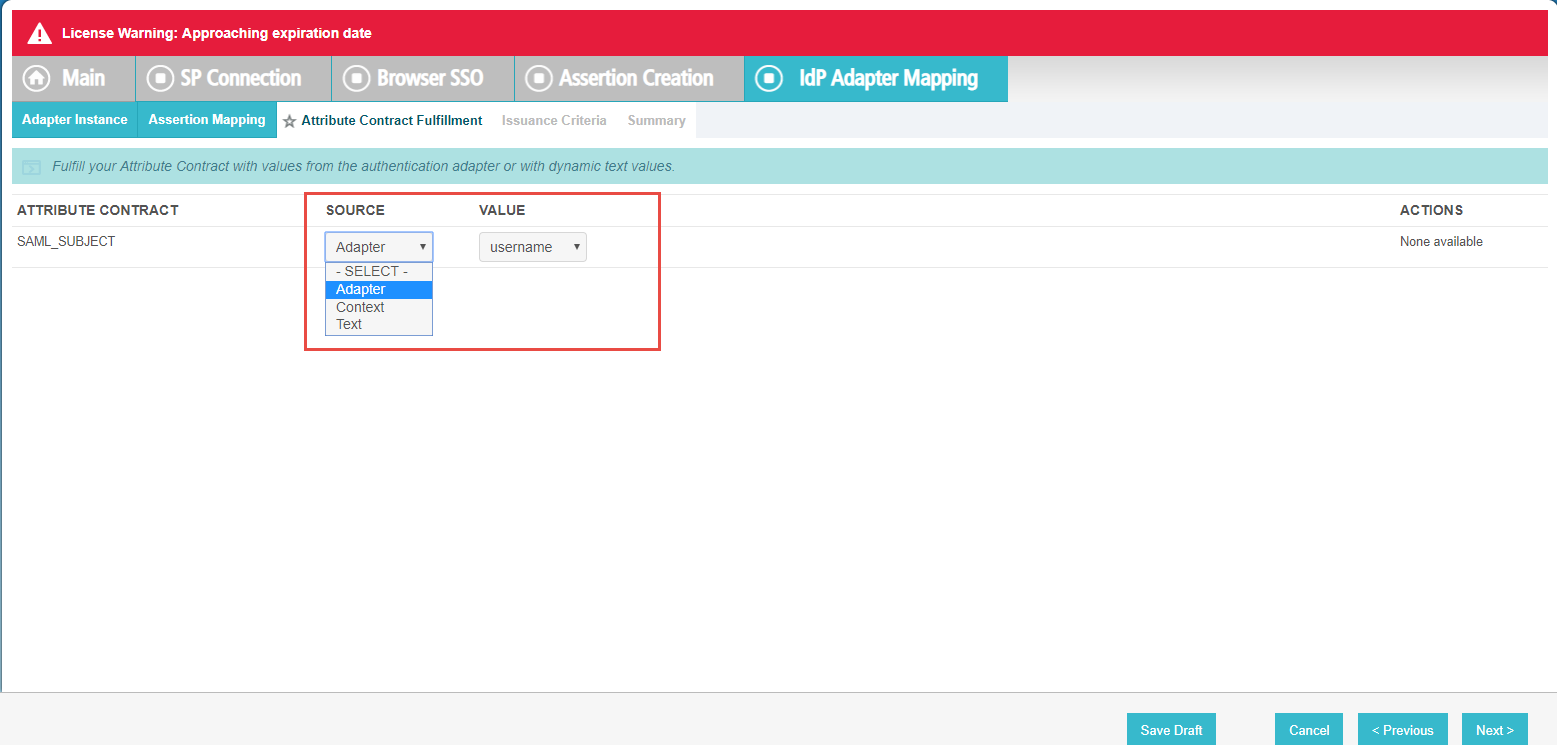
On the Attribute Contract Fulfillment tab, you will need to select the Source and Value that is used. Select
Adapter and then Username.
-
On the Issuance Criteria tab, you can leave everything blank and click Next. You will then see a Summary tab of
your settings, verify they are correct and click Done.
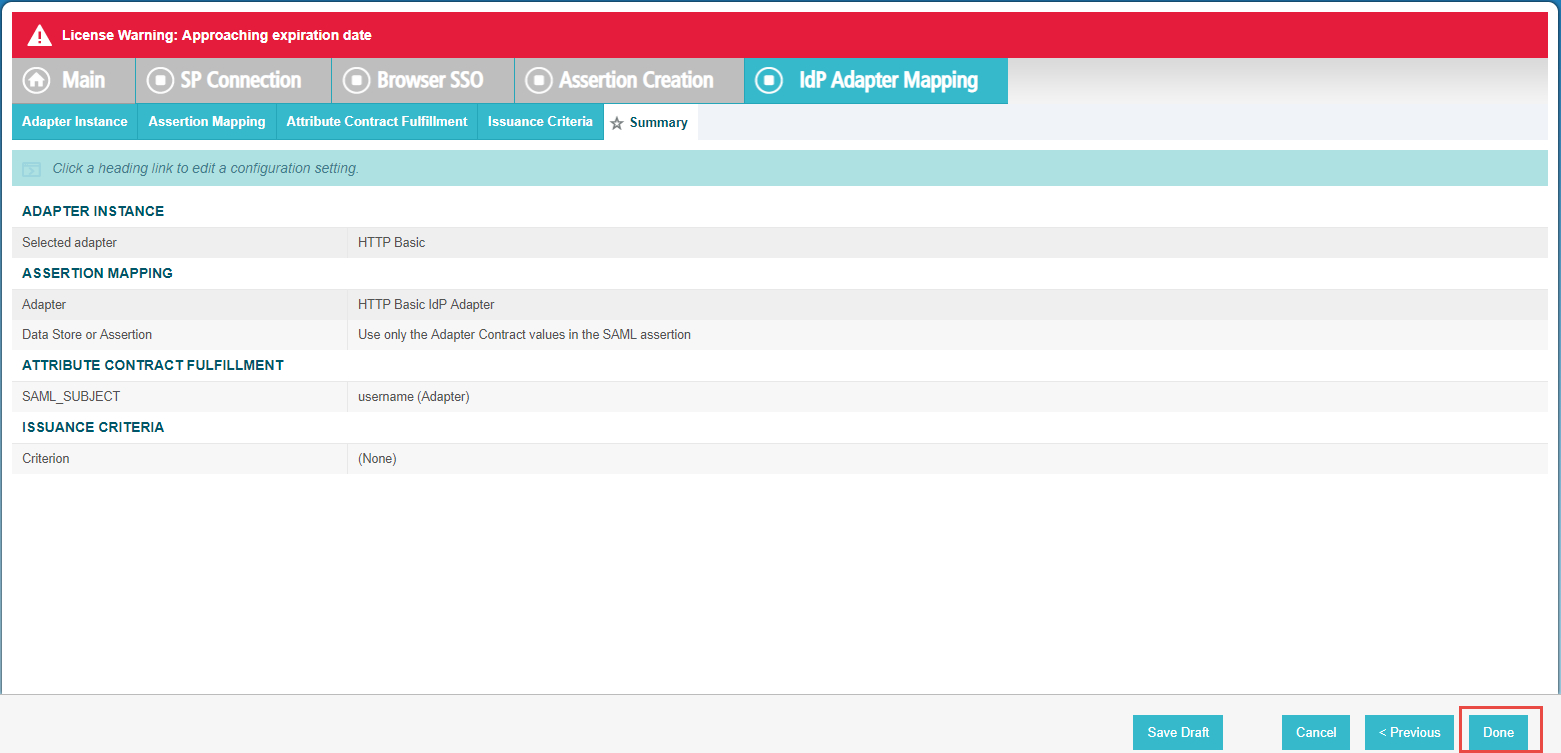
You will be taken back to the Authentication Source Mapping tab.
-
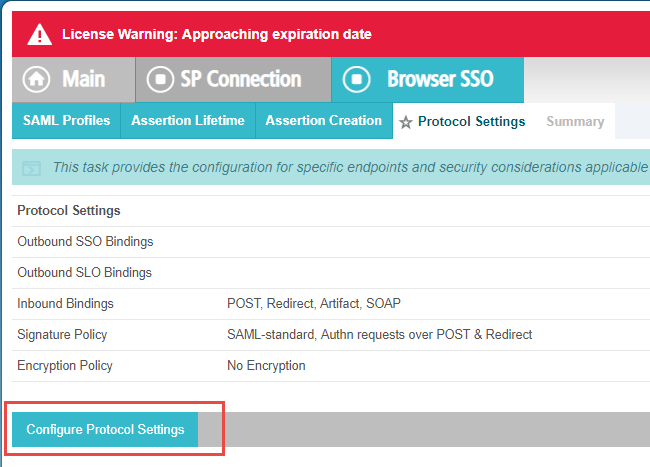
On the Protocol Settings tab, click Configure Protocol Settings.
-
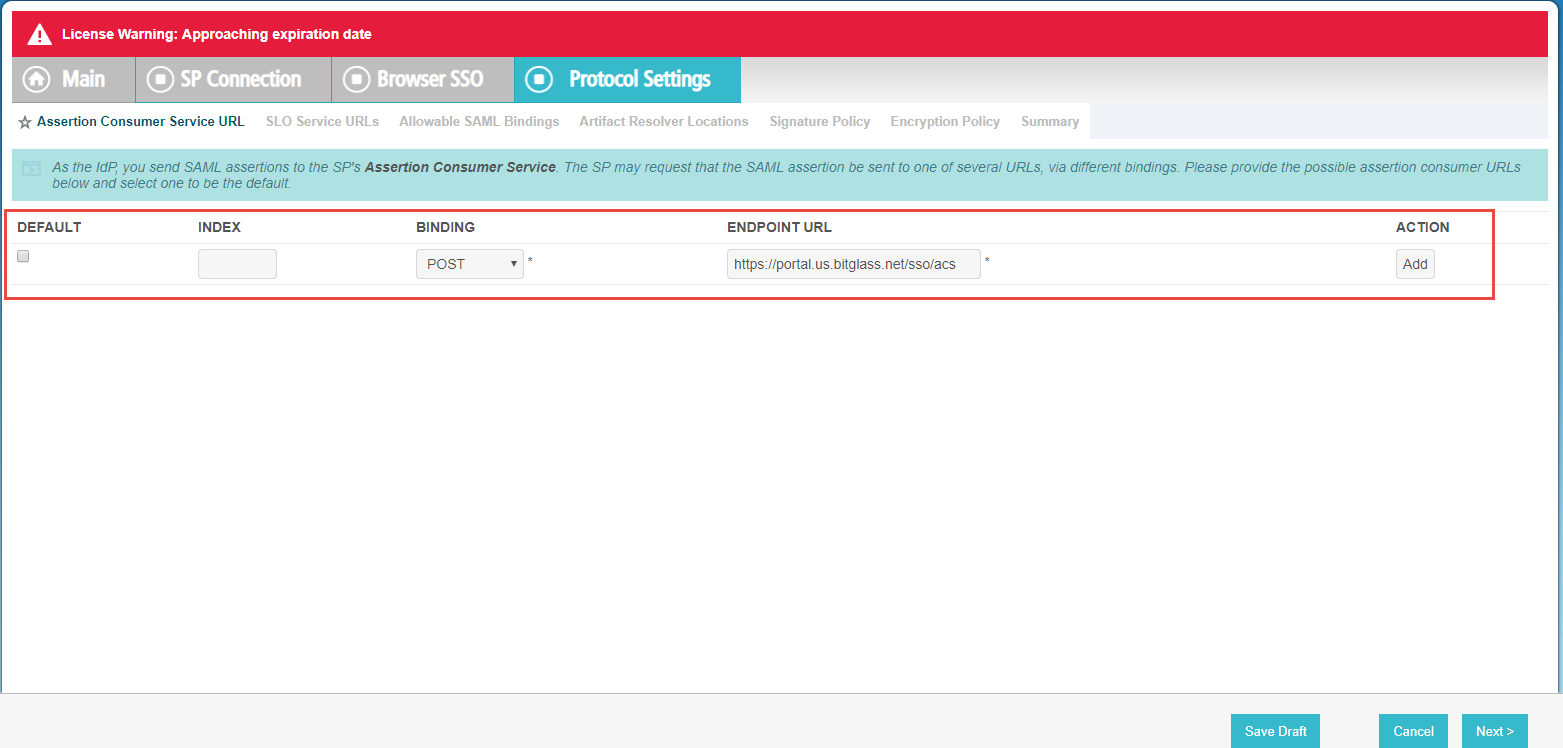
Select Post for the Binding and then enter https://portal.bitglass.com/sso/acs in Endpoint URL. Click Add on the side to add it. To find the endpoint URL
info, refer to the Any SAML IdP: Configuring Forcepoint Data Security Cloud | SSE as a SAML SP.
-
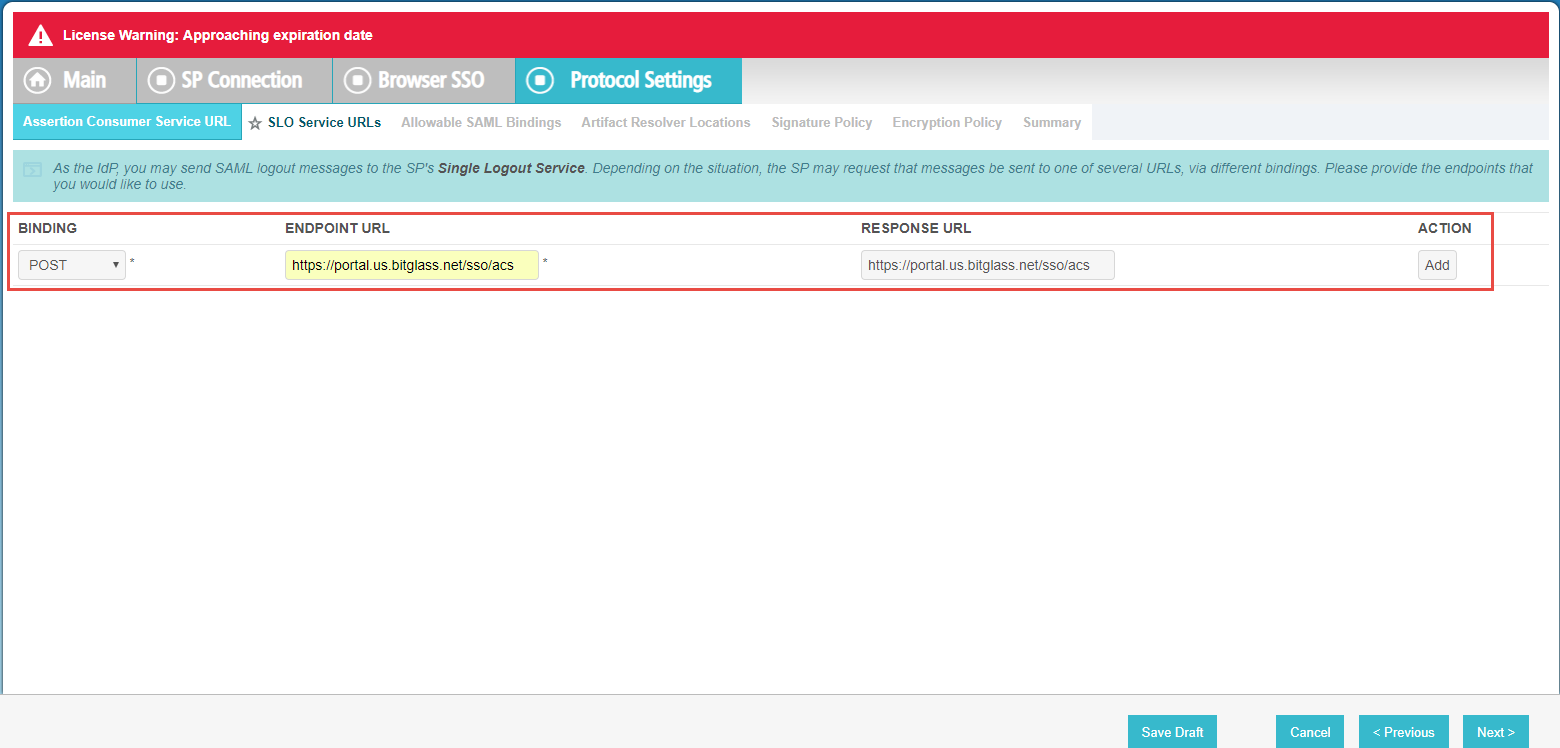
On the next page, use the same URL above for Endpoint URL and Response URL (Binding is still
Post). Click Add when ready and then click Next at the bottom.
-
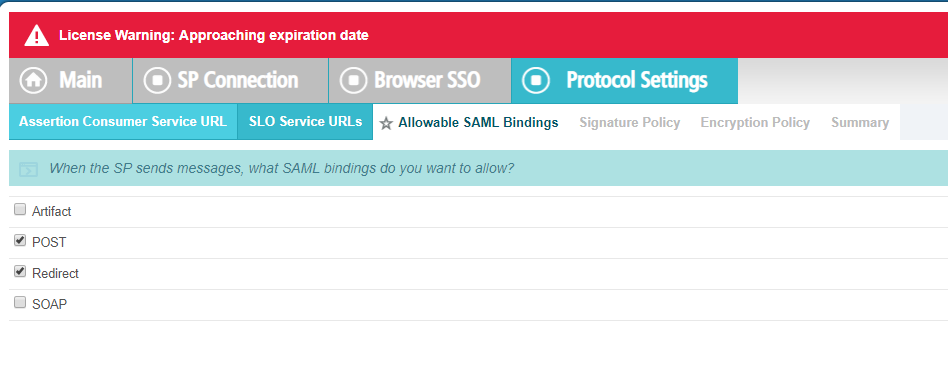
On the Allowable SAML Bindings tab, only allow Post and Redirect and then click Next at
the bottom again to proceed.
-
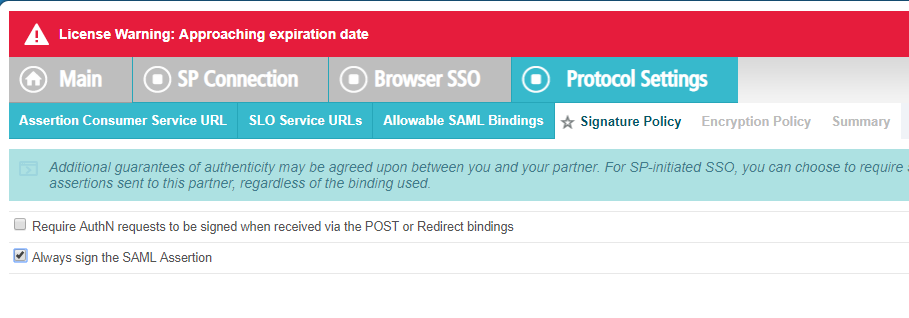
On the Signature Policy tab, select Always sign the SAML Assertion and then click Next.
-
On the Encryption Policy, leave as None and then click Next to proceed to the Summary and
then click Done.

-
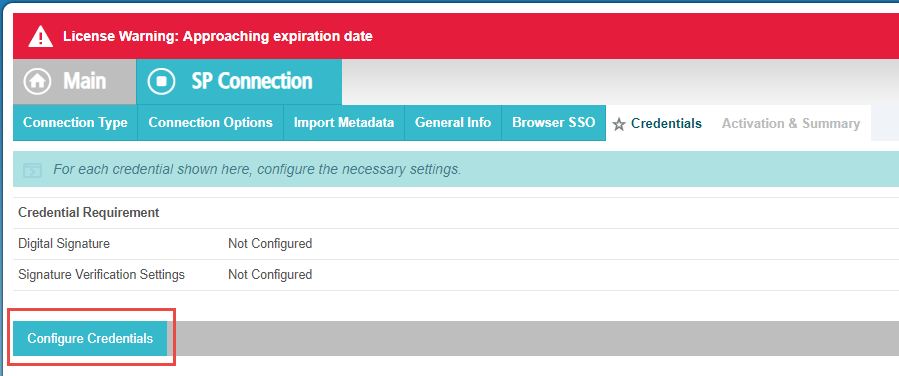
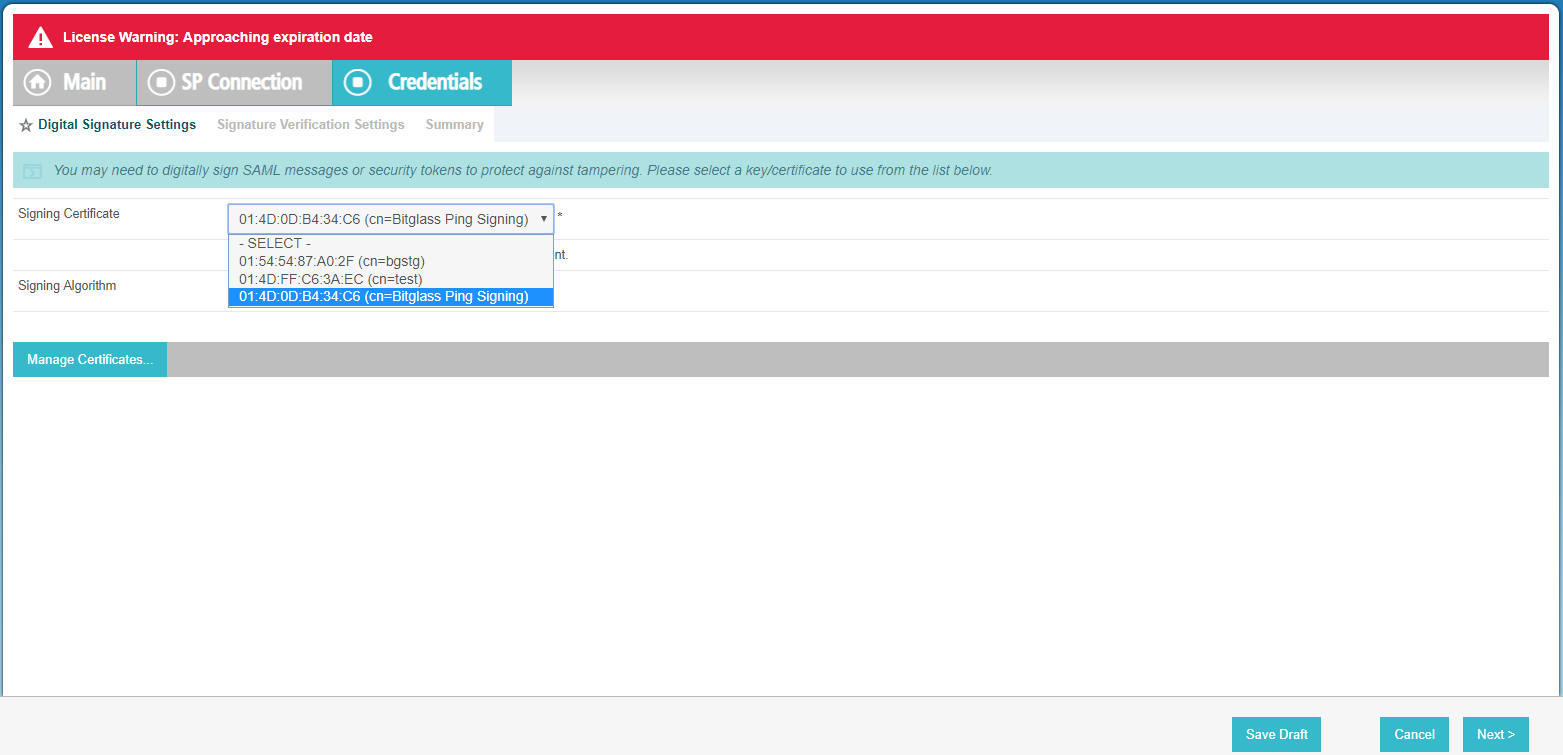
On the Credentials tab, click Configure Credentials in the middle of the page and then Select cn=Bitglass Ping
Signing from the Signing Certificate drop-down and leave the Signing Algorithm at it is default of
SHA256.
-
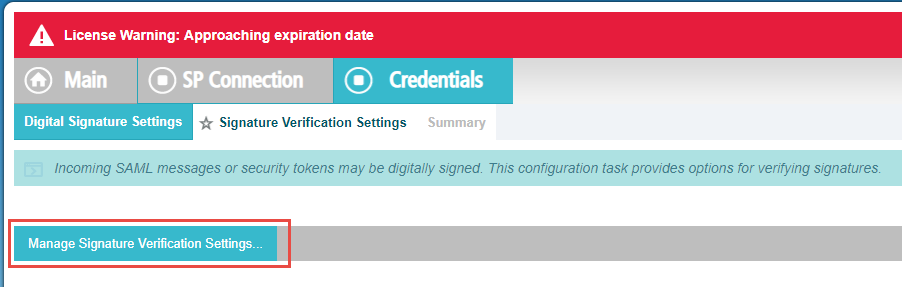
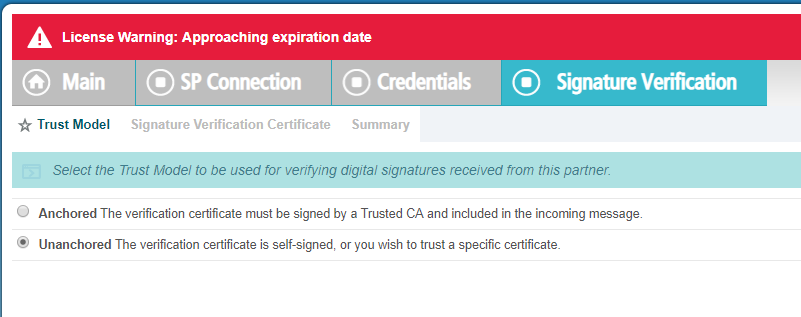
On the next page, select Manage Signature Verification Settings and then leave as the default Unanchored option.
-
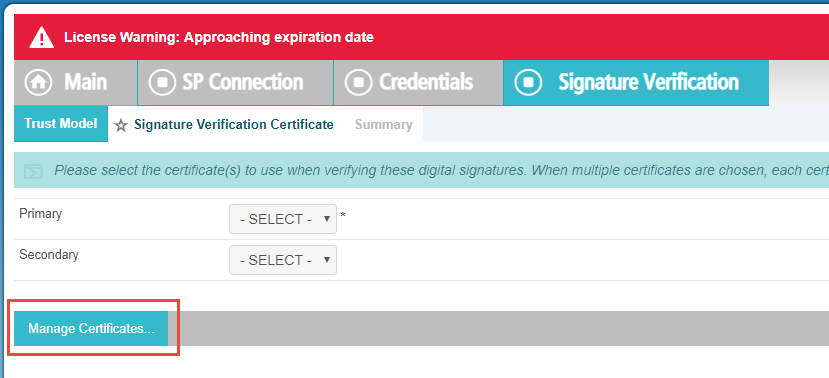
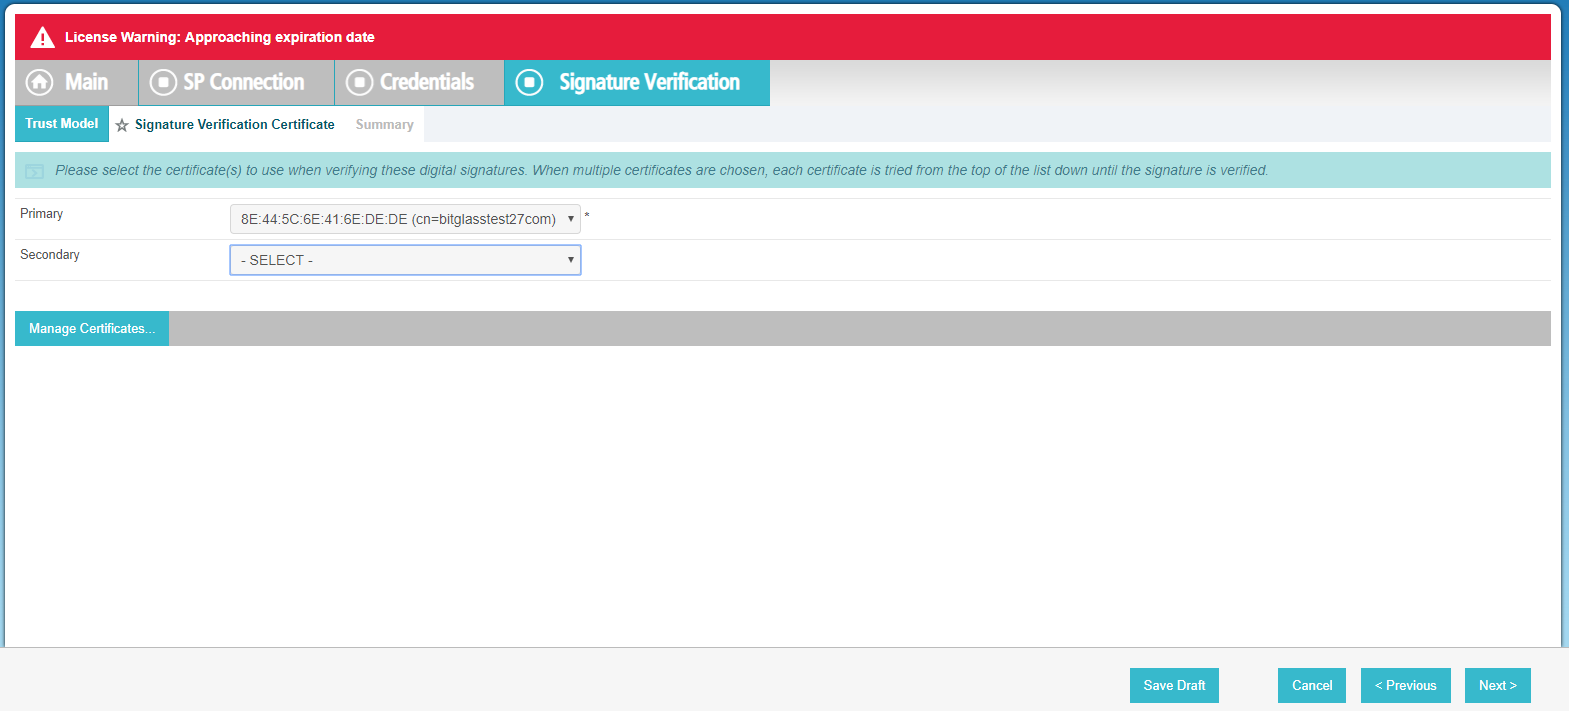
On the Signature Verification Certificate, you will need to manage the certificates first before selecting them.
-
Click Manage Certificates.
-
Upload a SAML Signing Certificate that you can download from the Forcepoint Data Security Cloud | SSE portal.
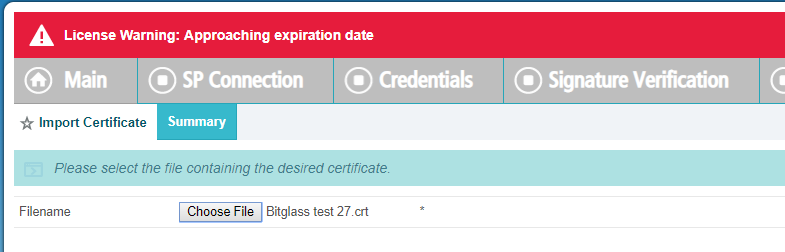
With the cert downloaded, import it to PingFed. You will be taken to a Summary page of the cert.
-
Click Done.
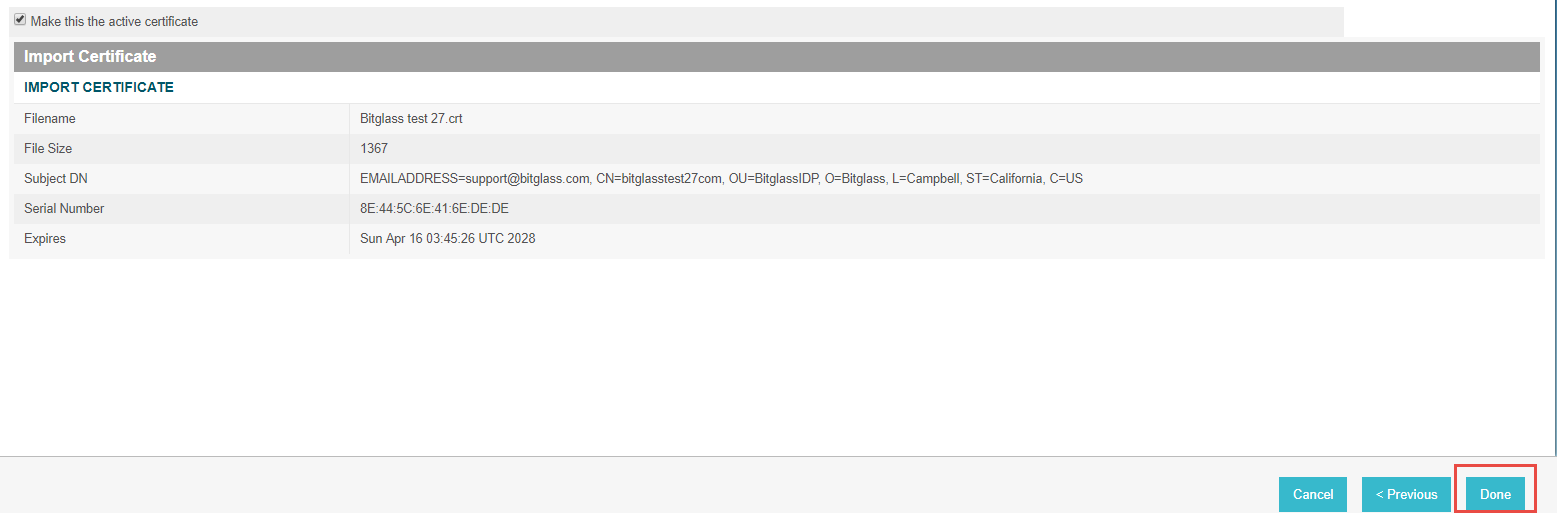
You will be taken back to the Manage Certificate page and click Done again.
-
Click Manage Certificates.
-
Choose your cert for Primary (it is already selected by default) and then click Next to continue. Click Done
on the following Summary page and next on the Signature Verification Settings page.
-
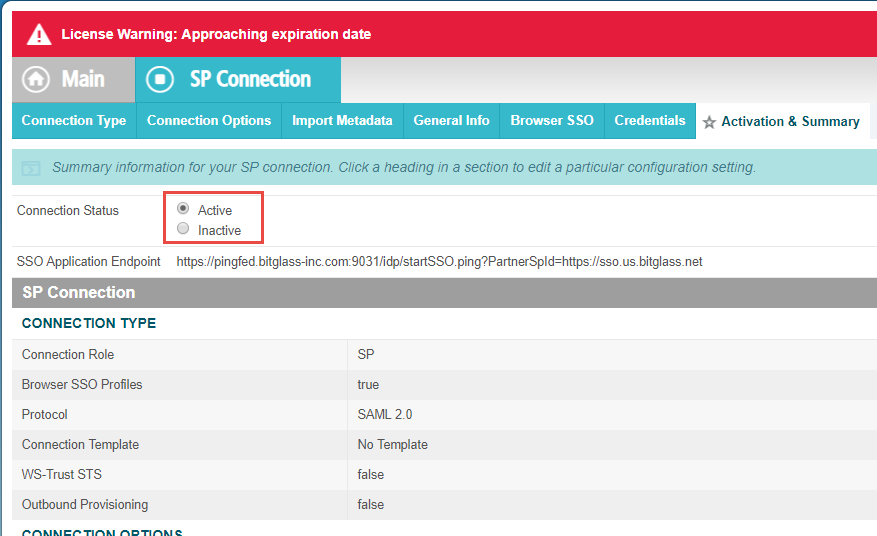
On the Activation and Summary tab, make sure your Connection Status is set to Active. Verify the rest of the
info and then click Save at the bottom.
-
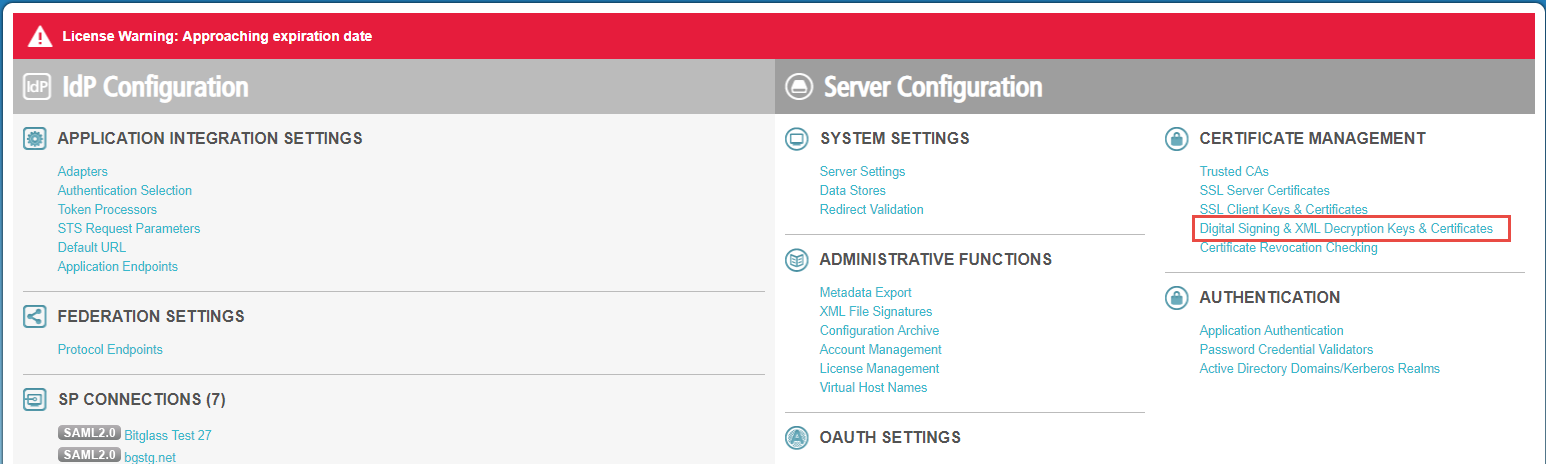
On the homepage, select Digital Signing & XML Decryption... from the Certificate Management section.
-
On the External IdP setup page, enter the following information:
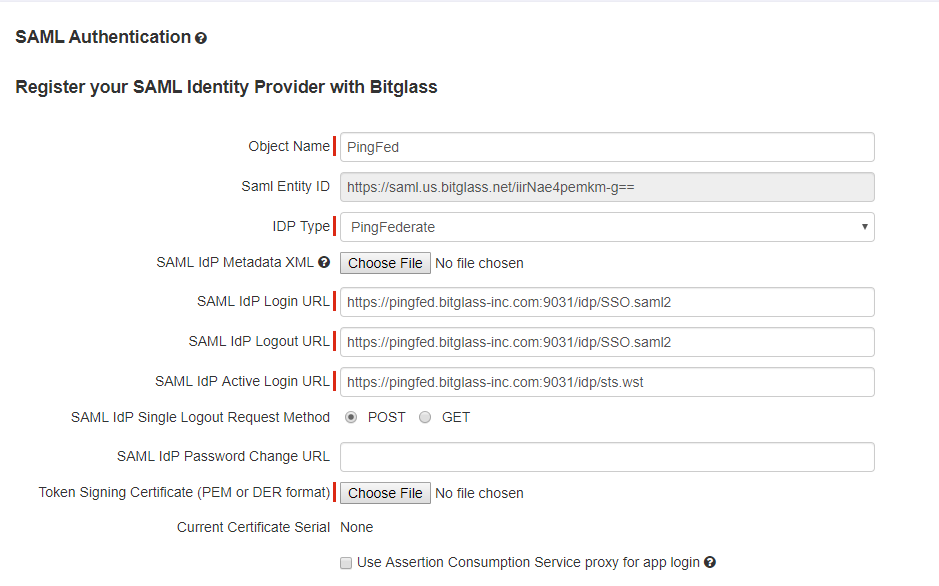
- Object Name: Name for the external IdP object for you to recognize when choosing your authentication method by application or app instance.
- IdP Type: Ping Federate
- Login and Logout URL: https://pingfed.(yourdomain).com:9031/idp/SSO.saml2
Replace (yourdomain) with your domain that is configured in PingFed.
- Active Login URL: will be automatically configured based on the above Login URL.
- Request Method: Post
- Token Signing Certificate: Upload the cert that you downloaded in step 24 above.