ADFS: Configuring Forcepoint Data Security Cloud | SSE as a SAML SP
You can configure Active Directory Federation Services (ADFS) to support Forcepoint Data Security Cloud | SSE as a SAML Service Provider.
Before you begin
It is also helpful to have a web browser window opened and logged into the Forcepoint Data Security Cloud | SSE admin portal since some steps will require information you can copy over from the Forcepoint Data Security Cloud | SSE portal. You will also need to configure the IdP object towards the end of the setup in Forcepoint Data Security Cloud | SSE once you have completed the setup in your AD FS server.
Steps
-
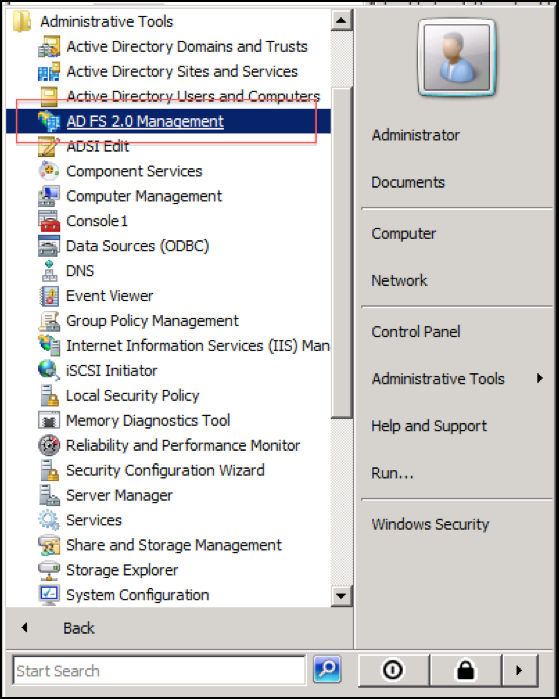
Login to your server and start AD FS Management.
-
From the Actions pane, click Add Relying Party Trust… to start a configuration wizard.
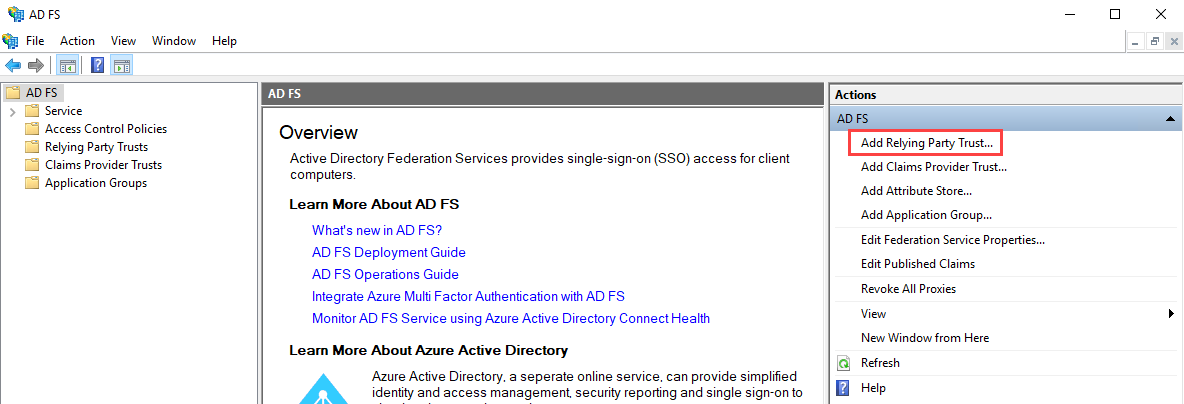
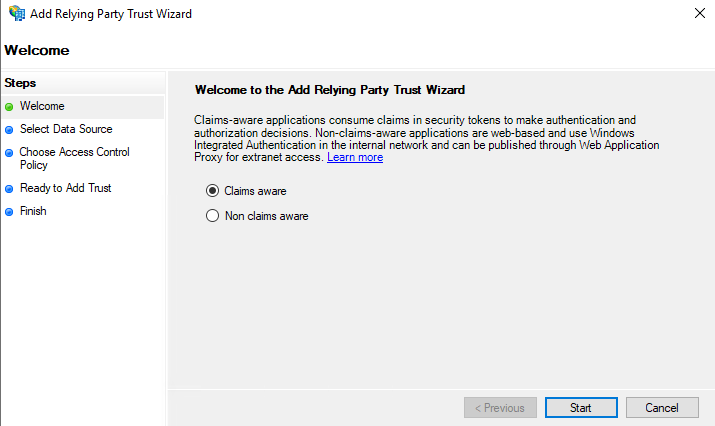
The Add Relying Party Trust Wizard opens.
-
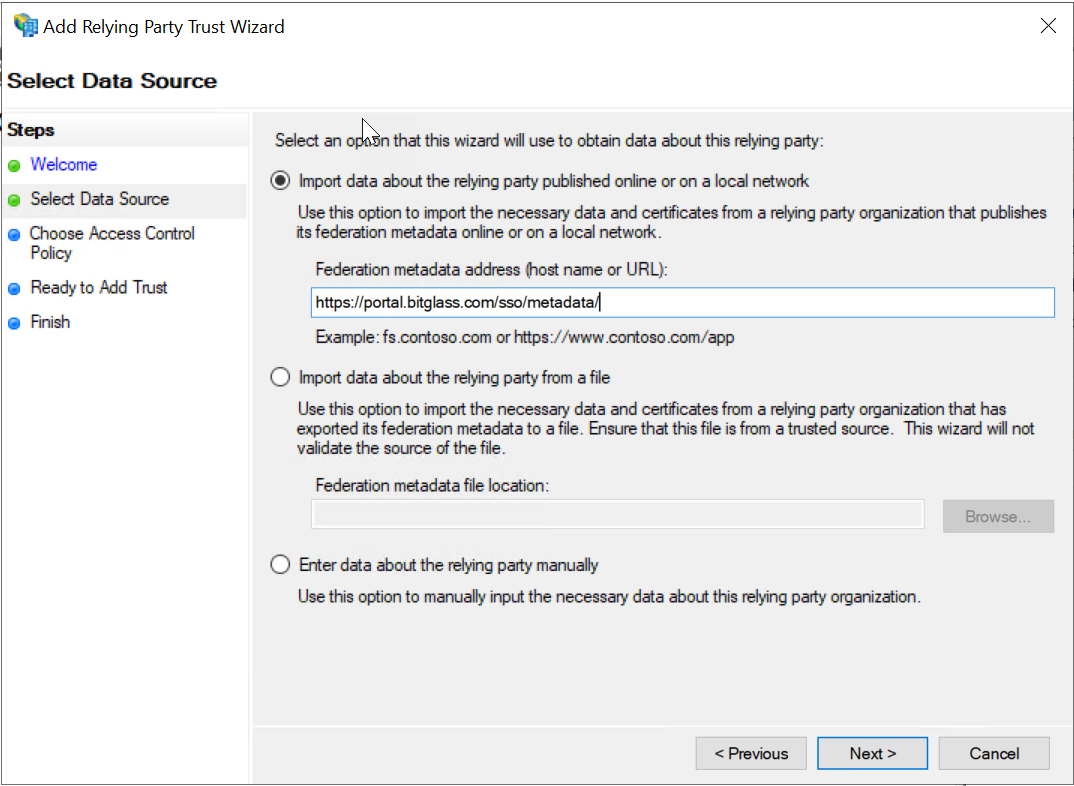
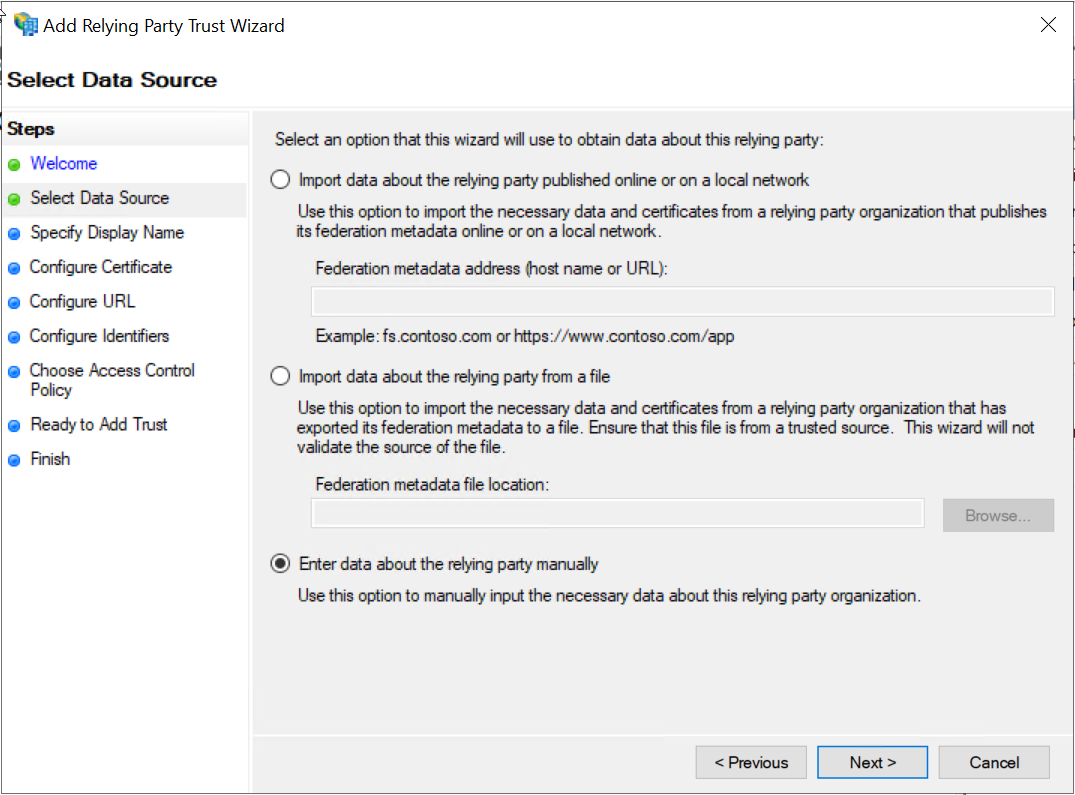
If you want to pull metadata through URL, then follow the steps below:
-
In Federation metadata address, enter the SAML Metadata URL (https://portal.bitglass.com/sso/metadata/).
-
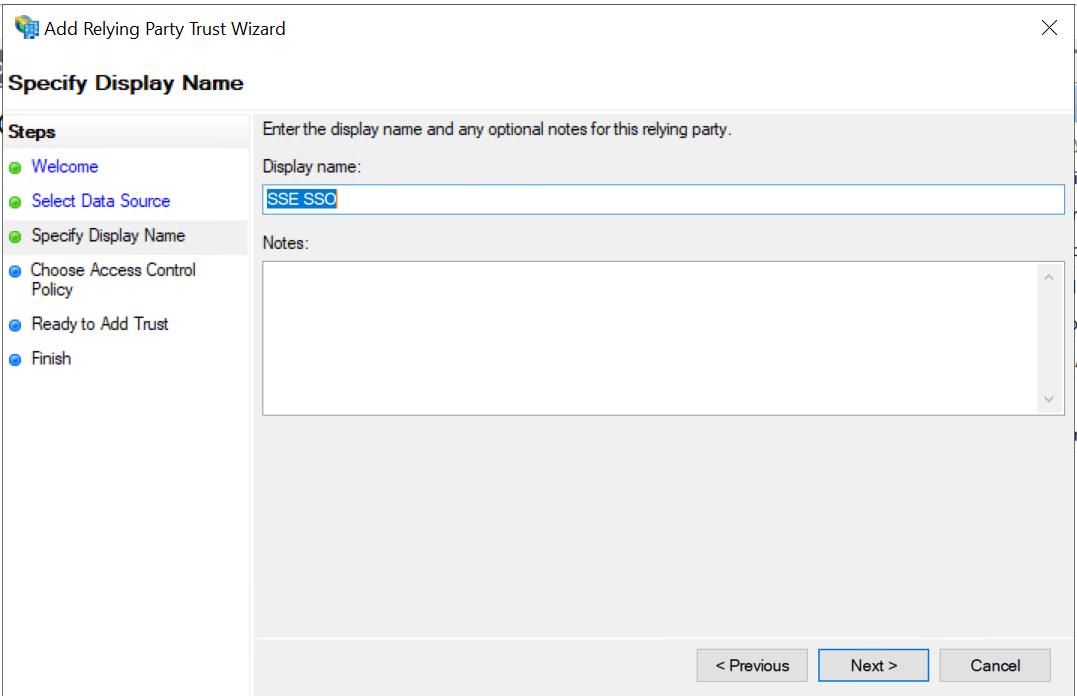
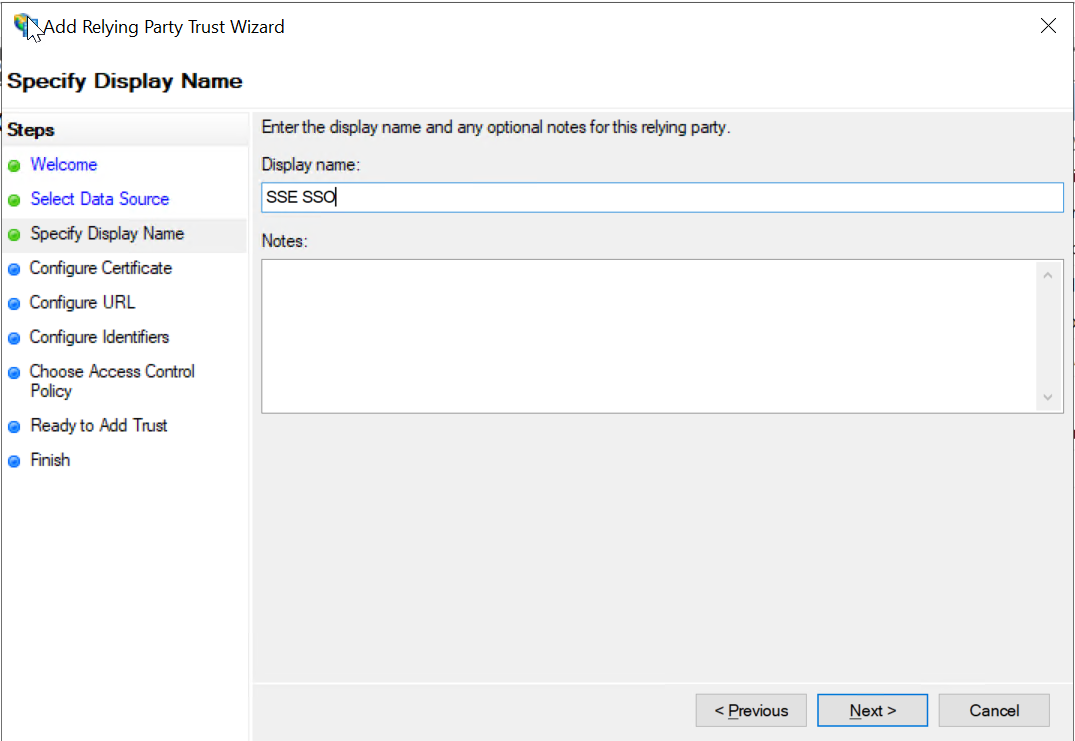
Enter SSE SSO as the Display name and click Next.
-
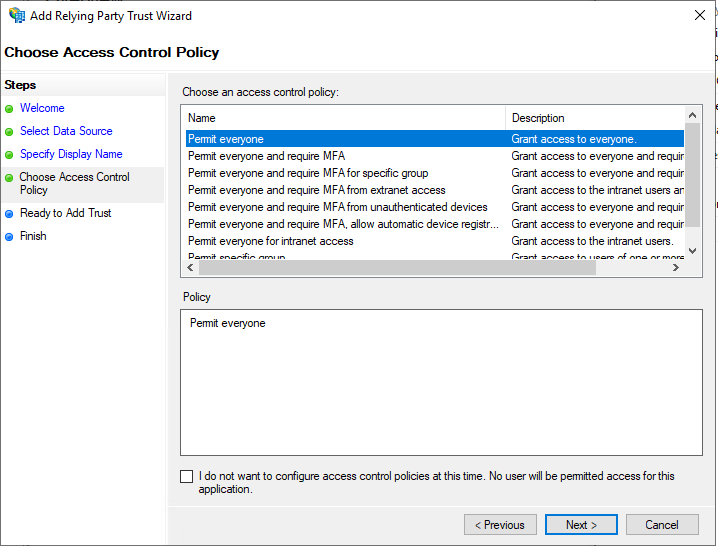
Choose Permit everyone and click Next.
-
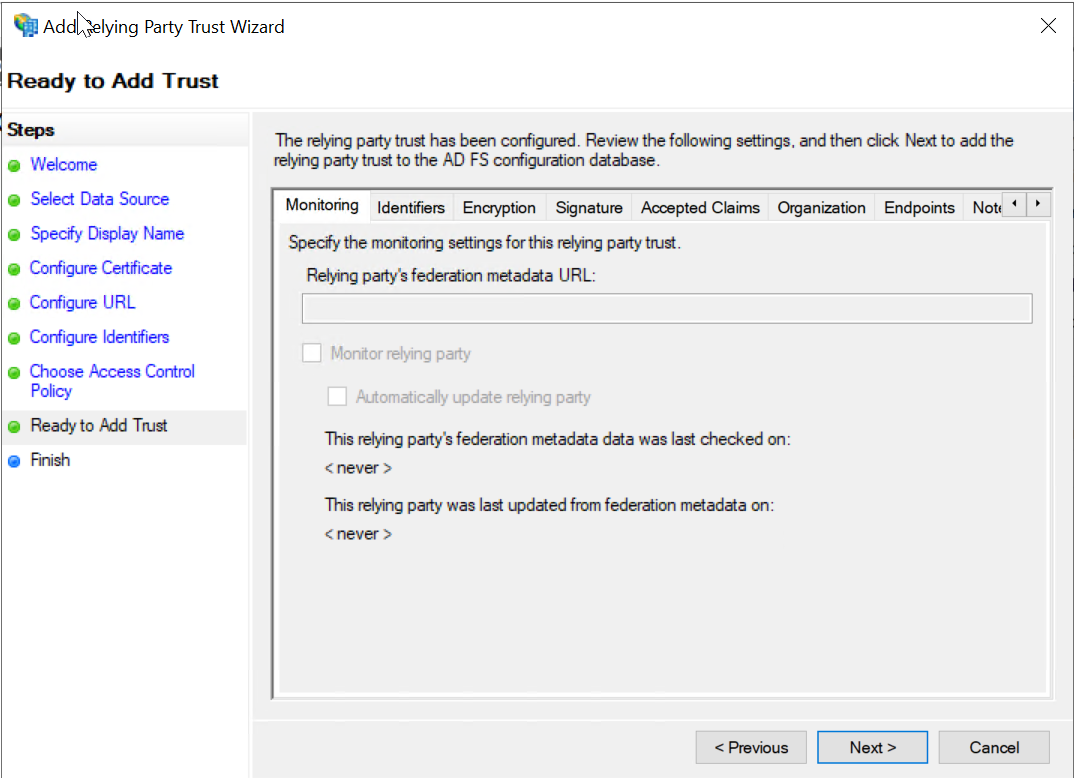
On the Ready to Add Trust tab, review the settings on each sub-tab and then click Next to complete the wizard.

-
On the Finish tab, ensure that the Configure claims issuance policy for this application checkbox is selected and click
Close.
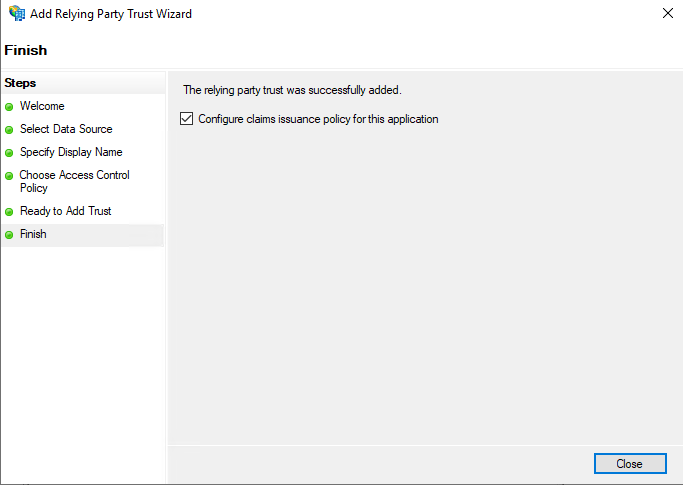
The relying party trust gets created and displayed under the on Console Tree. Also, opens the Edit Claim Issuance Policy dialog.
-
In Federation metadata address, enter the SAML Metadata URL (https://portal.bitglass.com/sso/metadata/).
-
If you want to manually enter the metadata details, then follow the steps below:
-
Select the Enter data about the relying party manually option and click Next.
-
On the next page, enter SSE SSO for the Display name and click Next.
-
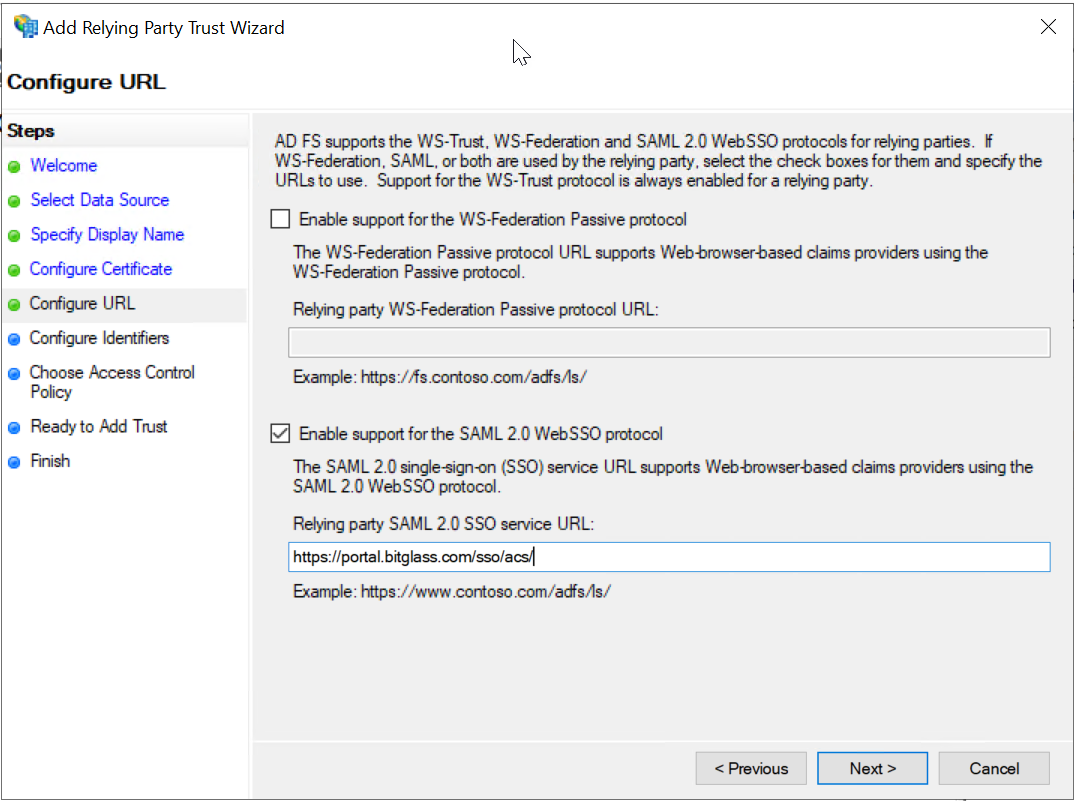
On the Configure URL tab, click Enable support for SAML 2.0 WebSSO protocol and enter the Forcepoint Data Security Cloud | SSE URL: https://portal.bitglass.com/sso/acs/.
-
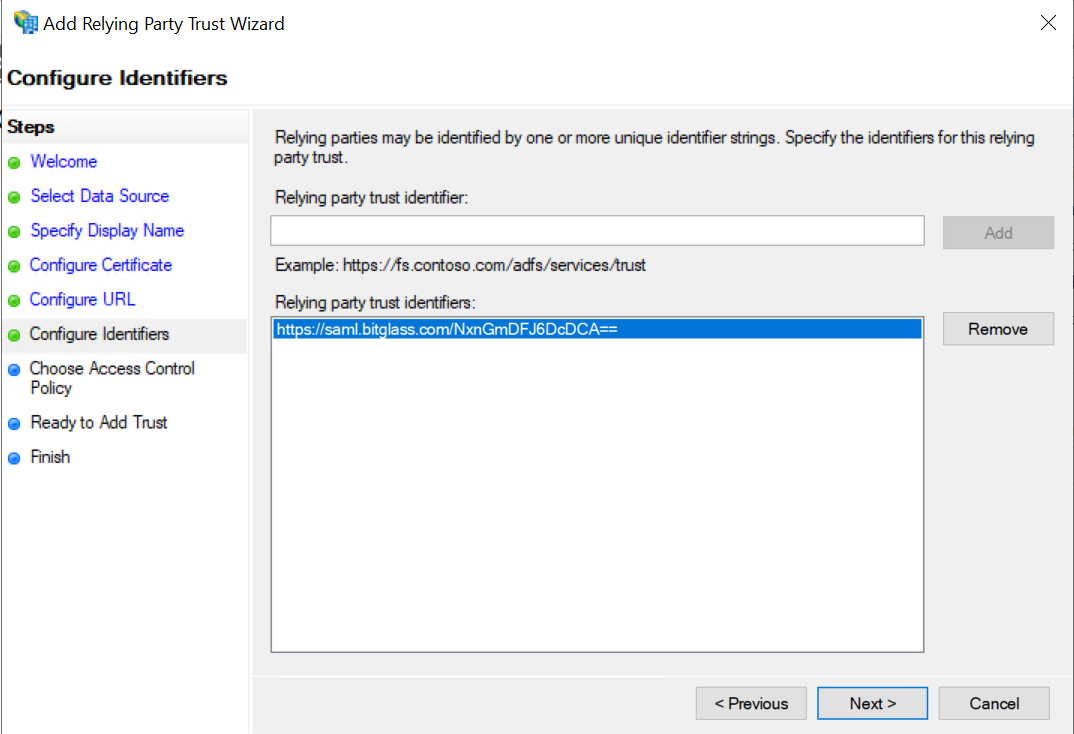
On the Configure Identifiers tab, you will need the SAML Entity ID from the Forcepoint Data Security Cloud | SSE.
In your browser window, you have open and logged into the Forcepoint Data Security Cloud | SSE, navigate to and create a new External IdP object.
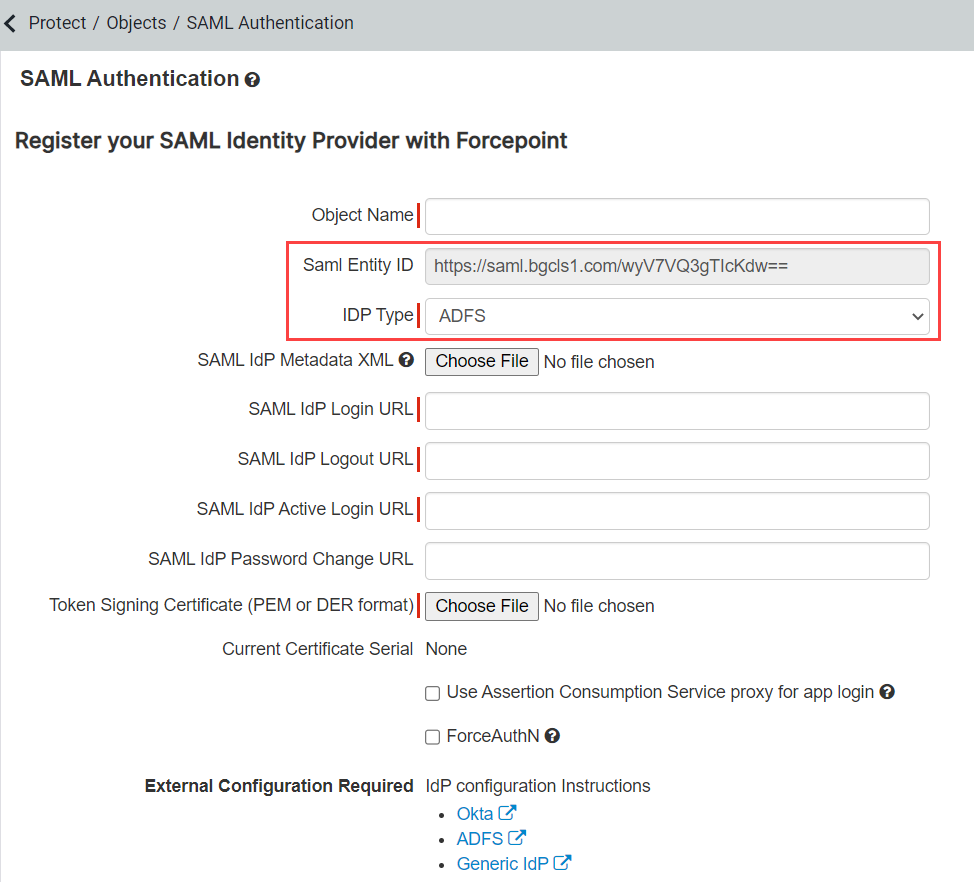
On the new page, select ADFS from the IDP Type drop-down. Copy the SAML Entity ID, navigate back to the ADFS configuration window and paste the URL into the Relying Party Trust Identifier field and click Add.
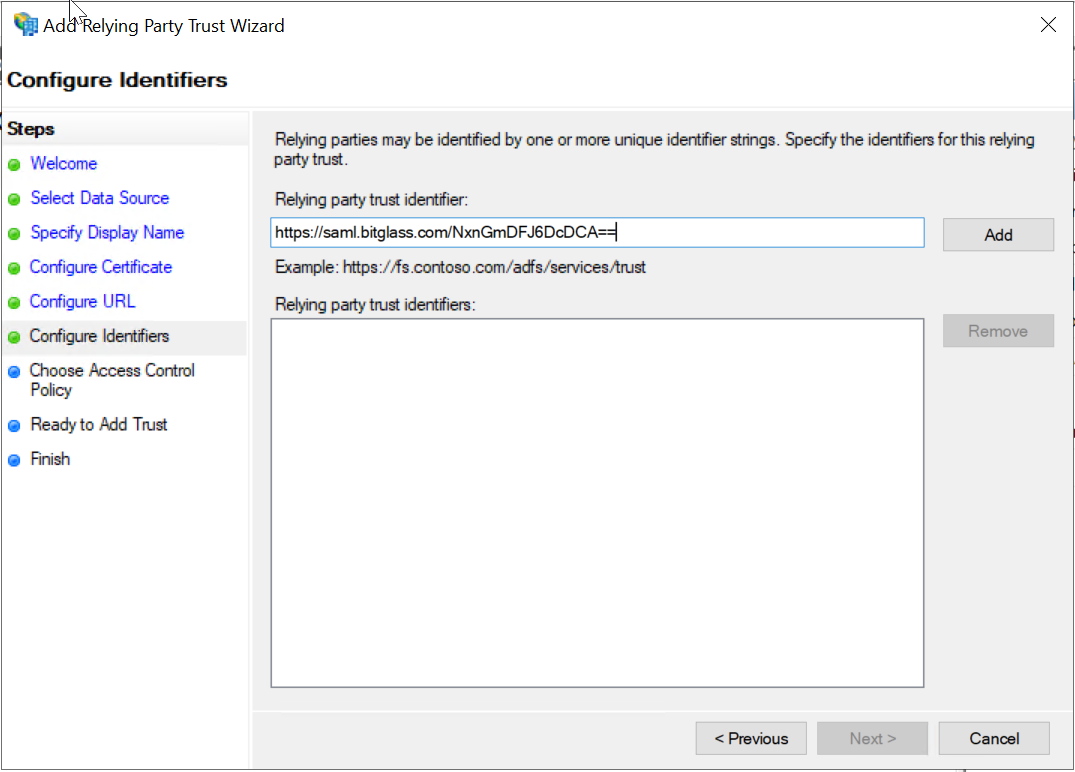
Once added, click Next at the bottom.
-
On the Choose Access Control Policy page, select Permit Everyone and then click Next.

-
On the Ready to Add Trust tab, review the settings on each sub-tab and then click Next to complete the wizard.
-
On the Finish tab, ensure that the Configure claims issuance policy for this application checkbox is selected and click
Close.
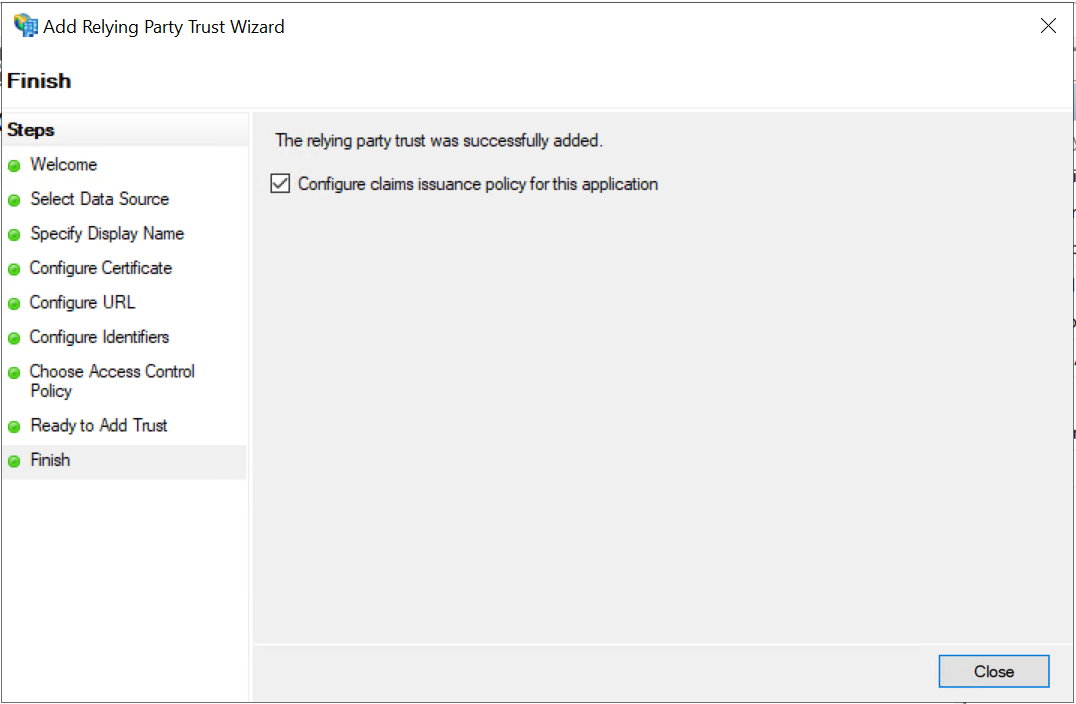
The relying party trust gets created and displayed under the on Console Tree. Also, opens the Edit Claim Issuance Policy dialog.
-
Select the Enter data about the relying party manually option and click Next.
-
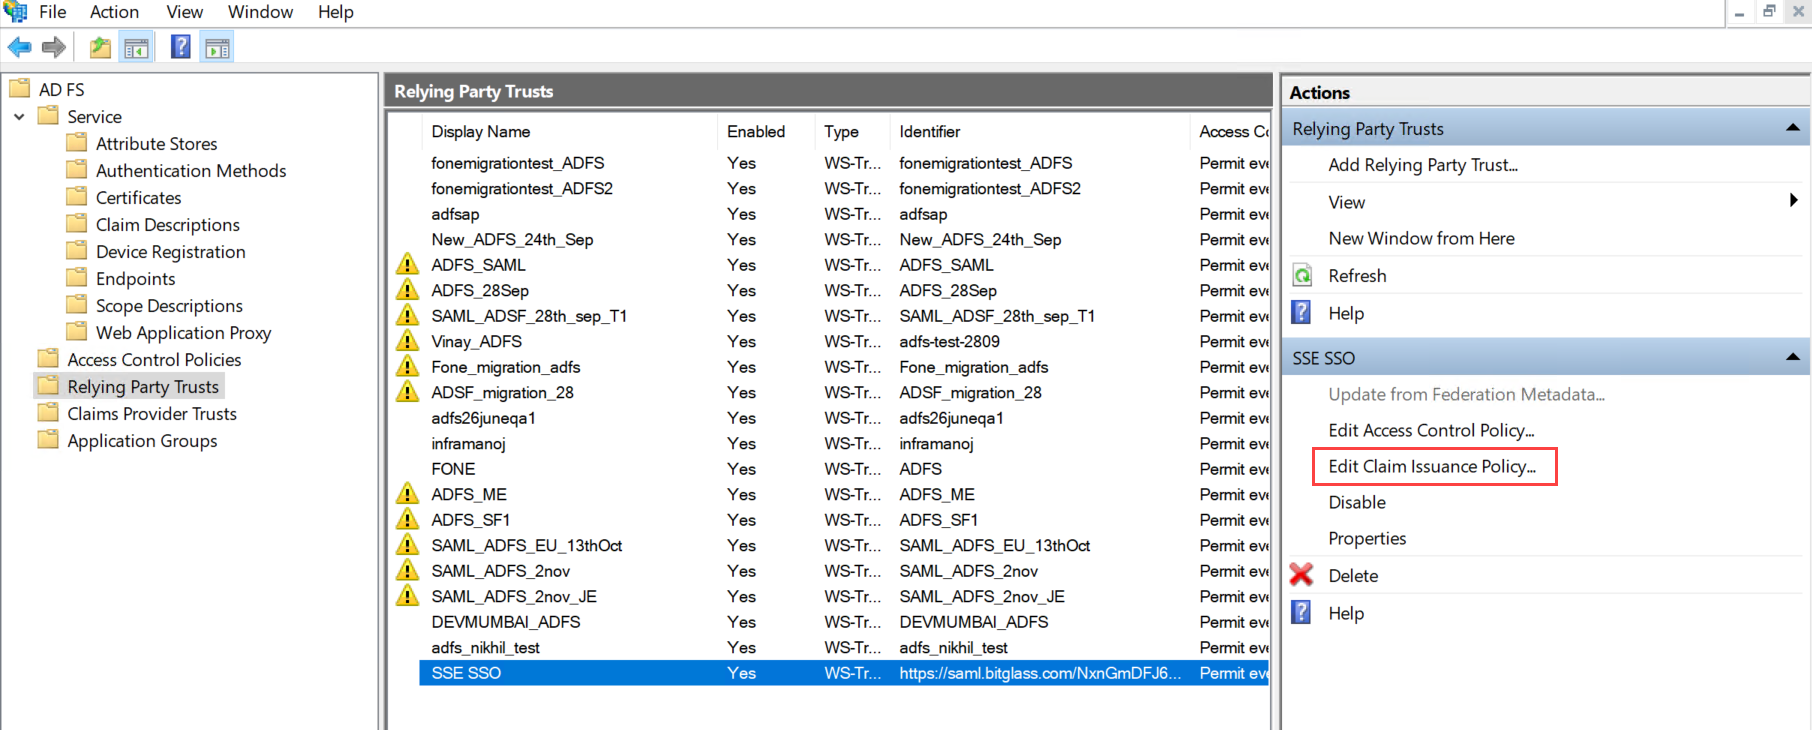
If the Edit Claim Issuance Policy dialog is closed, select the relying party that you have created from the Relying Party Trusts page
and select Edit Claim Issuance Policy from the Actions pane.
-
On the Edit Claim Issuance Policy dialog, click Add Rule ....
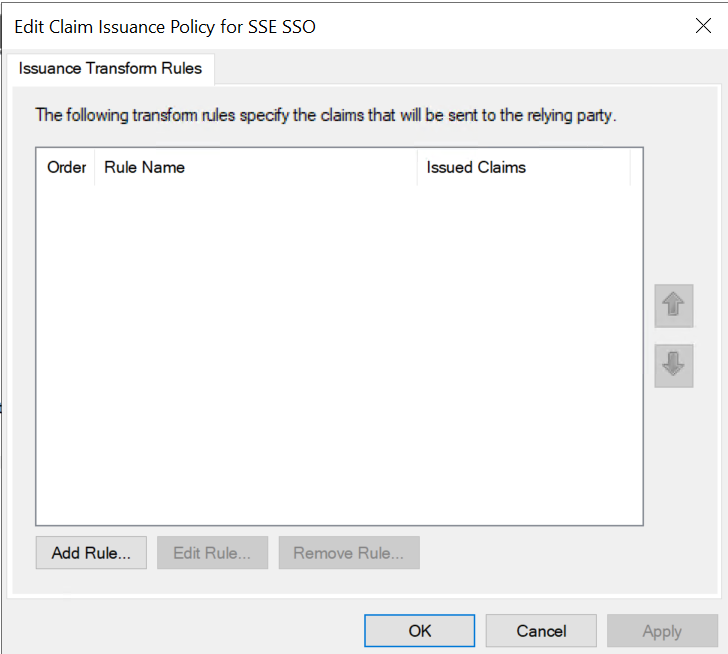
The Add Transform Claim Rule Wizard dialog opens.
-
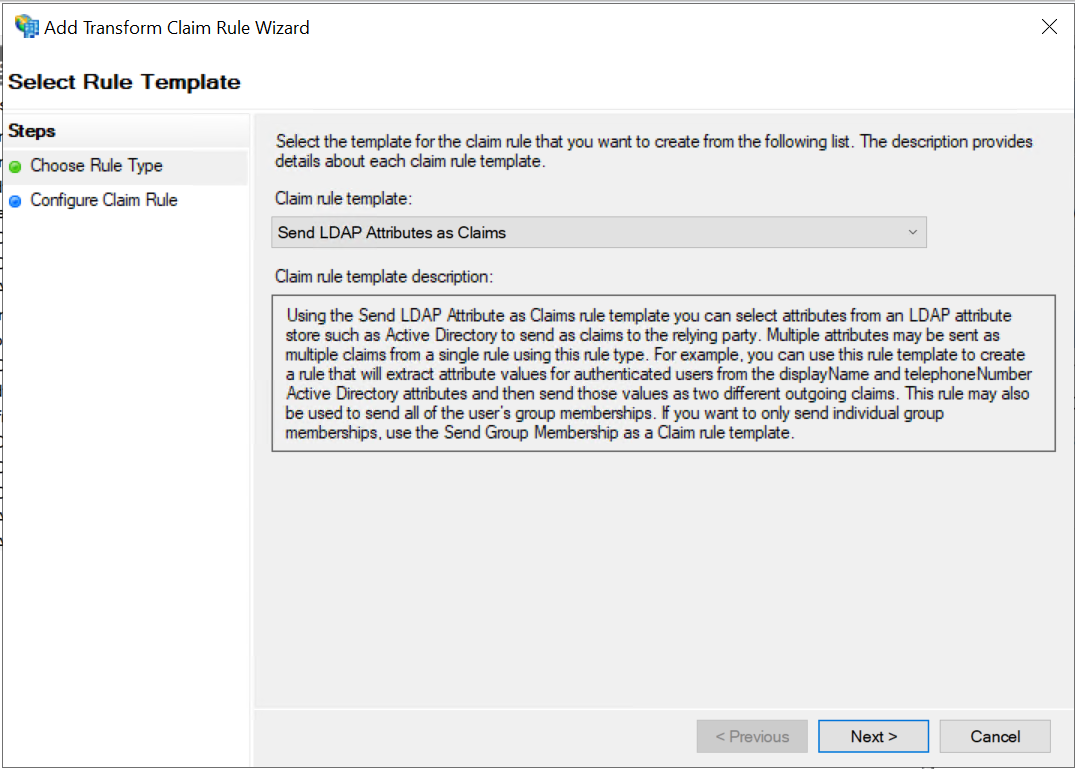
On the Choose Rule Type tab, verify that the Claim rule template is set to Send LDAP Attributes as Claims and
then click Next.
-
Enter Claim rule name. Select Active Directory as the Attribute store. Enter the appropriate LDAP attribute
values and then click Finish.
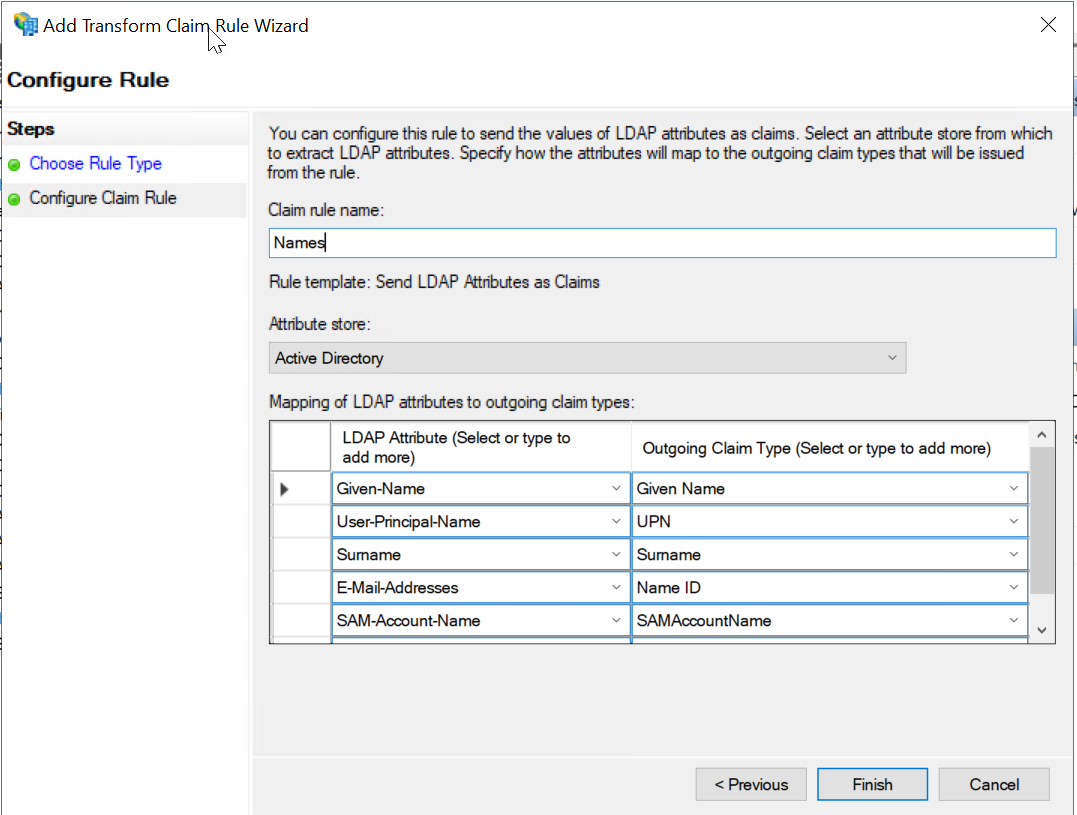
- E-Mail-Addresses:Name ID
- objectGUID:objectGUID
- Given-Name:Given Name
- Surname:Surname
- User-Principal-Name:UPN
- SAM-Account-Name:SAMAccountName
Optional fields can be used to populate additional user account attributes and are desirable in the following scenarios:
- ObjectGUID attribute is required if you are setting up O365 with Forcepoint Data Security Cloud | SSE.
- User Principal Name is helpful with Office 365 SSO when a users email address and UPN mismatches. Forcepoint Data Security Cloud | SSE recommends passing email address as Name ID and passing UPN separately to avoid creation of a secondary fake email domain to allow provisioning of users.
- SAMAccountName and NetBios are helpful with Exchange in mobile use cases where ActiveSync traffic does not carry a users email address because Forcepoint Data Security Cloud | SSE will deny traffic if a user account cannot be found. Make sure to set to NetBios Domain\SAMAccountName if applicable.
- NetBios Domain is not an LDAP attribute available for selection. However, it can be propagated in an Outgoing Claim Rule by creating a Custom Issuance Transform
Rule and using the following value with the <Netbios_Domain> placeholder replaced with the appropriate value for your domain:
- => issue(Type = "NetBios", Value = "<Netbios_Domain>");
- for example, => issue(Type = "NetBIos", Value = "ACME-GADGET");
- NetBios Domain is not an LDAP attribute available for selection. However, it can be propagated in an Outgoing Claim Rule by creating a Custom Issuance Transform
Rule and using the following value with the <Netbios_Domain> placeholder replaced with the appropriate value for your domain:
- FirstName and LastName are helpful administratively when searching for users in the Forcepoint Data Security Cloud | SSE admin portal (for example, , ). Click the Finish when done.
Optional LDAP Attributes Outgoing Claim Type Example Given-Name Given Name Dave Surname Surname Demo User-Principal-Name UPN 8216372@acme-gadget.com SAM-Account-Name SAMAccountName 8216372 -
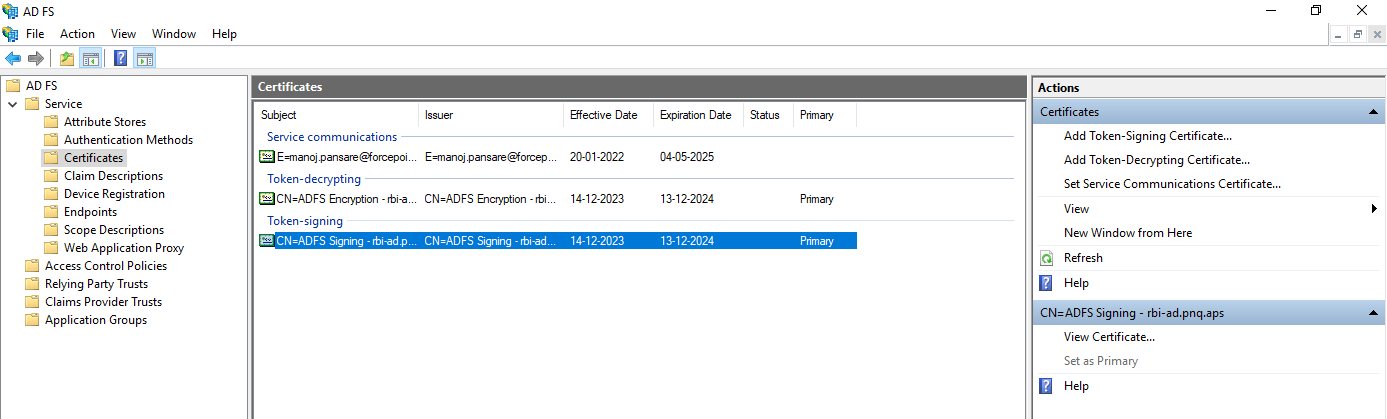
Export the token-signing certificate from ADFS to upload into Forcepoint Data Security Cloud | SSE.
-
In ADFS, expand .
-
In ADFS, expand .
-
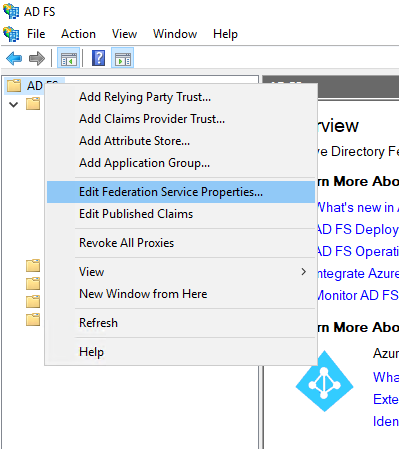
Right-click on AD FS top level folder and then click the Edit Federation Service Properties… menu item.
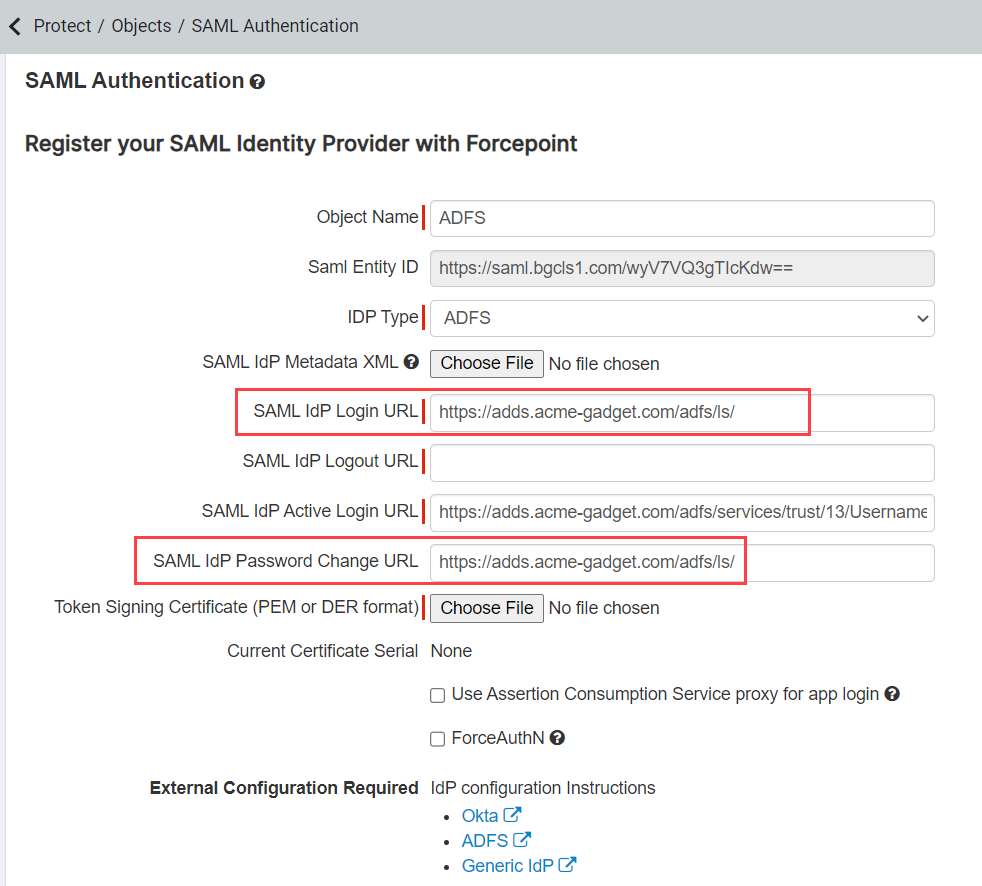
Copy the Federation Service Name and paste it into SAML IdP Login URL of the SAML setup in Forcepoint Data Security Cloud | SSE.

-
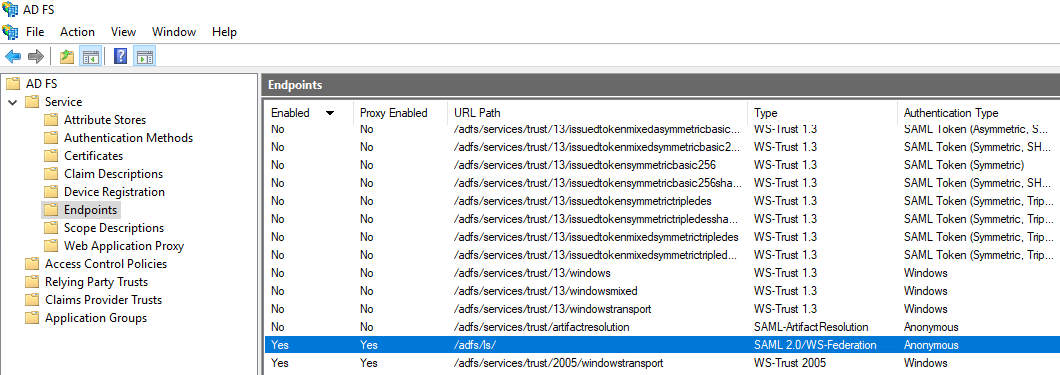
Navigate to and find the URL Path of the SAML 2.0/WS-Federation type under Token Issuance.
Append the SAML IdP Login URL and SAML IdP Password Change URL in Forcepoint Data Security Cloud | SSE with URL Path.
-
Navigate to your other browser window where you logged into the Forcepoint Data Security Cloud | SSE.
- If you followed the manual configuration steps, skip to step 15.
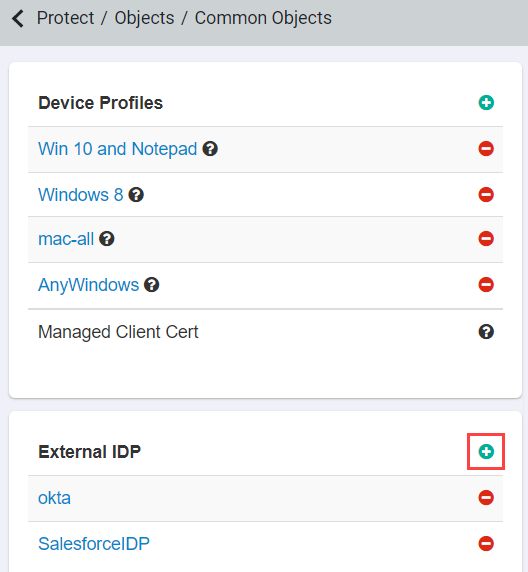
- If you configured automatically via metadata, navigate to and create a new External IdP. Provide a name for the IdP object and select ADFS for the IDP Type field. Enter the login password change URLs you created. You should replace acme-gadget.com with your domain in the following example.
-
Enter the SAML IdP Active Login URL in order to authenticate Active Requests in addition to Passive requests.
This field is optional. However, Forcepoint Data Security Cloud | SSE recommends you enter Active Login URL.
This field will automatically populates the same link you have entered in SAML IdP login URL.
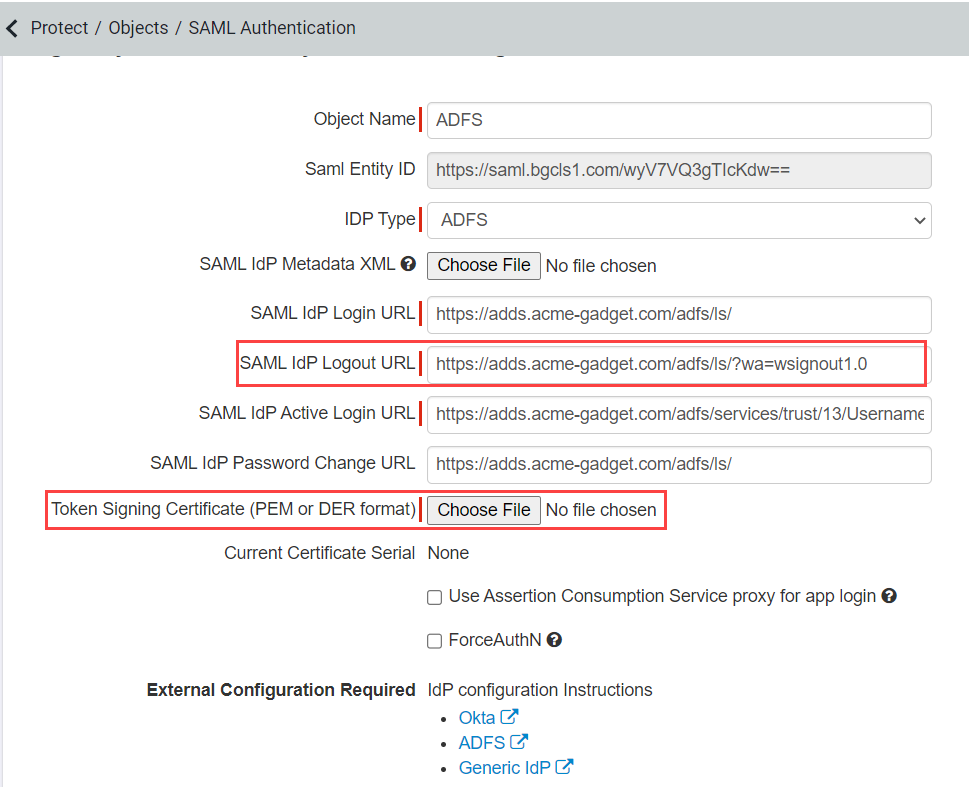
Most Active Login URLs will be: https://<your domain>/adfs/services/trust/13/usernamemixed.
For more information on enabling the endpoint, refer to the Get-ADFSEndpoint Microsoft article.